
Hardware
Thermaltake Core P3 Snow ATX Open Frame Wall Mount Chassis Review
Introduction
The PC Case has morphed over the years from a simple beige colored steel box designed to do nothing more than hold components, to a bold statement in and of itself that sets each build apart from the rest.
As showmanship and modding have become more prevalent, PC component manufacturers have put considerable effort into making things like Motherboards and GPU’s look as well as they perform. Due to this, it’s getting harder and harder to find a case WITHOUT a window in the side, but why would you want one?
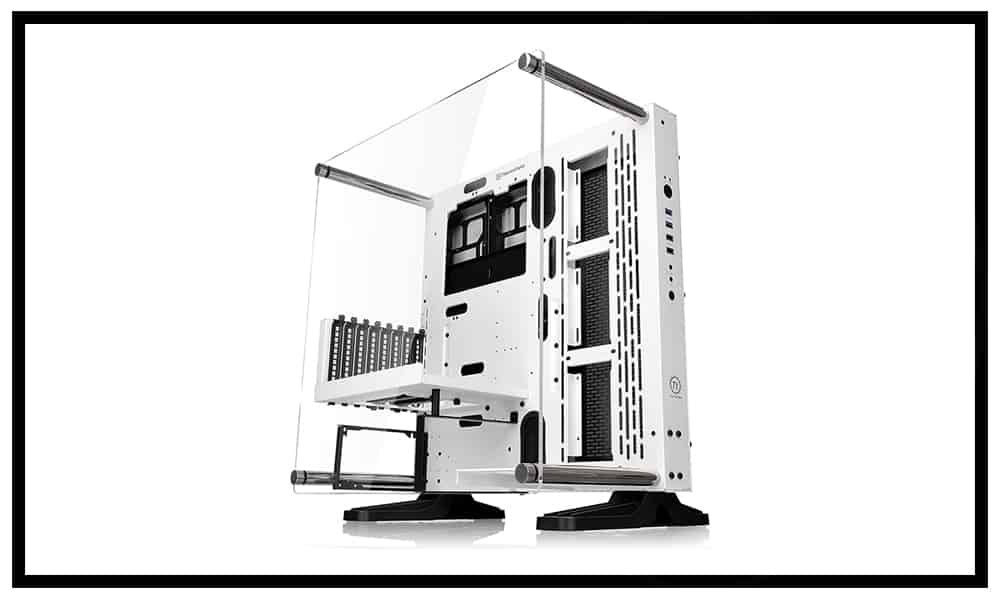
What if you want to go more the other direction? Instead of leaning down to peak through a tiny window to see your parts, what If you want almost everything to be visible from all angles? We aren’t quite to the point where every component is wireless and just floats in a bubble near your desk, but Thermaltake has gotten as close as anyone with the Core P3 chassis.
Visibly open from 5 of the 6 sides, it provides just enough structure to hold your system while keeping nearly everything visible. You can even mount it on a wall instead of just sitting on your desk (although you can do that too). As many enthusiasts like to be unique, The Core P3 can be configured in dozens of different ways and coupled with limitless hardware combinations out there, you can build the ultimate and still unique system you’ve always wanted.
ProClockers would like to Thank Thermaltake for sending us the Core P3 chassis to check out!
Thermaltake’s Take on the Core P3 ATX Wall-Mount Chassis
Bring out the modder within you. The Core P3 SE Snow Edition Open Frame chassis sets a new benchmark in groundbreaking open frame chassis design. With full support for liquid cooling – the Core P3 is built from the ground up to make even the most advanced PC customization and modification effortless and hassle-free, making it a dream to build with. The open frame panel design is protected with a clear acrylic panel – behind which sits the chassis frame, with supports the latest PC hardware, AIO, and DIY liquid cooling solutions. Specially designed dual GPU and PSU layouts, plus a 3-way stand placement (wall mountable, horizontal laying, and vertical standing) allow users to position the chassis at any orientation – and appreciate your artwork’s status-worthy build.
Features & Specifications
| Product Specifications | |
|---|---|
| Model | Core P3 SE Snow Edition |
| P/N | CA-1G4-00M6WN-02 |
| Case Type | Mid Tower |
| Dimension (H x W x D) | 512 x 333 x 470 mm (20.2 x 13.1 x 18.5 inch) |
| Net Weight | 10.3 kg / 22.7 lb |
| Side Panel | Transparent Window |
| Color | White & Black |
| Material | SPCC |
| Drive Bays | Accessible: 2 x 3.5″ or 3 x 2.5″(Outside the chassis) Hidden: 2 x 3.5’’ or 2.5’’ (Inside the chassis) |
| Expansion Slots | 8 |
| Motherboards | 86.7” x 6.7” (Mini ITX), 9.6” x 9.6” (Micro ATX), 12” x 9.6” (ATX) |
| I/O Port | USB 3.0 x 2, USB 2.0 x 2, HD Audio x 1 |
| PSU | Standard PS2 PSU (optional) |
| Fan Support | Left Side: 3 x 120mm, 3 x 140mm |
| Radiator Support | Left Side: 1 x 360mm, 1 x 420mm |
| Clearance | CPU cooler height limitation: 180mm VGA length limitation: 280mm (With Reservoir & Radiator) 450mm (Without Reservoir & Radiator) PSU length limitation: 200mm |
Features
Tt LCS Certified
Tt LCS Certified is a Thermaltake exclusive certification applied to only products that pass the design and hardcore enthusiast’s standards that a true LCS chassis should be held to. The Tt LCS certification was created so that we at Thermaltake can designate to all power users which chassis have been tested to be best compatible with extreme liquid cooling configurations to ensure you get the best performance from the best features and fitment.
Built for Makers
By practicing and incorporating the idea of “maker movement” as well as 3D printing, Thermaltake designs the open frame panoramic viewing chassis as anyone can access and do his/her own mods as well as print out his/her own ideas using available liquid cooling components and manuals without boundaries.
Users can download 3D printing accessory files on 3D Makers Microsite, printing them out to do a special mod.
Maker’s Website: http://3dmakers.thermaltake.com
DMD – Dismantlable Modular Design
The Core P3 open frame chassis enables user to freely build the system from the ground up with given modular panels, racks, brackets, and pre-design mounting arrays. No more unreachable screw corners or gaps and enjoys installation in a breeze with Dismantlable Modular Design.
3-Way Placement Layout
The Core P3 is designed for use in three different ways: Wall-mount, vertical, and horizontal placement. Built for customization that reflects the makers’ personality, it allows for adjustments to the chassis for the best viewing presentation while ensuring outstanding cooling performance.
Users can hang it on the wall as decoration, take it to wherever they want and display the nice builds vertically or horizontally.
Believe in Seeing
The open frame structure with unique Panoramic Viewing design advanced the Core P3 visual presentation, that permit users to show off their dedication and skill set unlike any other cases on the market.
Versatile GPU & PSU Orientation
Show off your graphic card and power supply with our special design bracket. The Core P3 has included a riser cable for you to choose the way you want to build the system. Further, the Core P3 also has the support for vertical PSU layout when ITX motherboard is applied.
Native AIO Support
The Core P3 is natively supported for all types of All-In-One liquid cooling solution without the need for extra bracket.
Supreme Hardware Support
The Core P3 offers the most flexible mounting option with the special designed mounting array which not only supports up to four by 120mm or 140mm fans or radiators, it also supports the mounting of 3.5” and 2.5” storage devices. Further, two 3.5”/2.5” drive trays are included and hidden in the back panel that offers 45mm of cable management space.
Core P3 Wall-Mounting Support
It’s an optional feature that wall-mounting parts are not included.
Packaging & Unboxing
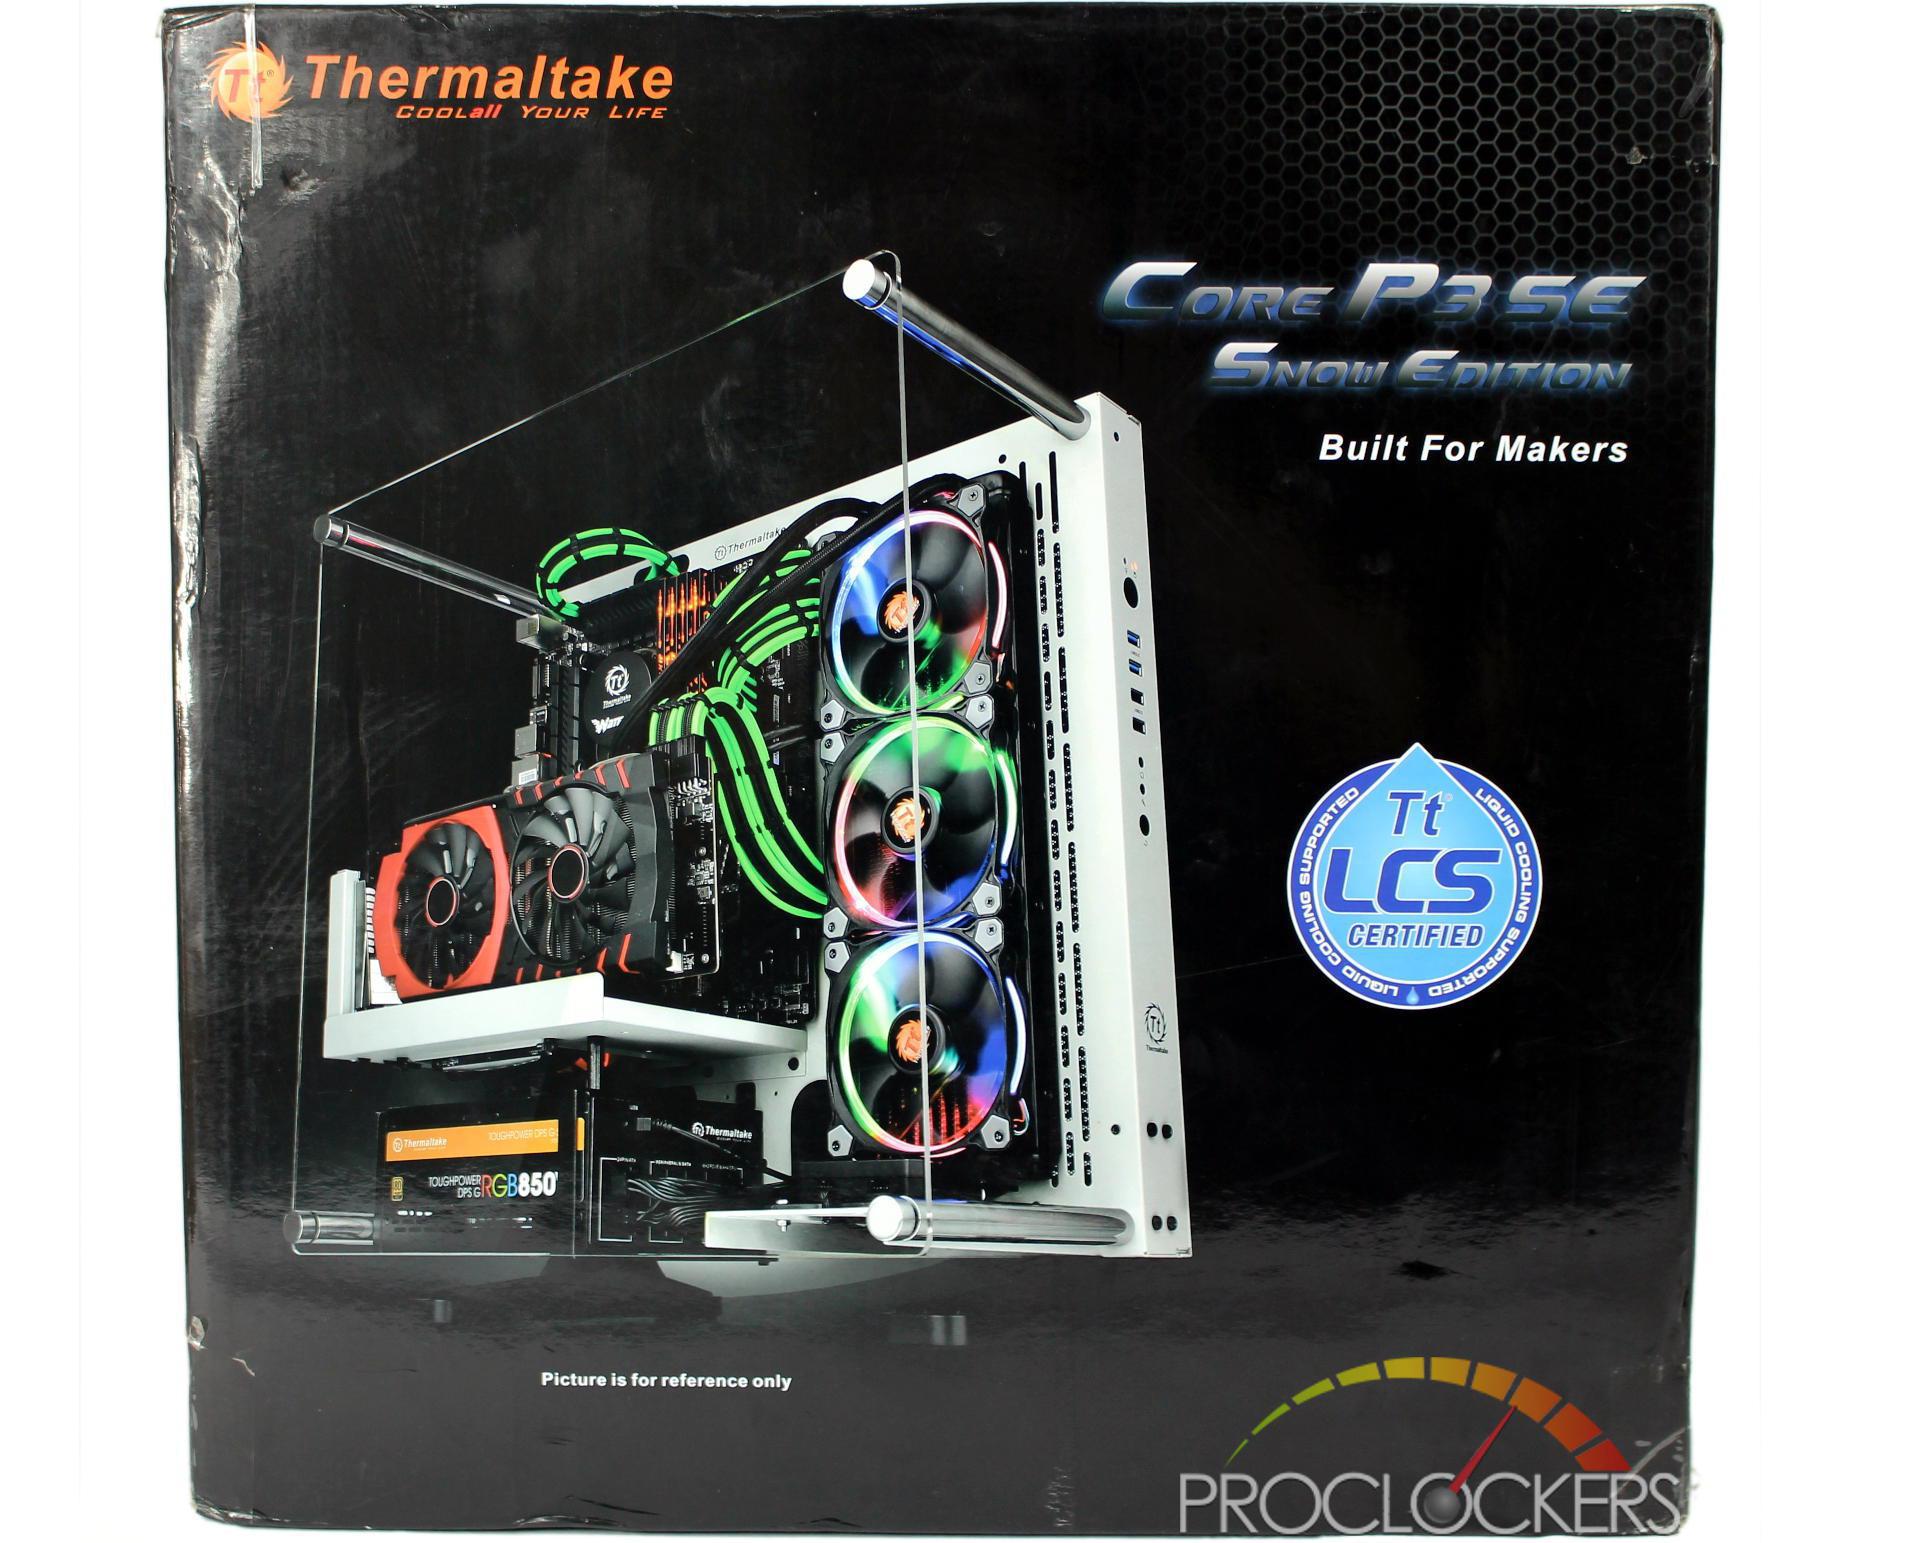
You certainly can’t say the Thermaltake Core P3’s box isn’t colorful. A full color picture of a sample build dominates the front of the box next to a large Tt LCS badge for Thermaltake’s Liquid Cooling System Certified gear.
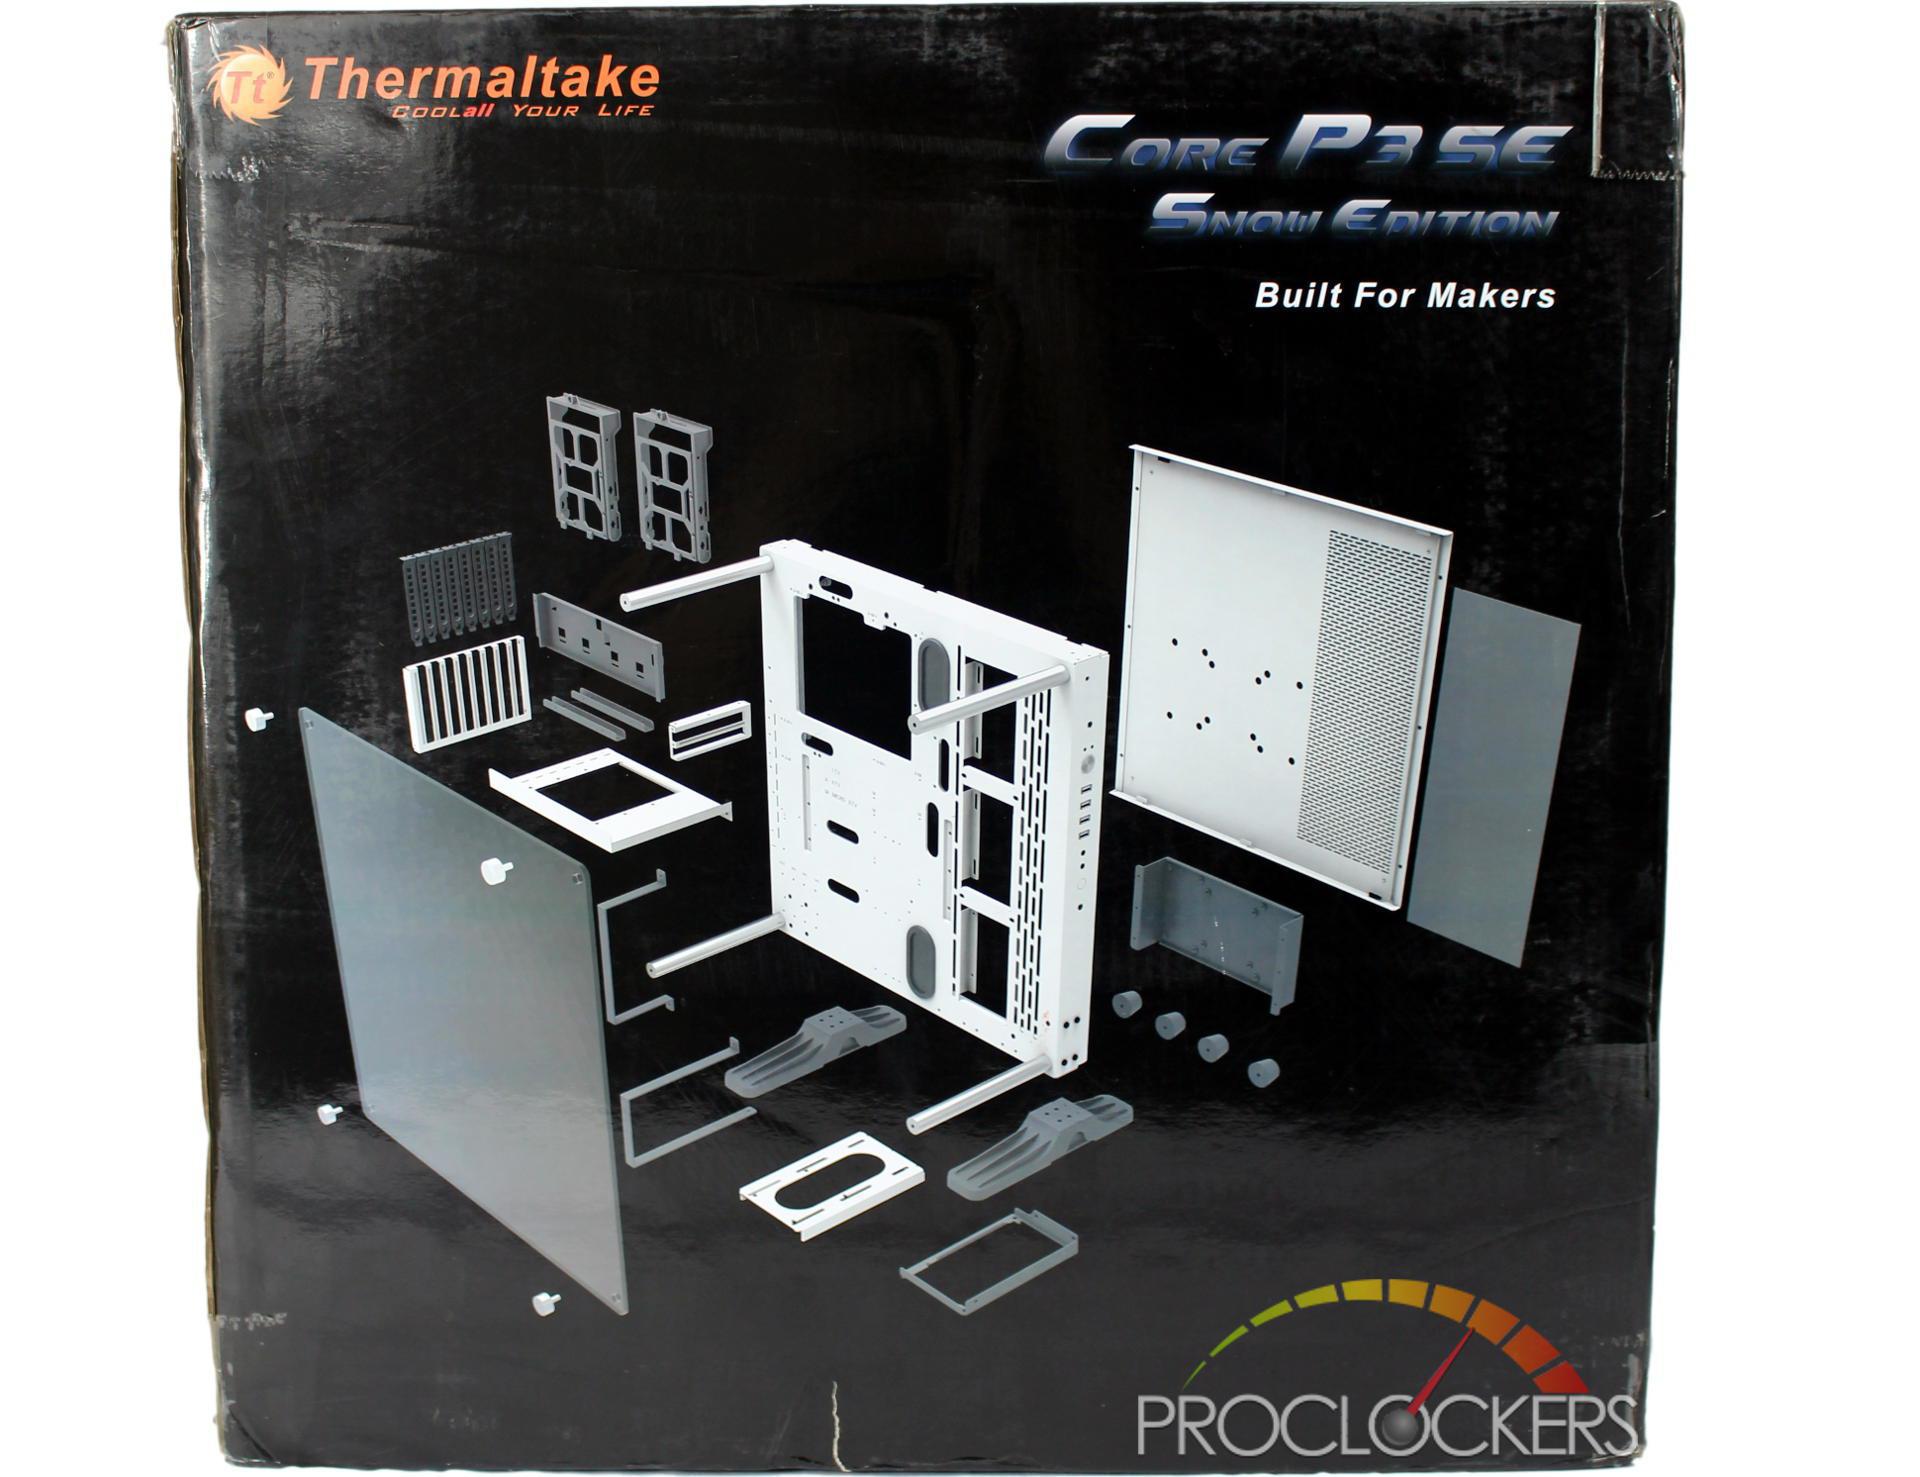
The rear of the box gives an exploded view of the chassis and shows most of the huge pile of parts included to help you assemble this flexible chassis in any configuration you desire.
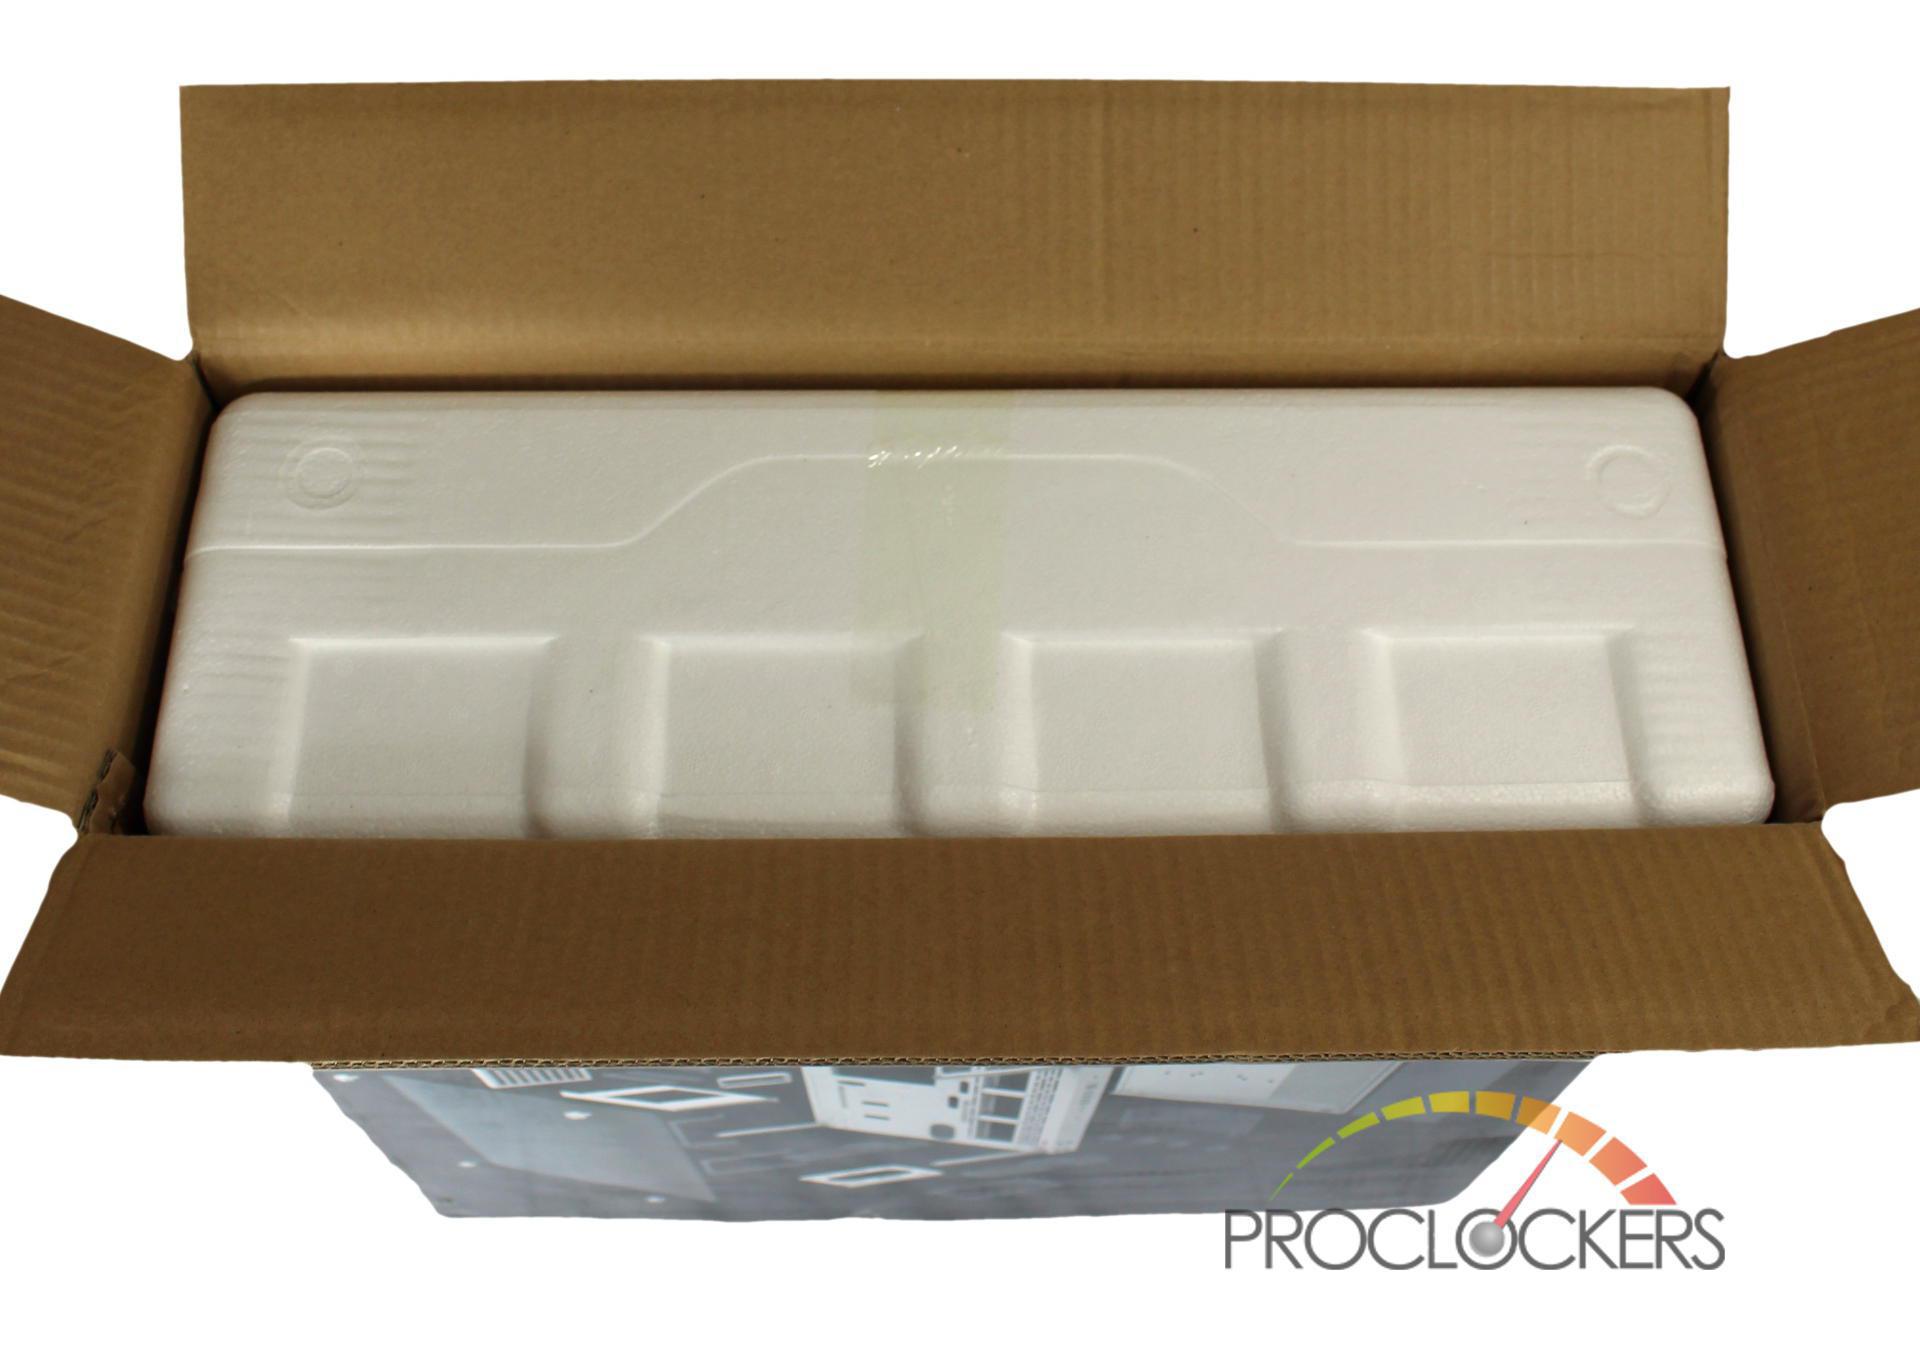
Opening up the box you are greeted with a massive block of Styrofoam.
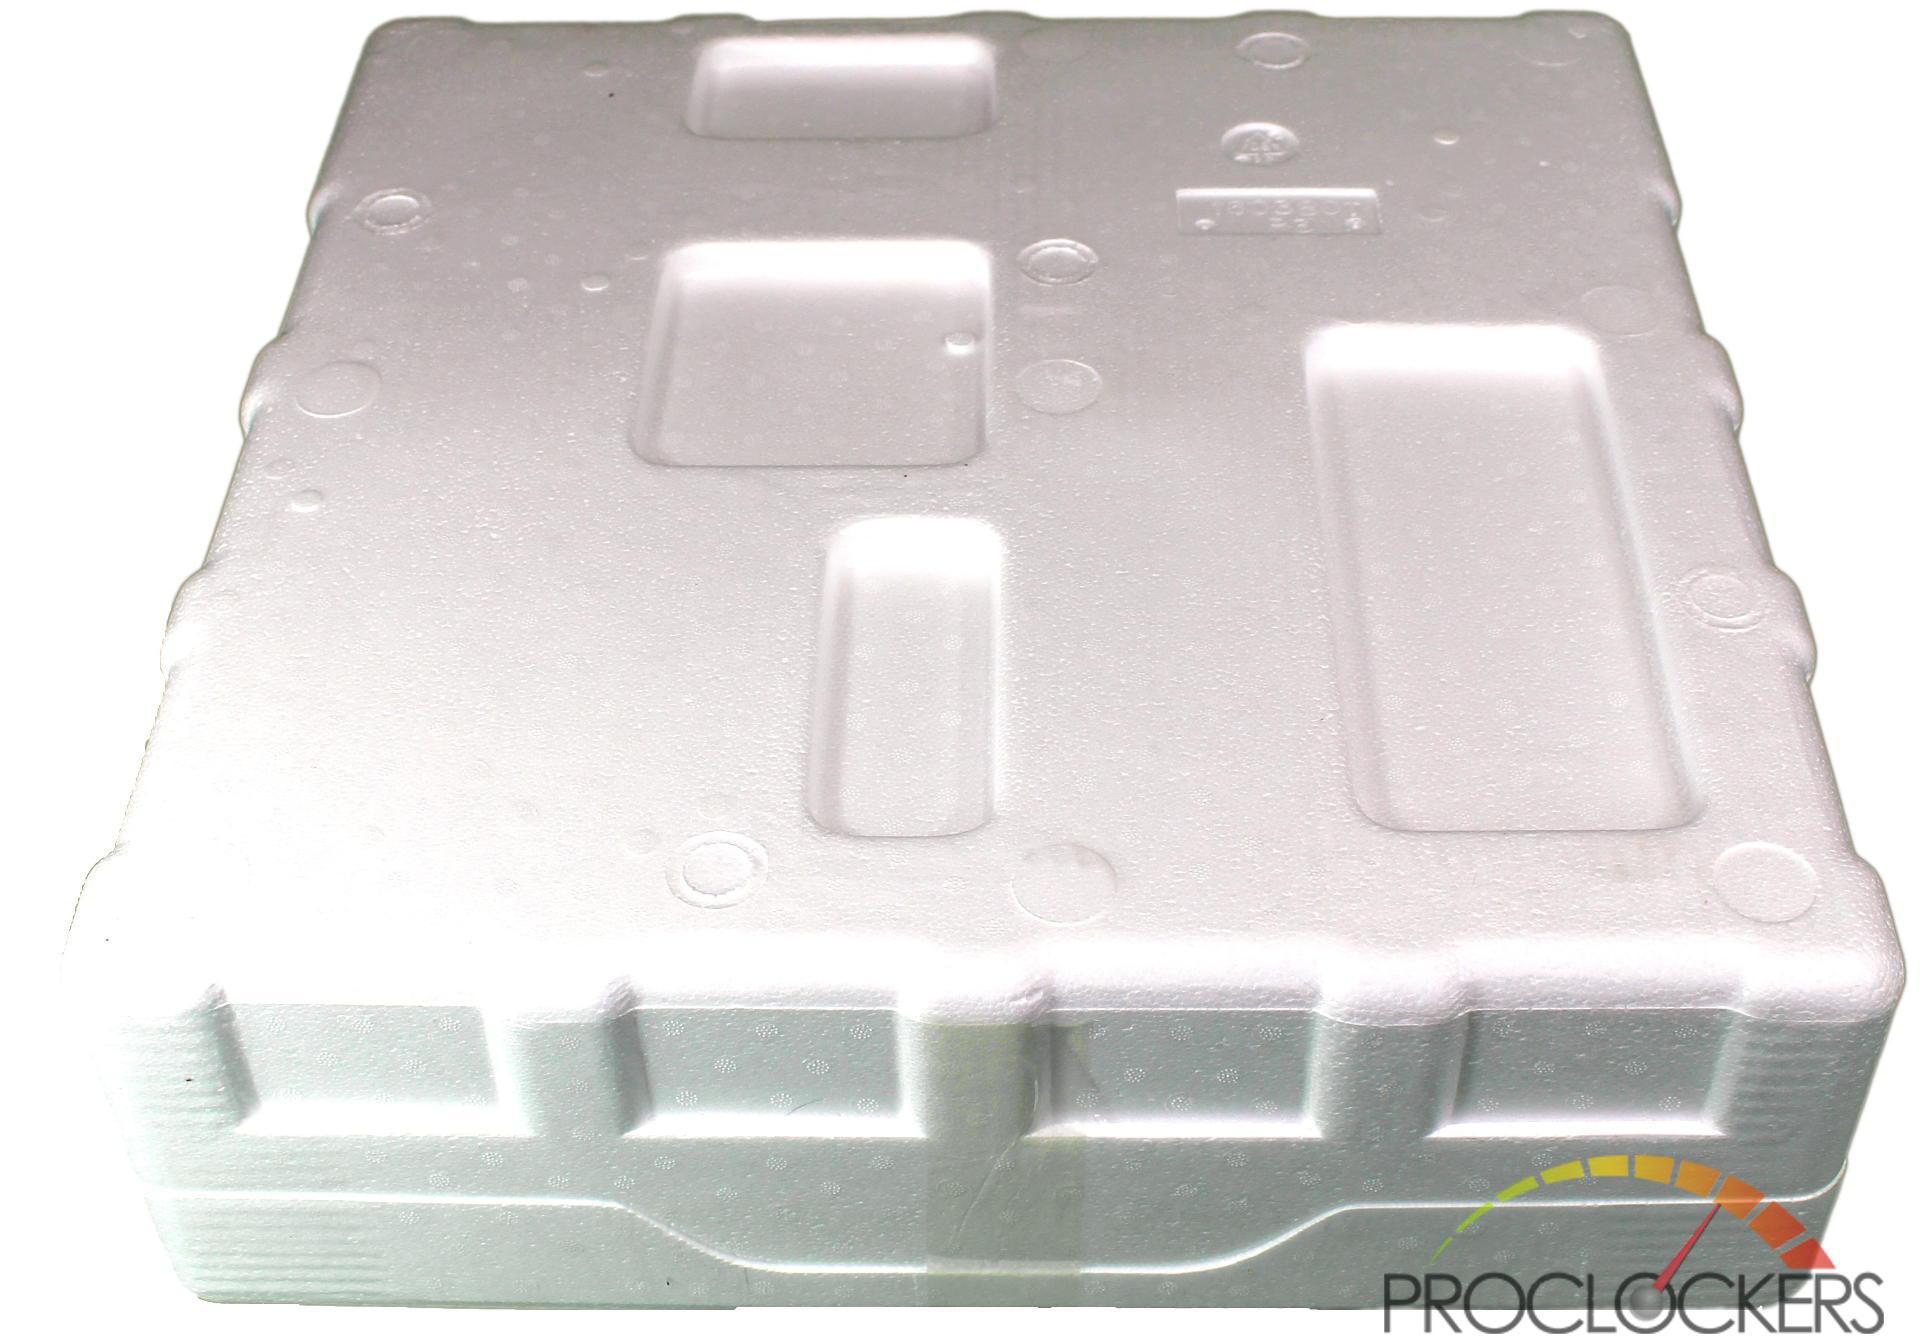
If you’ve unboxed a few monitors before, you expect to have little pockets on the outside that might hold parts as you remove it from the box, but that is not the case here. Everything is contained securely inside the monolithic white block.
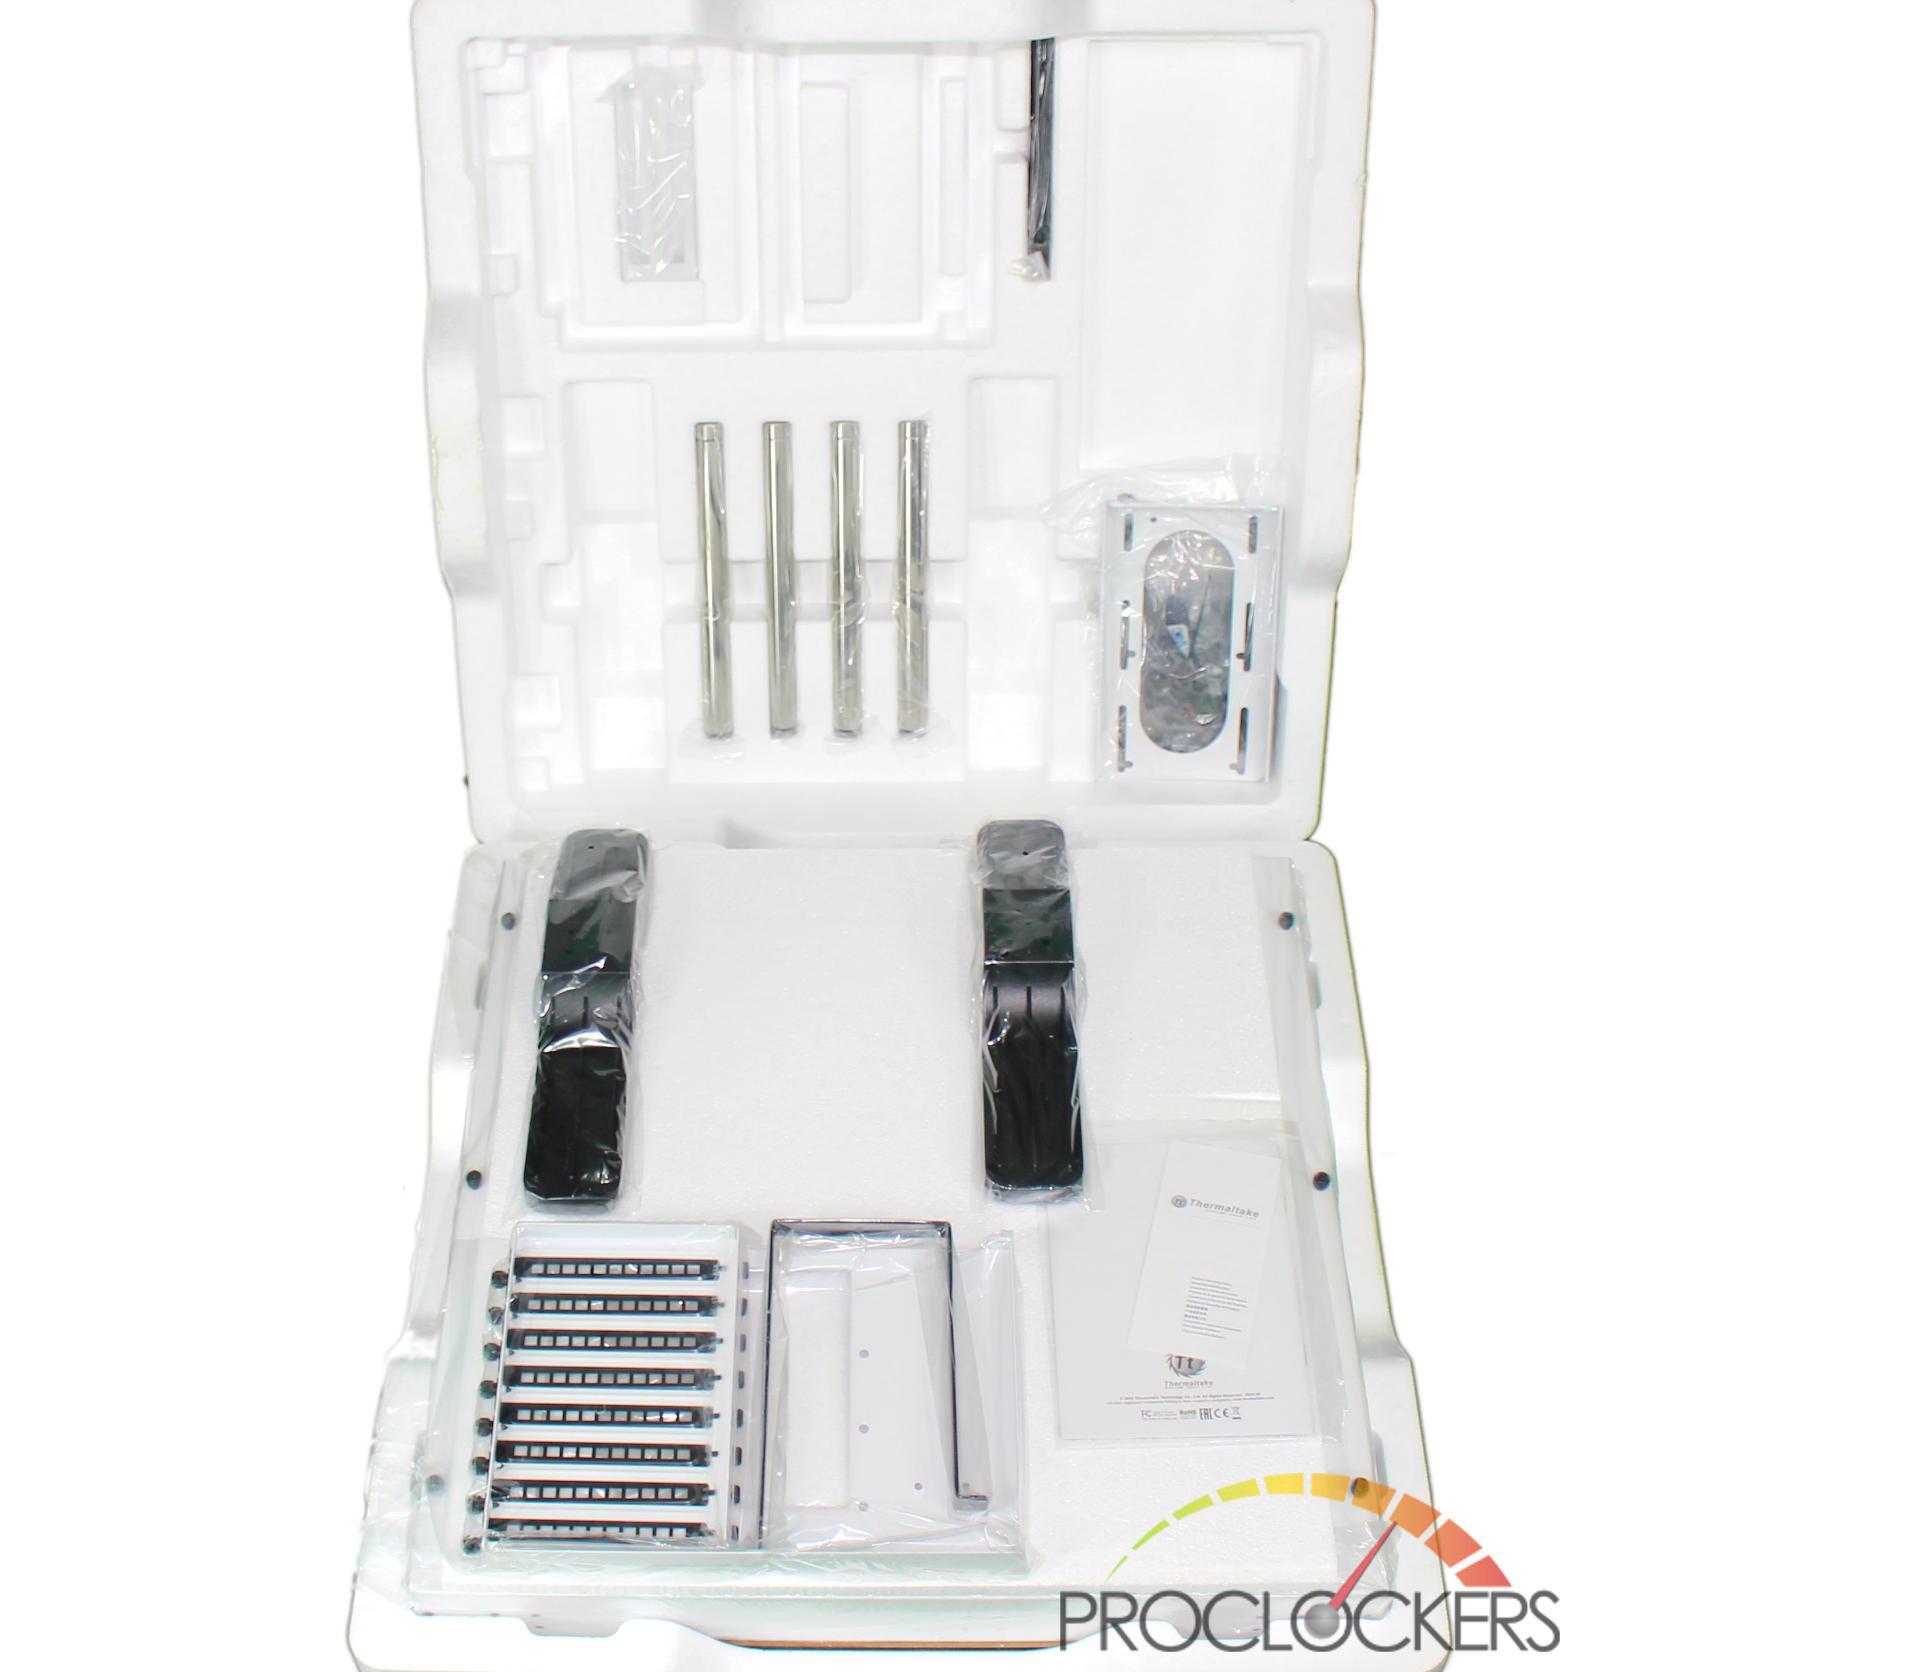
Cracking open the clam shell, you get your first look at some of the parts.
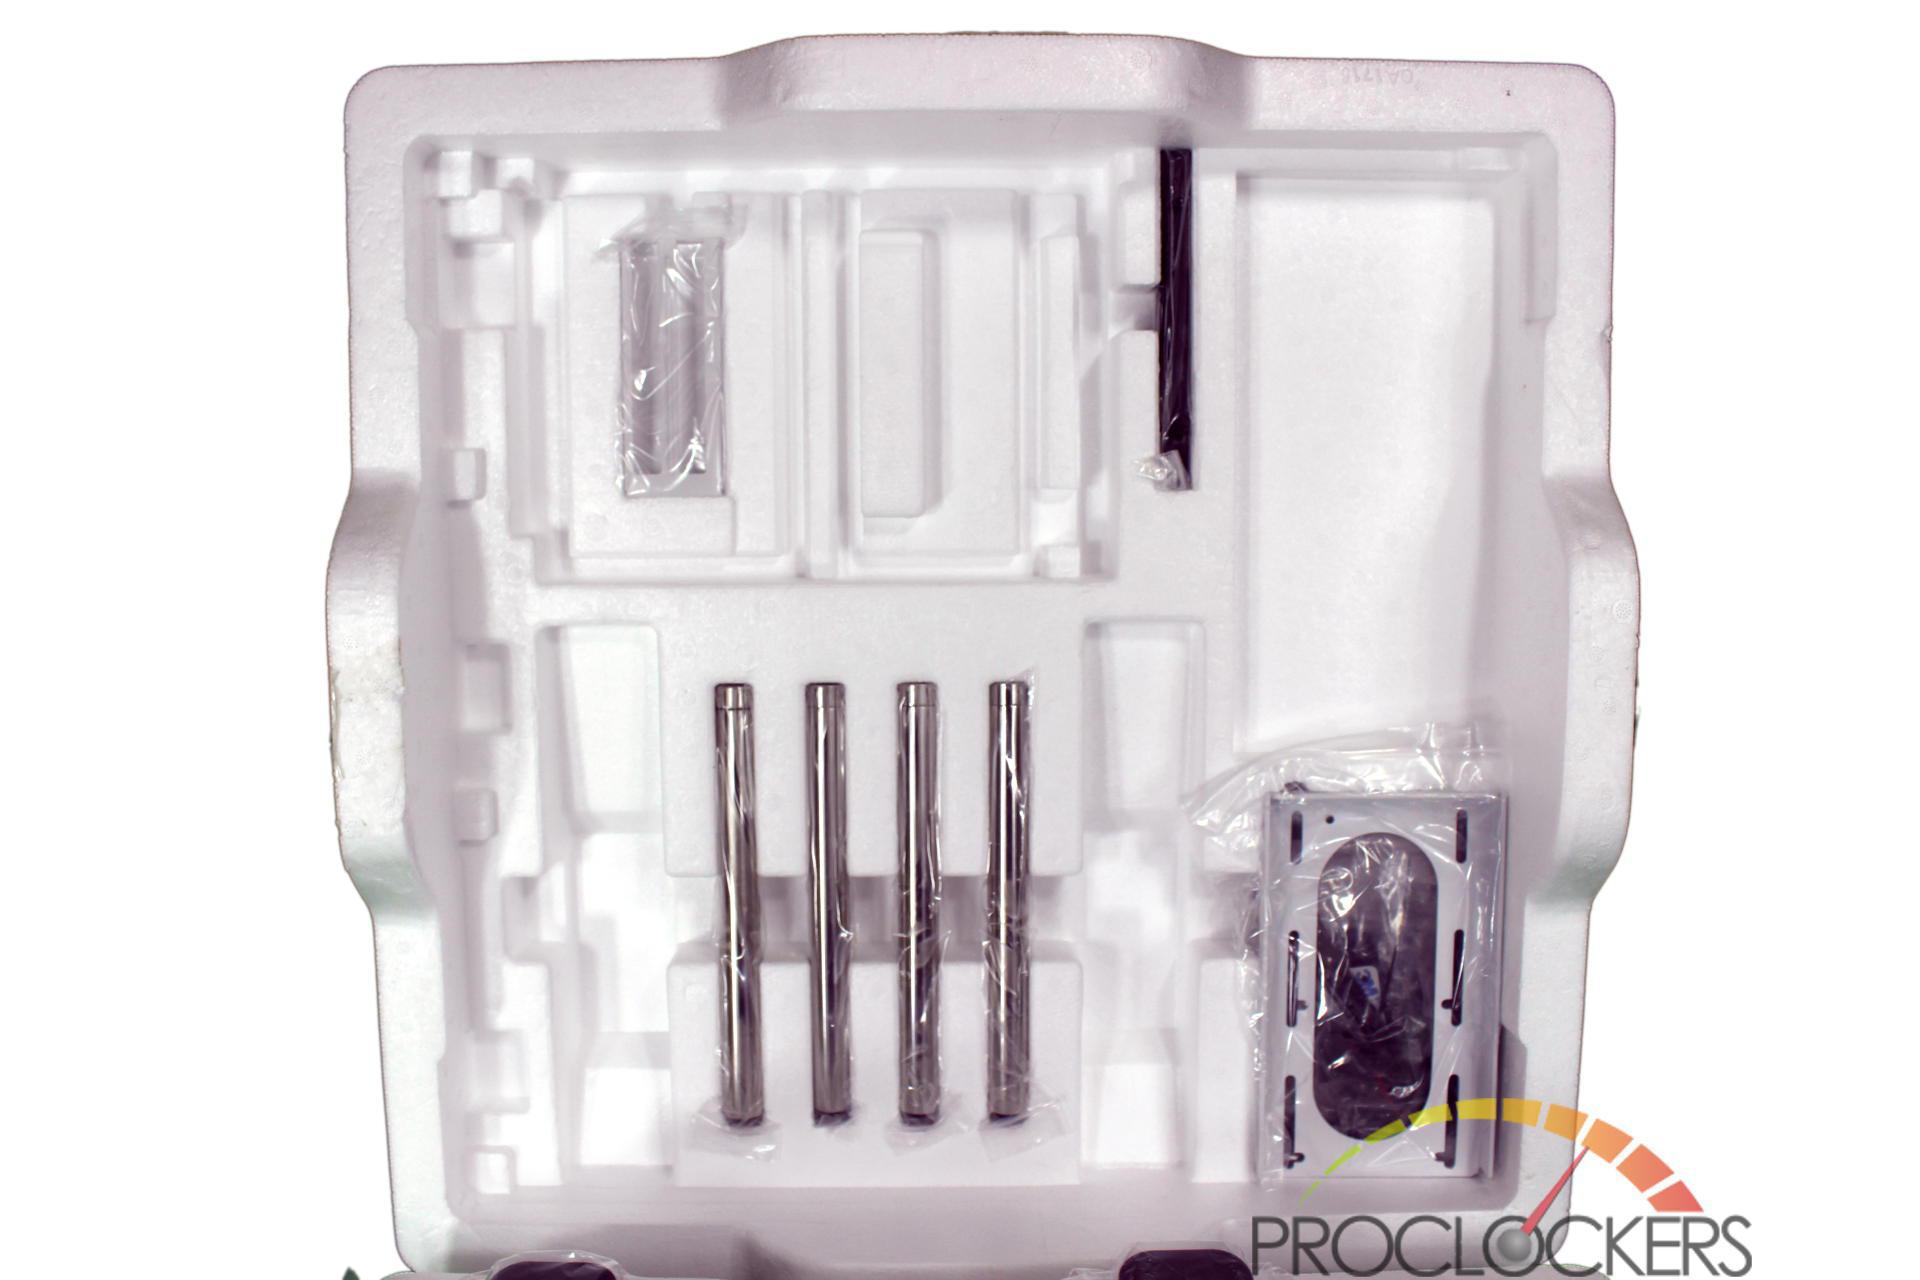
The top half of the shell contains most of the smaller parts such as the window support bars, the Pump Mount, PSU brackets, Case feet, rear I/O Brackets and a pretty impressive assortment of screws and hardware.
The bottom of the packing cradles the main chassis itself, separated from the top half by a thin piece of foam to protect from scratching.
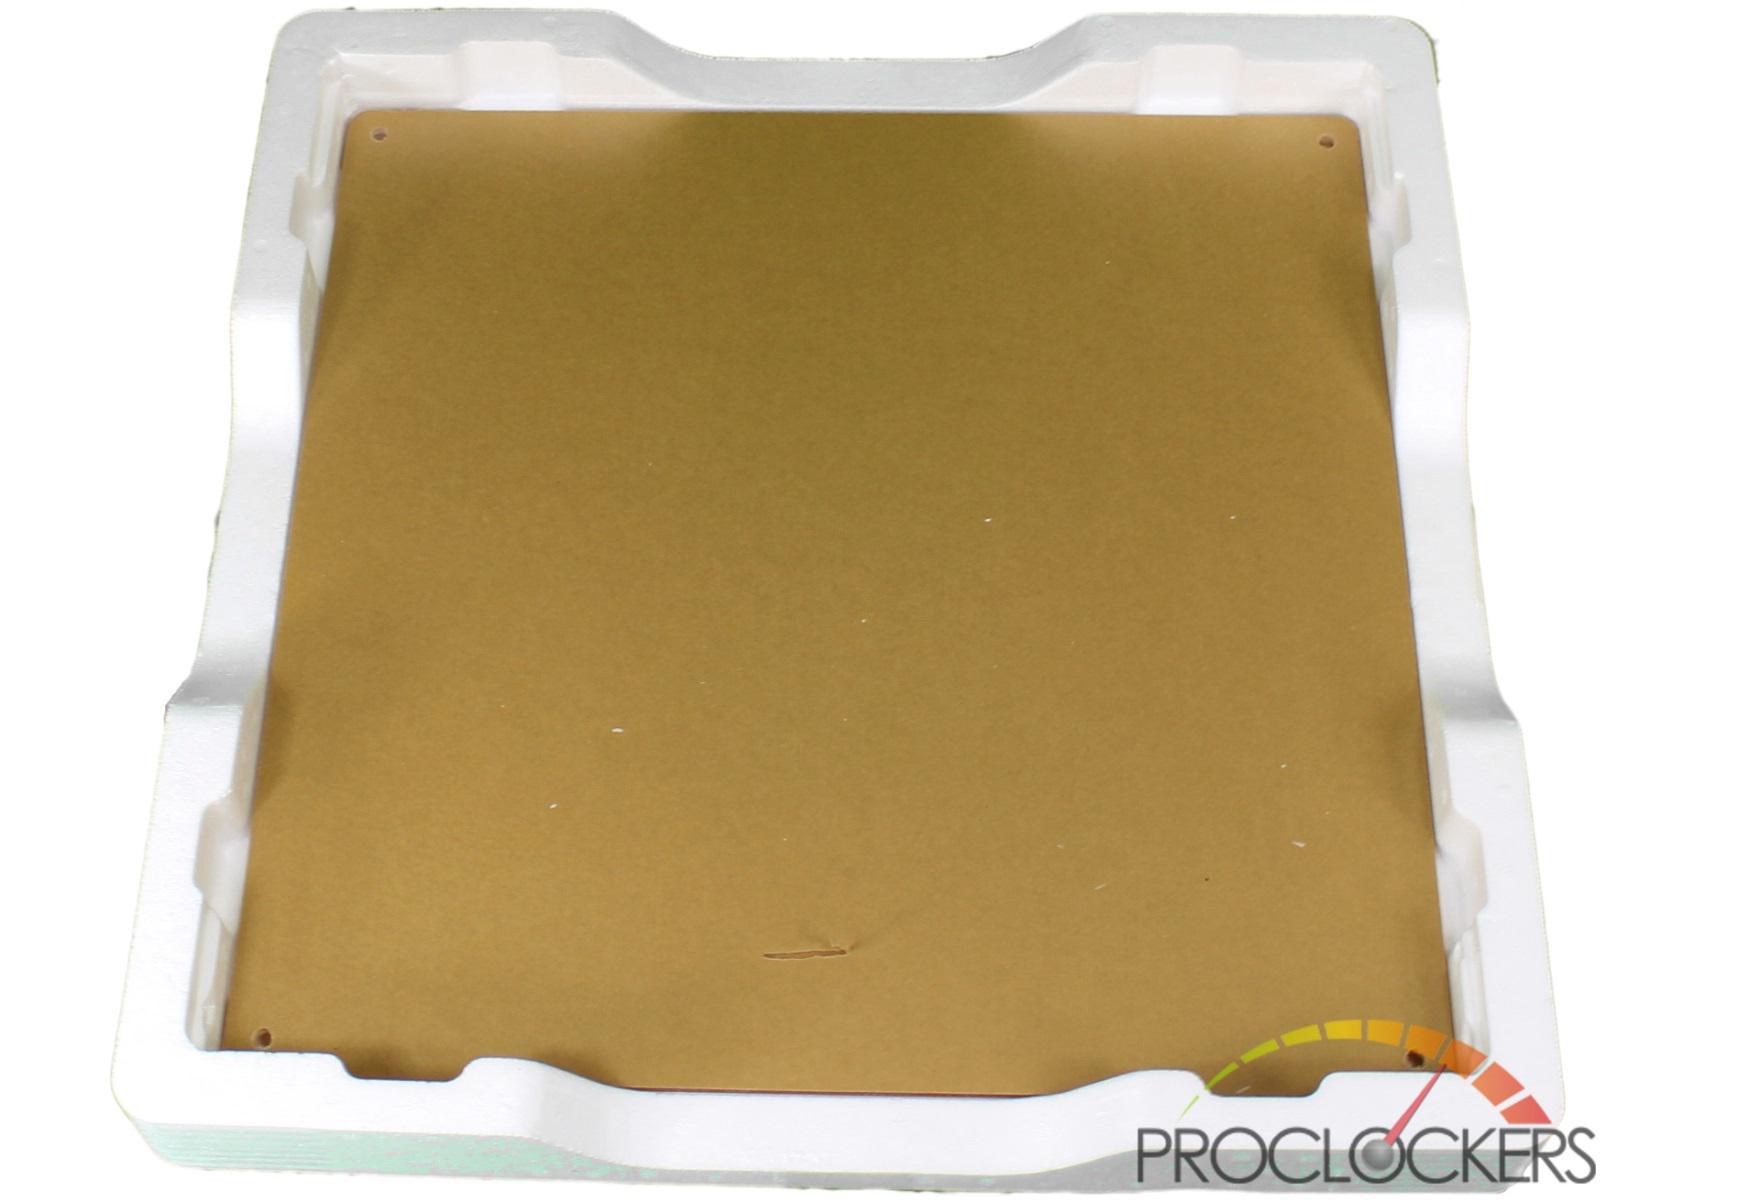
Under the chassis you find the case window. The window is protected from scratches by thick paper on both sides, which usually denotes a cell cast acrylic which is optically superior to cheaper extruded plastic that usually comes with a plastic masking.
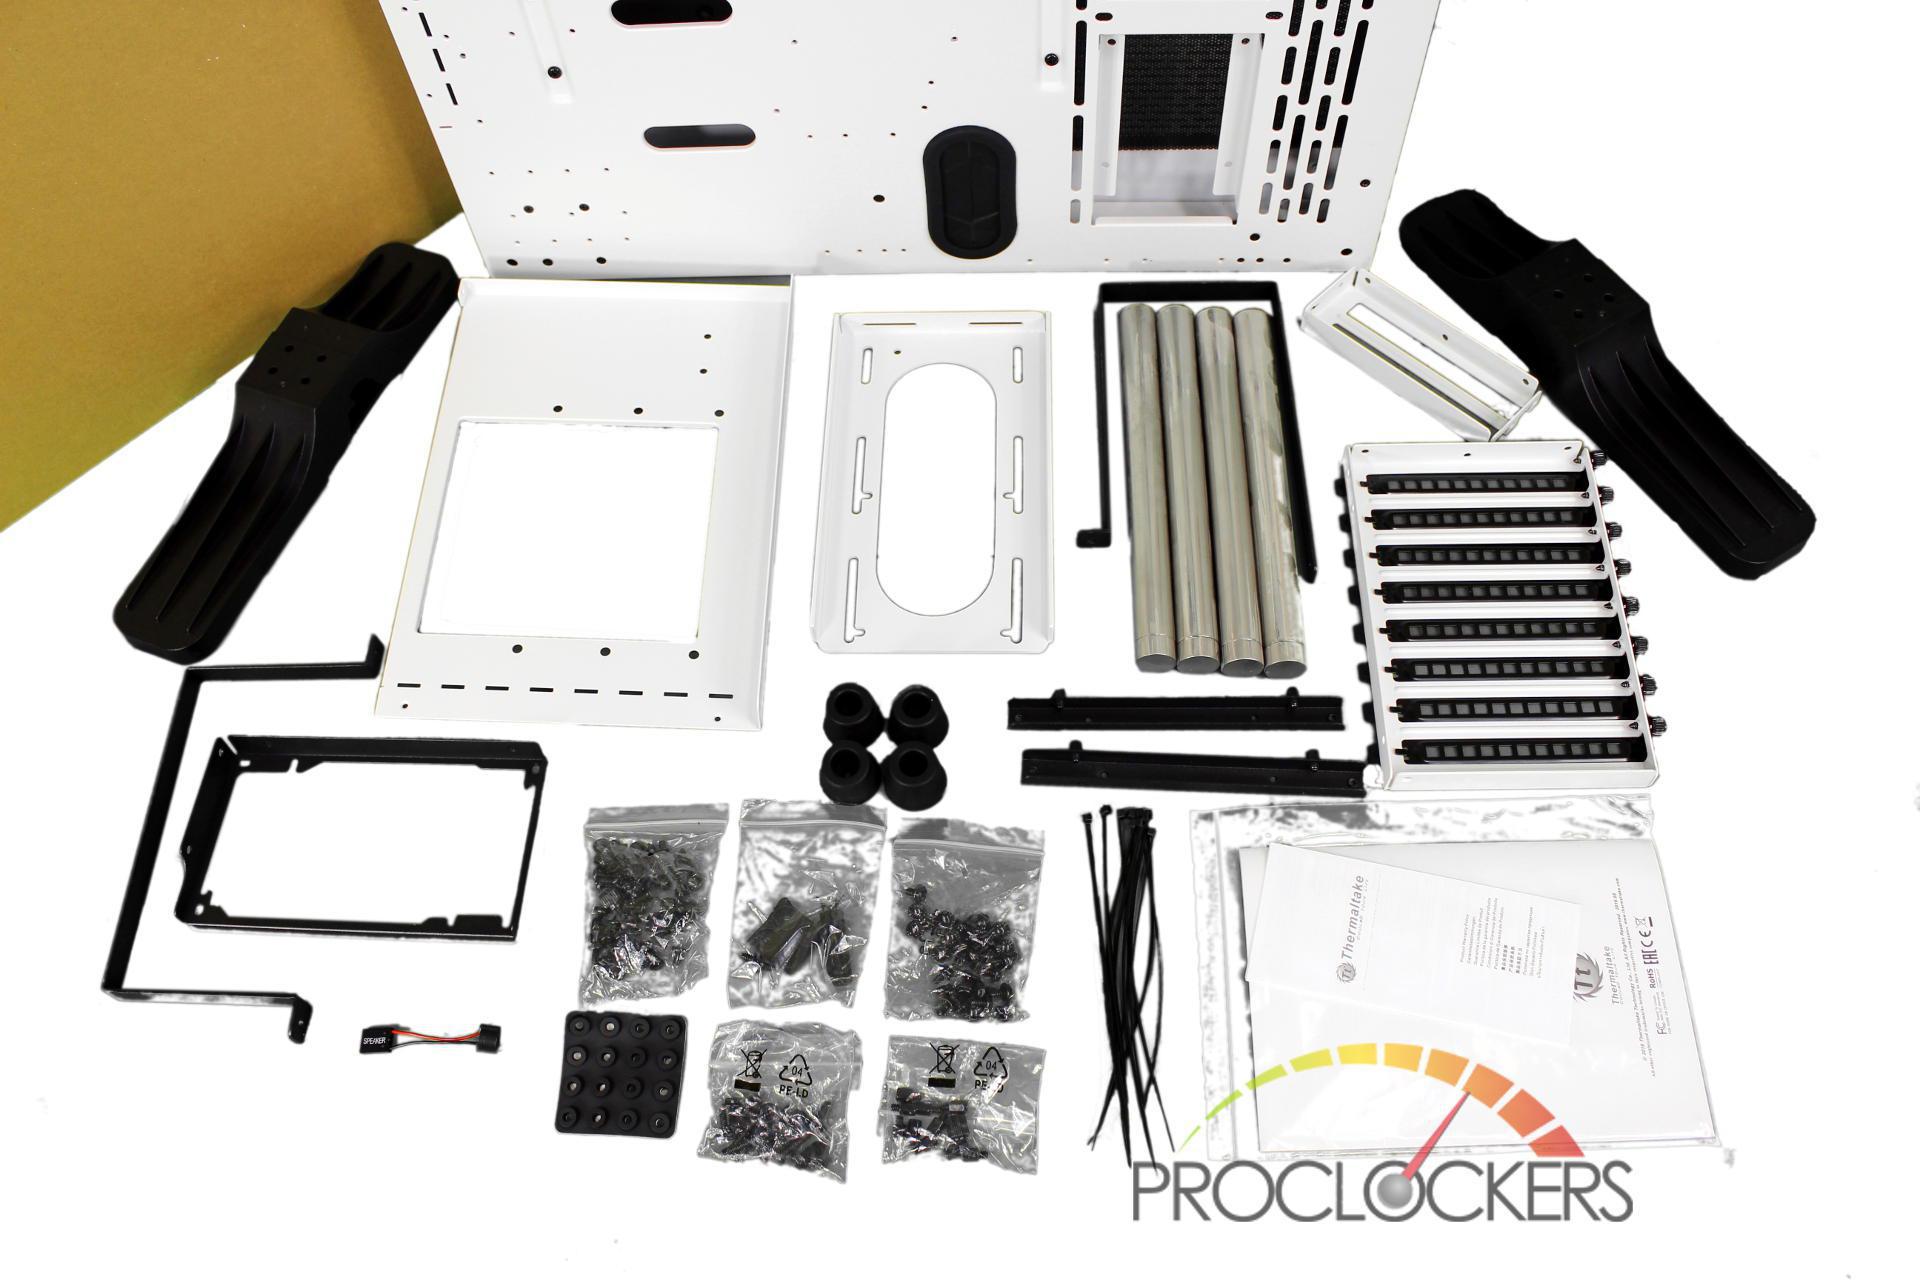
After digging everything out of its individual spot in the foam block and unwrapping it all, you are left with the following mountain of parts and hardware.
A Closer Look
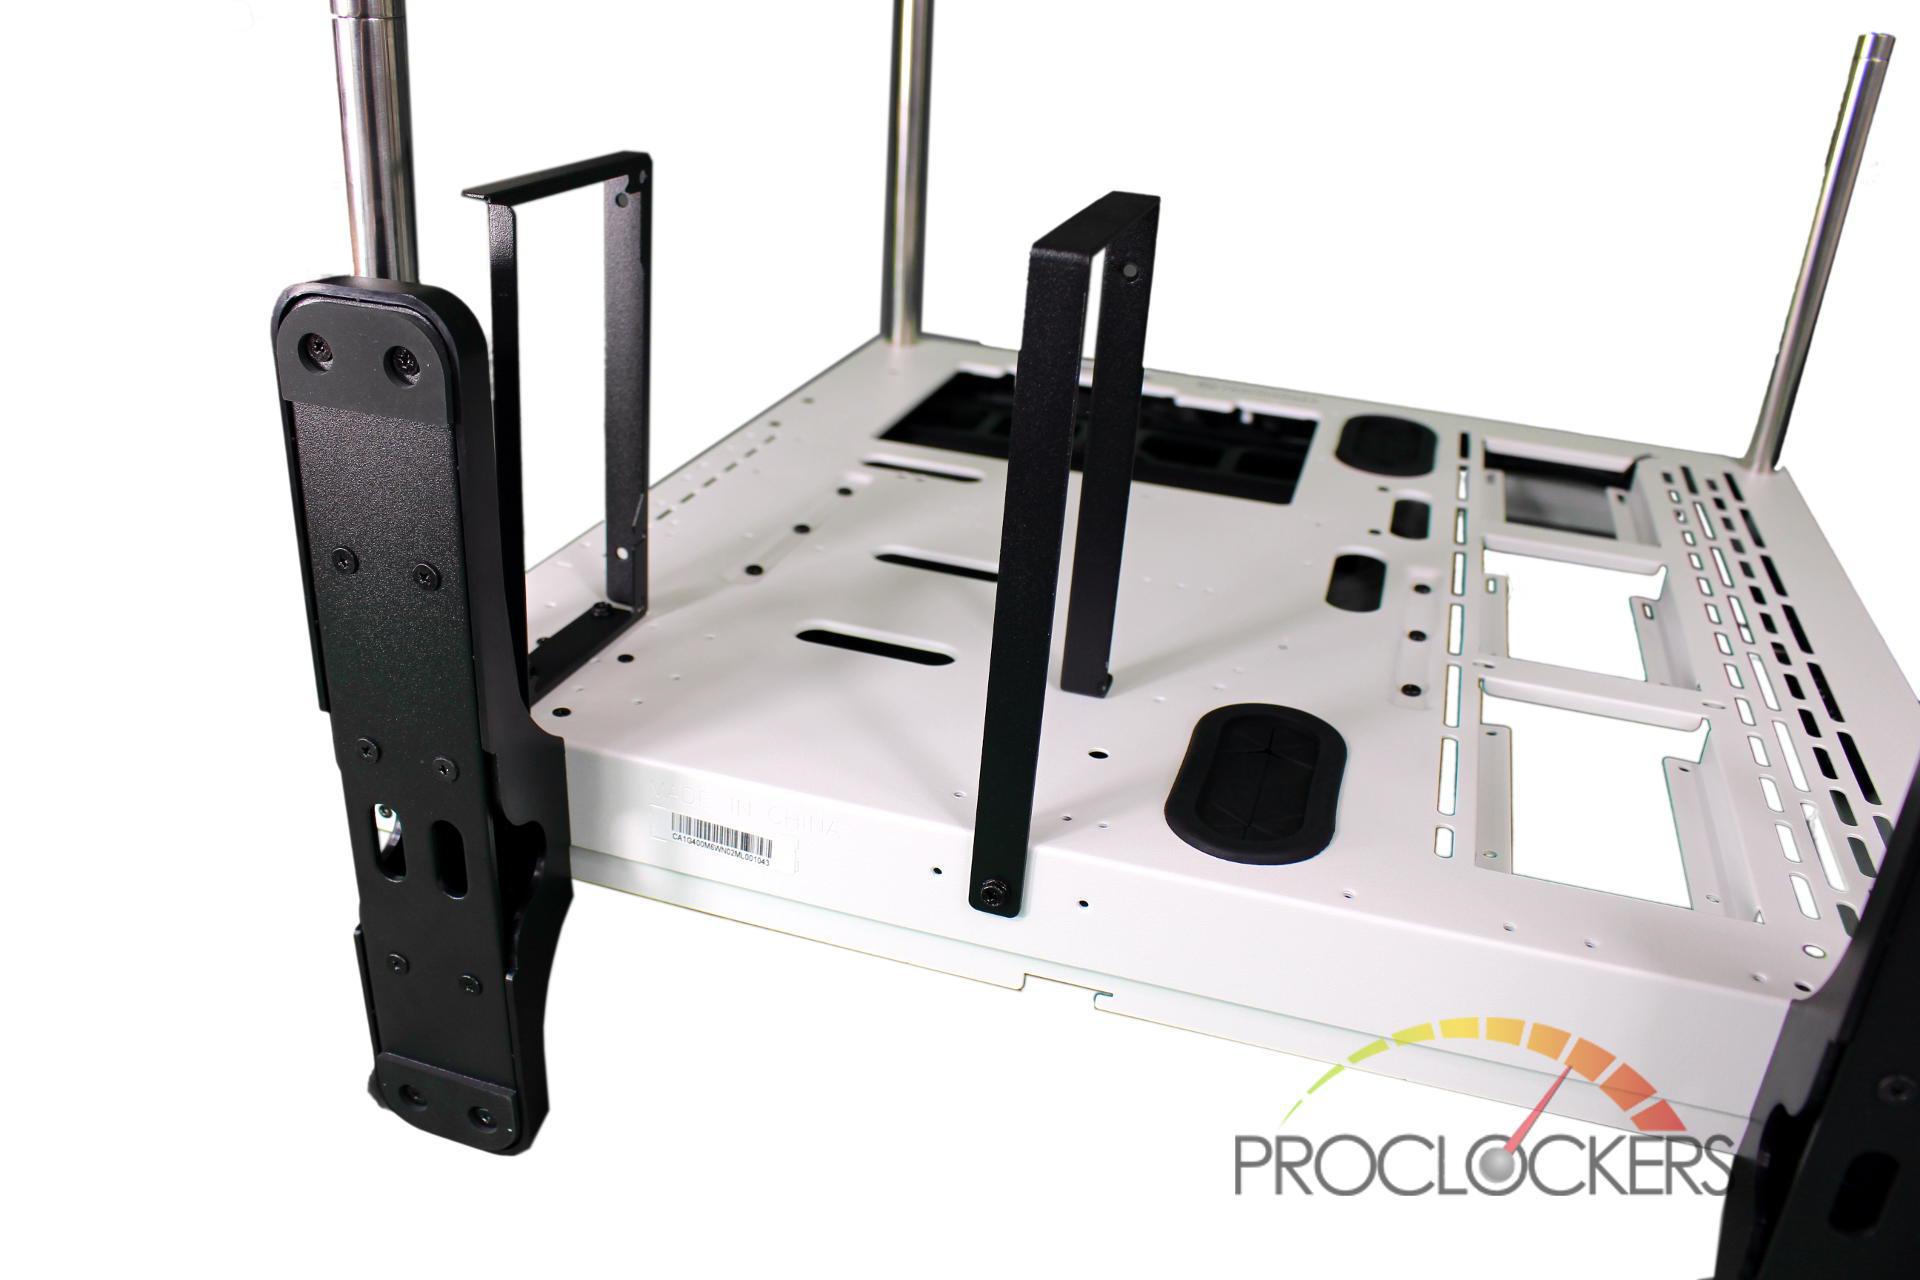
The Thermaltake Core P3 Snow edition’s bare chassis might not seem like much before assembly, but it offers quite a list of possible configurations to suit nearly any build.
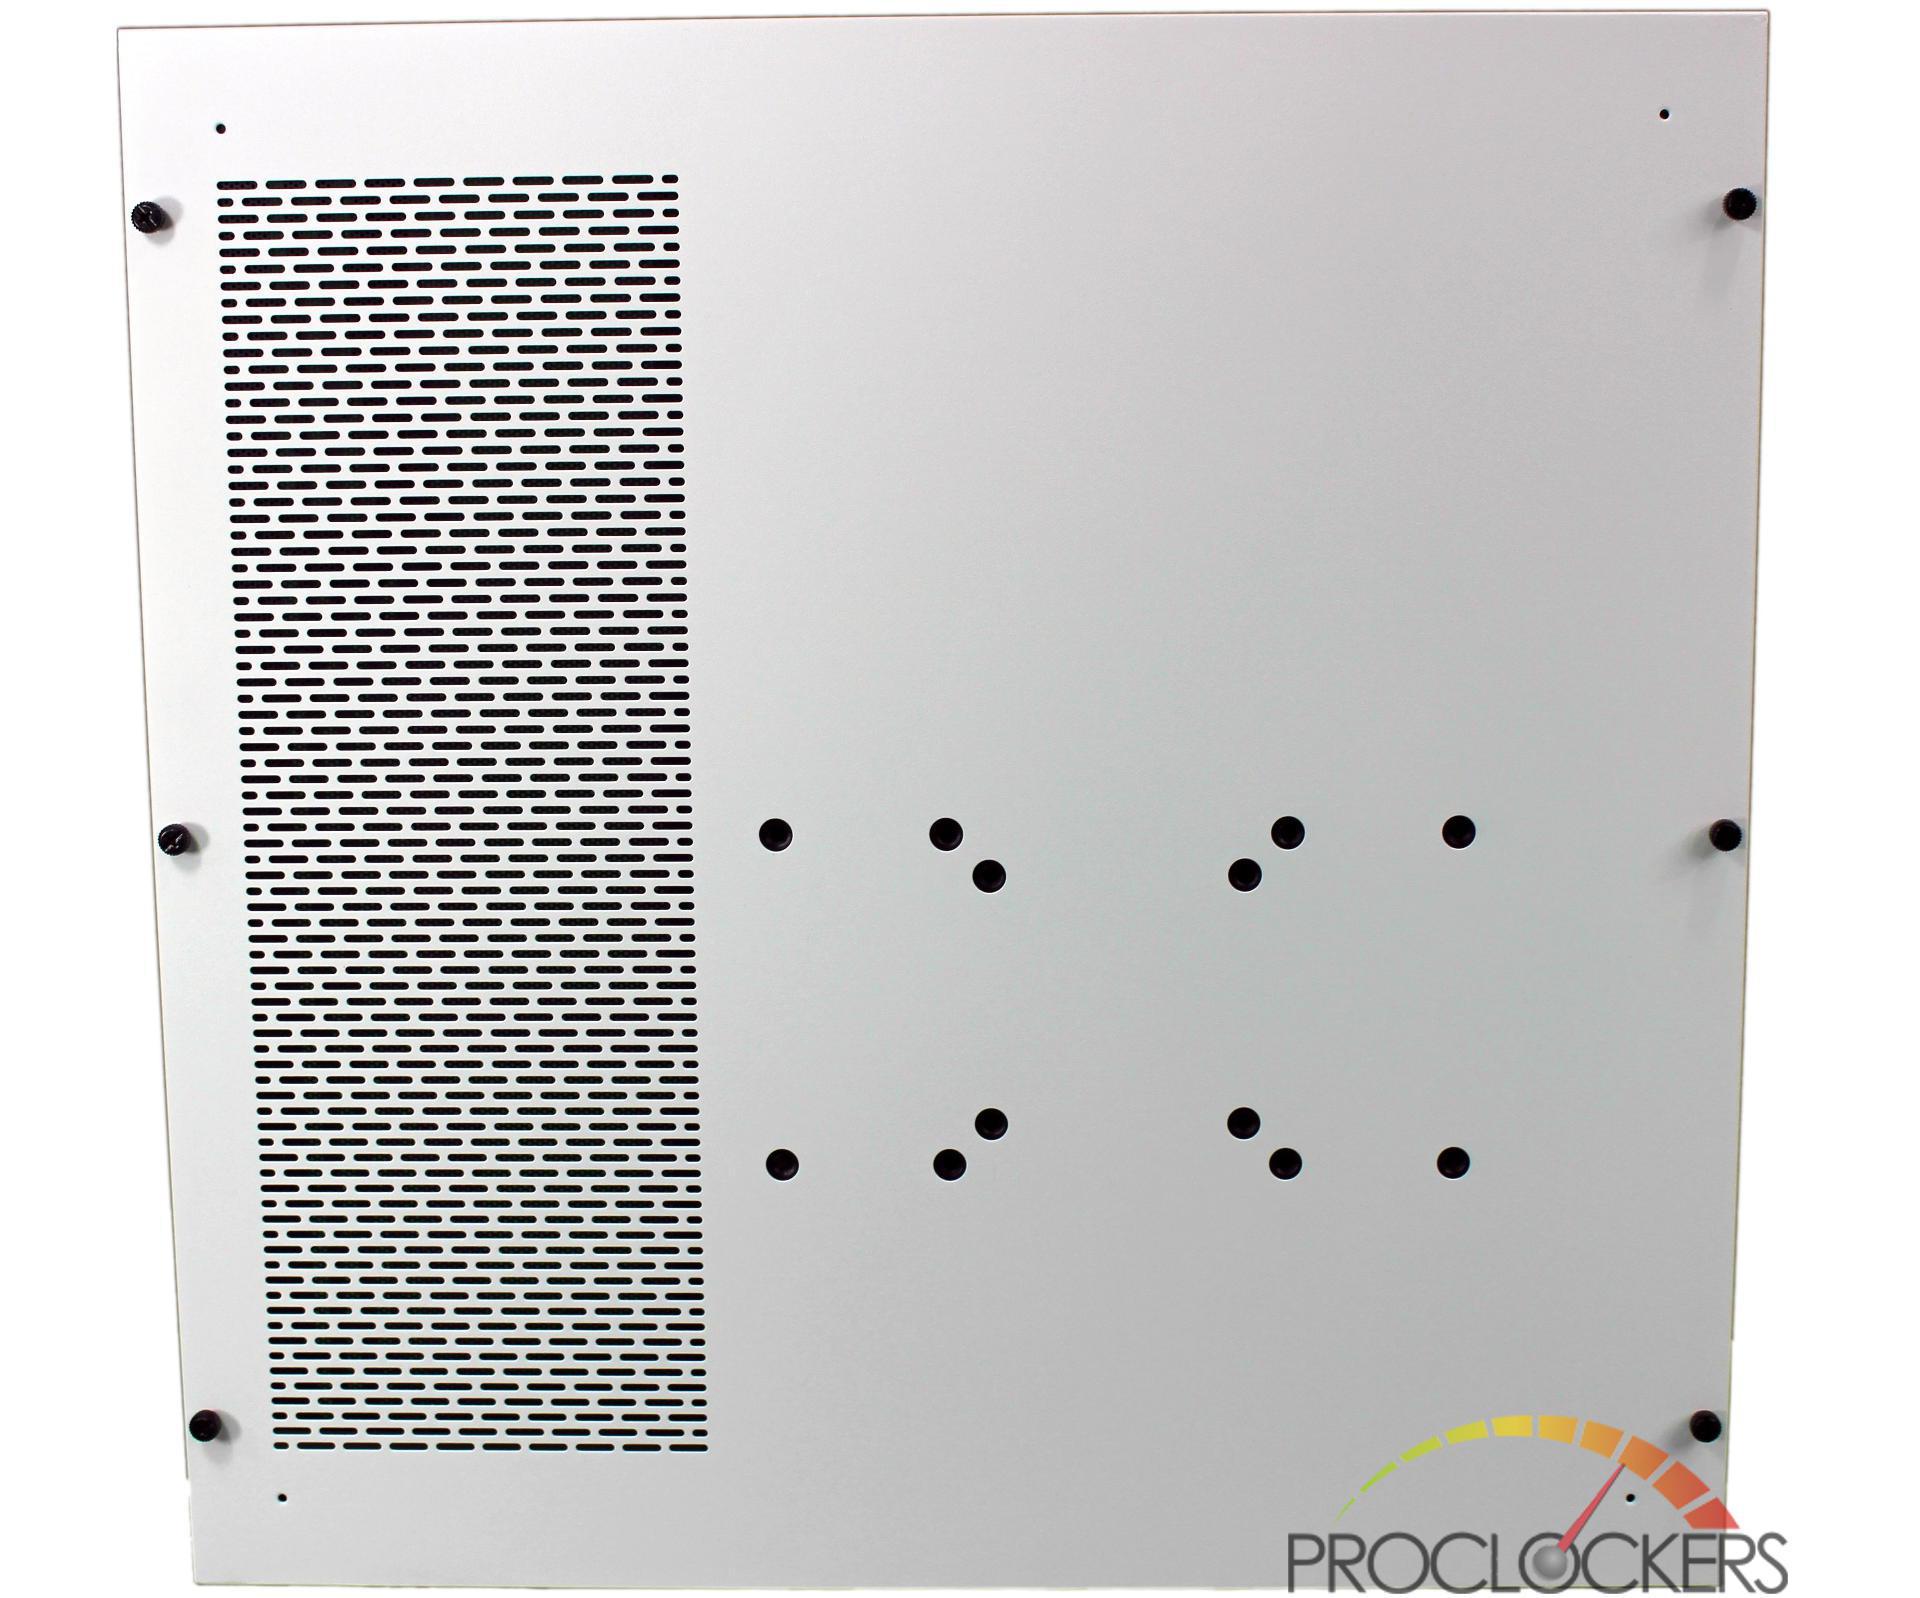
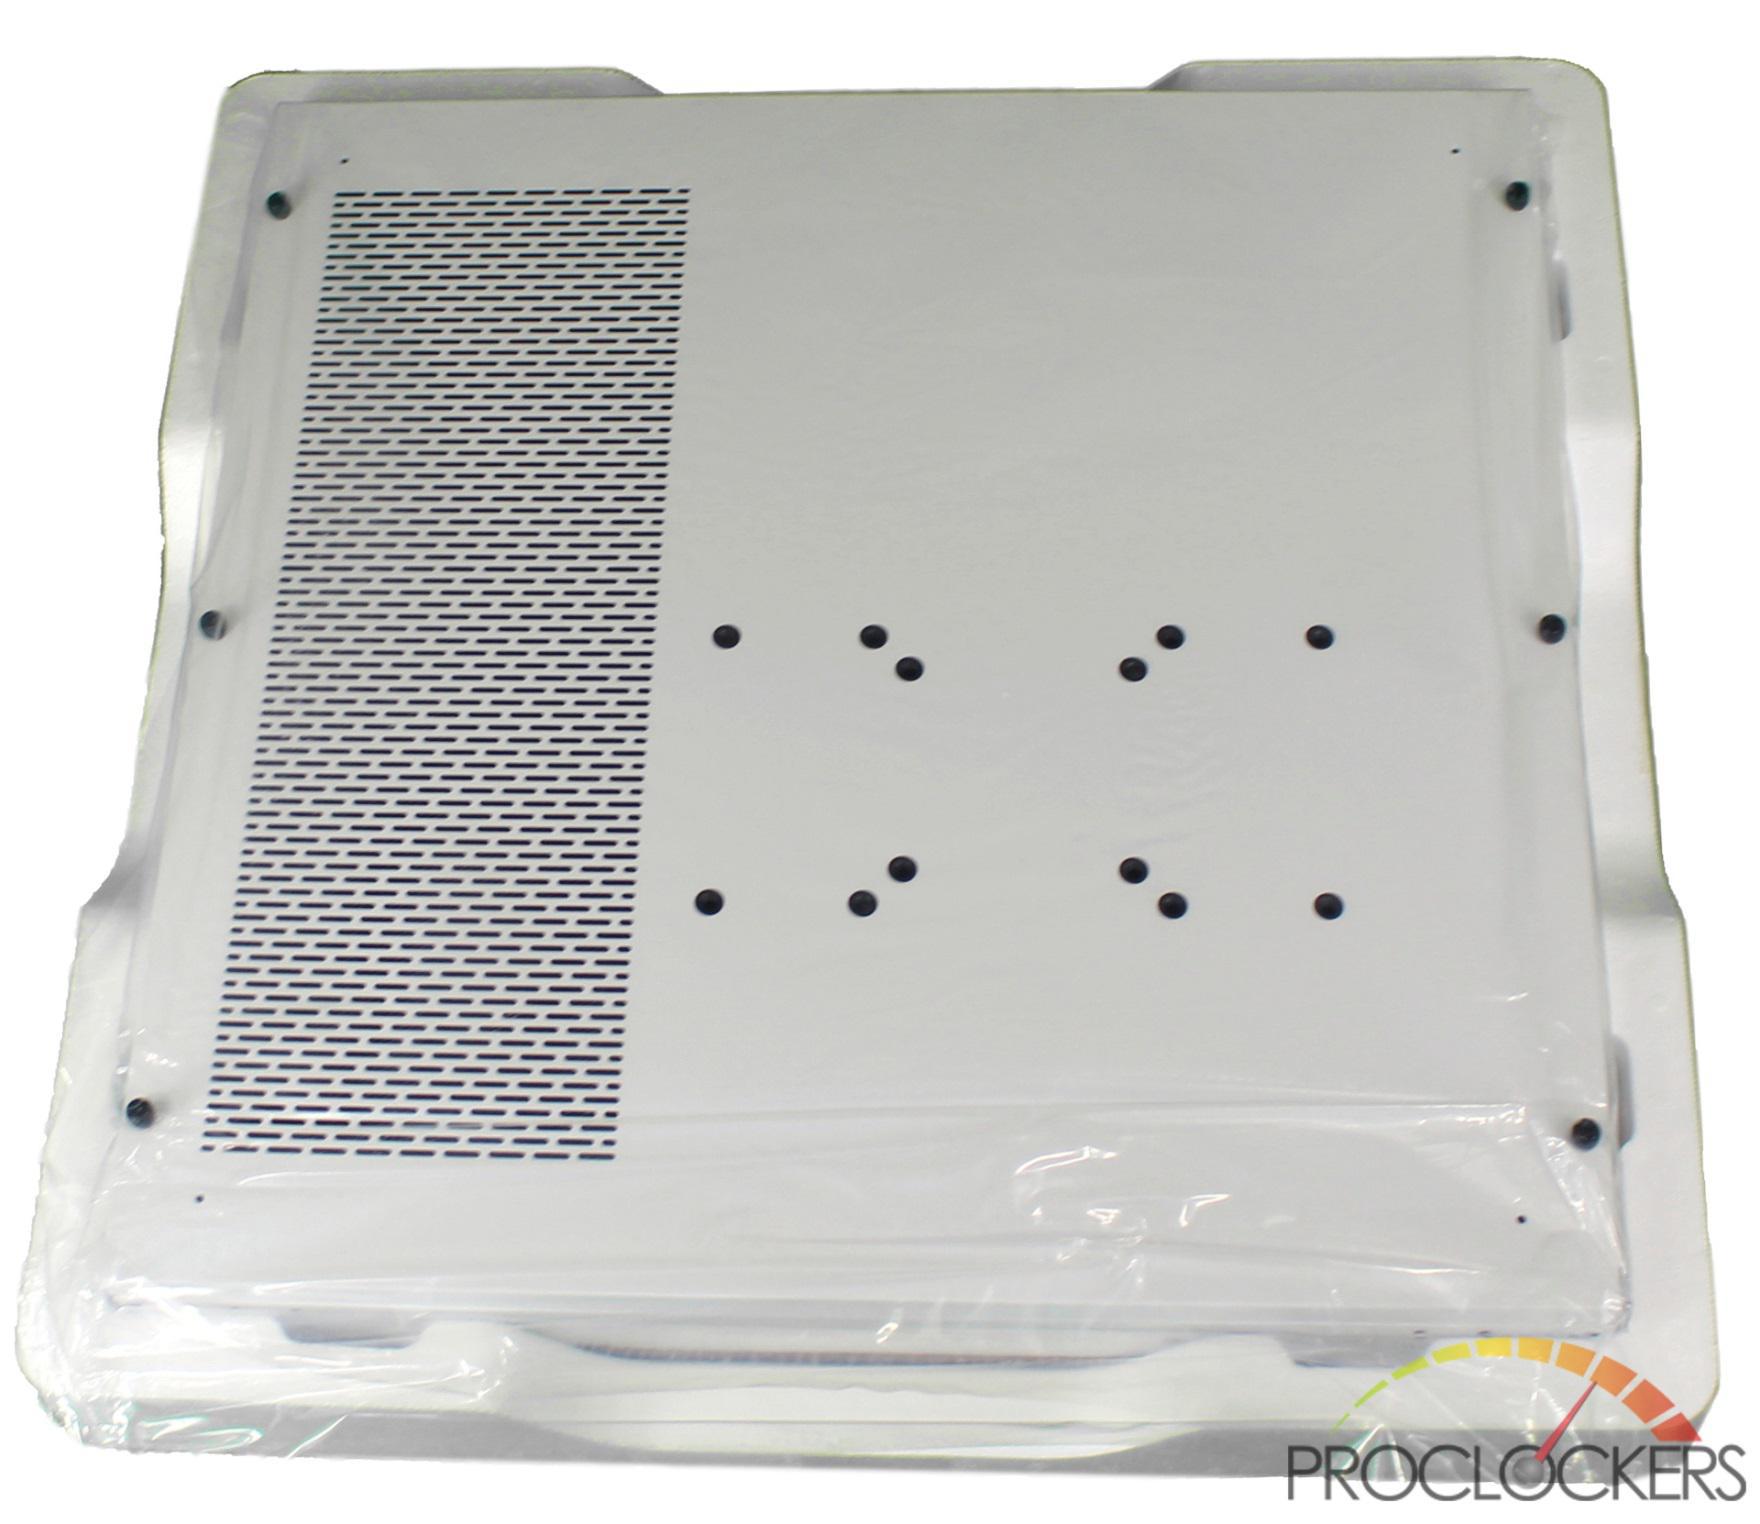
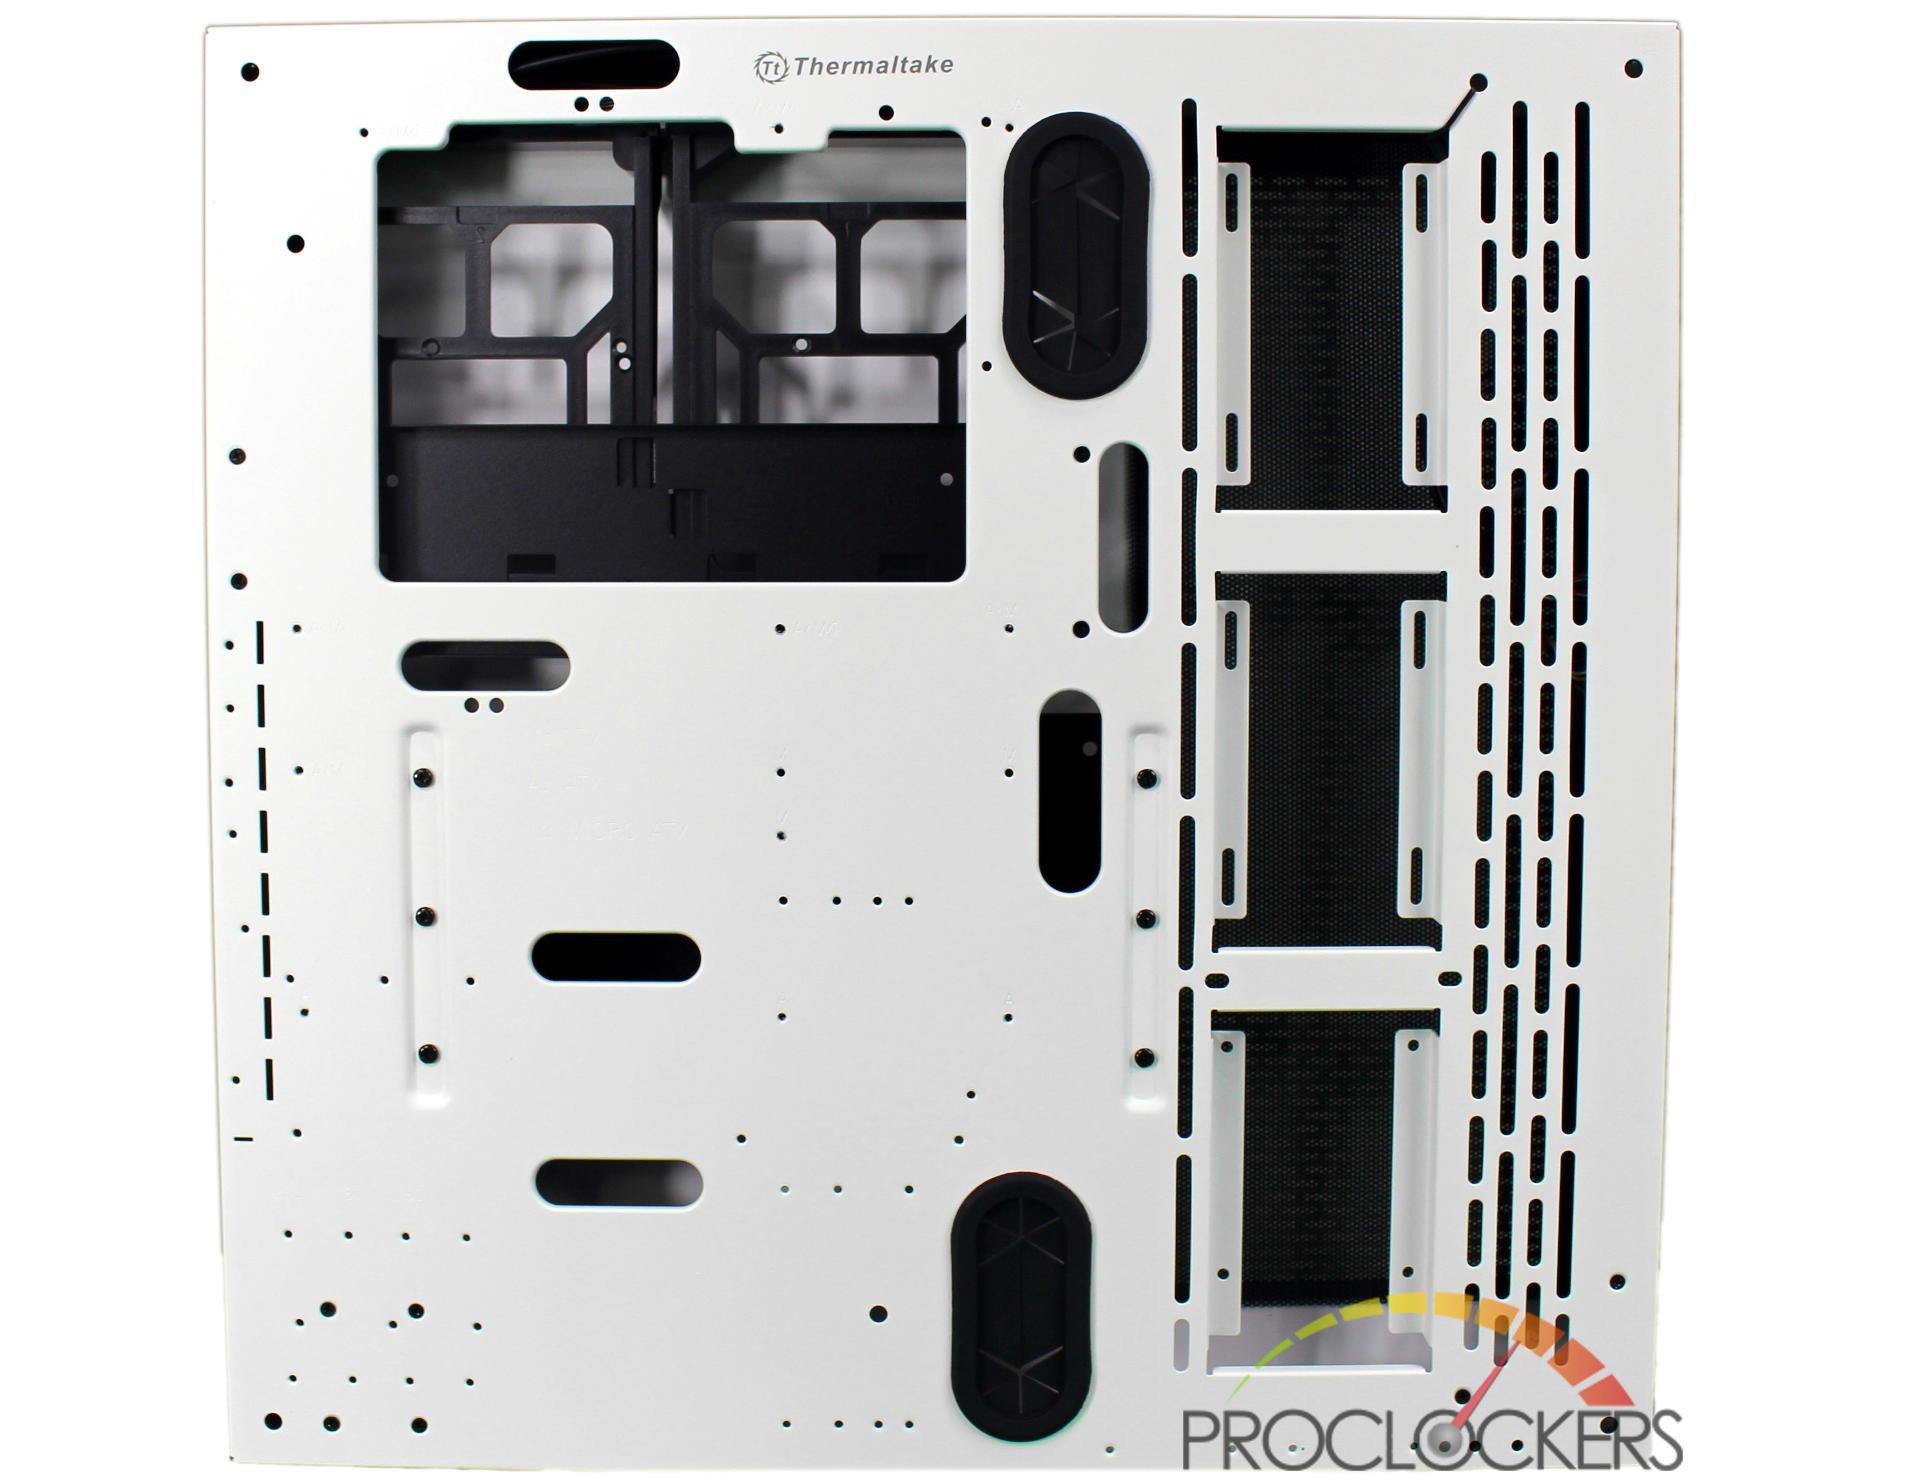
The rear, or underside of the case if used in a test bench configuration, doesn’t have much on it. A Large vented area mirrors the radiator mounting area on the front. A VESA compatible mounting pattern for 75x75mm, 100x100mm, or 200x100mm mounting with M6 screws gives a secure place to bolt your own wall mounting hardware. Six thumbscrews secure the rear cover to the main chassis.
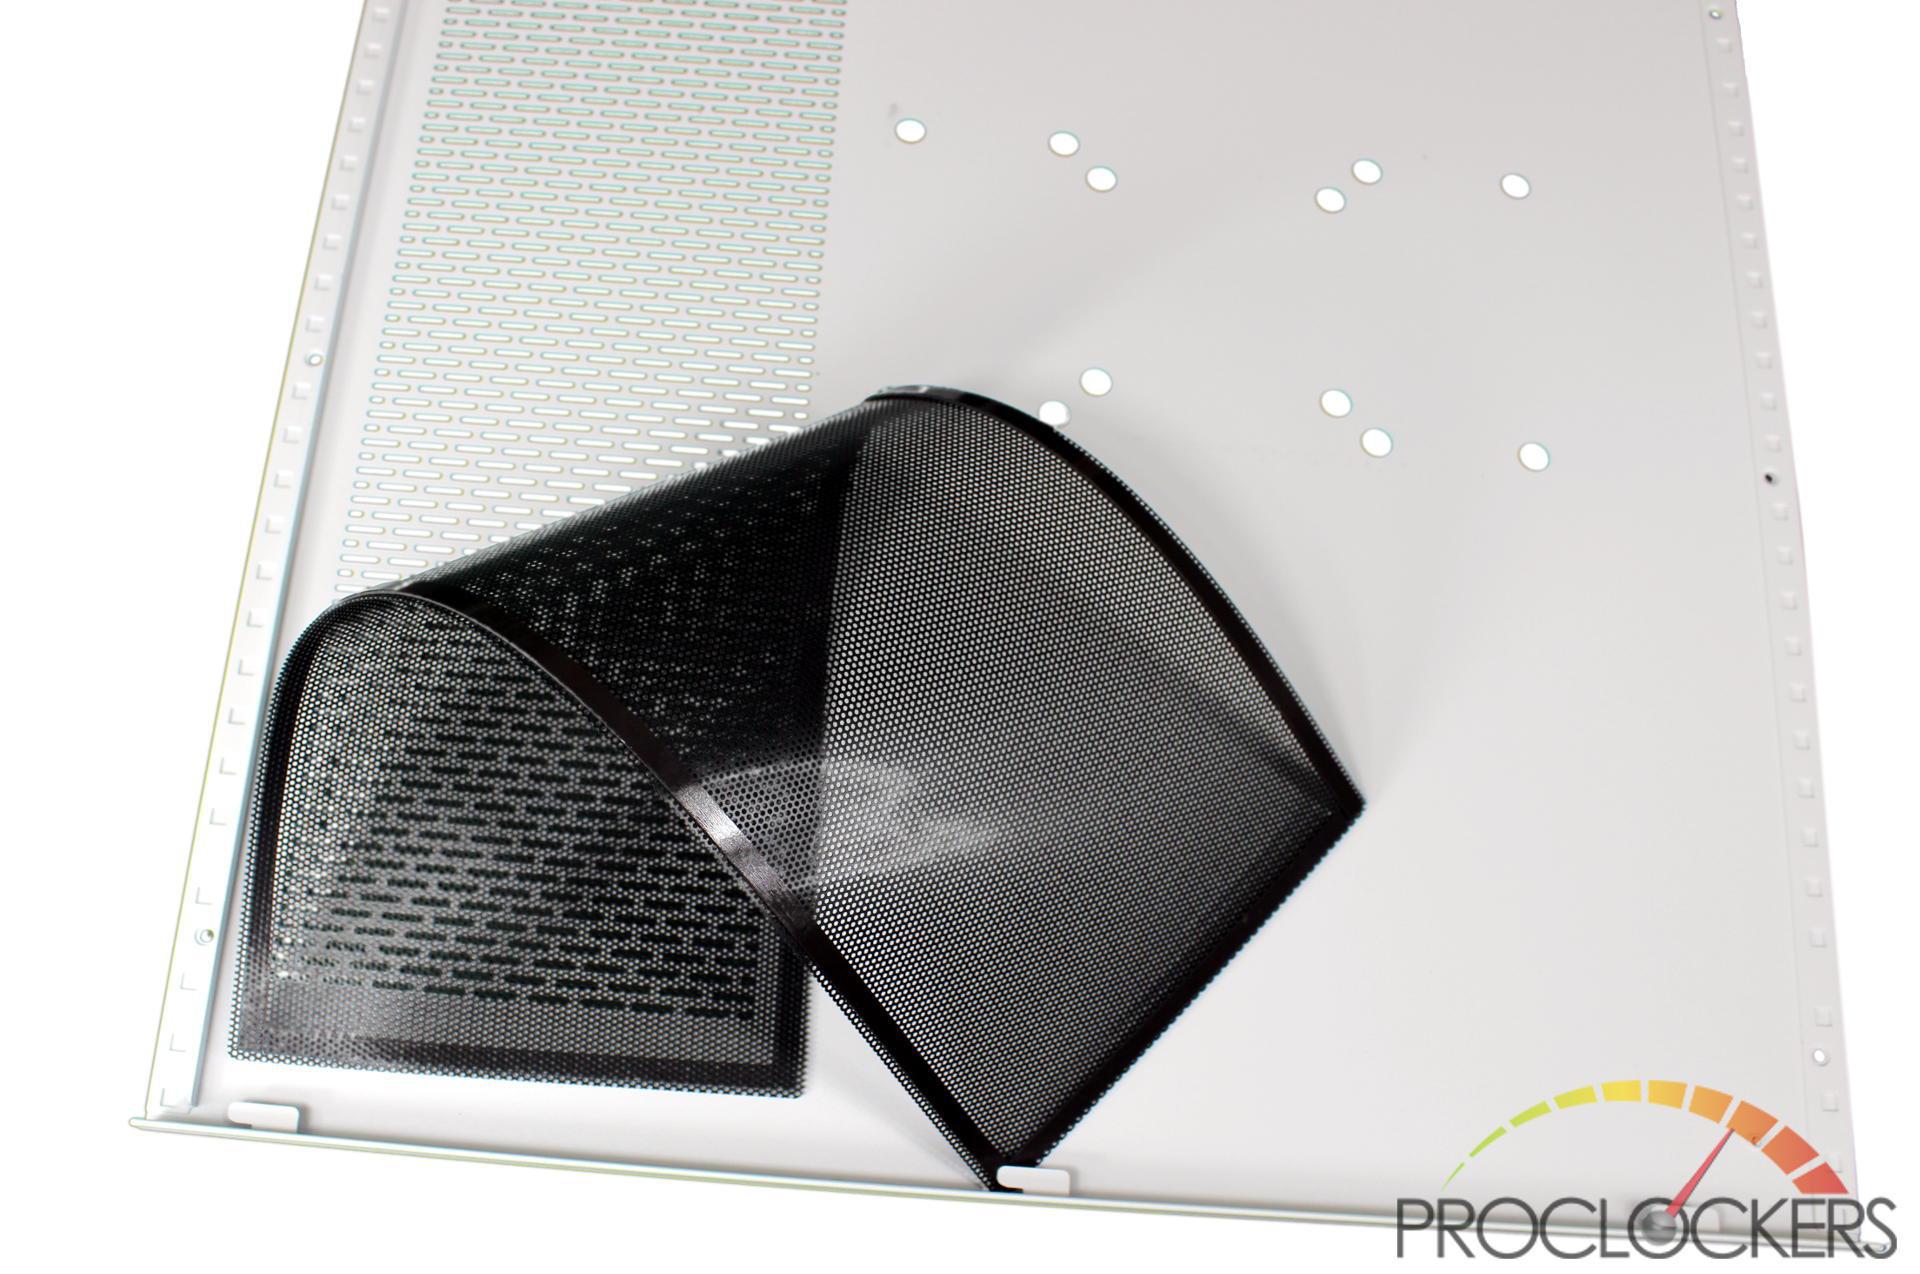
Inside the rear panel hides a washable magnetic dust filter. If you wall mount or configure the Thermaltake Core P3 case as a test bench, you may be able to move this to the outside of the case for easy access for cleaning as needed.
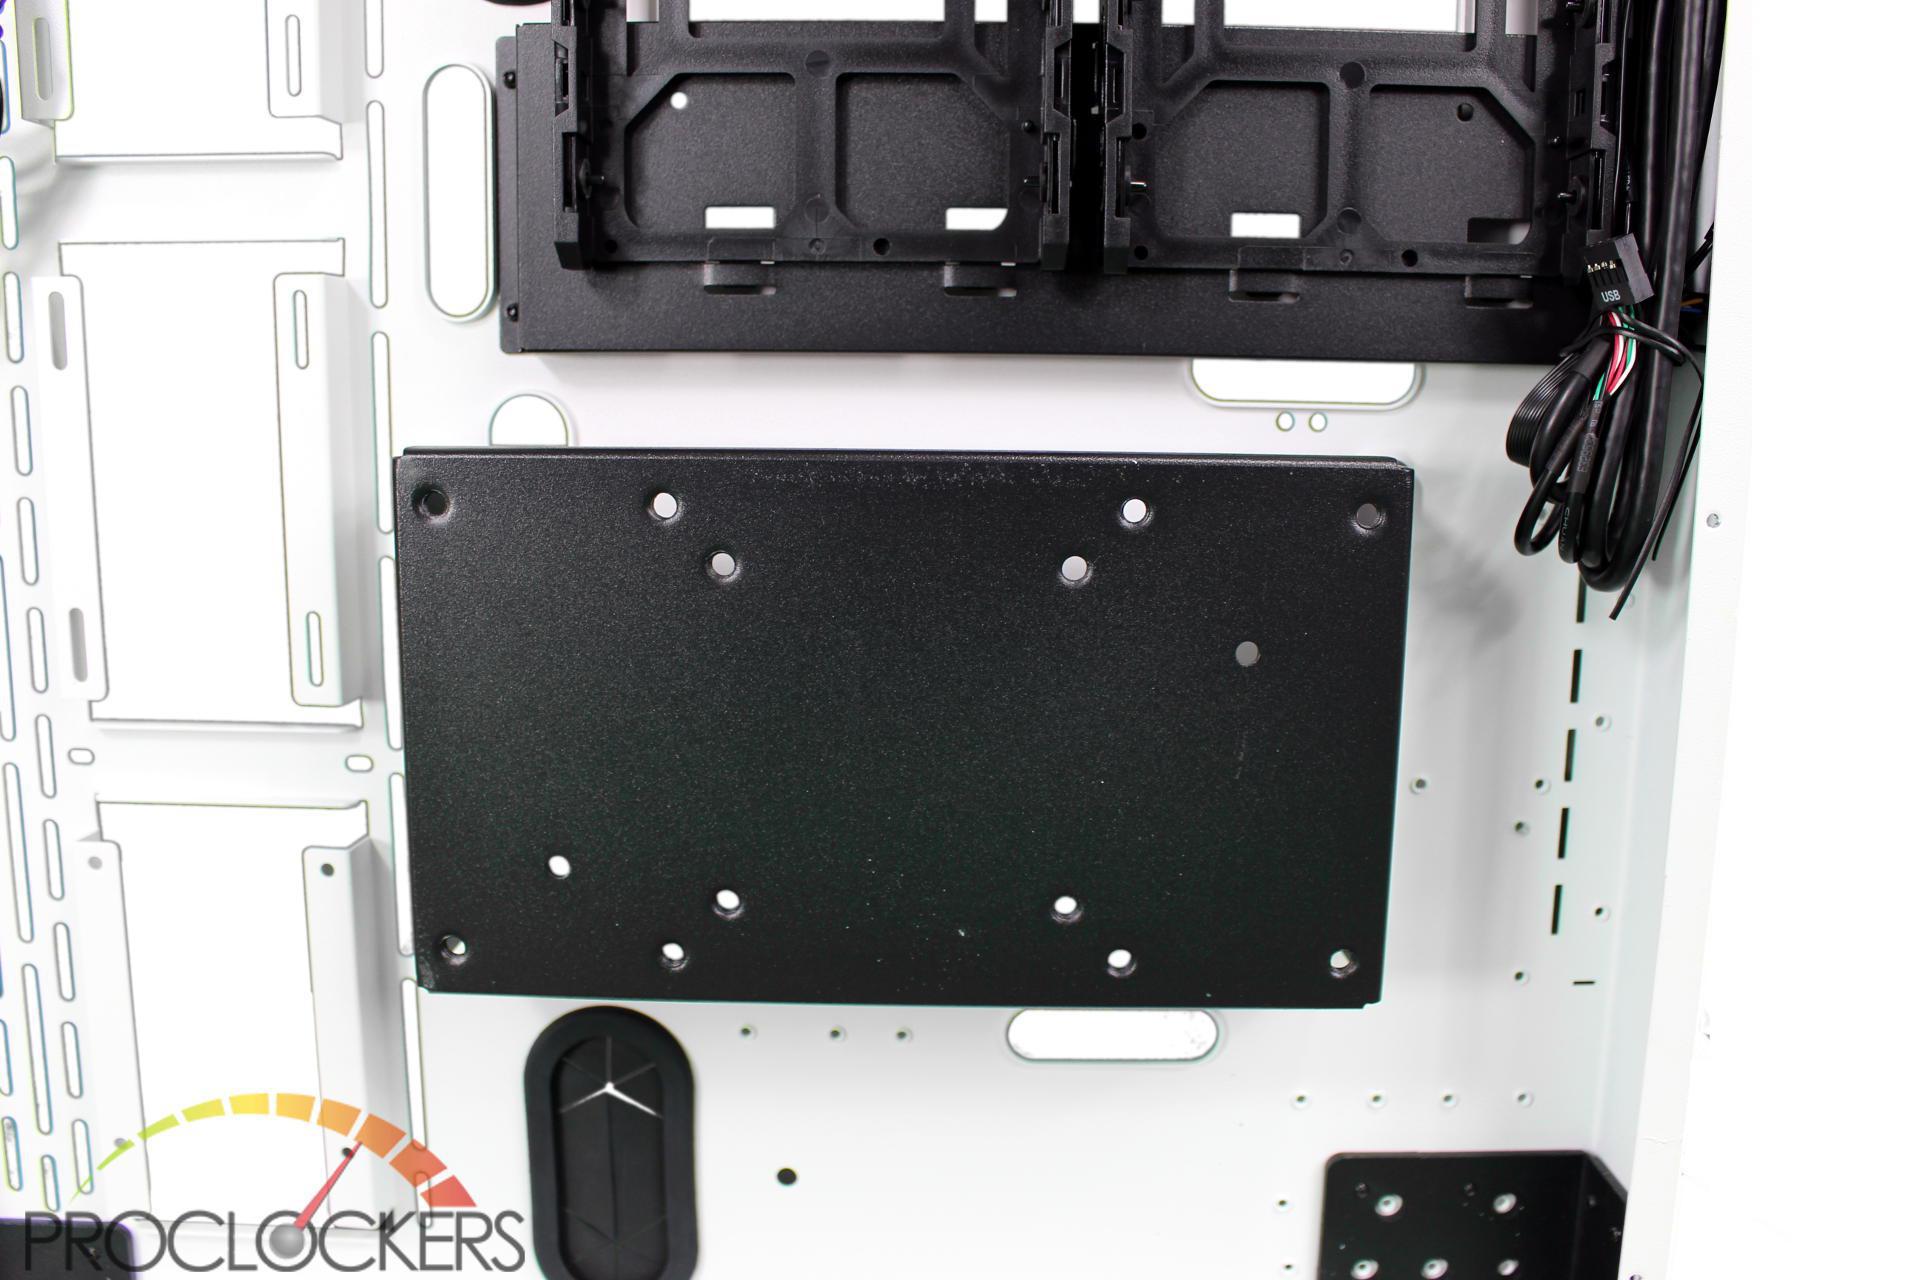
Wall mounting brackets attach through the rear door to this heavy bracket located inside the chassis. Like nearly everything else on the Core P3 Case, it can be removed for more space if not needed.
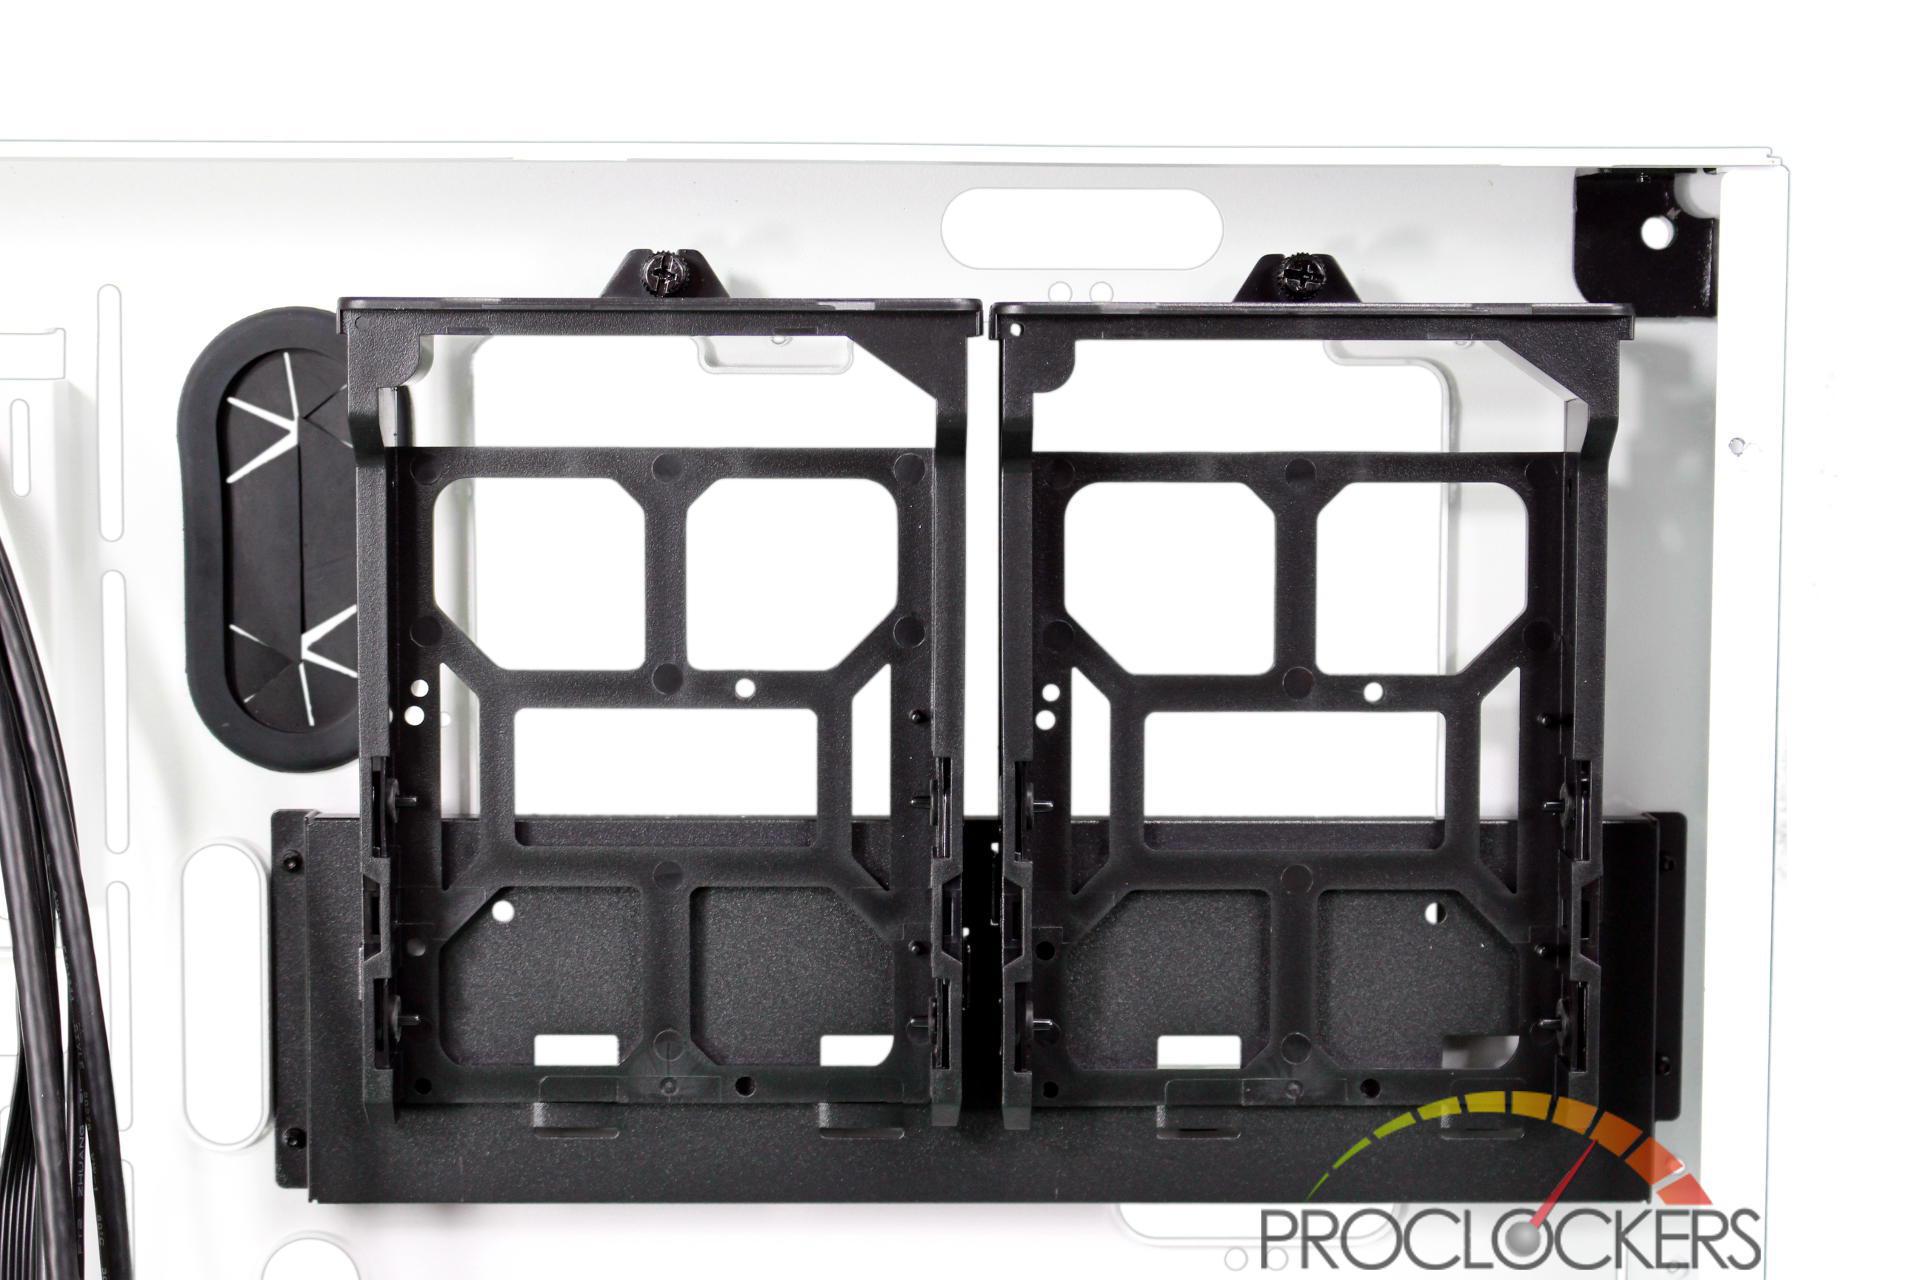
Directly behind the motherboard area inside is two removable drive sleds for either 3.5” or 2.5” drives. One thumb screw keeps them in place and the bracket they snap into can be removed to open up a larger cutout area behind the motherboard if needed.
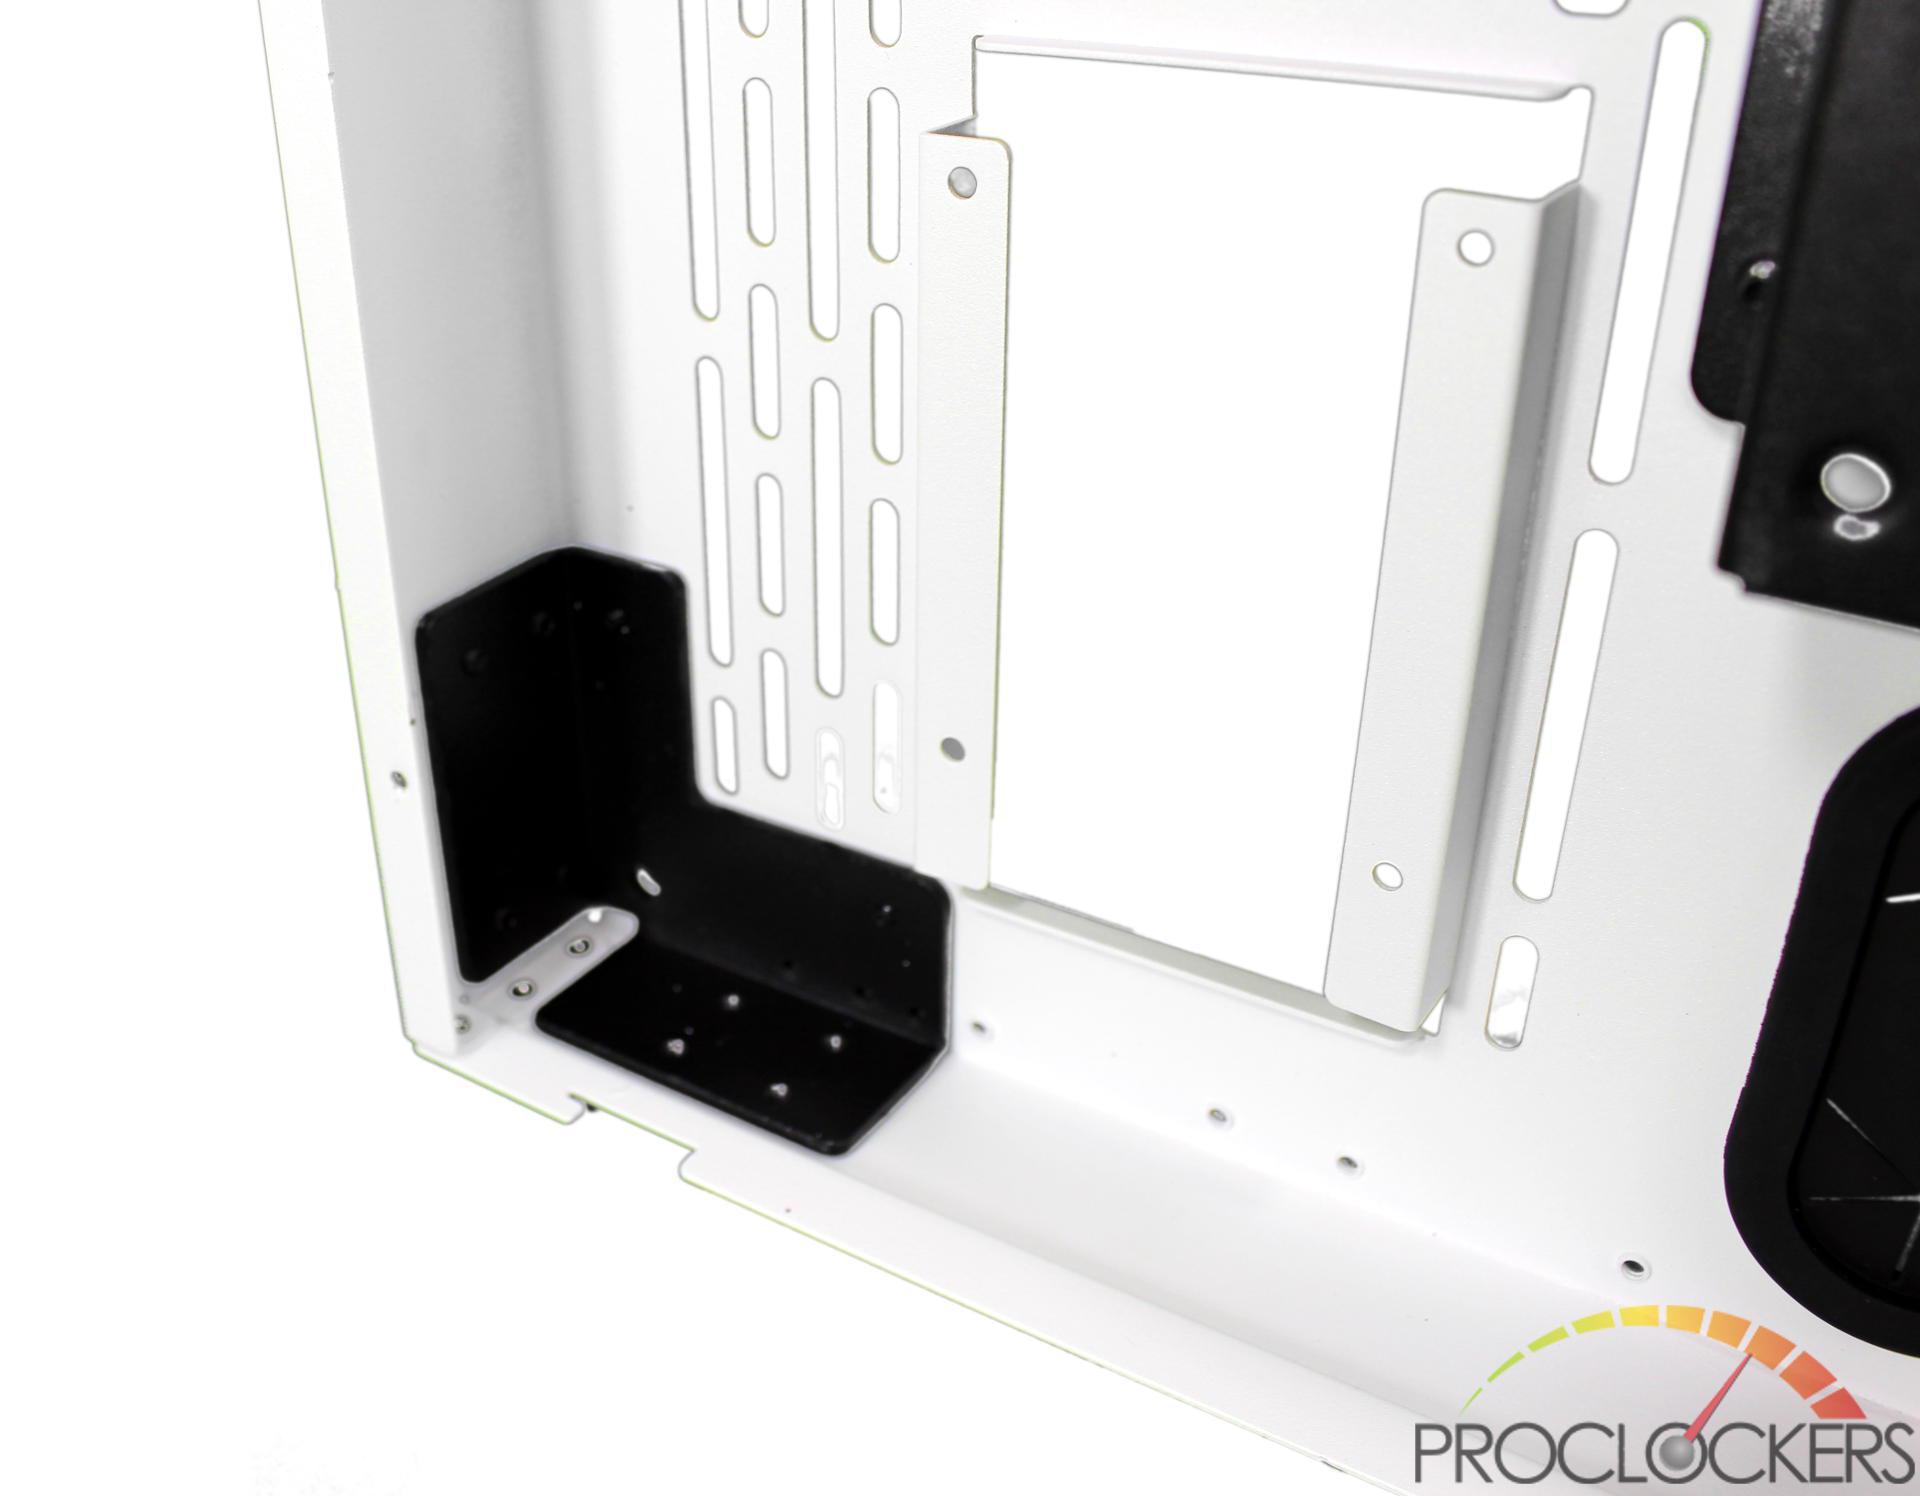
Each of the four corners of the case is reinforced with a very heavy duty bracket. The front window support rods bolt through this bracket, as well as the case feed bolting to both lower brackets. This makes for one very sturdy case no matter what configuration it is used in. Here you can also see one of the 3 spots in the radiator mounting area that can hold a 2.5” drive to display from the front.
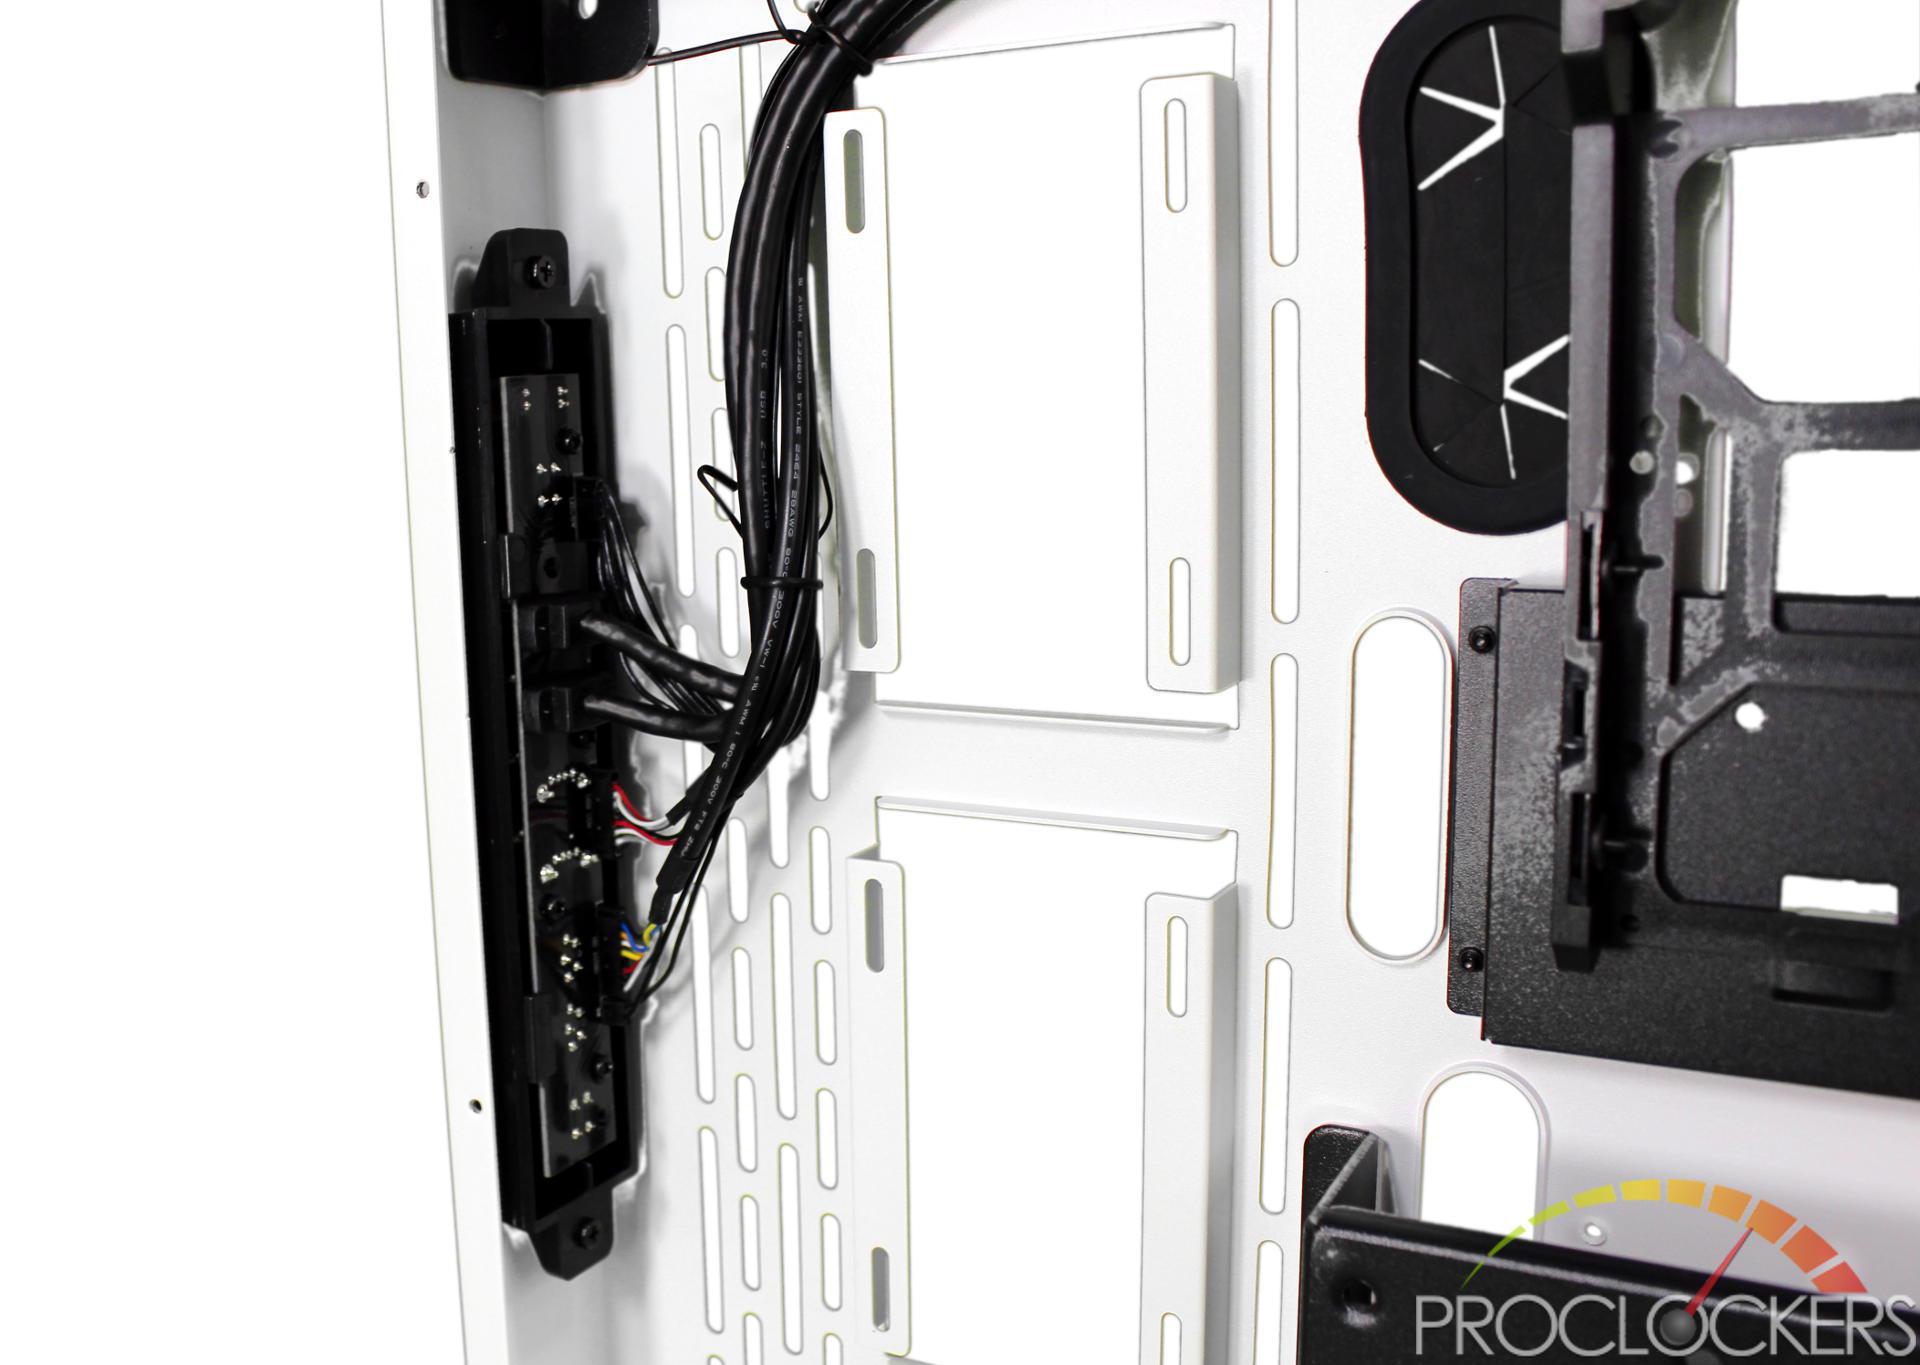
The Front I/O Panel is mounted to the front of the case with 2 screws. Two USB 2.0 ports, two USB 3.0 ports, audio and the usual power switch and indicator LED’s can be found. The wiring for the front panel is quite long for such a small case and offers plenty of routing options.
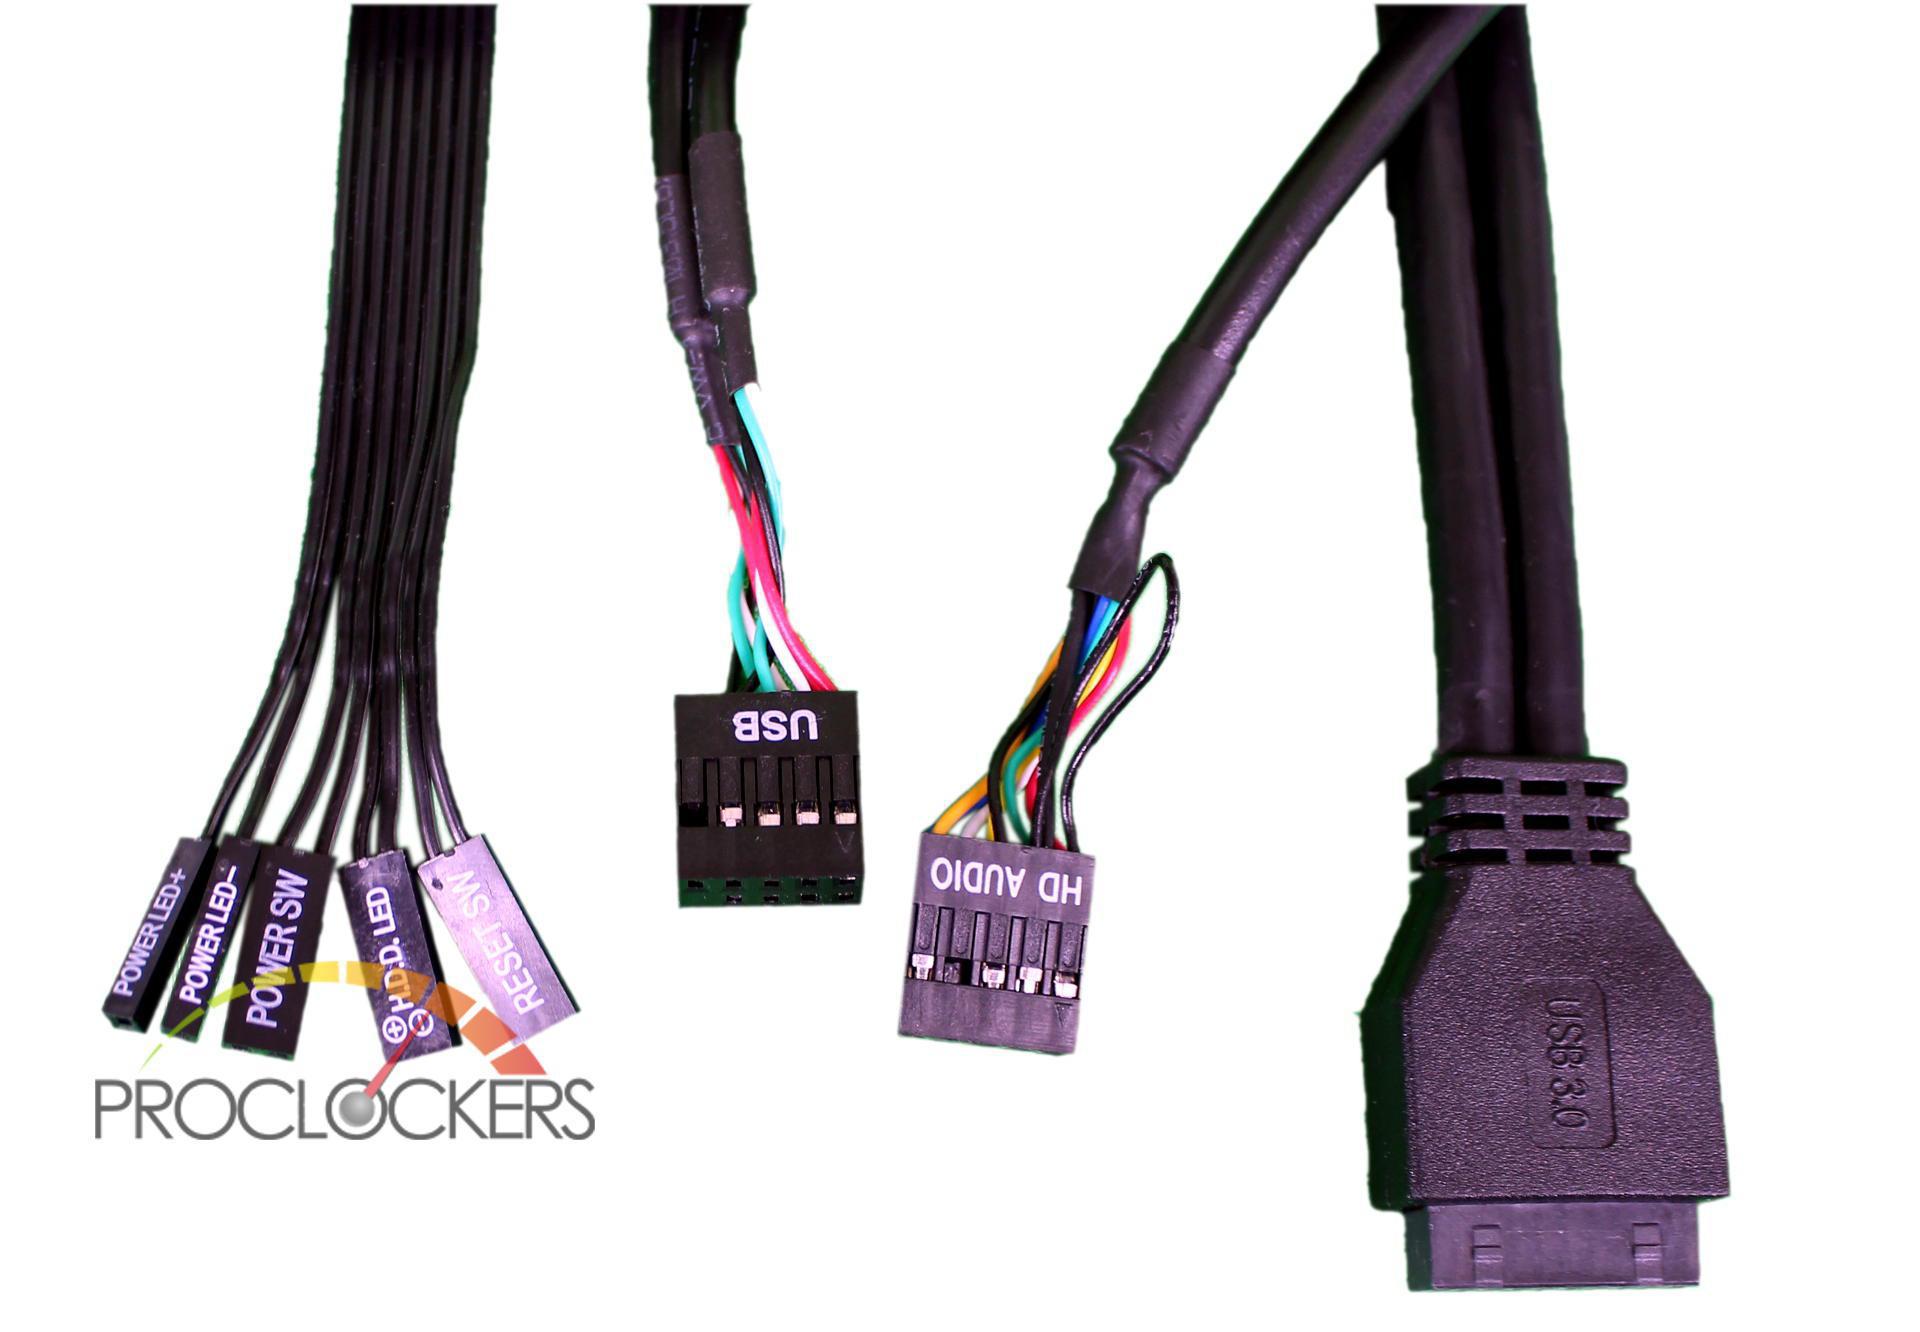
The front I/O Panel connections to the motherboard are pretty typical and should be supported on nearly any build.

One thing stood out on unboxing, how heavy the front window support bars are. Weighing in at a hefty 15.6 oz each means, using these adds nearly 4 pounds to the weight of the build.
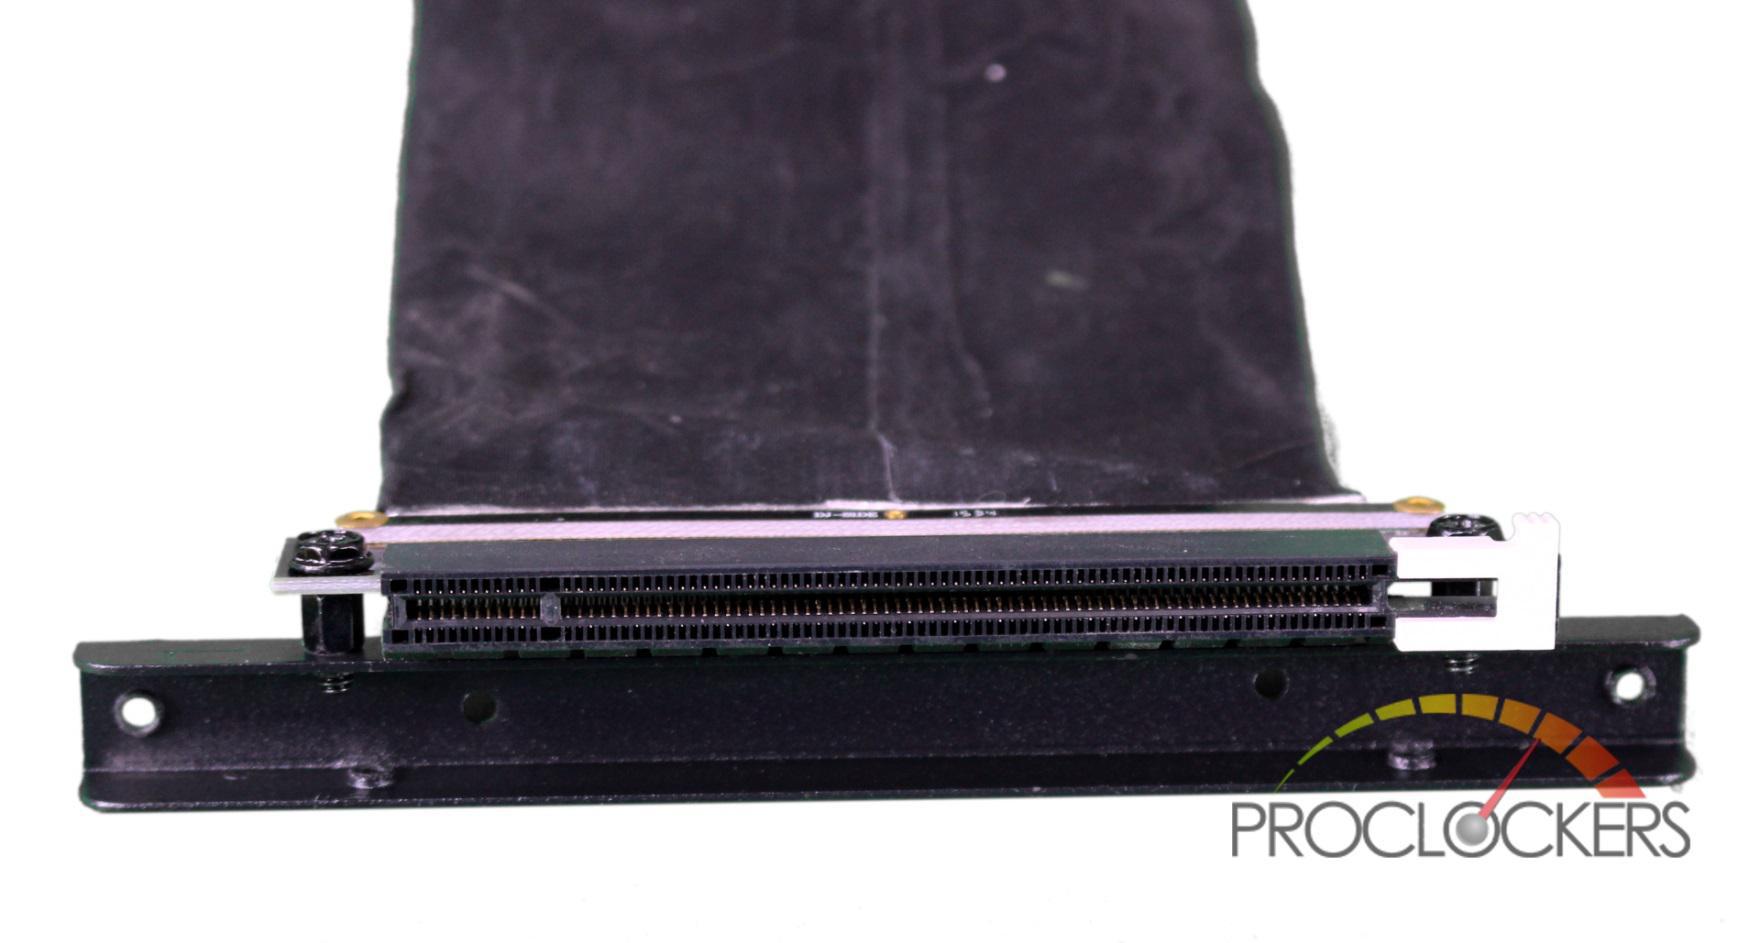
While not included in our review sample, we did happen to have the PCIe X16 flexible riser from a Core P5 chassis lying around, so we will be using it with this review since it is also compatible with the Core P3 case.
Build & Installation
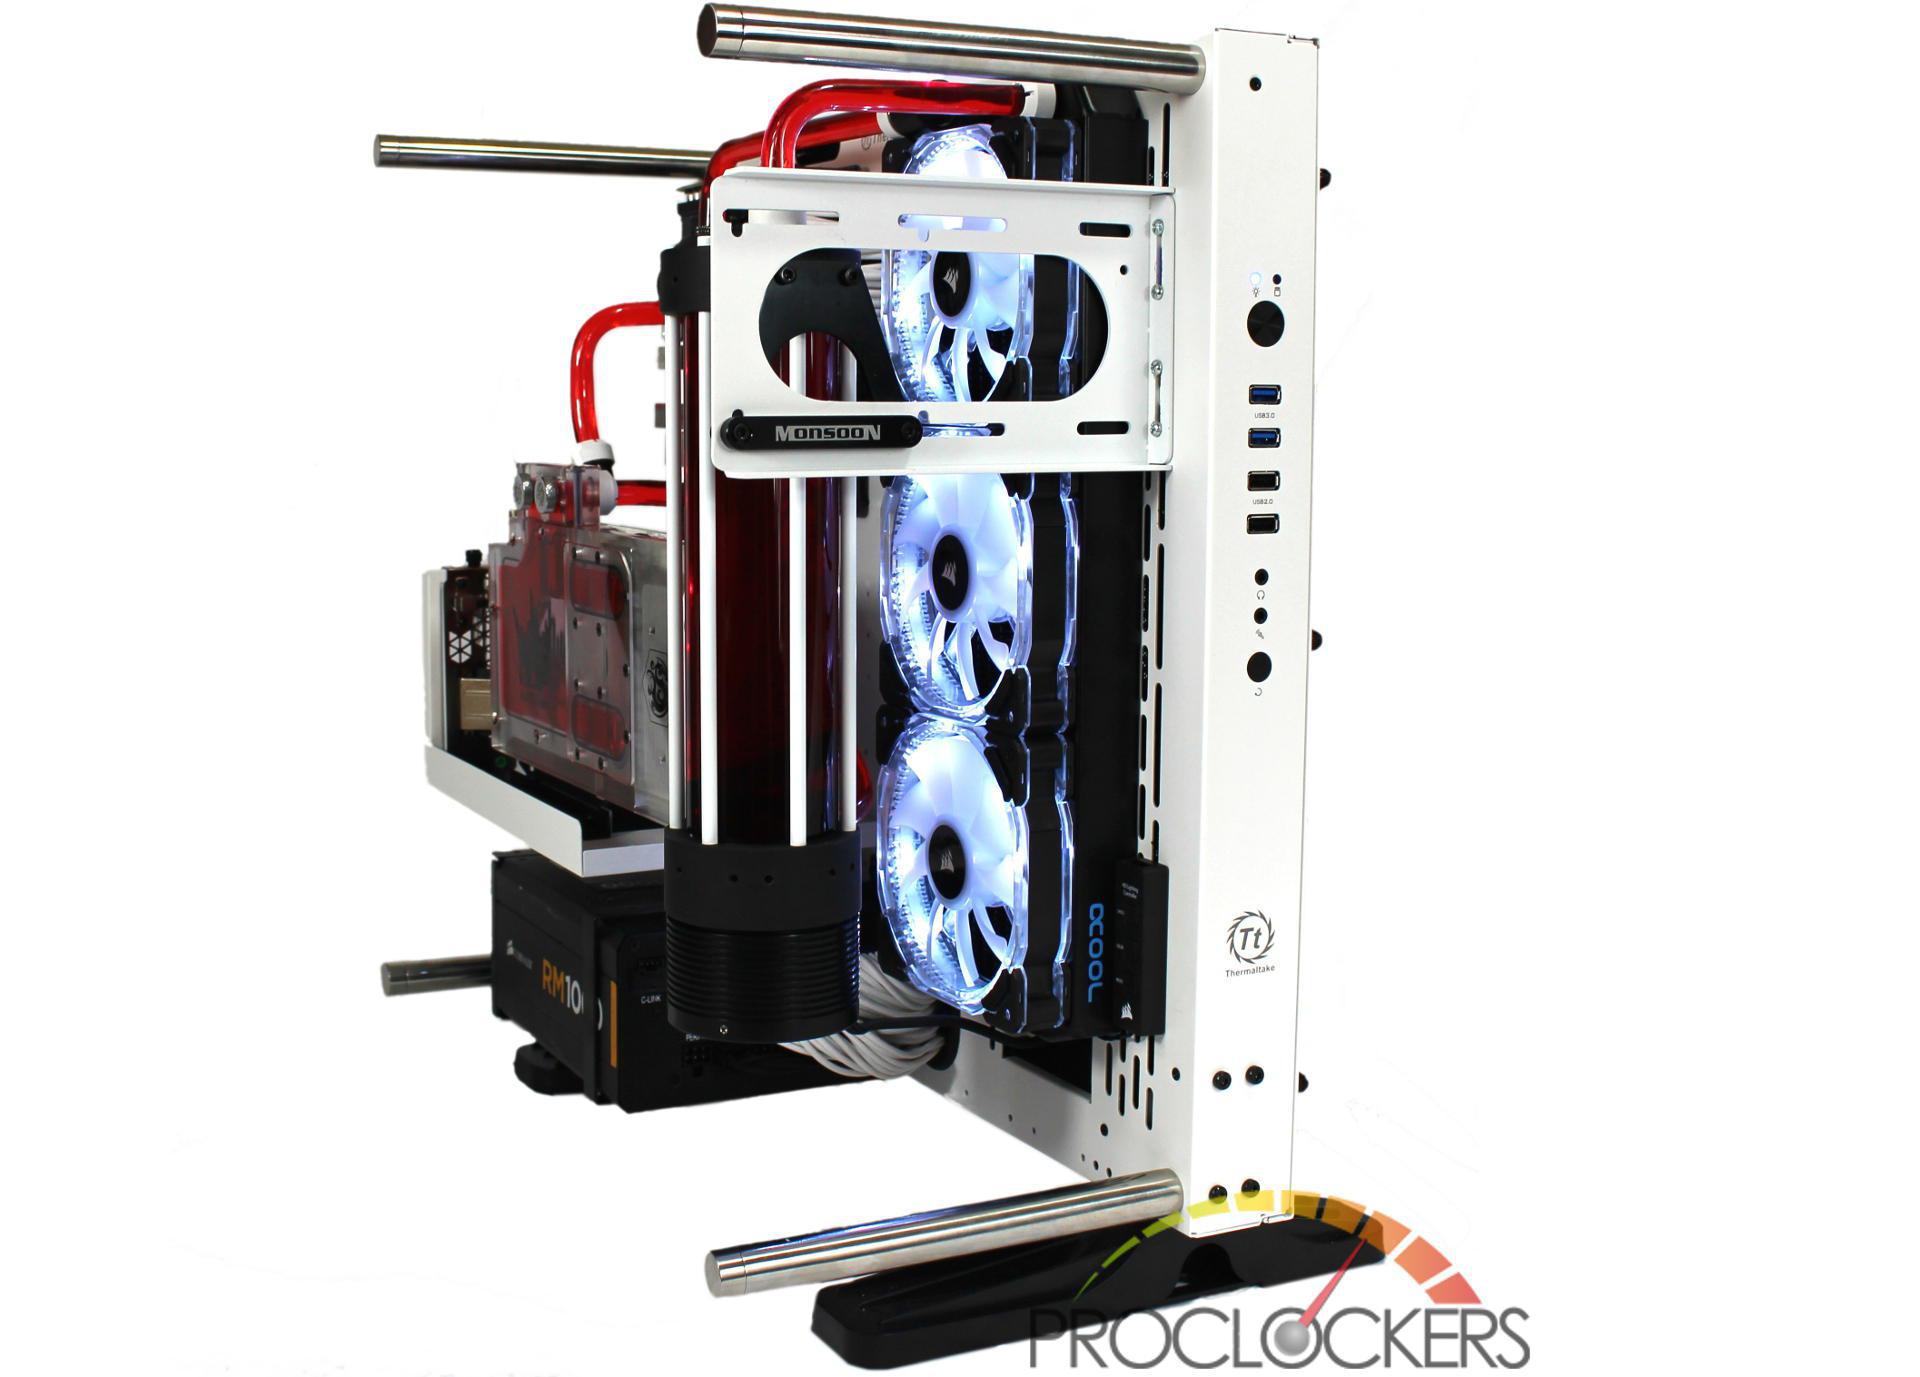
Build Specs
- Mobo: ASUS Maximus Viii Impact
- CPU: Intel Core i7-6700k
- RAM: 16GB G.Skill TridentZ 3200Mhz
- SSD: 2x Corsair Force GT 240GB
- GPU: Galax 1070 HOF
- Case: Thermaltake Core P3
- PSU: Corsair RM1000 with Corsair White cable set
- Rad: Alphacool 360mm
- Res/Pump: Monsoon MMRS with D5 Pump
- Fittings and Tubing: Monsoon
- Fans: Corsair HD120 3-pack
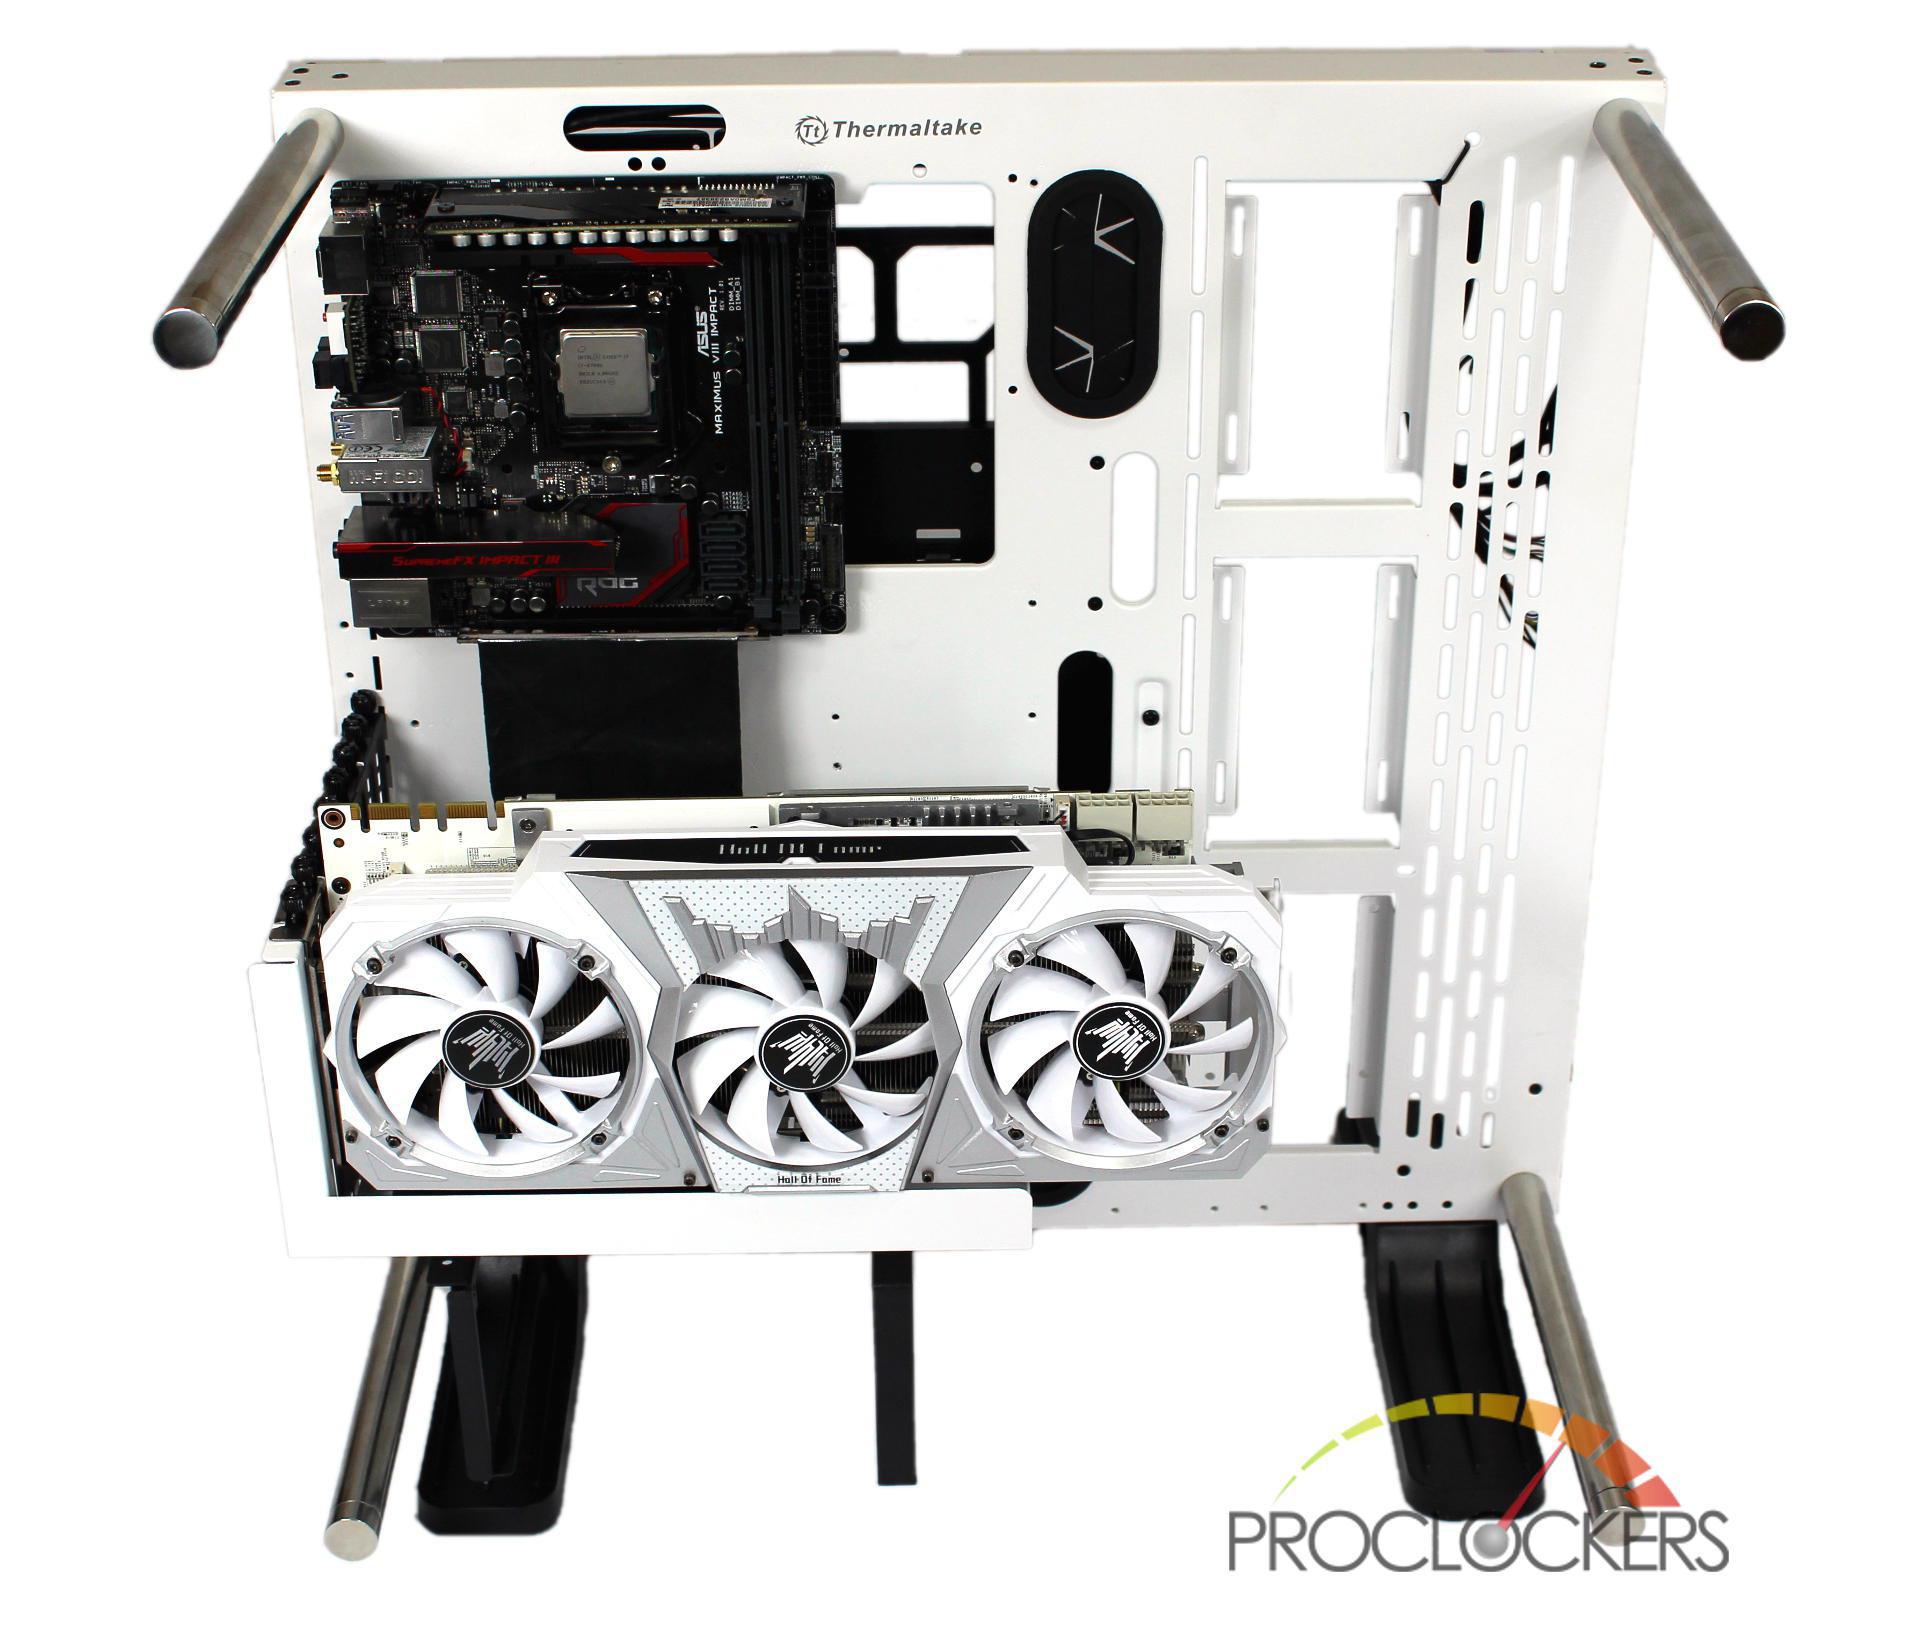
Unlike some cases, The Core P3 does take a few thoughts about planning before you begin building due to the possible configurations. Are you going to use a full size Motherboard or an ITX? Are you going to mount your GPU’s like normal or vertical? Are you going to mount the PSU flat to the case or horizontal?
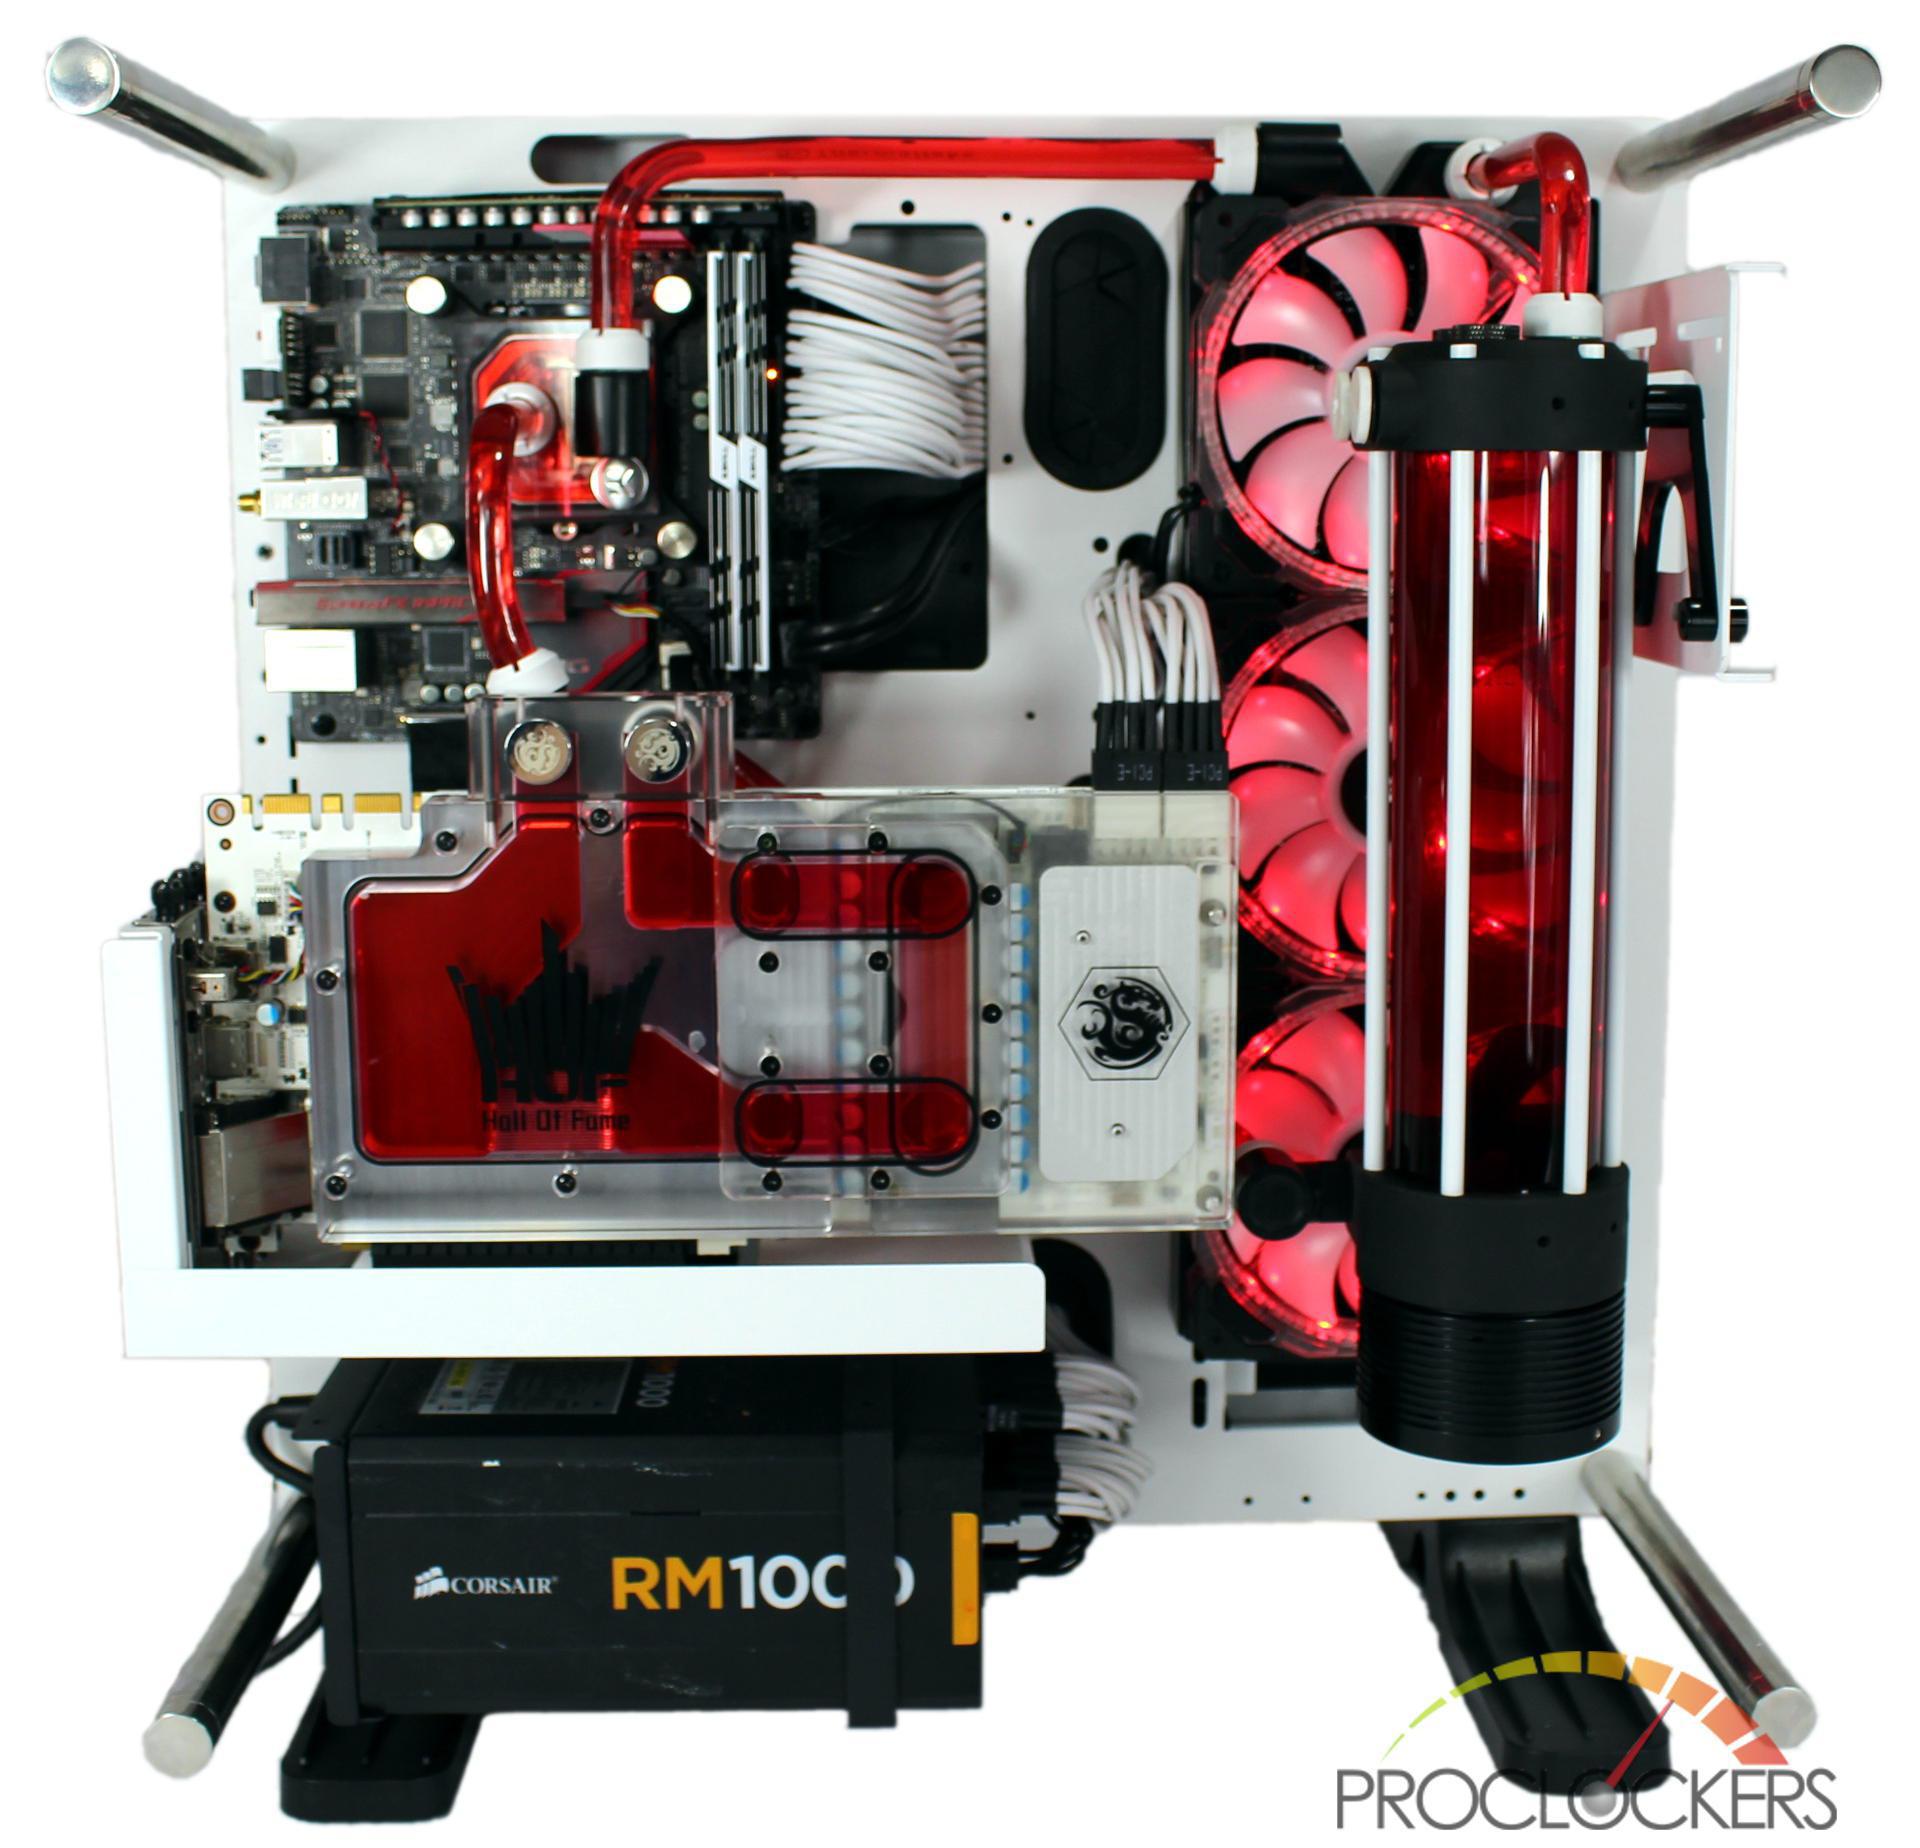
For our build, we are doing an ITX based build with one vertical mounted GPU on a free standing case. Per this, our first steps were to install the feet and the appropriate brackets for a horizontal PSU per the manual.
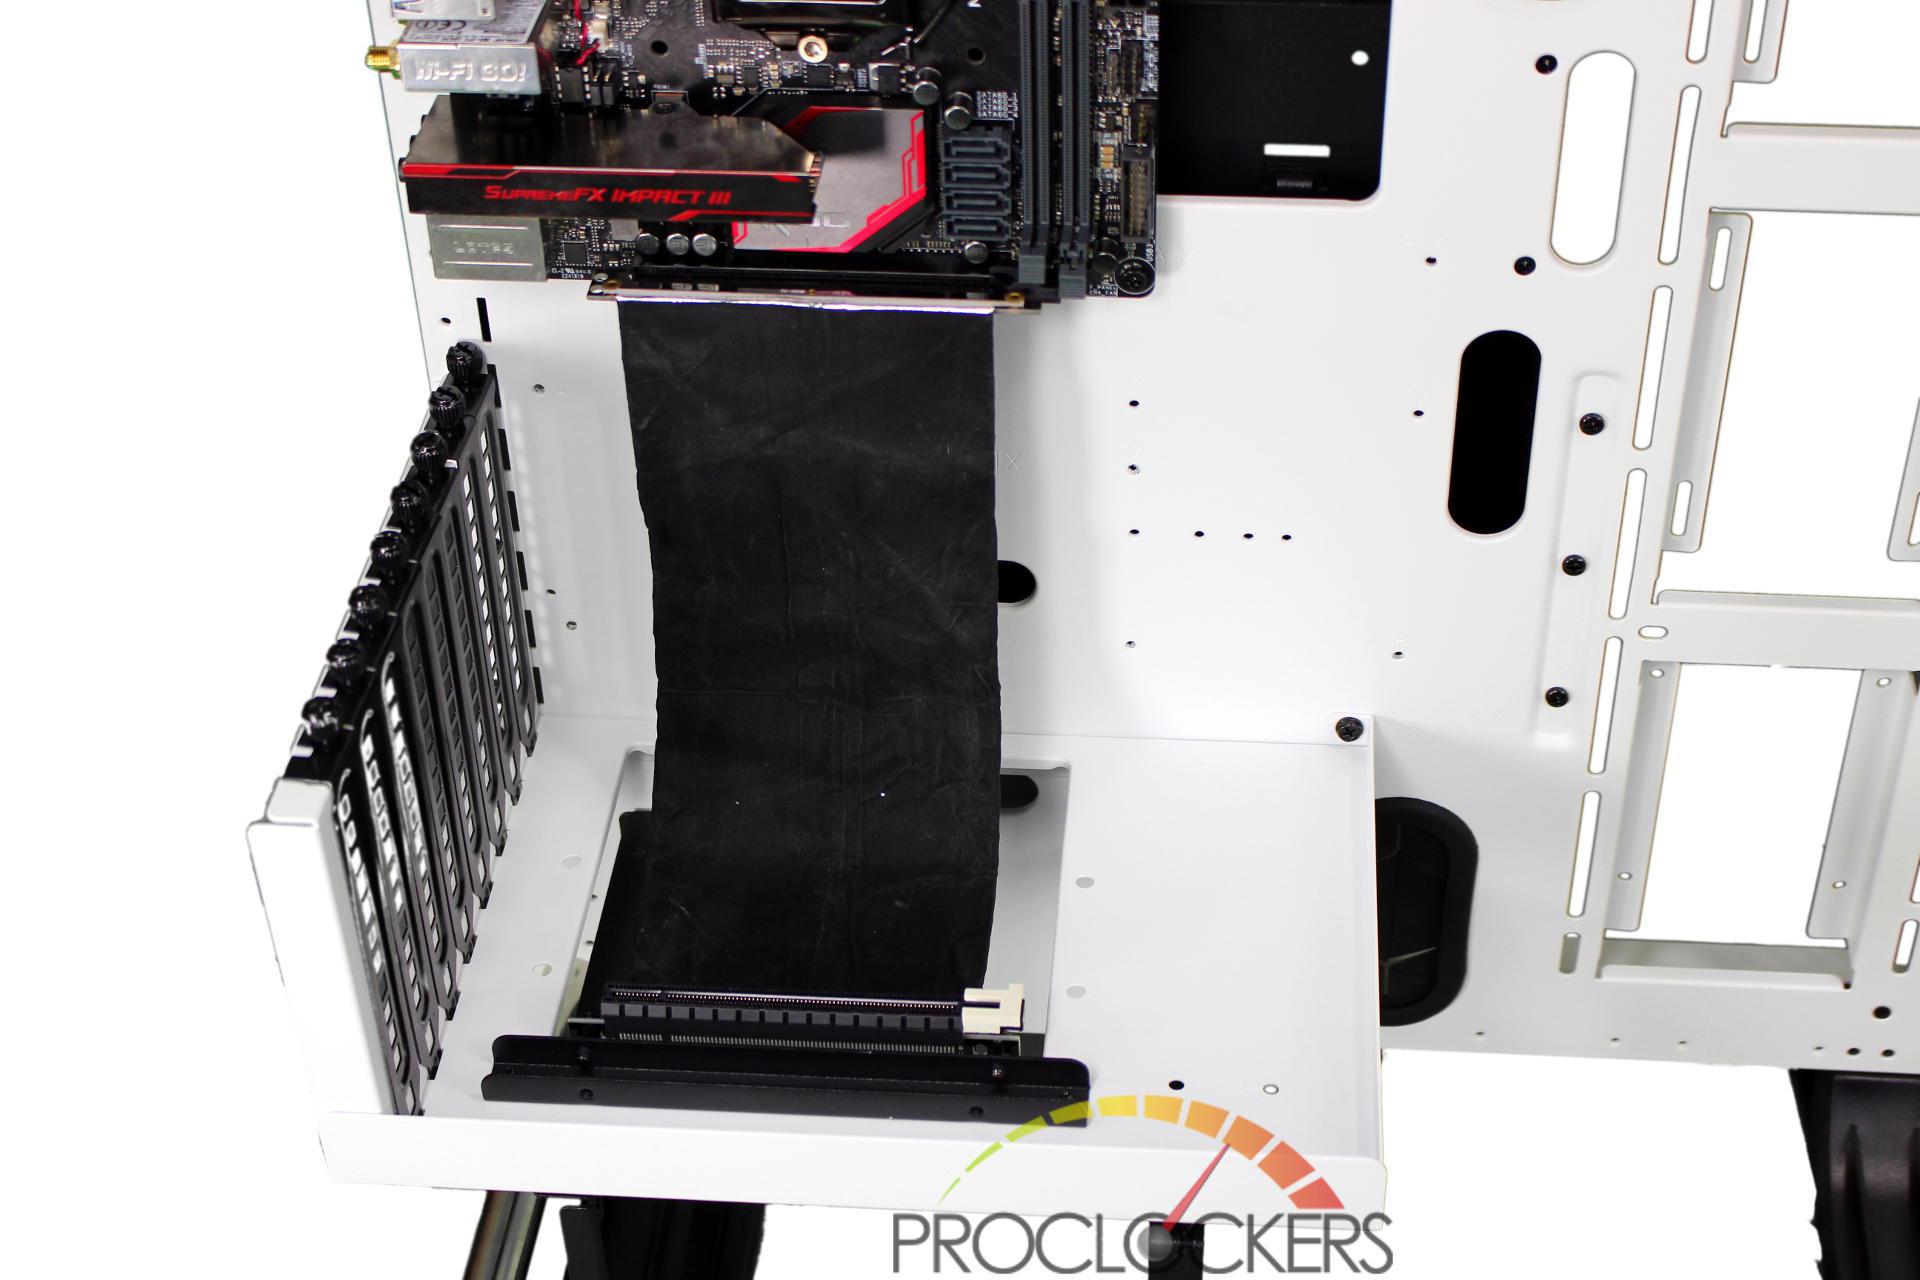
Next we installed the motherboard and Horizontal I/O tray to see if the flexible riser would reach. No worries here, the riser will reach from the ITX’s PCIe slot to the position closest to the window like we wanted.
There is plenty of room for even large graphics cards such as our Galax 1070 HOF in this build, but as well matched as that heat sink assembly is to the Snow Edition P3, we are going to rip it off and water-cool it.
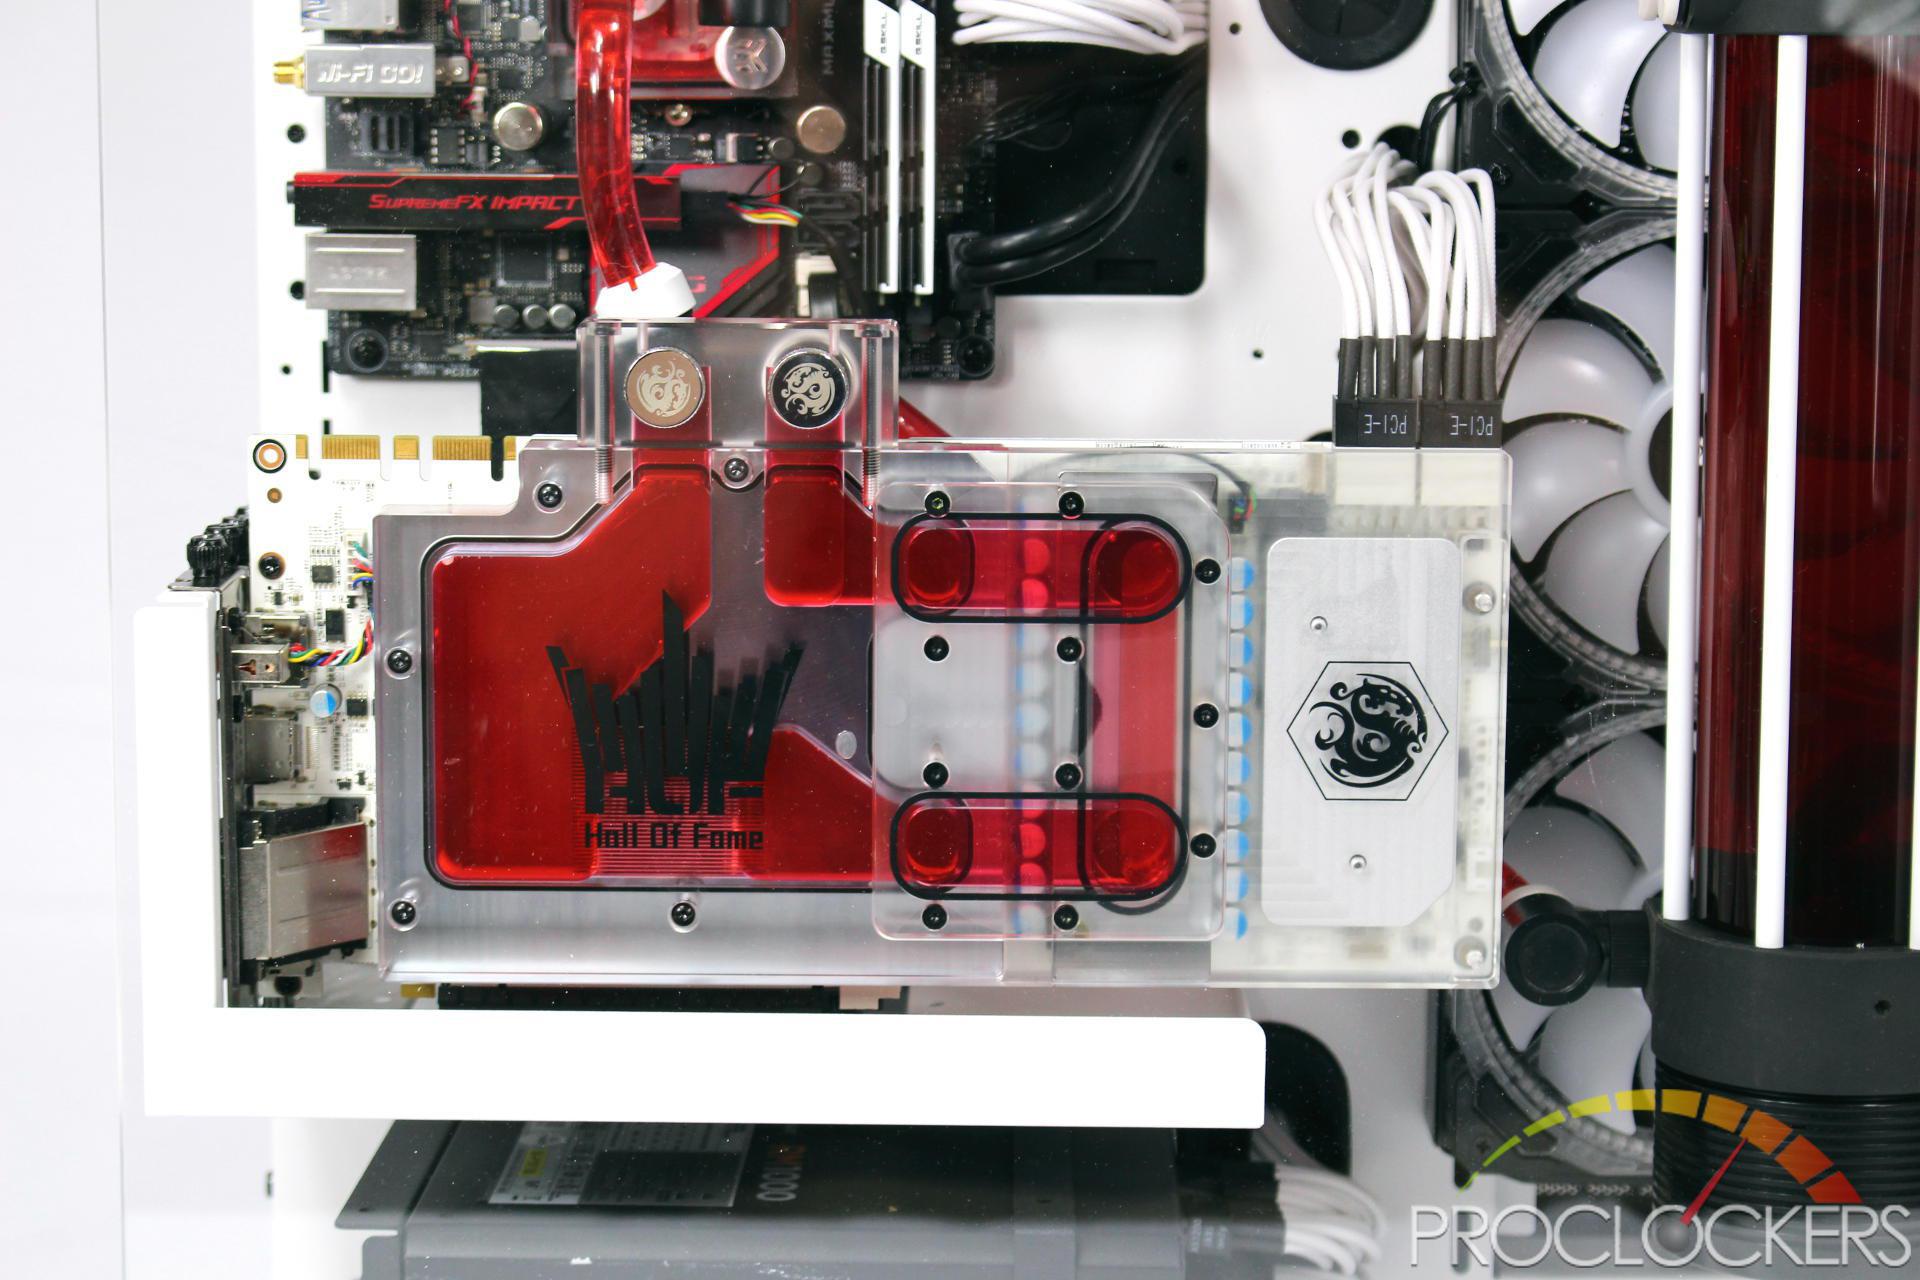
We could be biased, but everything looks better water cooled doesn’t it?
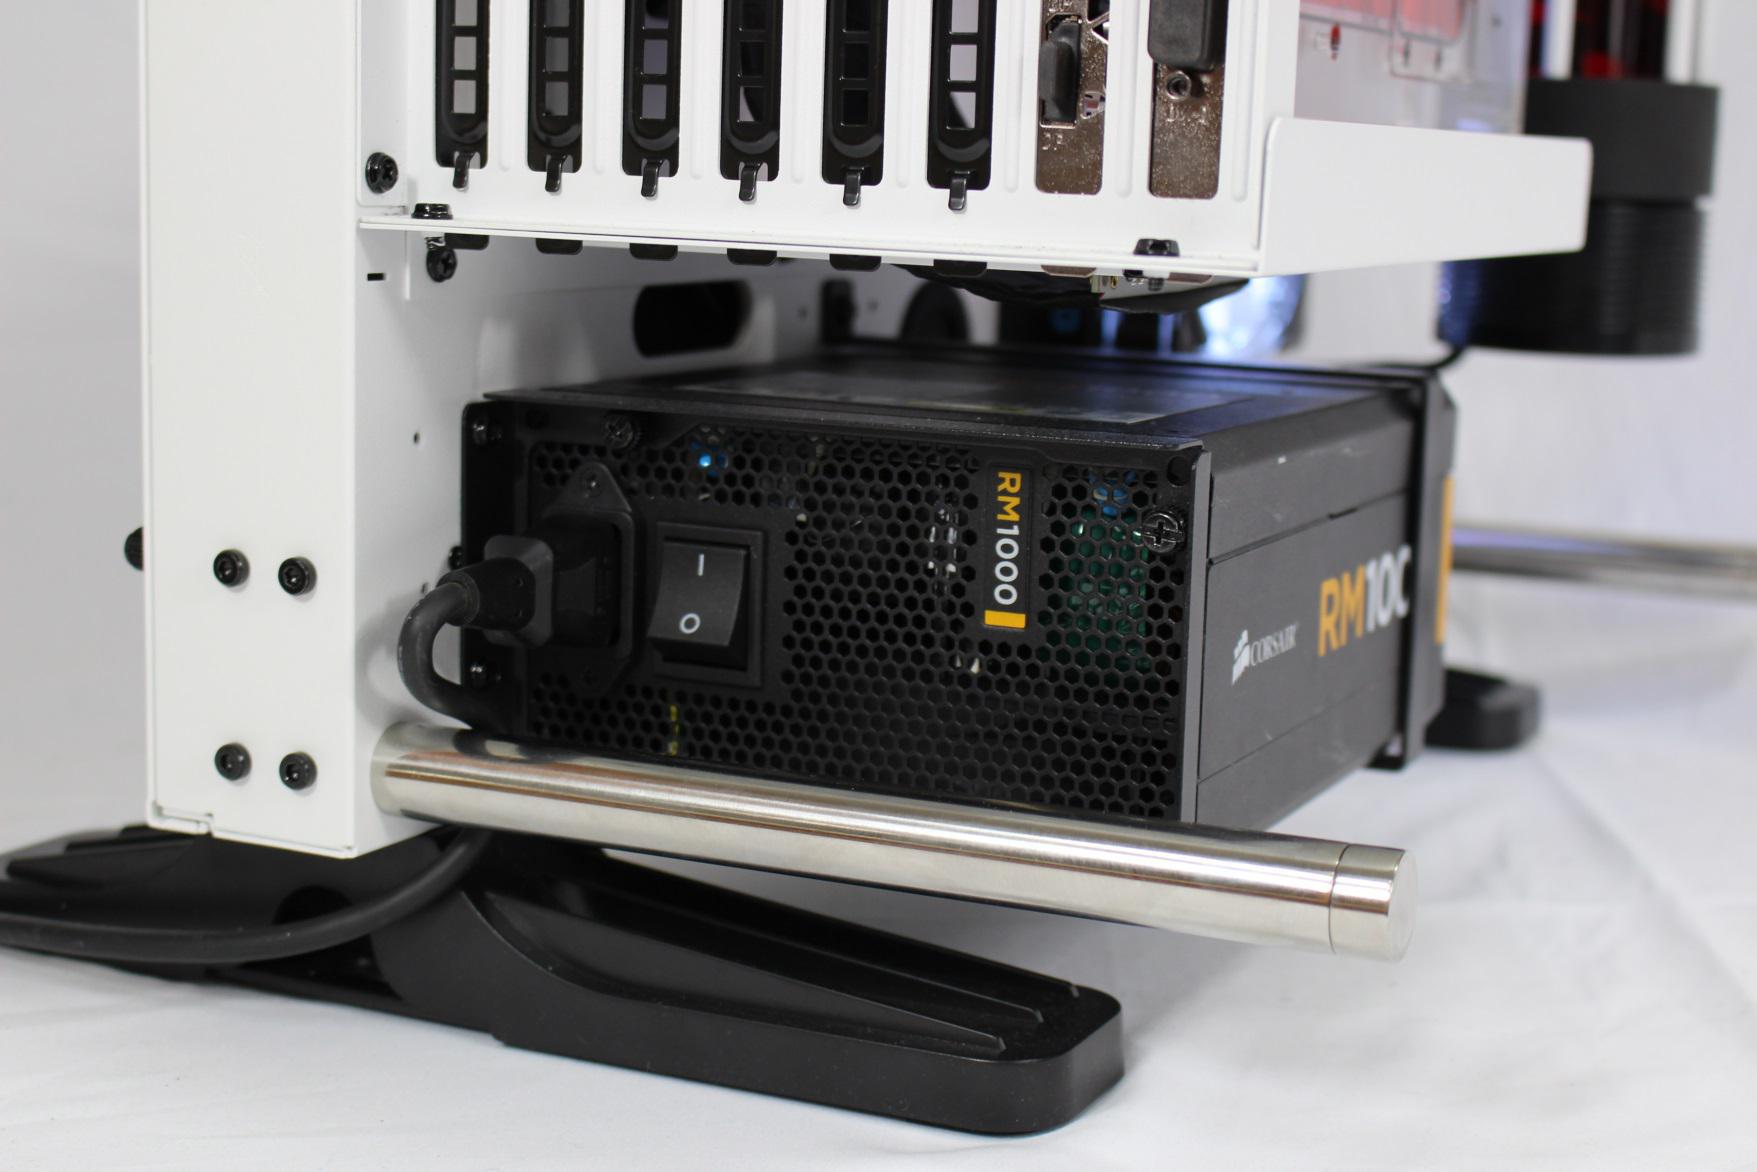
With the GPU mounted vertical, the power supply has to be mounted horizontal. It tucks in right below the GPU tray with enough room for good airflow with the GPU fan pointed up. With this build being water-cooled, we choose to install it with the fan opening down just in case there happened to be a leak.
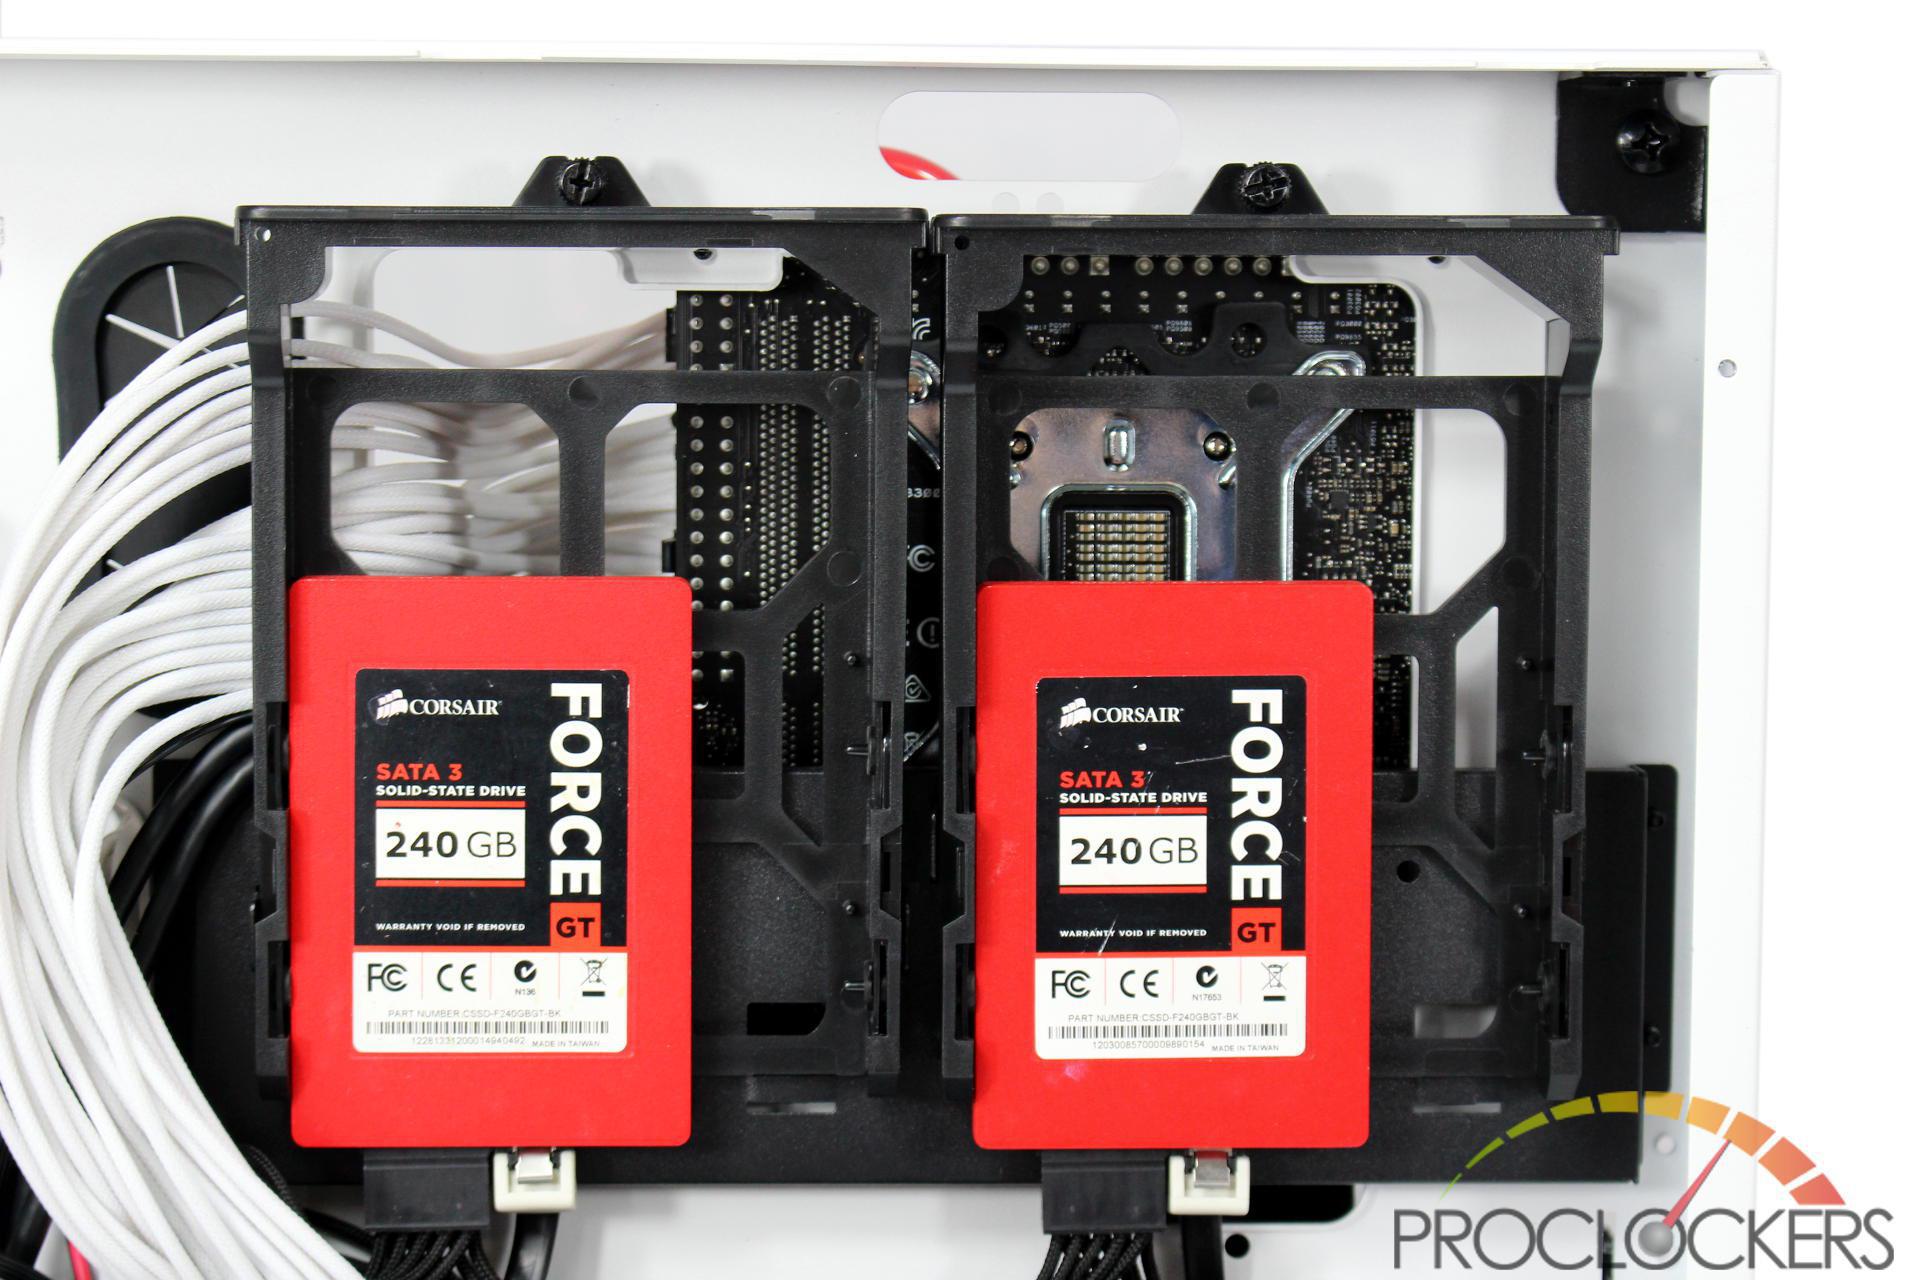
Two Corsair Force GT 240GB SSD’s in RAID-0 should make a speedy array for this build.
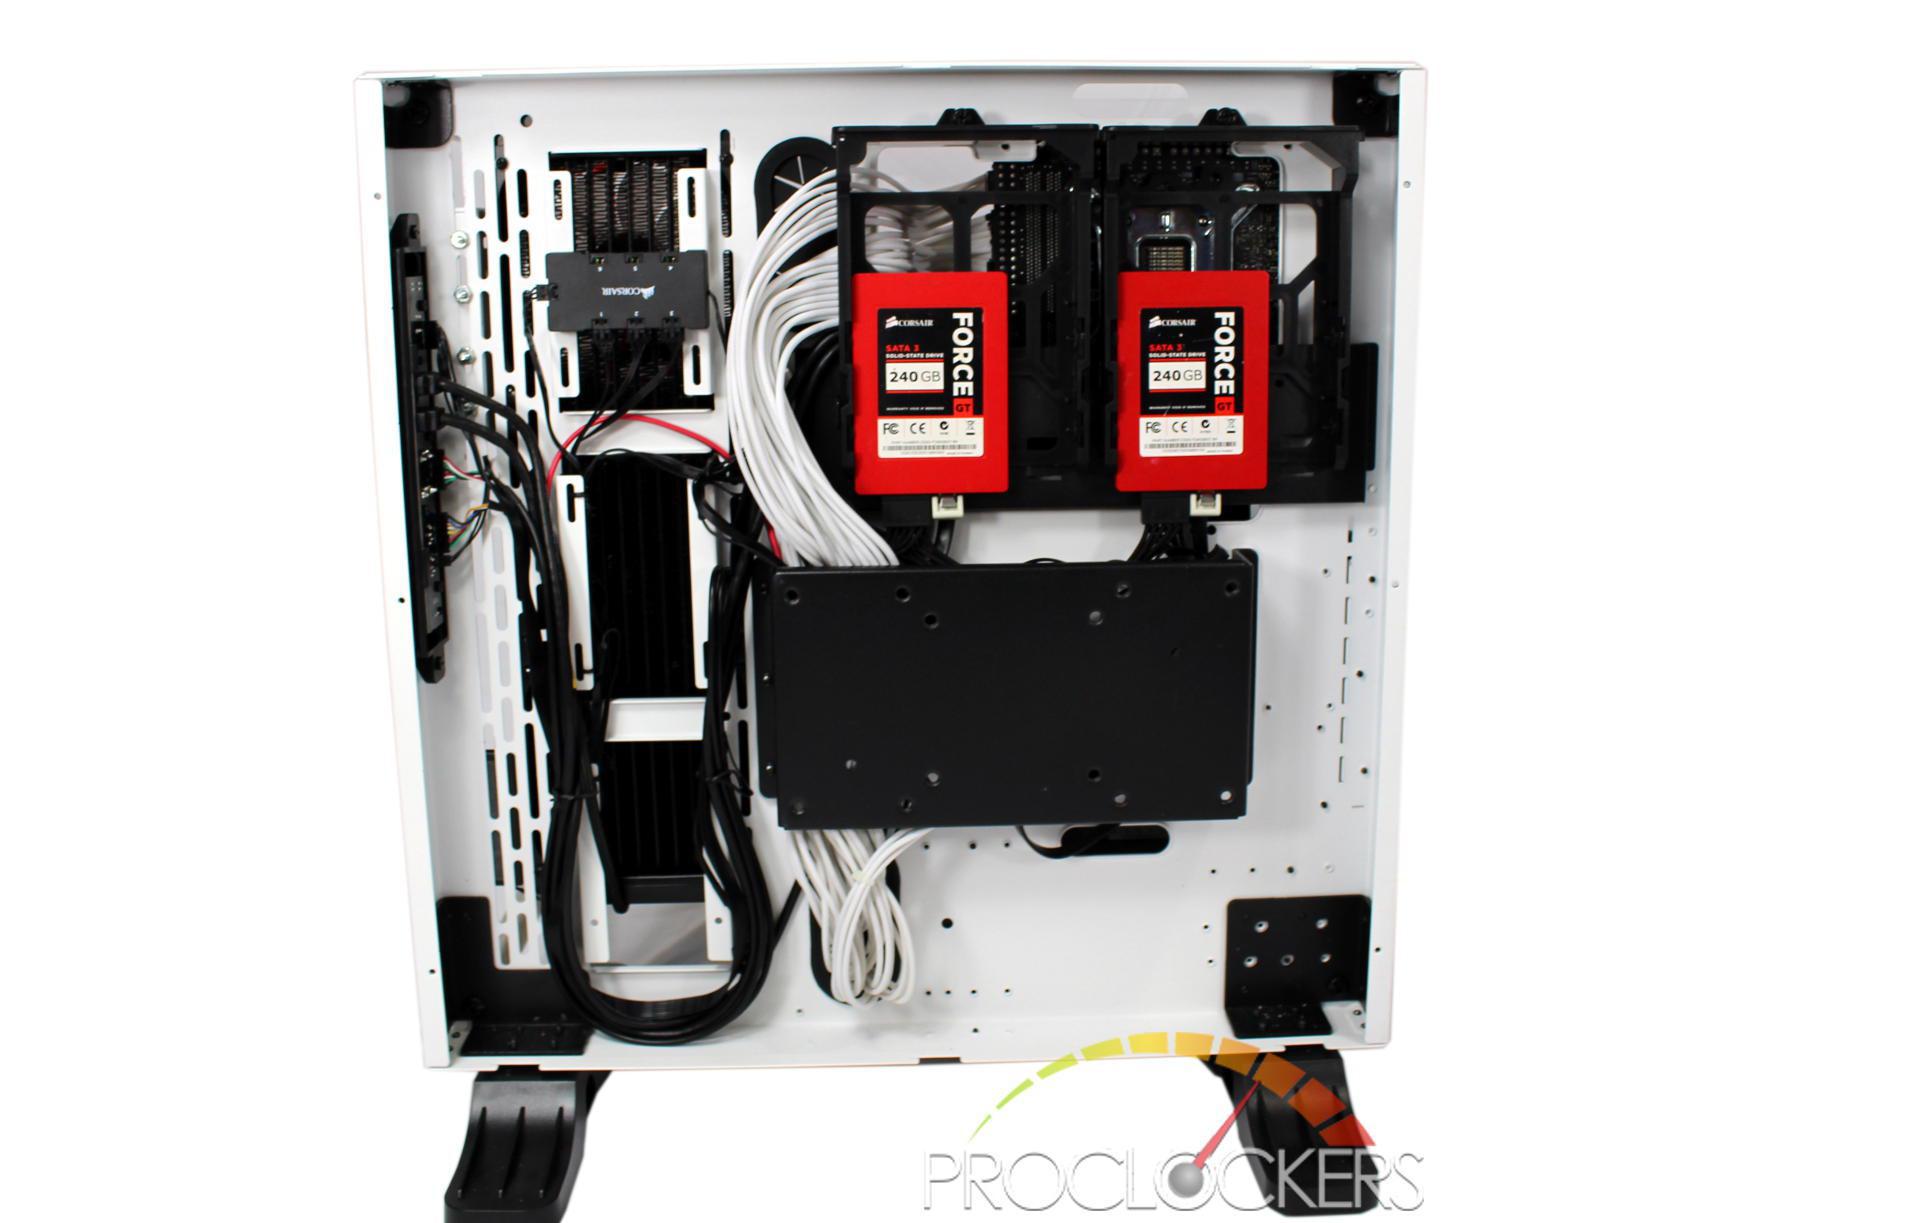
With a full system built, there is tons of room inside the chassis for cable management, fan controllers and anything else you need.
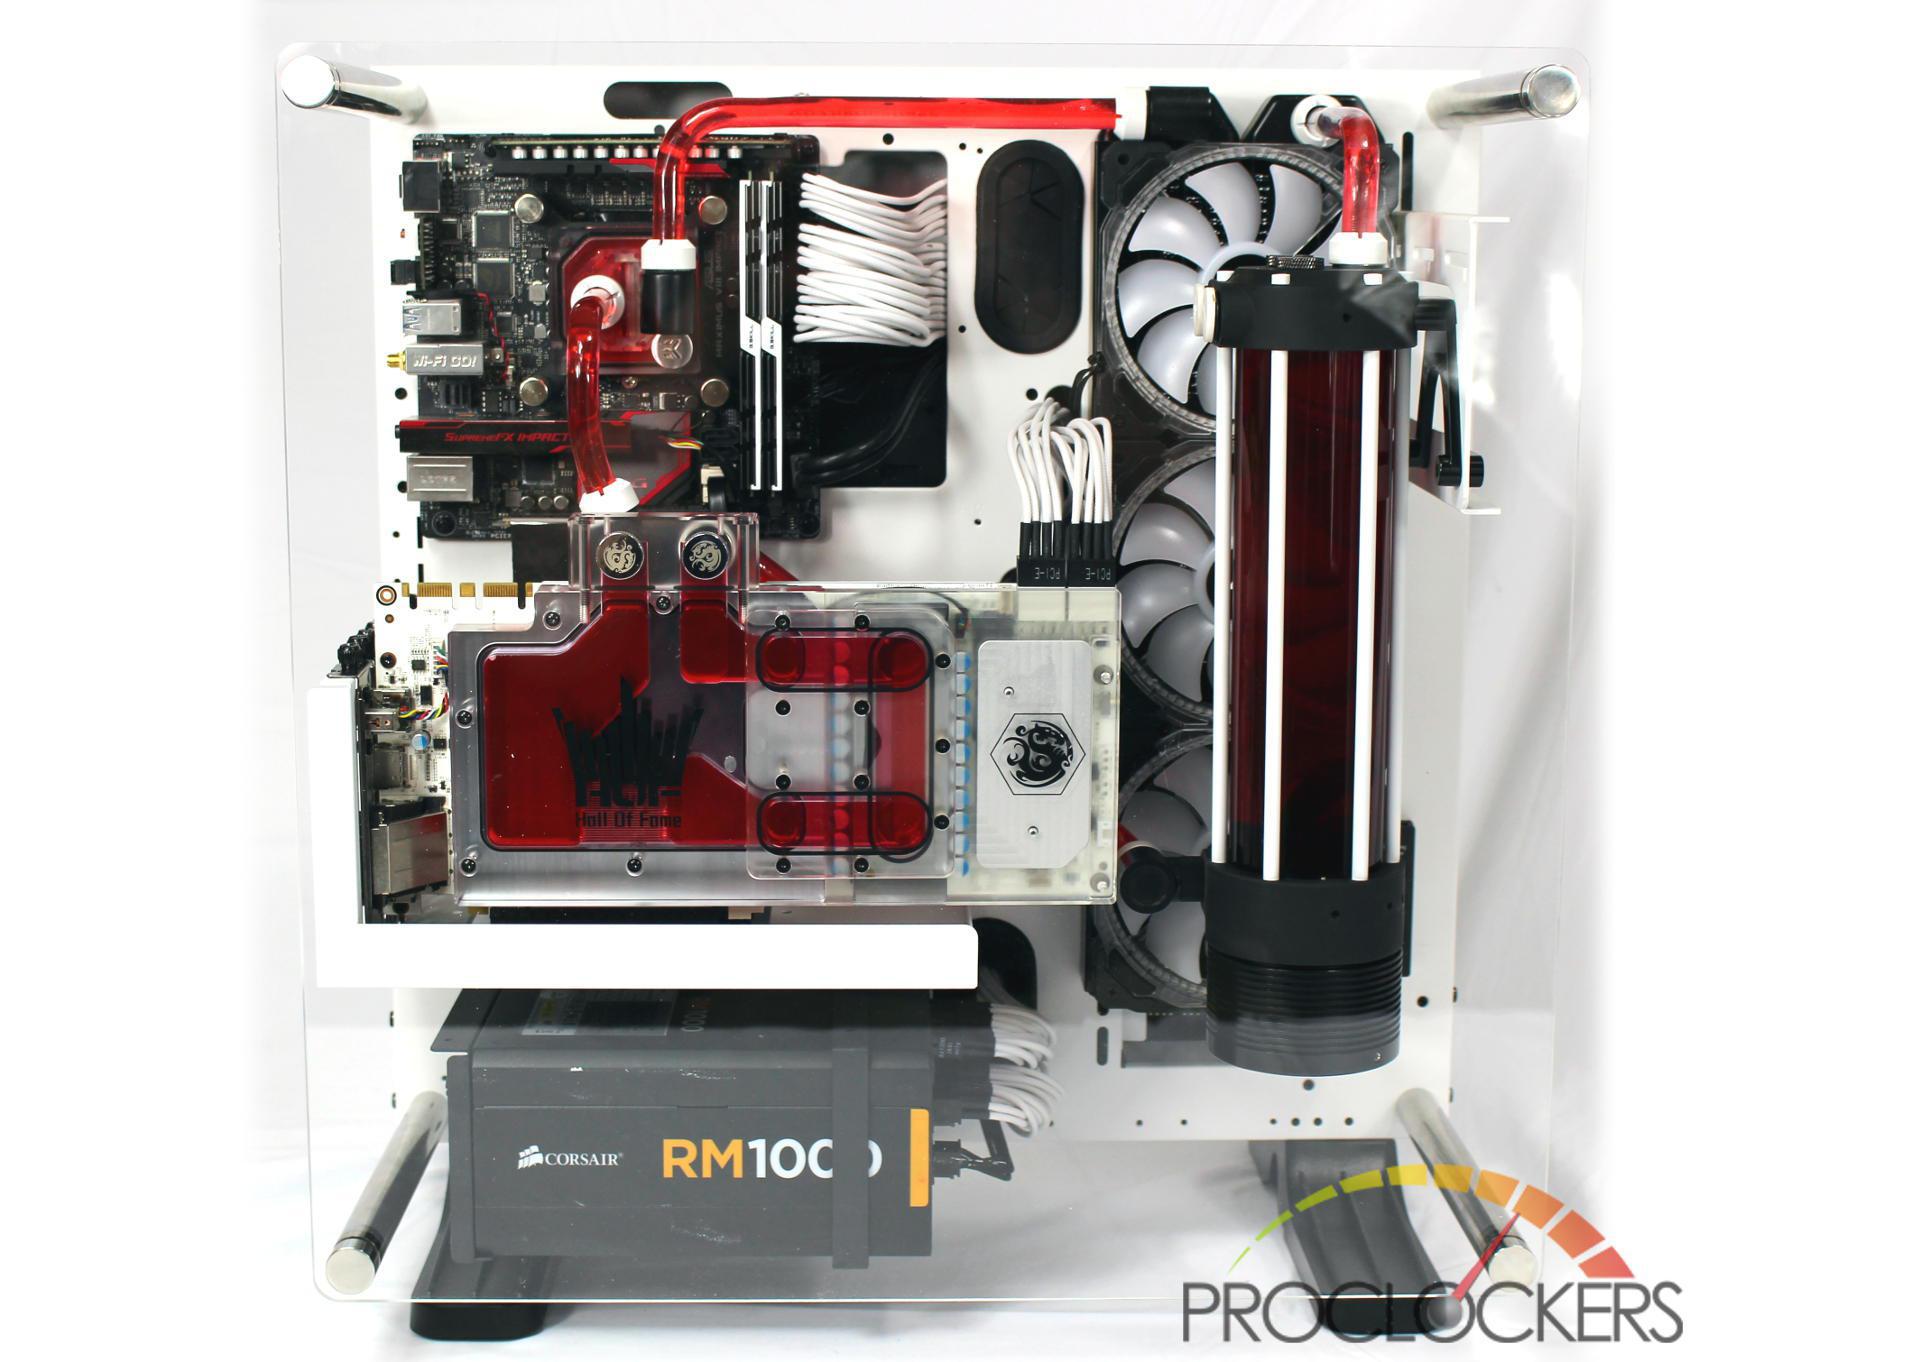
The complete build took about 2 hours. Bending hardline and bolting everything together was the majority of that. Mounting the main components was faster than normal due to the extremely open design.

And the first full power up! There are so many possibilities with this case, it would be easy to do dozens of builds in the same case and not feel like it’s the same build.
Final Thoughts & Conclusion
The Thermaltake Core P3 Snow Edition offers flexibility only matched by its smaller and larger siblings in the Core P series lineup. The selection of wall mountable cases on the market is already slim, but none of the others can also stand in as a free standing desktop AND a horizontal test bench. Able to be reconfigured from a standard ATX build with quad GPU’s to an ITX build with that shows off your GPU in all its glory, all while handling enough water-cooling gear to satisfy all but the most radiator happy enthusiast means this affordable chassis can adapt just as fast as you can. The slightly smaller stature than its larger P5 sibling makes using All-in-One cooling solutions more of a possibility without running into tubing length limitations.
Overall build quality is spot on, the case is very solid with almost no flex, and that’s important with all of your expensive components on display and potentially even literally hanging on the wall. The window support rods are a bit too heavy for my liking at nearly a pound a piece, but they do act as a roll cage of sorts so it works out well. If you plan to hang your build on the wall, please use a quality TV mount as opposed to a lighter duty monitor mount as the case can get quite heavy when fully loaded. If the nearly limitless options still aren’t enough for you, there is a ‘maker’ community offering up 3D Printable models to add even more flexibility and options for you.
If you can never really make up your mind what you want to do, or you change your mind and rebuild often, the Core P3 should be at the top of your list. For its quality and nearly infinite options, we have to give it our highly recommended award! Great job again Thermaltake!
Check out the Thermaltake Core P3 Snow on the Thermaltake website:
Also make sure to check out the Thermaltake Makers website:
Buy the Thermaltake Core P3 Snow now at Newegg and Amazon:


The 25 Best Anime Cats, Ranked
What are the best anime cats? Cats are something you either love with every fiber of your being or vehemently...


The 25 Best Anime Teachers, Ranked
Who are the best anime teachers? With high school being such a prevalent setting in anime, it makes sense that...


The 25 Best Orange Hair Anime Girls, Ranked
Who are the best orange hair anime girls? Orange hair is interesting in anime because it can either be a...