
Hardware
Corsair CRYSTAL 280X RGB Case Review
Introduction
One trend in the PC world over the last few years following the push for more efficient components is to make things smaller. We’ve seen an impressive lineup of ITX and MicroATX boards from nearly all of the vendors out there extending from entry-level up through the High-End Desk-Top series.
The problem with high-powered systems is the need to cool them, no matter what size the board.
Typically, if you want to go with a smaller system, you have to compromise on cooling and typically aesthetics as well or stay with a larger case which sort of defeats the point of moving to a smaller board, to begin with. Corsair has the solution with the new Crystal Series 280X cases. Designed to give a small ITX or MicroATX build full-sized cooling support in a small package while looking amazing.
Pro-Clockers would like to thank Corsair for sending the Crystal 280X RGB over to check out!
Corsairs take on the Crystal 280X RGB:
The CORSAIR Crystal Series 280X RGB is a high-performance Micro-ATX case with three beautiful tempered glass panels, two stunning LL120 RGB fans and an innovative dual-chamber internal layout for clean looks and cleaner builds. Outstanding cooling potential offers room for up to six cooling fans and multiple 240mm liquid cooling radiators, while the dual-chamber design lets you put your core hardware on display while tidying drives, cables, and the PSU away in a dedicated compartment. With 32 RGB LEDs controlled by CORSAIR iCUE software, it? s easy to match your setup, create amazing lighting effects or synchronize all your CORSAIR RGB lighting together. CORSAIR Crystal 280X RGB – Clearly Compact
- Massive Cooling, Small Case: Room for up to five 120mm cooling fans, or a 240/280mm radiator on the top, 240mm radiator in the front, and 240mm radiator in the bottom.
- Stunning RGB Lighting with CORSAIR iCUE Software Control: Two included CORSAIR LL120 RGB fans boast 32 individually customizable LEDs, controlled by CORSAIR iCUE software to deliver a symphony of color.
- Three Panel Tempered Glass: Three stunning tempered glass panels put your system on display like no other Micro-ATX case.
- Dual-Chamber Internal Layout: Highlight your PC’s core components whilst tidying cables, drives, and the PSU into a dedicated rear chamber.
- Flexible Storage Space: Dedicated storage compartment for up to two 3.5” drives and three 2.5” drives keeps your system clean without sacrificing storage capacity.
- Fully Filtered: Front, roof, floor, and PSU dust filters keep your system looking great long after your build is finished.
- Direct Airflow Path™ Cooling: Cool air is directed to the hottest components, without any interference from drive cages.
Features & Specifications
Highlighted Features
1. LL120 RGB LED Fans (2x included): Light up your build with controllable RGB fans that provide excellent cooling.
2. Integrated Lighting Node Pro: Control all case and fan RGB lighting effects through iCUE software with the included Lighting Node PRO controller
3. Front 140/240mm fan mounts: With mounts for 2 x 120mm fans or 2 x 140mm fan, the front can support a 240, 140, or 120mm radiator.
4. Top 240/280mm fan mounts: The top cover can house 2 x 120mm or 2 x 140mm fans, with room for a 240mm/280mm radiator.
5. Bottom 120/140mm fan mounts: The bottom can house 2 x 120mm or 2 x 140mm fans (Mini-ITX systems only).
6. Up to 300mm clearance for GPUs, 150mm for CPU coolers, and 225mm for PSU.
7. 3 Tempered Glass Windows to Show off your Hardware: Tempered glass side, top and front panels put your system on display unlike any other case.
8. Three tool-free 2.5” SSD mounts: Easily add or remove 2.5” drives, the cage can be removed entirely.
9. Two tool-free 3.5” drive mounts in a modular drive cage: Installed from the rear, the cage can be removed entirely.
10. Plentiful cable routing cutouts and tie downs: To keep your system neat and tidy.
11. Removable top, front, floor and PSU dust filters: Keep your system looking great long after your build is finished.
Specifications:
MSRP $159.99
Exp. Slots 4
Side Panel Tempered Glass
Available Colors Black, White
Storage 2x 3.5”, 3 x 2.5”
Included Fans 2x 120mm LL RGB
Total Fan Support 6x 120mm
Lighting Control 1x Lighting Node PRO
Front Rad 240mm
Top Rad 240 / 280mm
Bottom 120 / 140mm fans only (MITX only)
Max GPU Length 300mm
Max Cooler Height 150mm
Max PSU Length 180mm
Front I/O USB USB 3.1 Type-A x2
Dust Filters Front + Top + Bottom + PSU
Packaging & Unboxing
Like many of Corsair’s cases, the Crystal 280X RGB comes in a plain brown cardboard box with only black ink used. The front of the box has a simple image of the case over a giant Corsair logo.
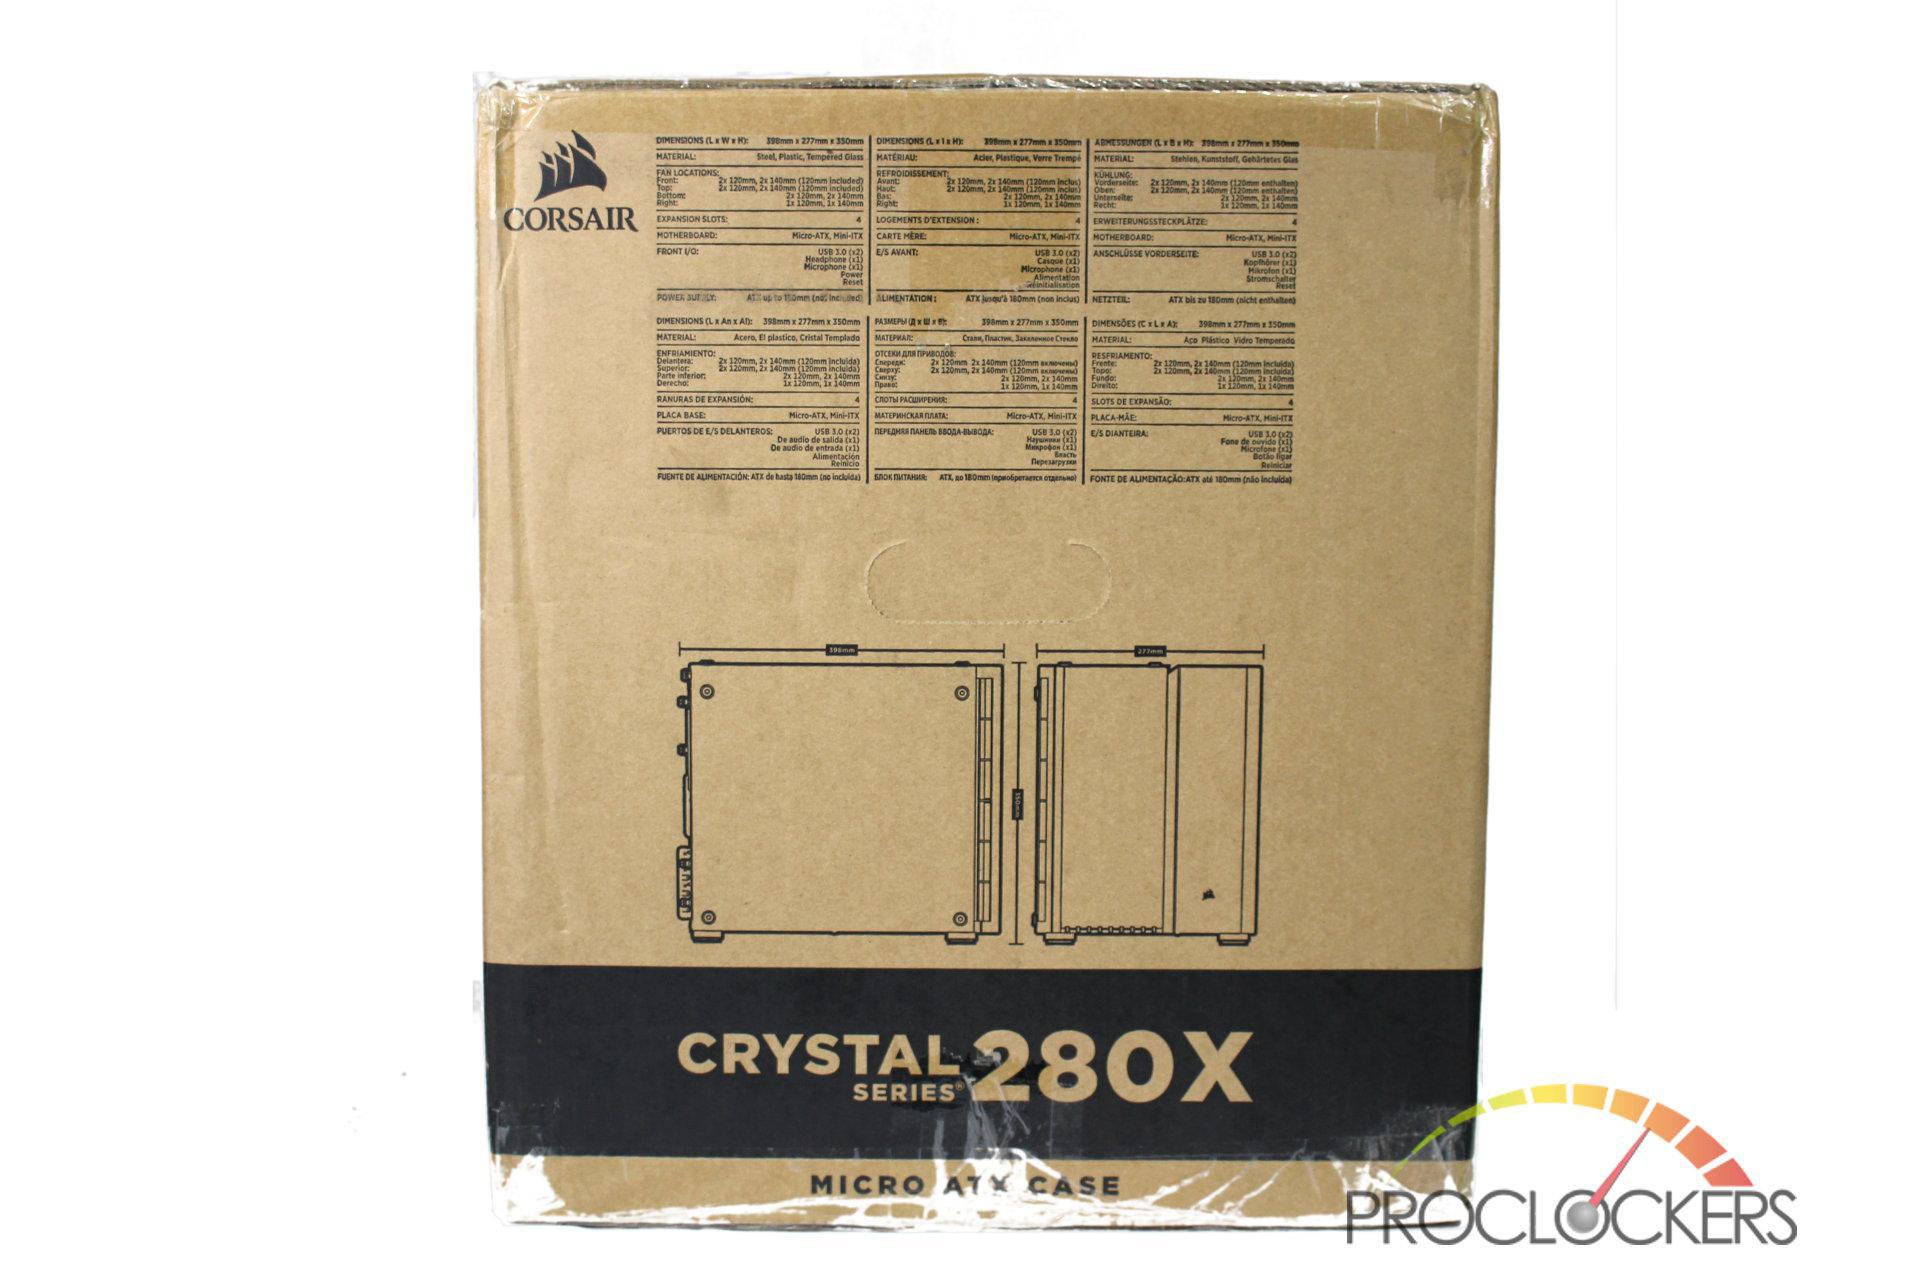
The right side of the box has dimensions as well as basic specs in a few languages.
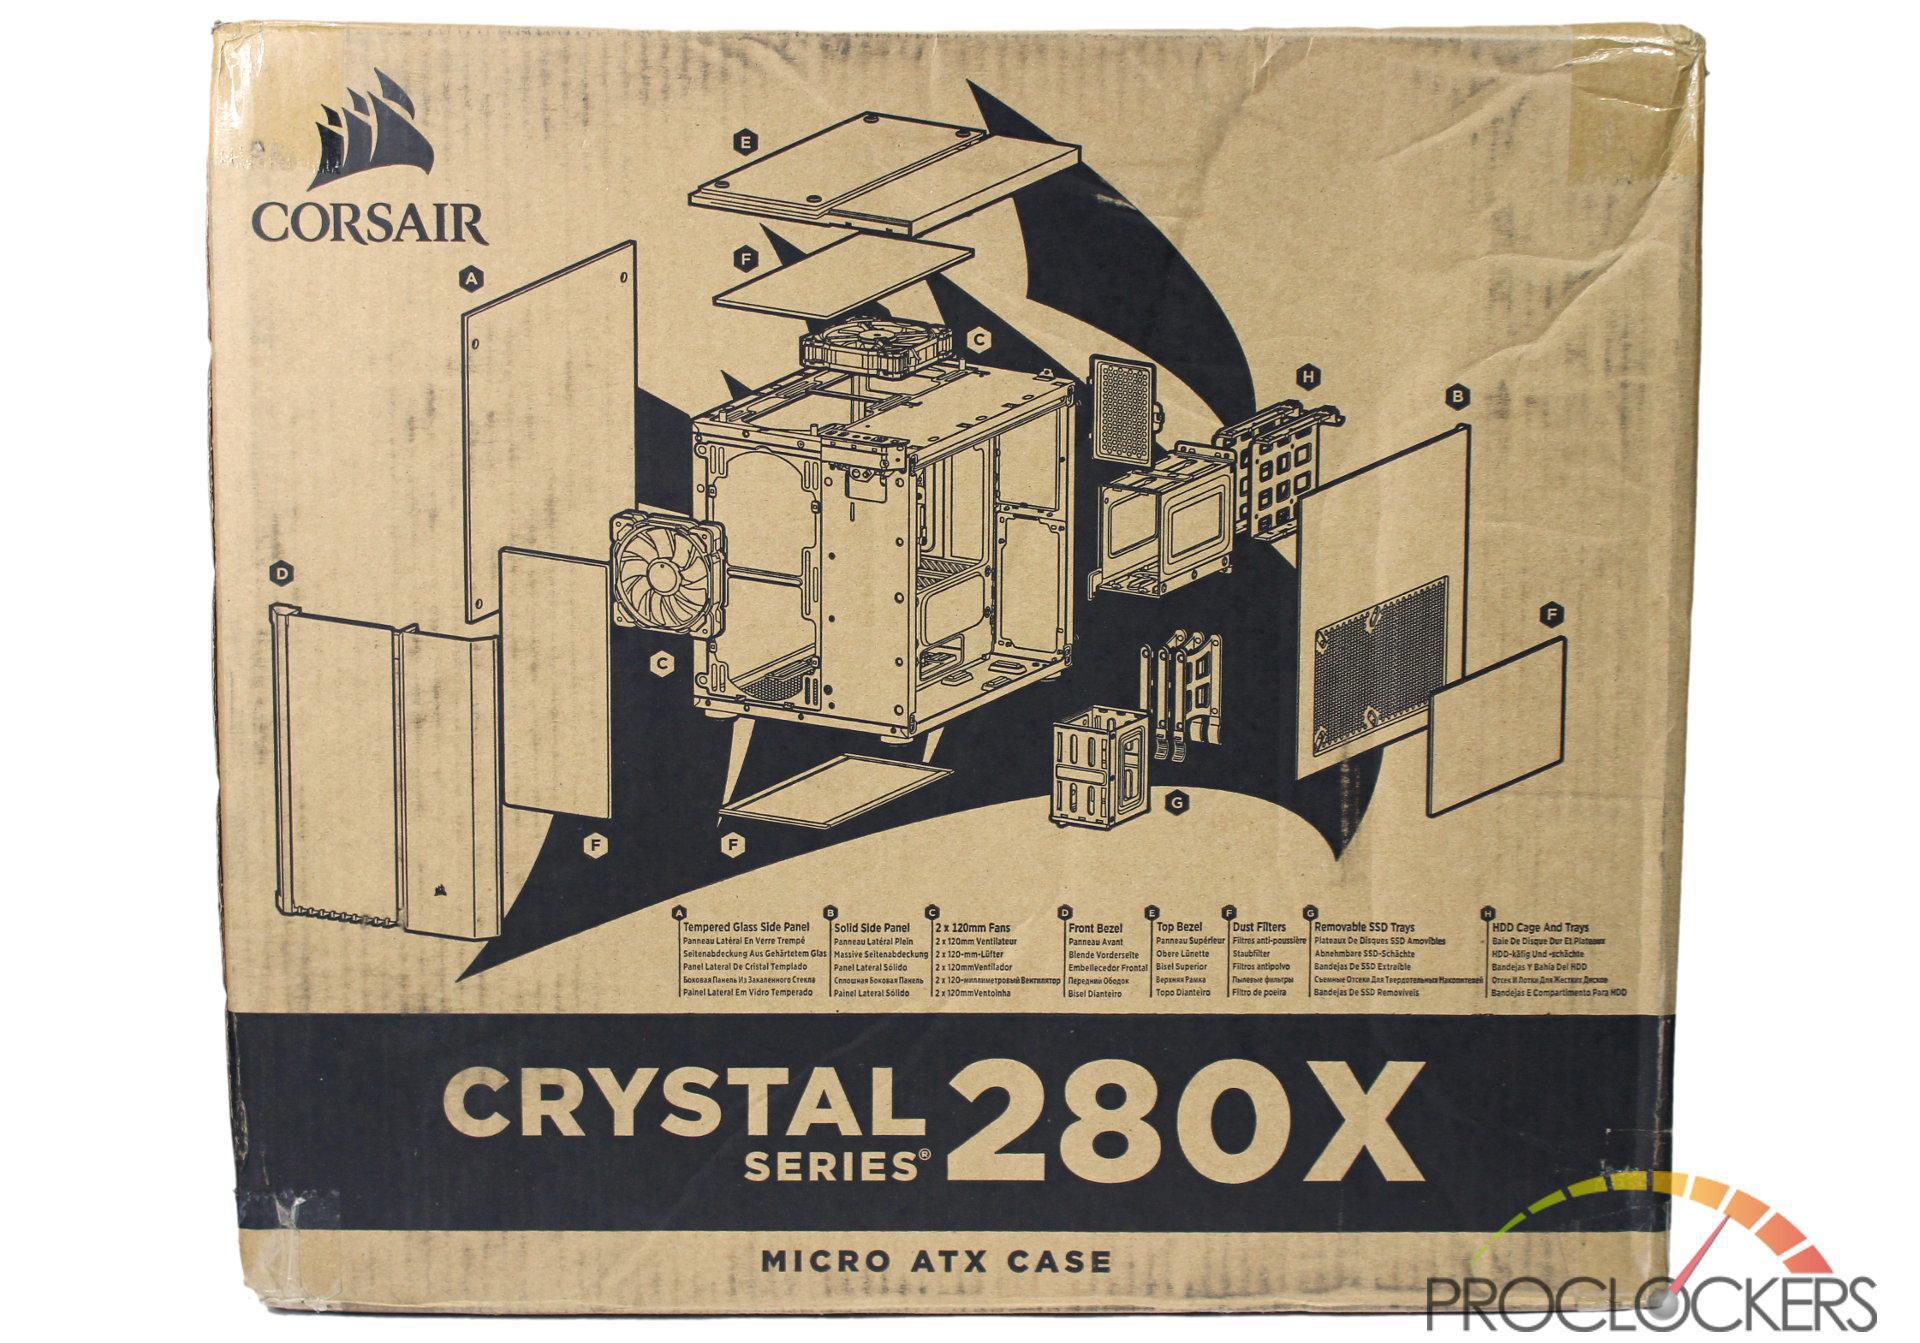
The back of the box has a large exploded view of the case highlighting several of the important features.
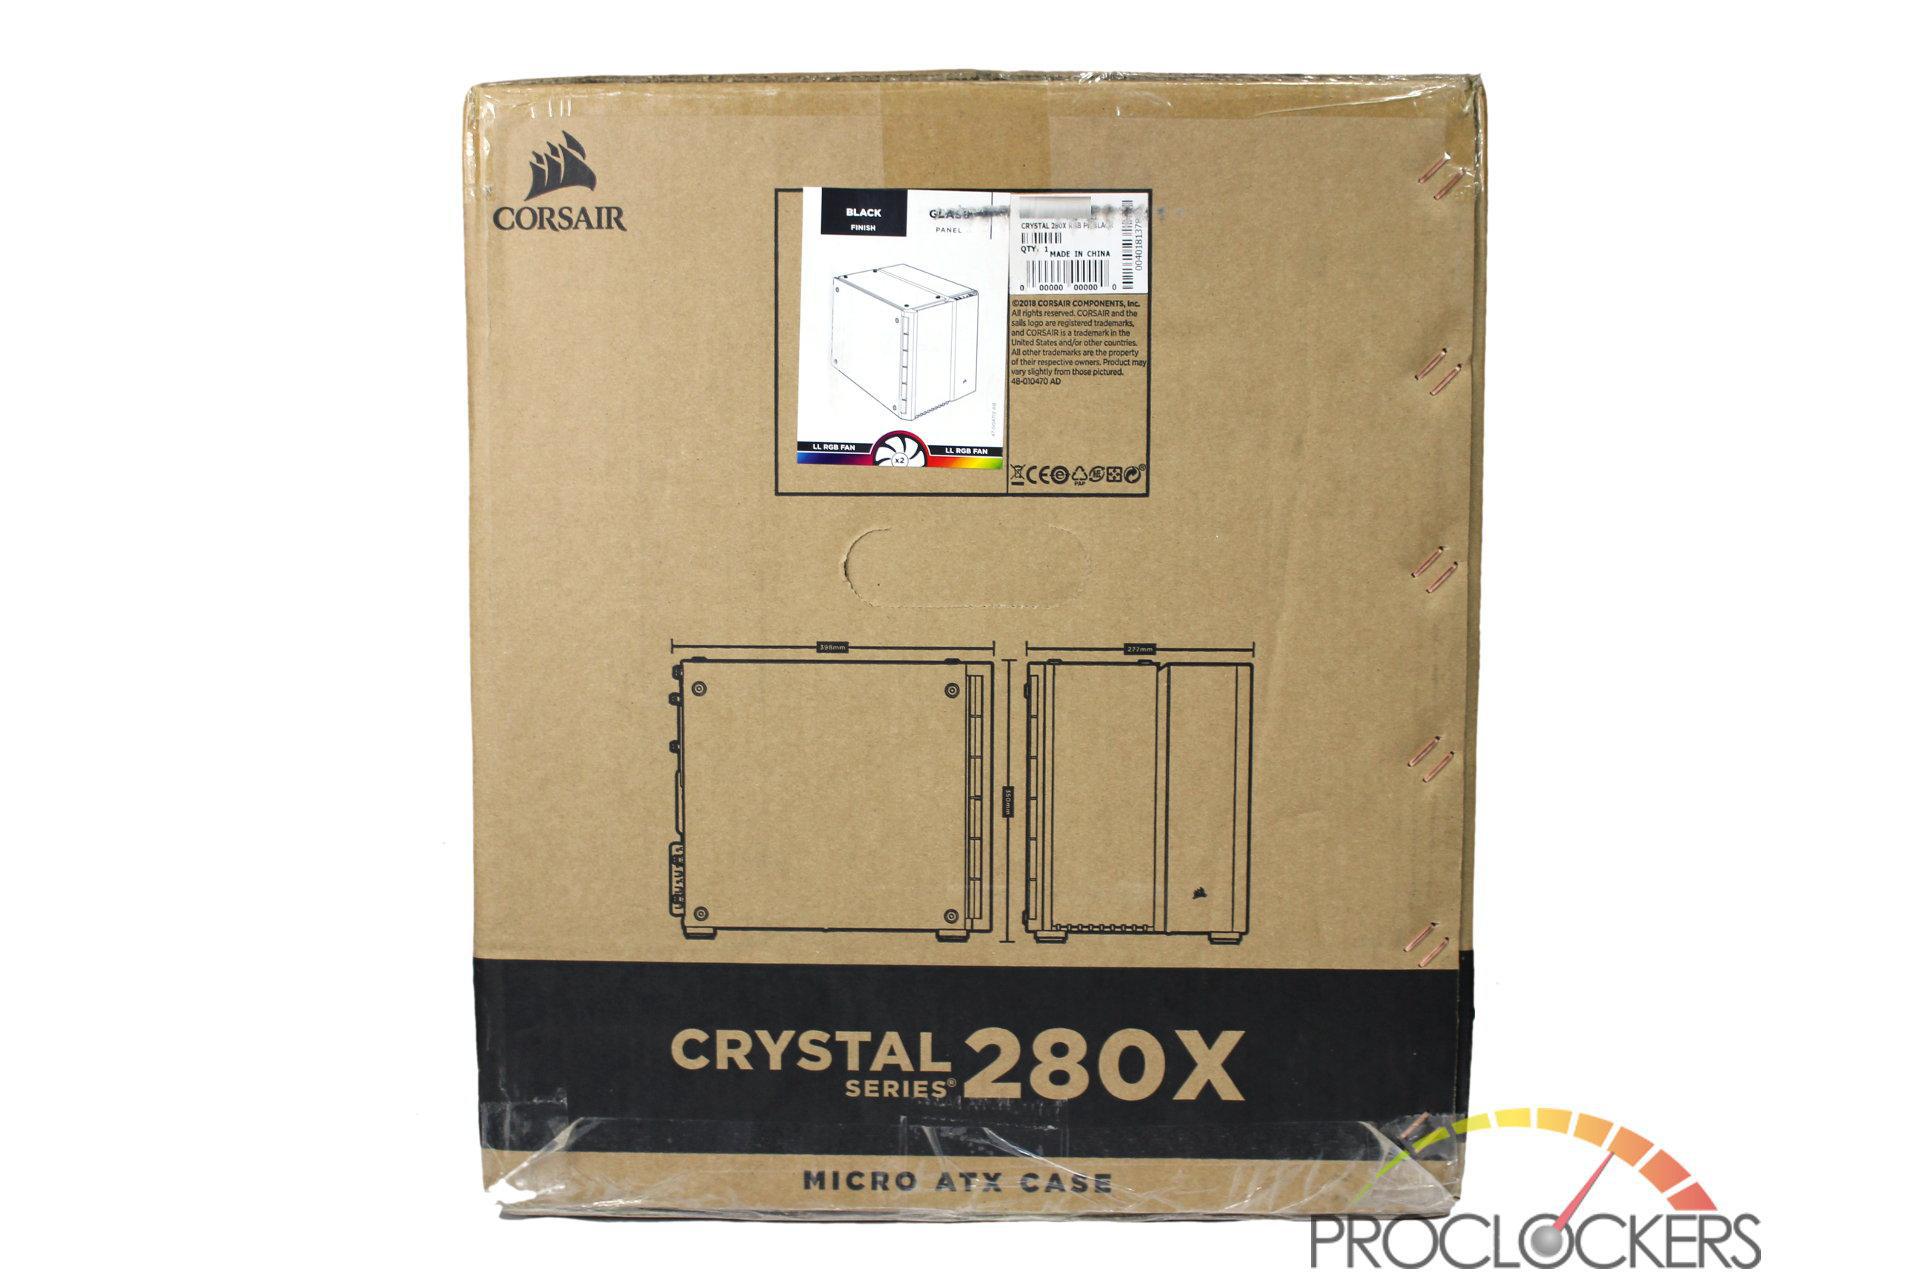
The other end of the box has the model and UPC information.
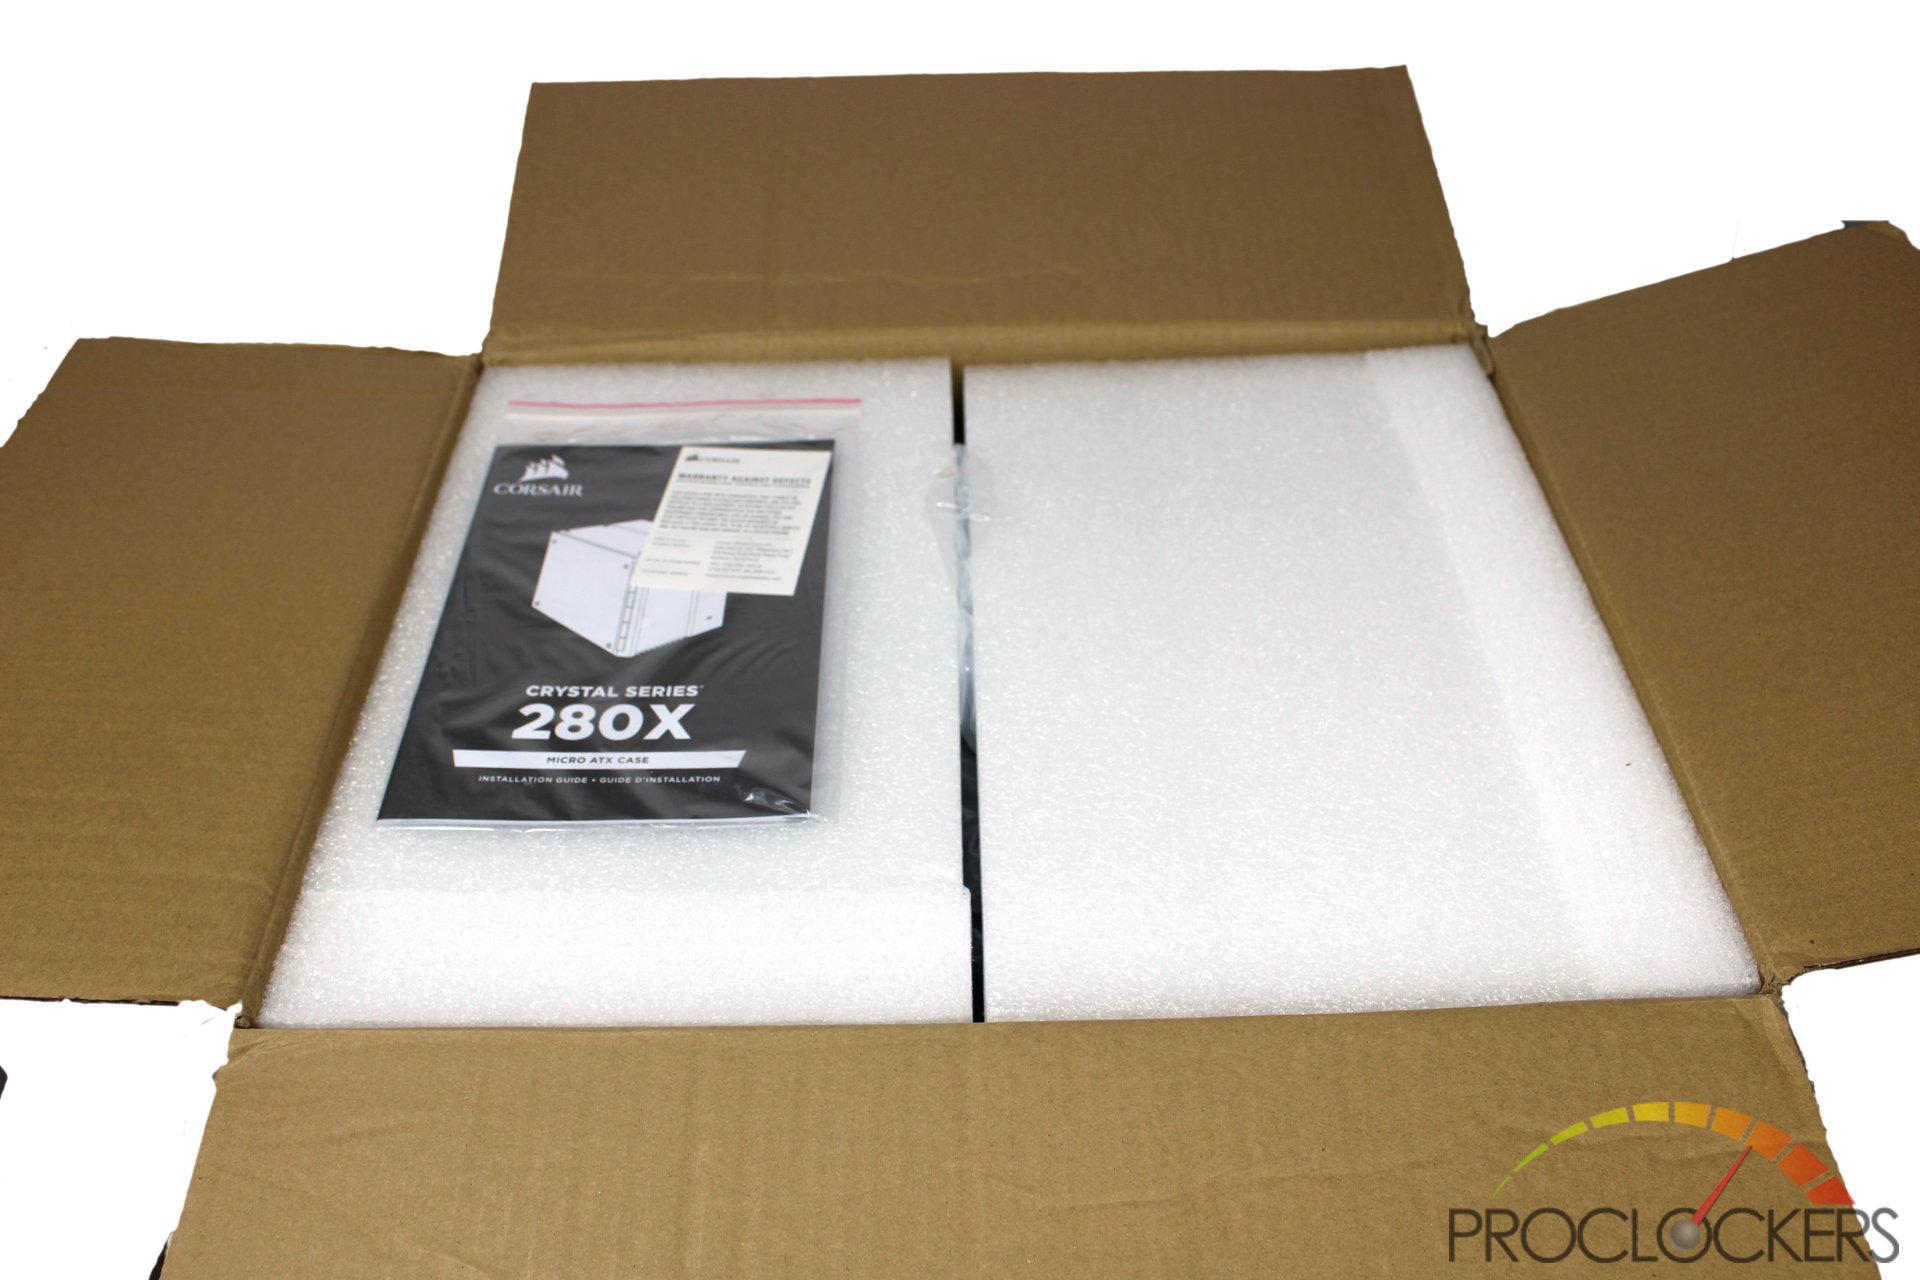
Opening the box gets a great view of…. nothing but a giant block of foam. A baggie with the manual is laying on top.
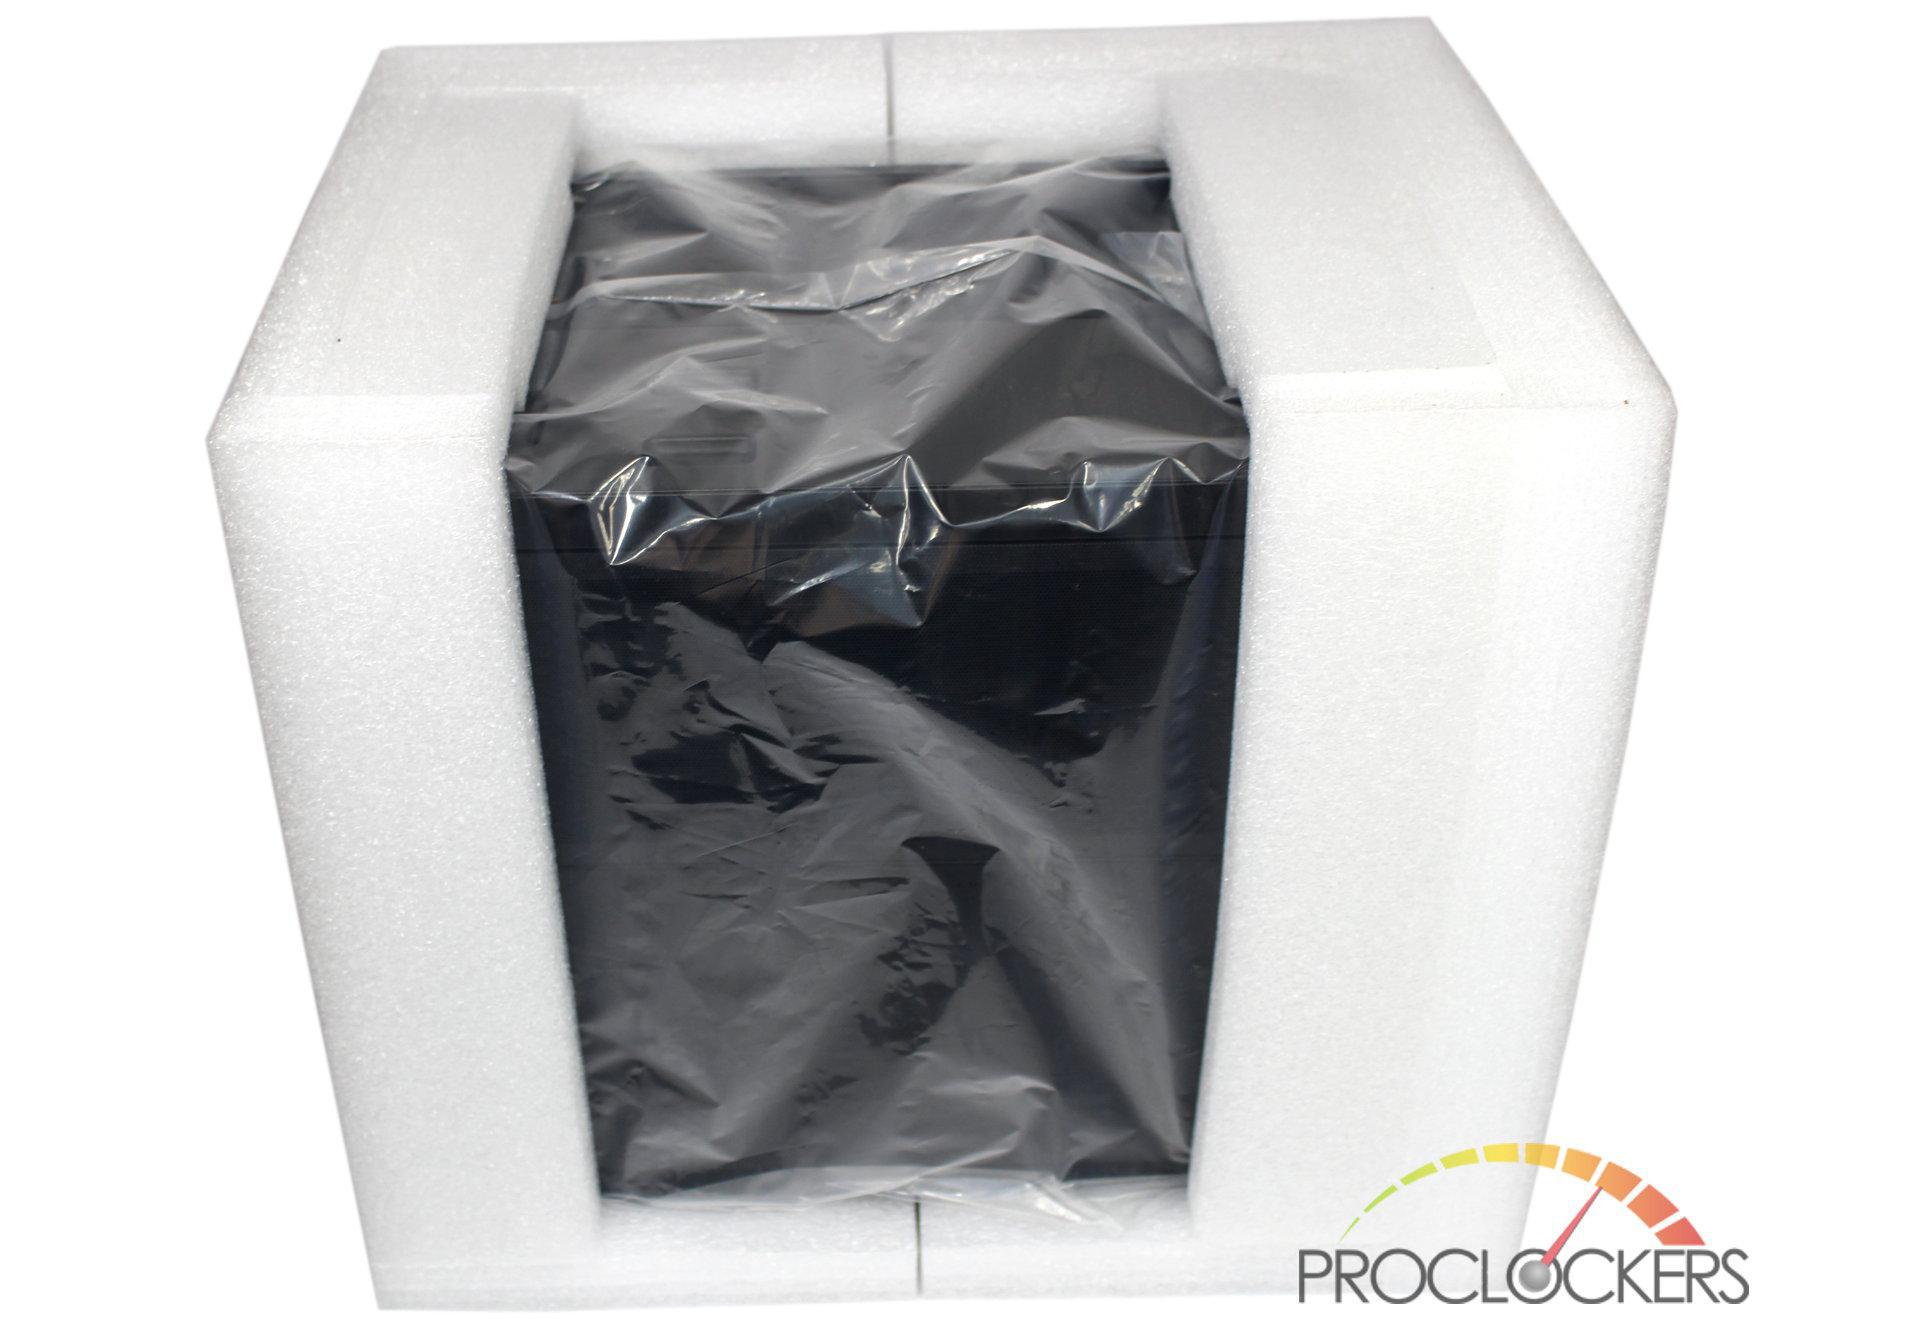
The case is nearly entirely enclosed in 2 pieces of foam. The areas with no glass are not covered in foam but are still well protected.
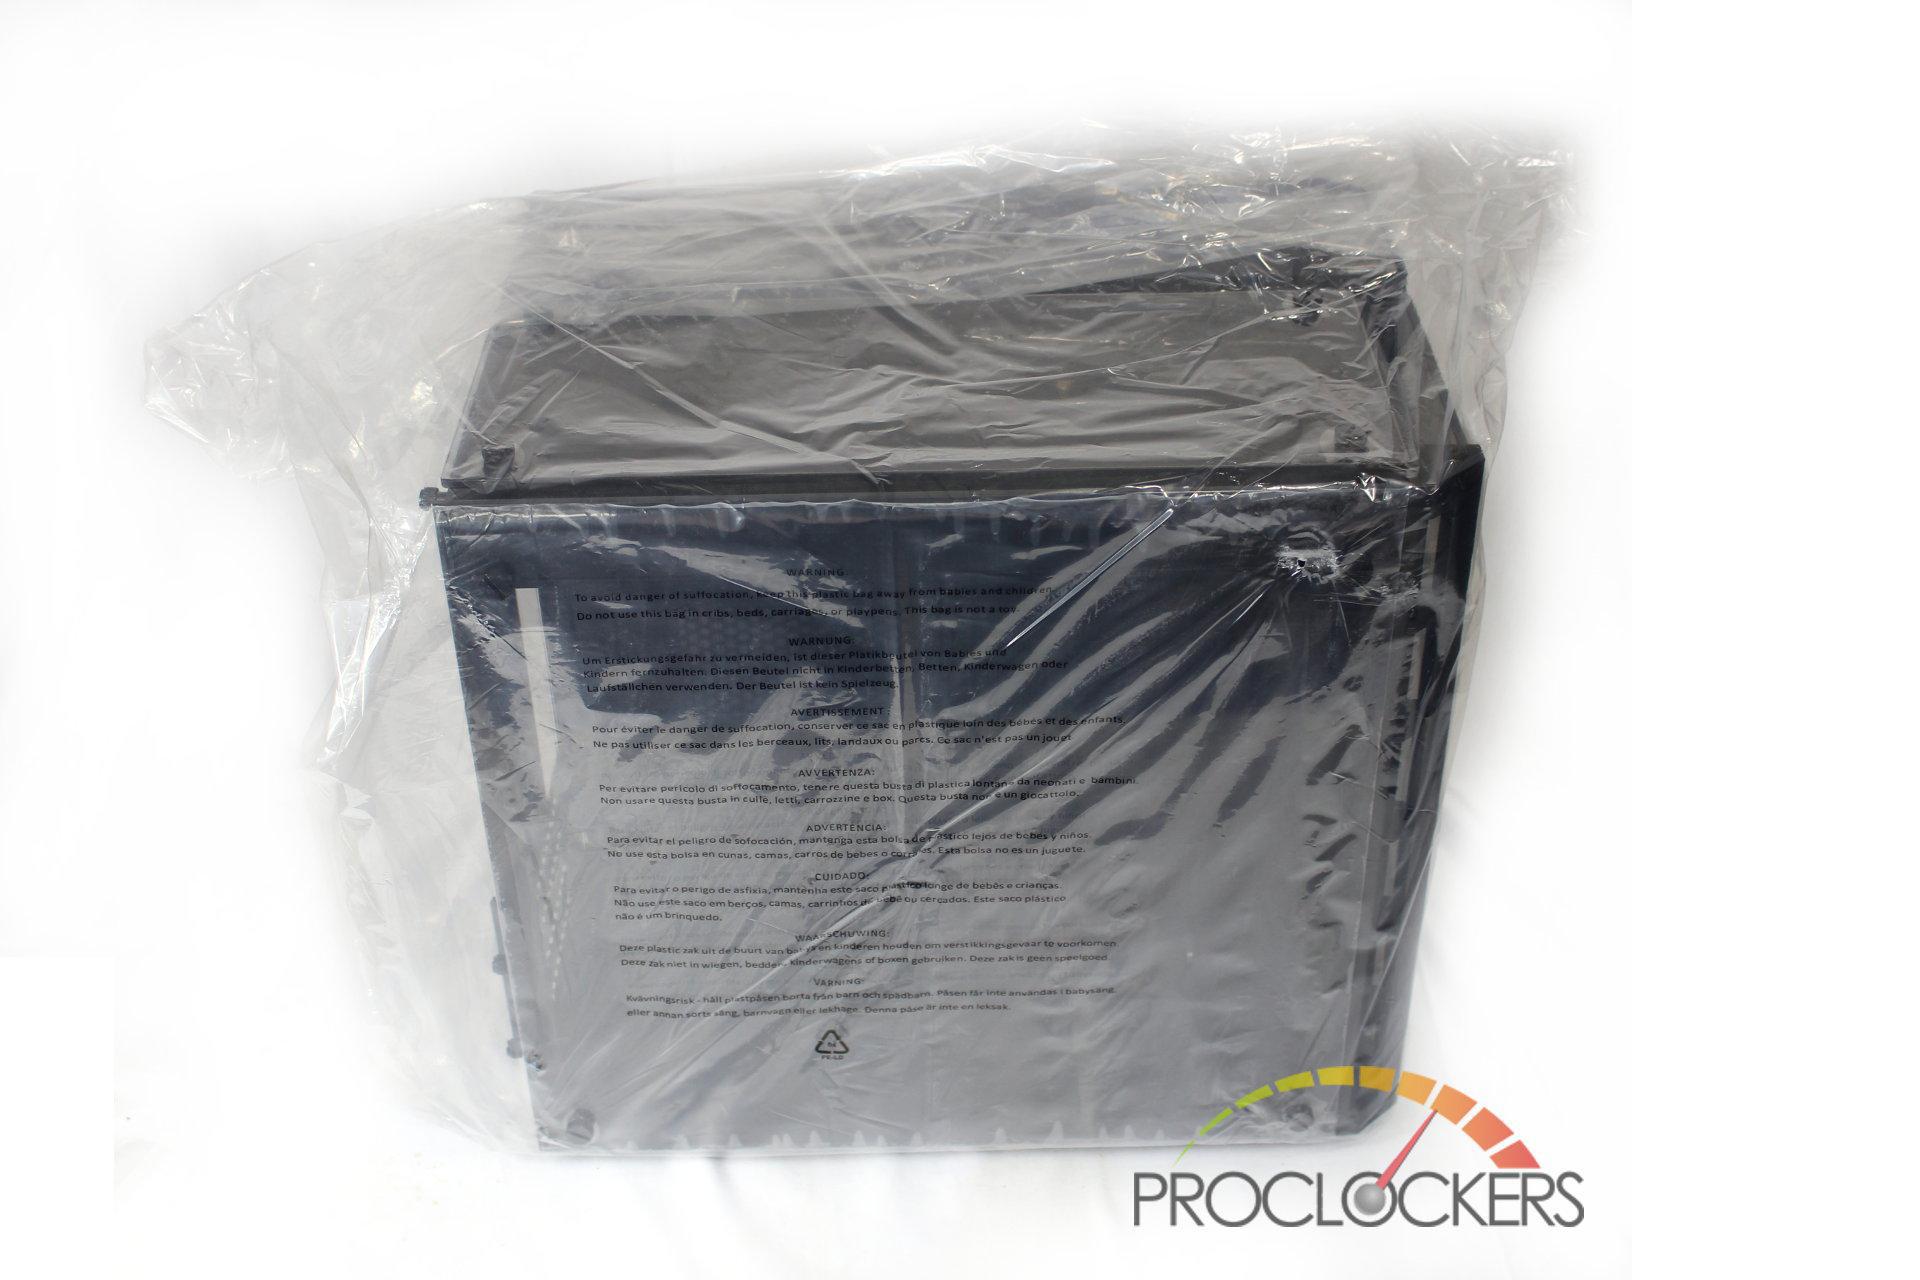
The case is wrapped in a plastic bag inside the foam. This makes it easy to extricate without getting fingerprints and dust everywhere.
A Closer Look: Exterior
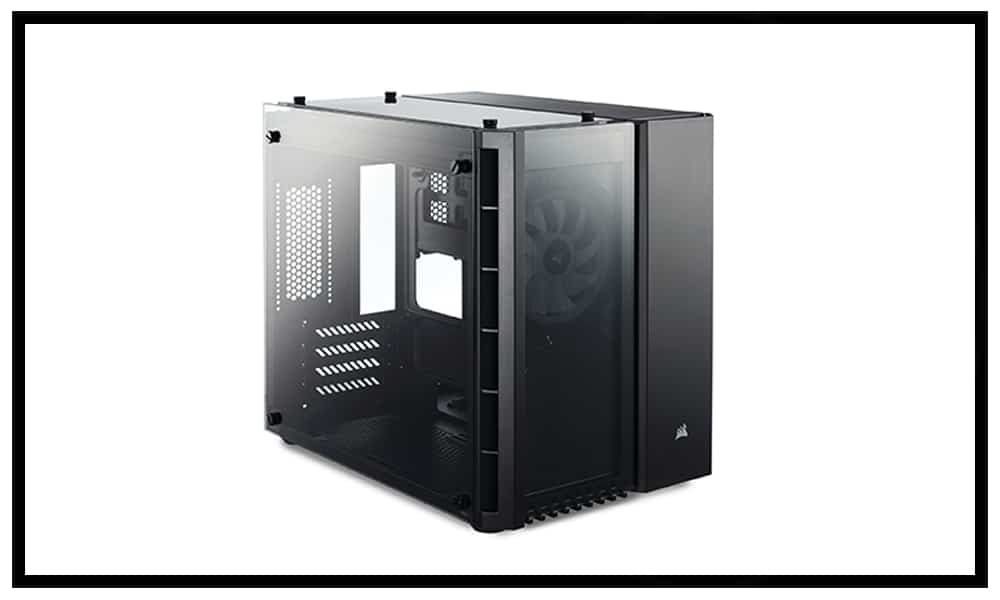
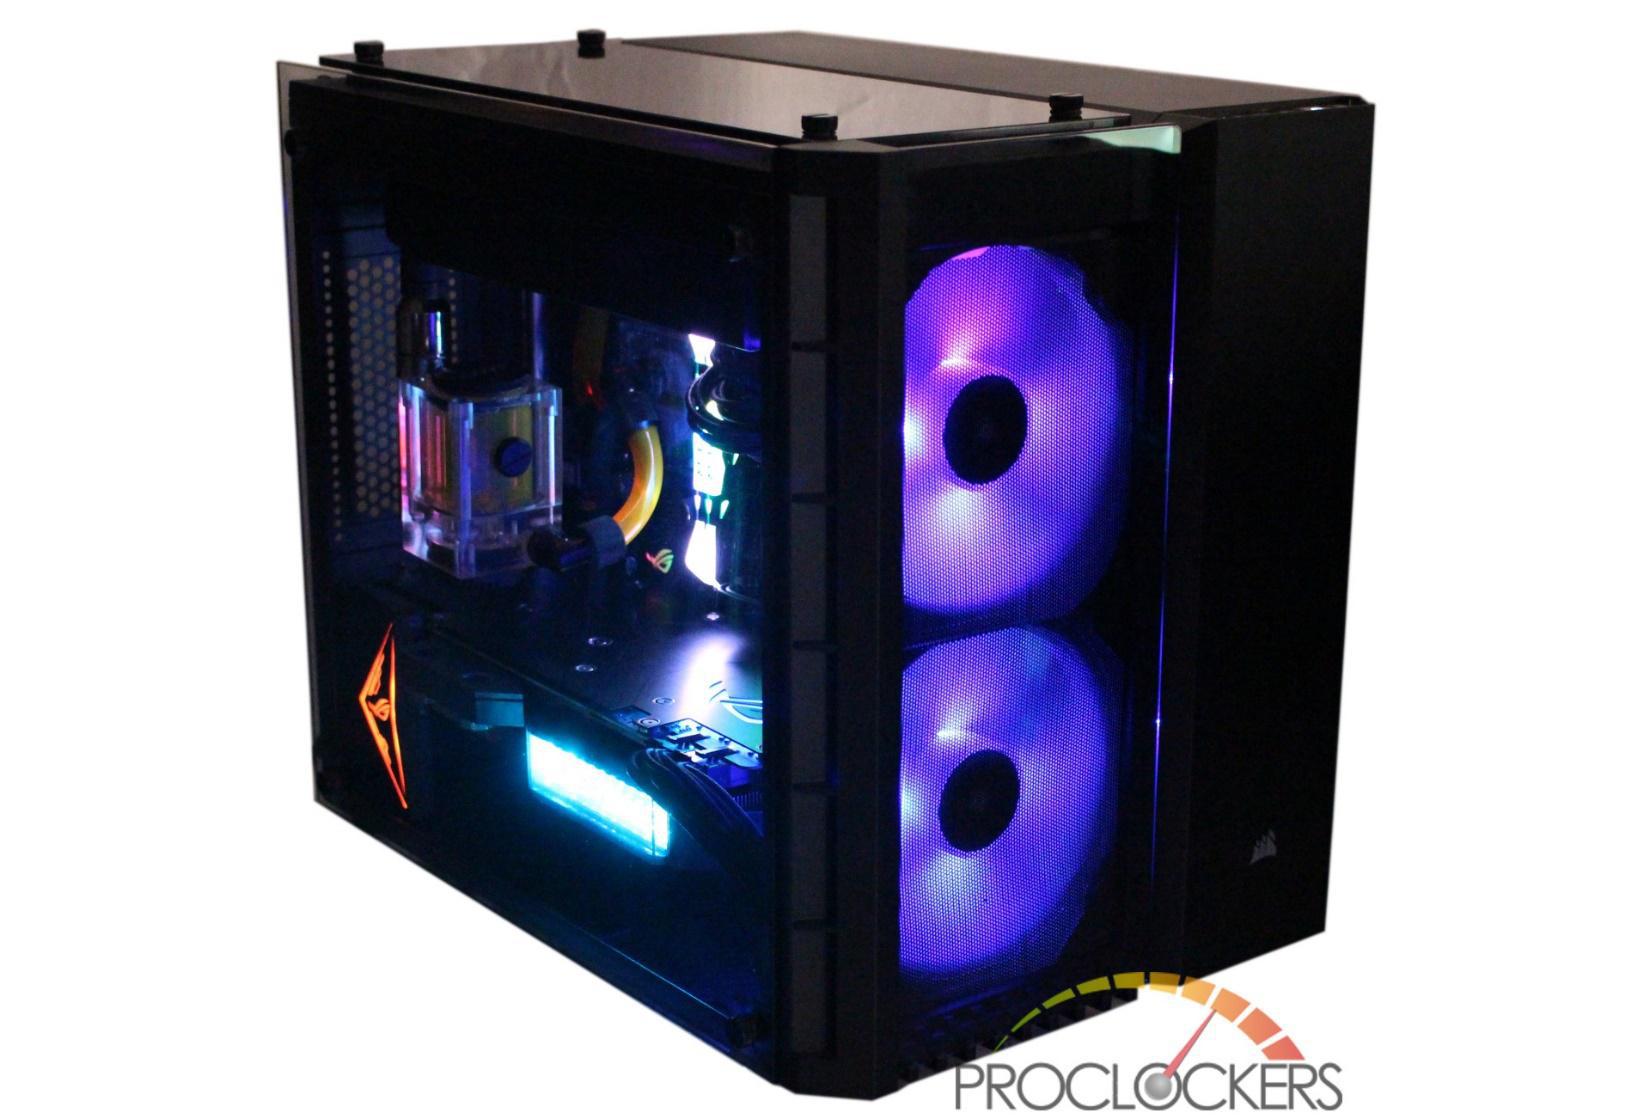
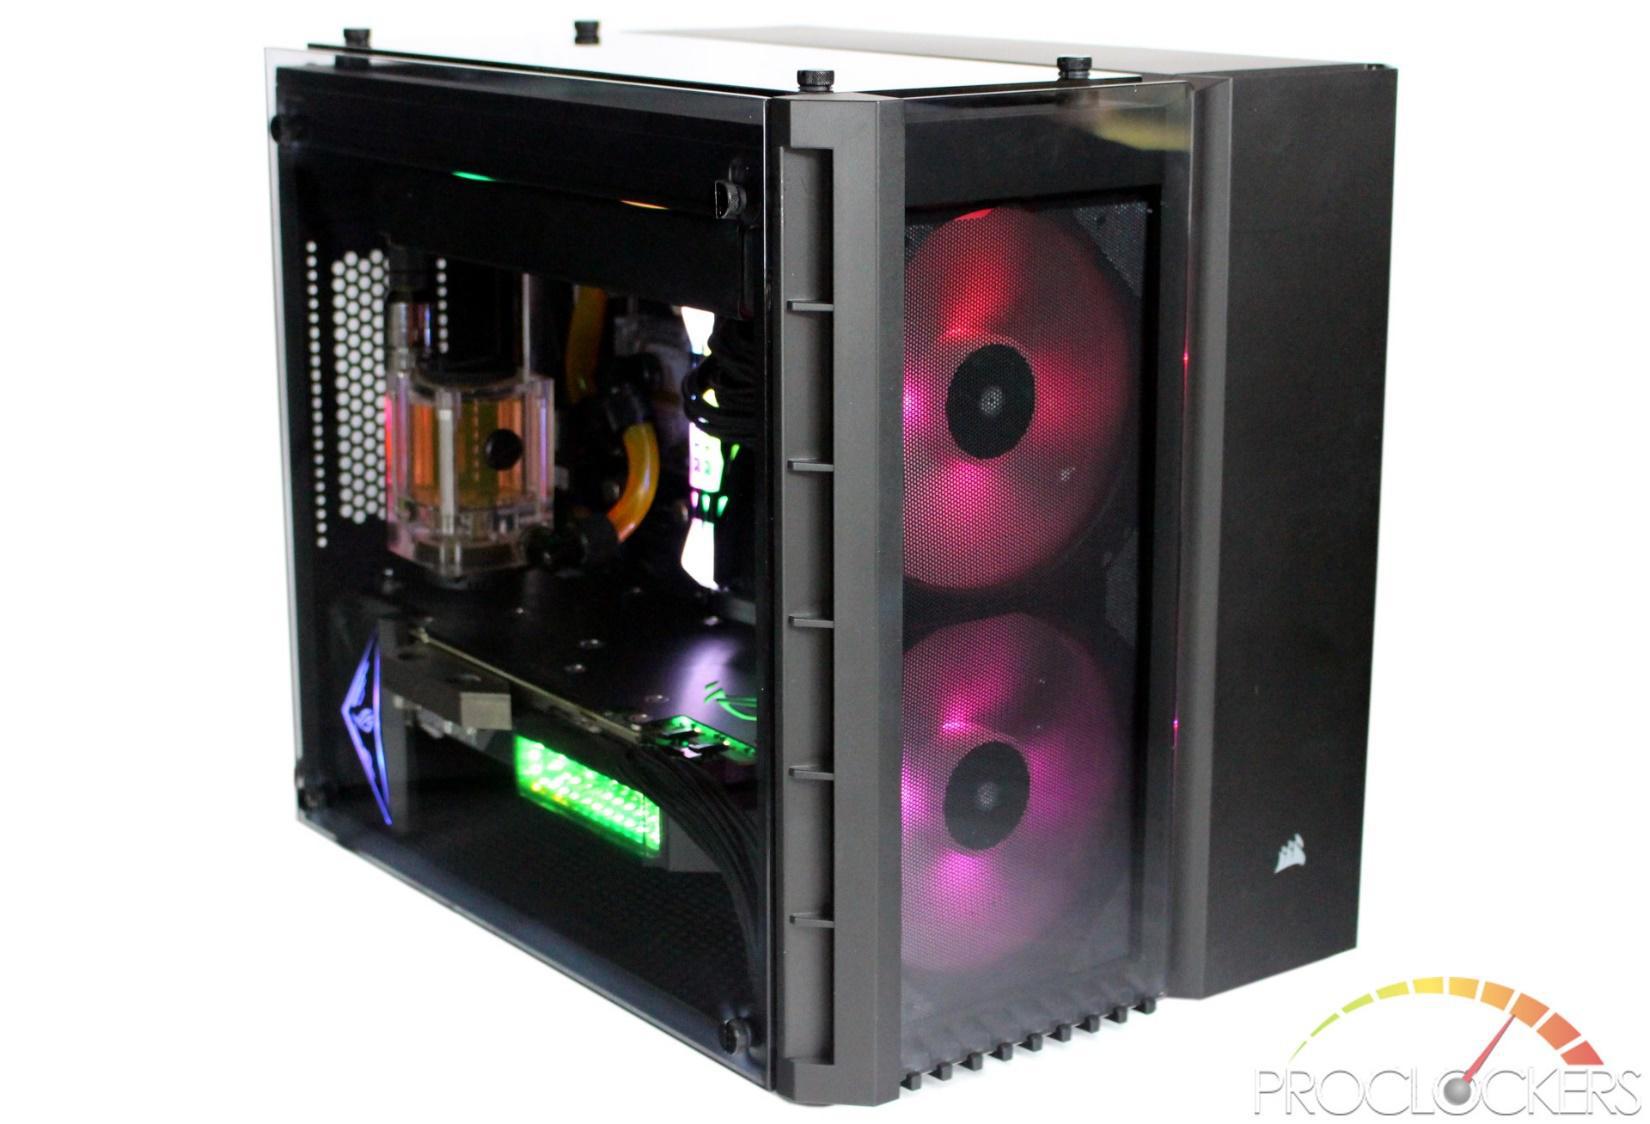
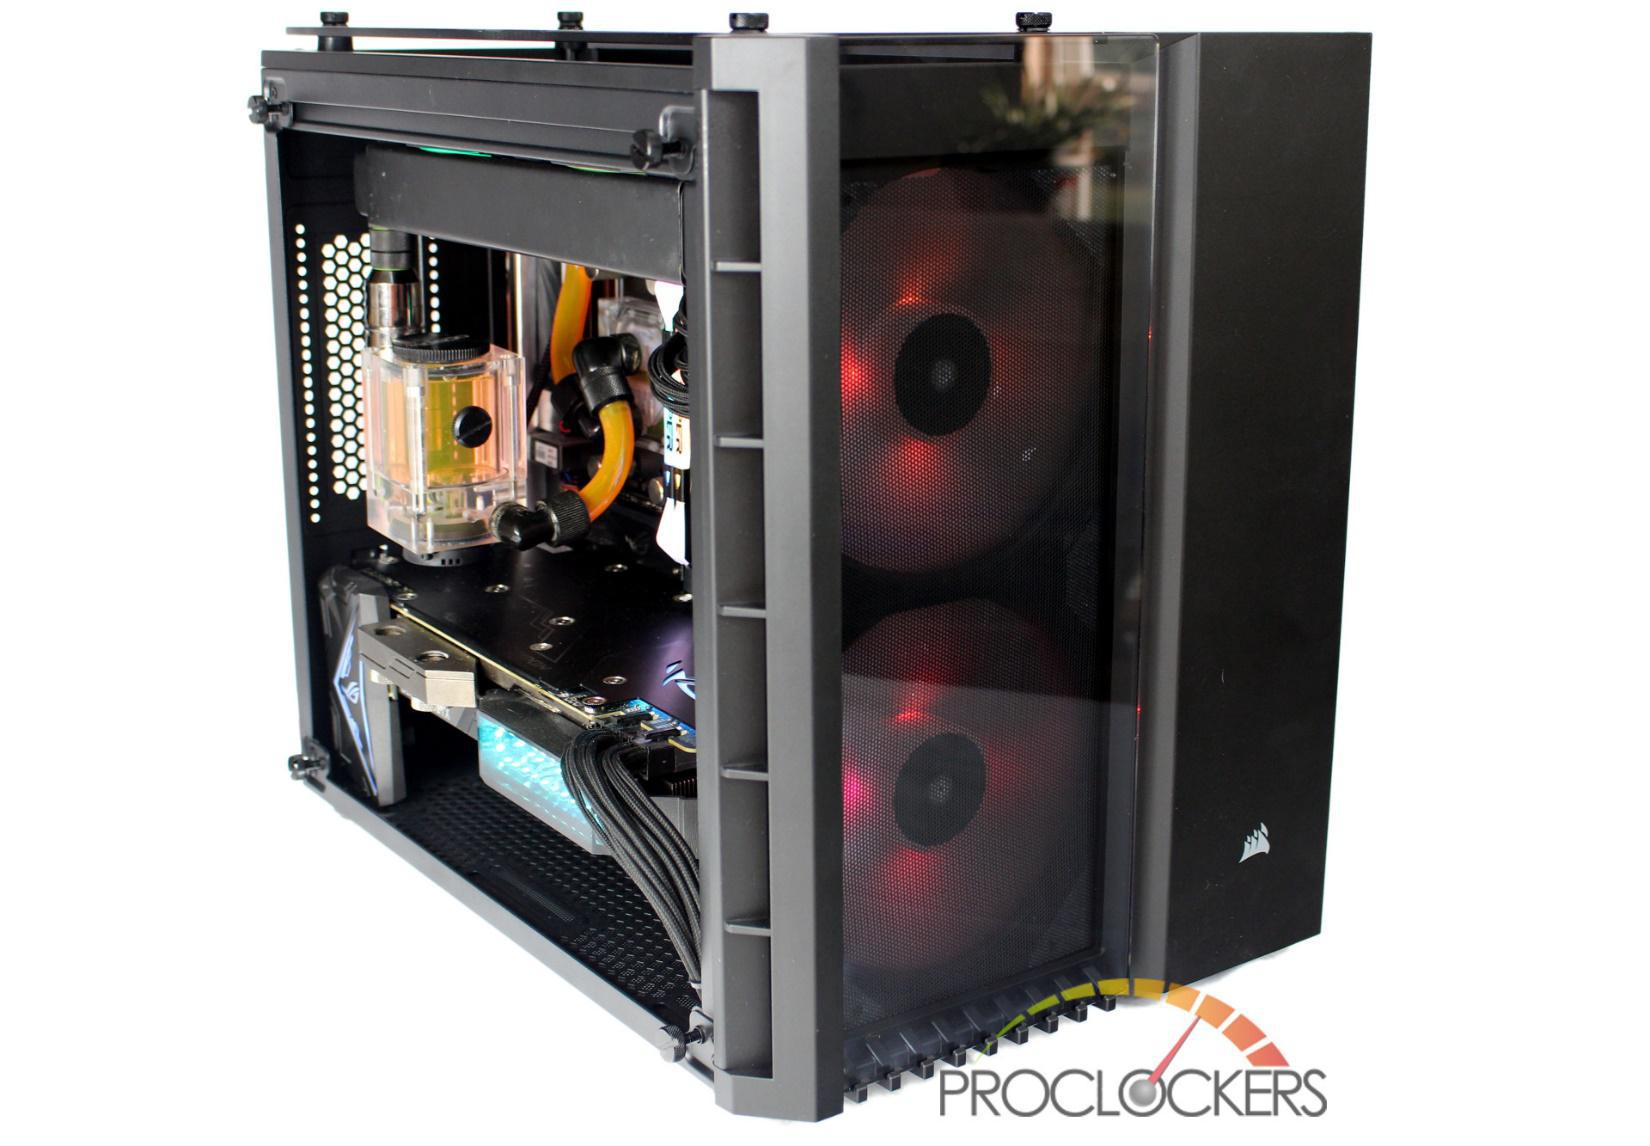
Corsair’s Crystal 280X is similar in layout to a few of Corsair’s past cube cases with a dual chamber design but picks up some modern elements from the Crystal series with the clean lines and tempered glass panels. The Crystal 280X is a Micro-ATX case with an optimized layout for liquid cooling.
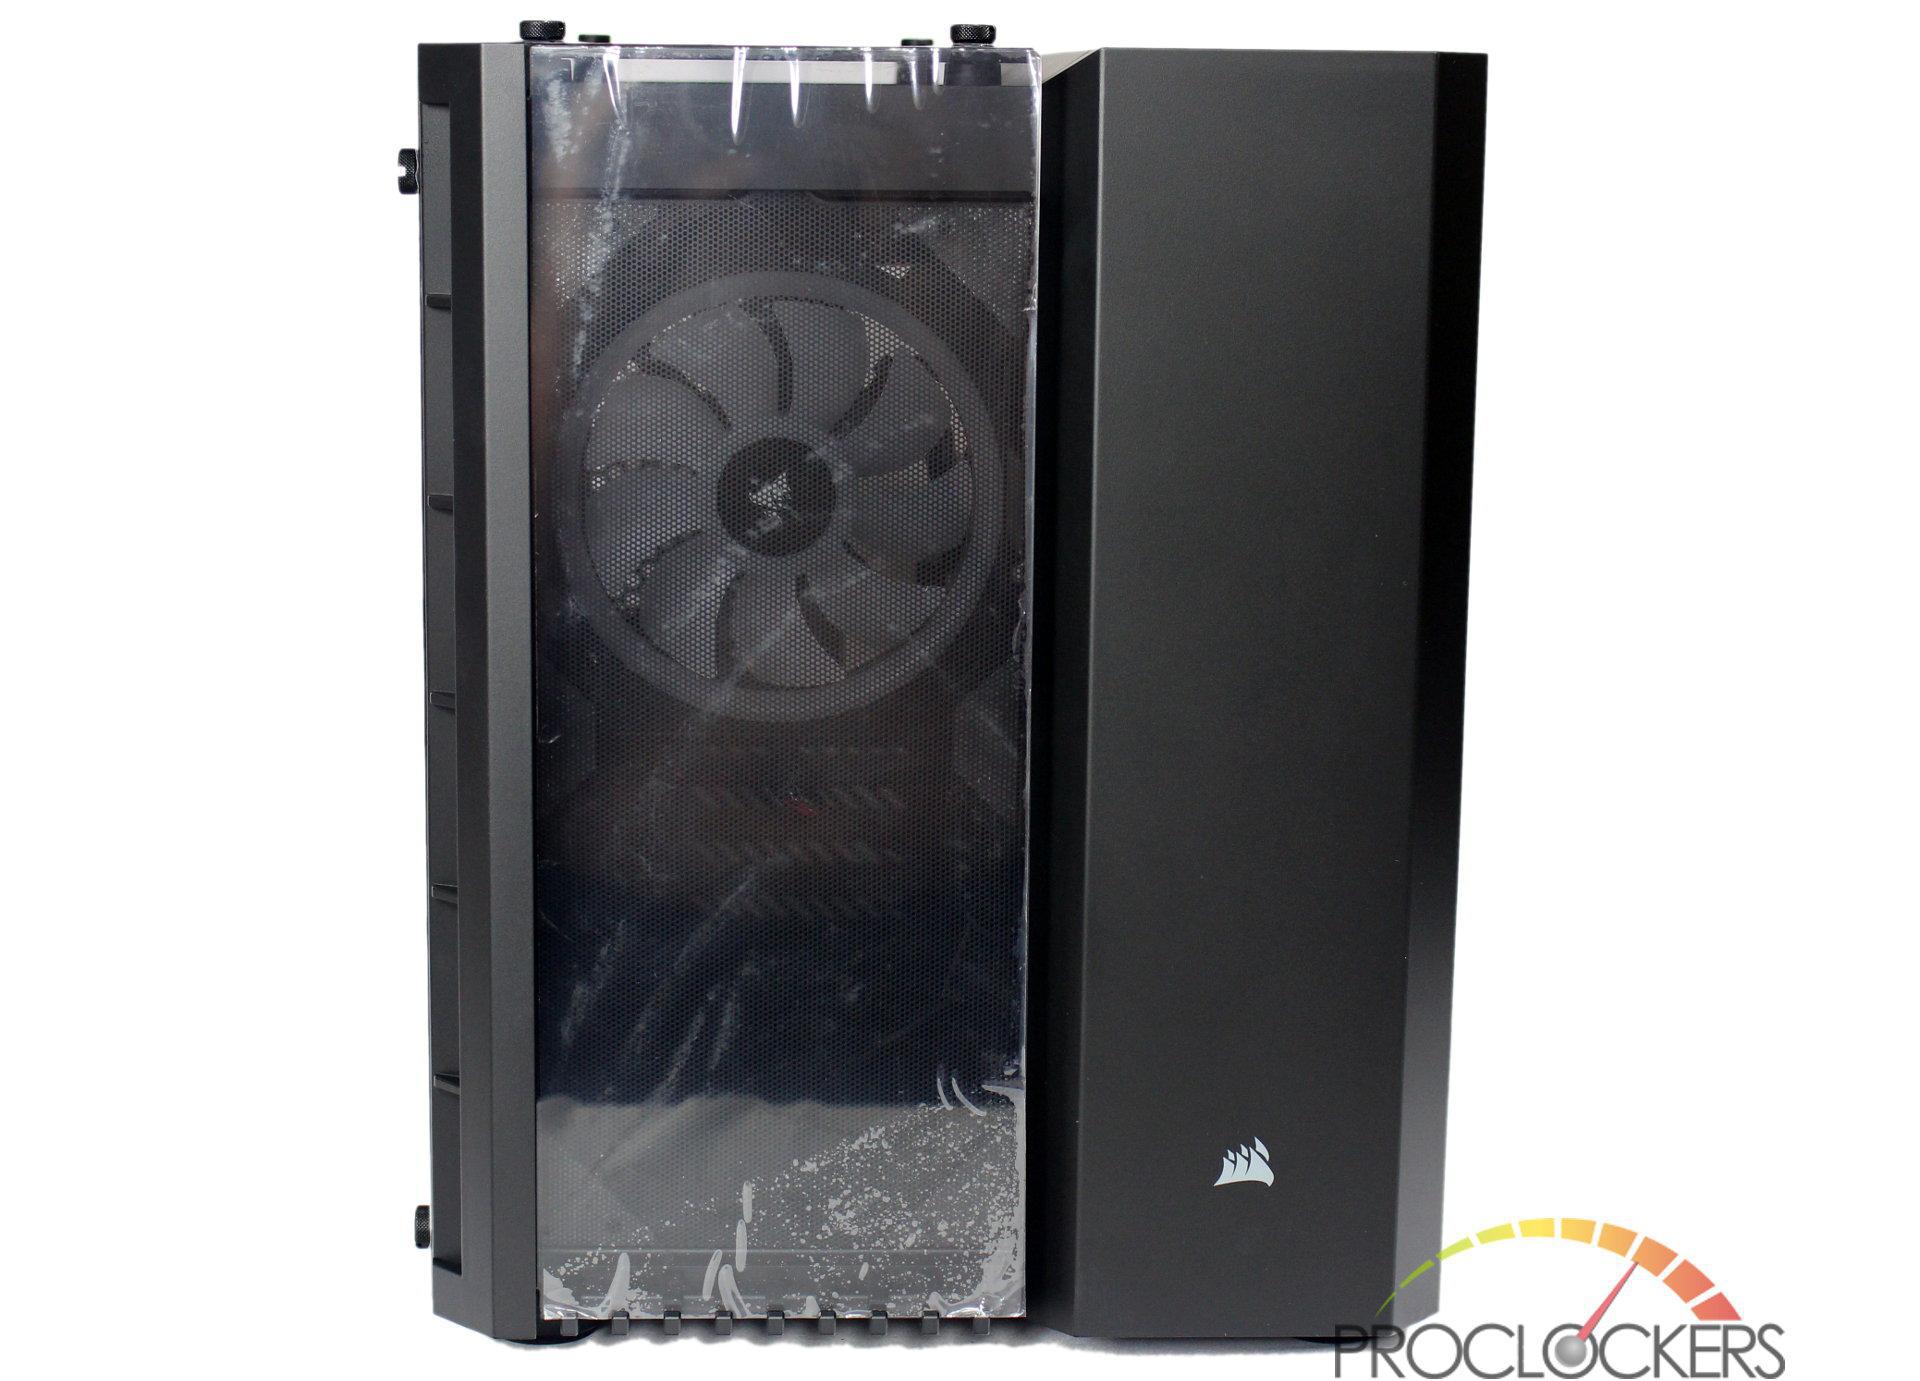
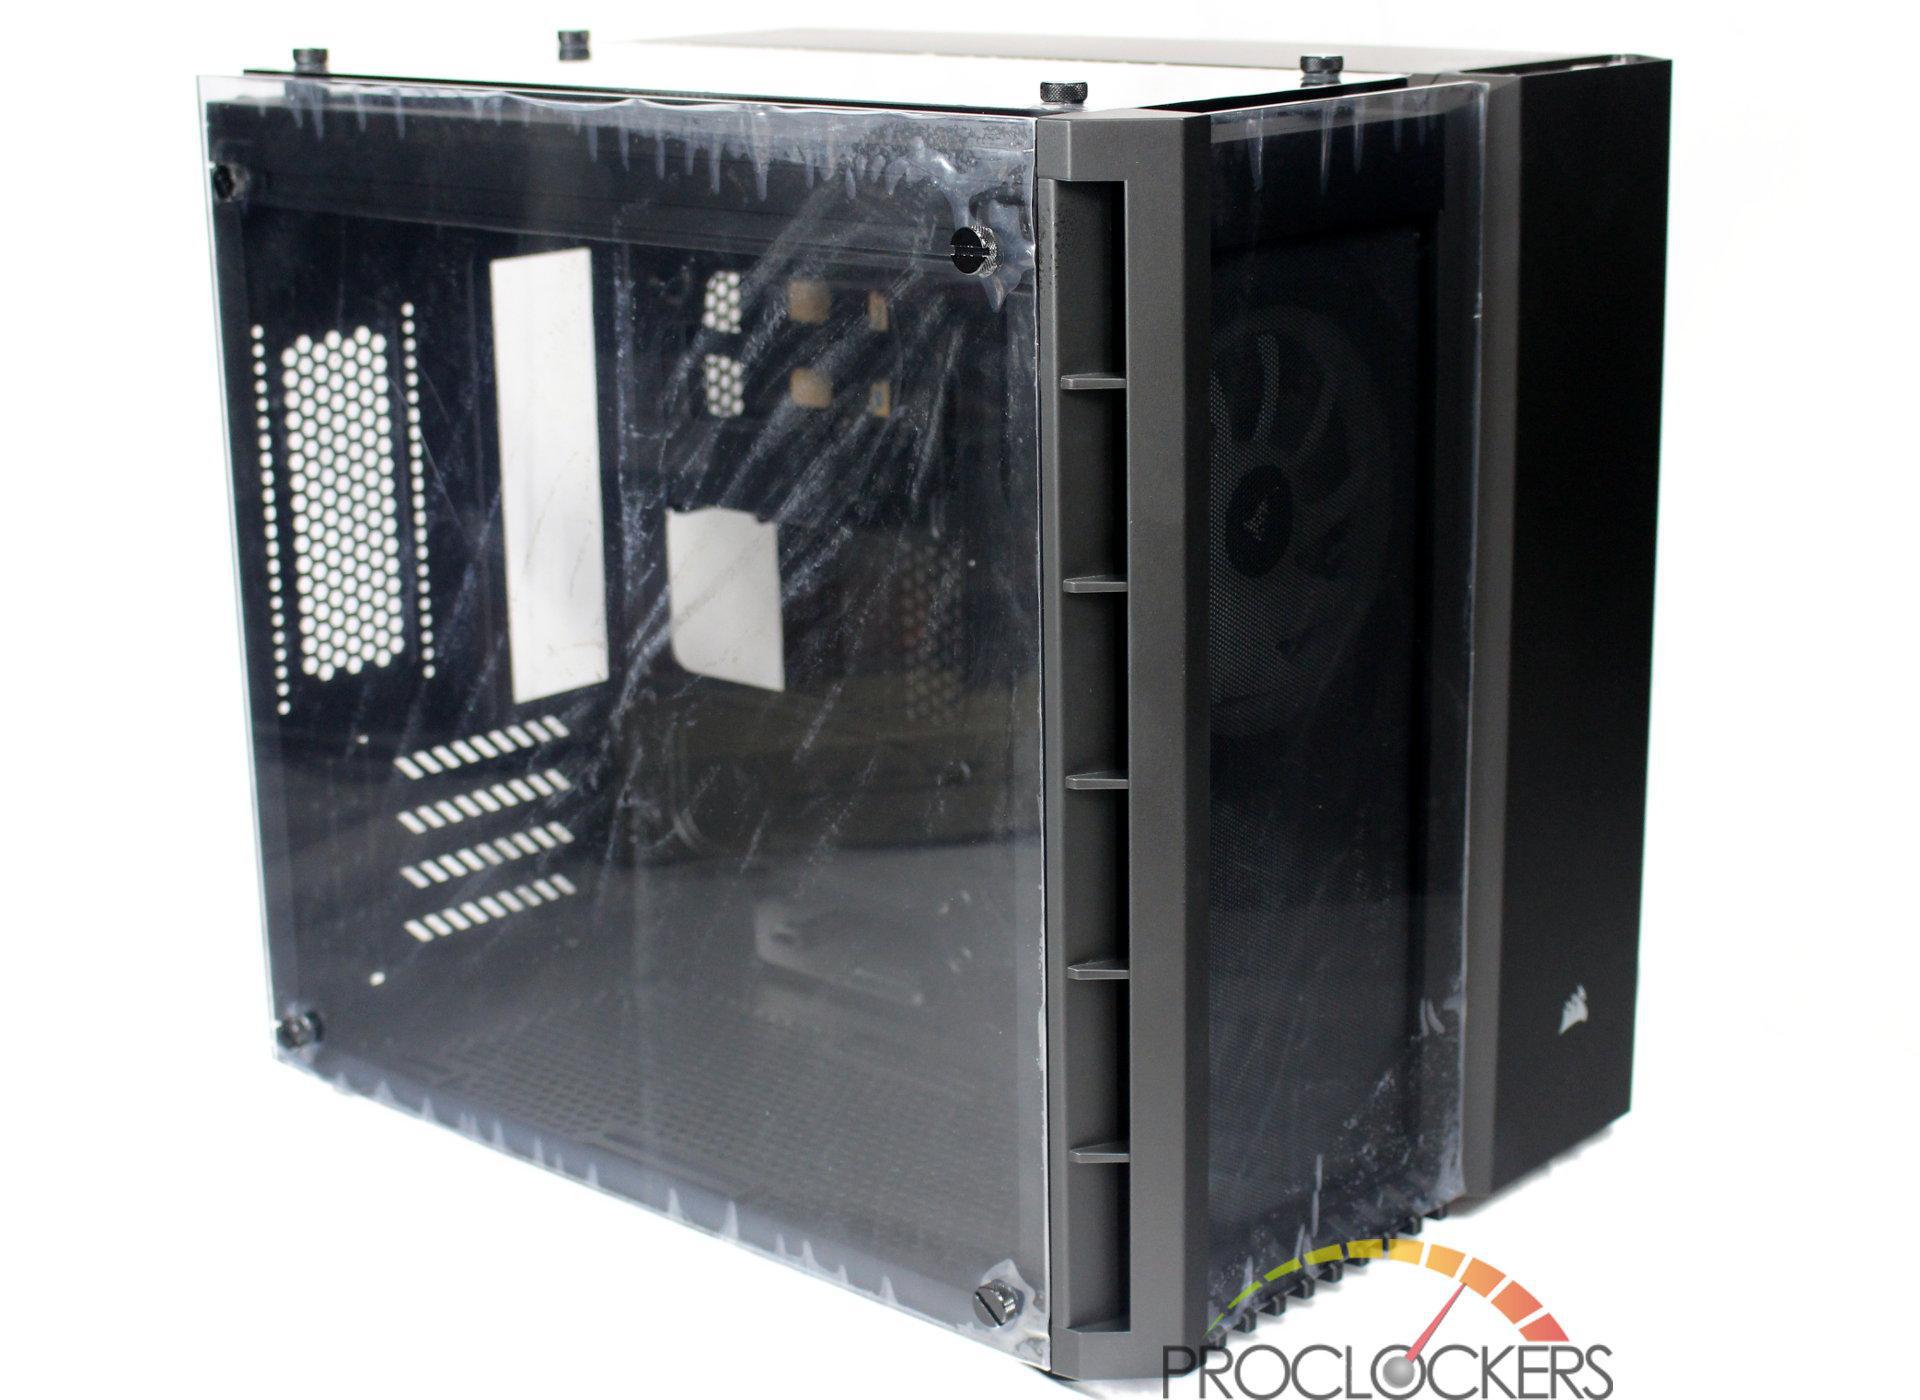
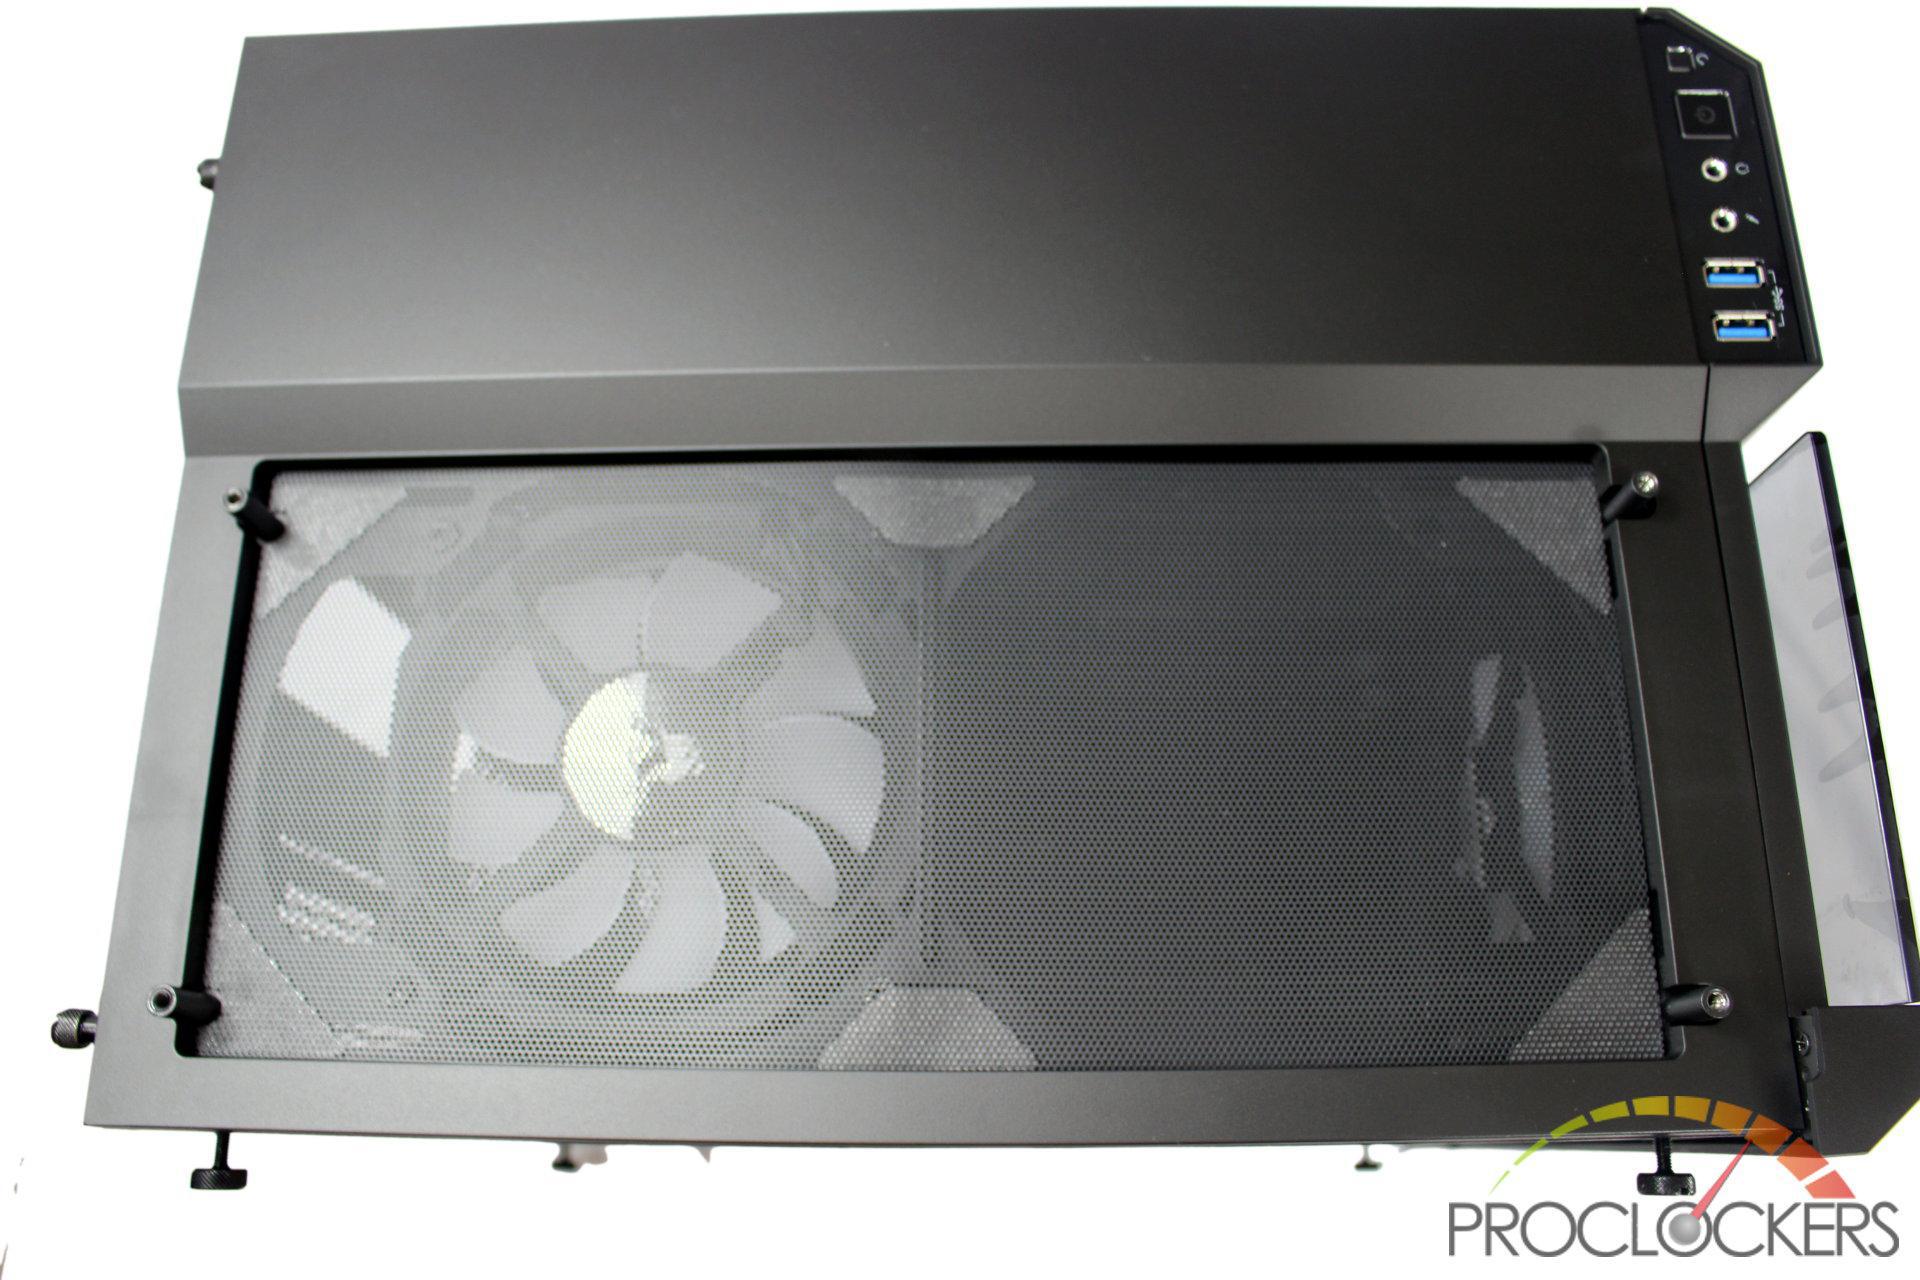
Reminiscent of Corsair’s past cube style cases, the 280X has replaced the front grill over the main chamber with a sheet of tempered glass. The glass panel is held from the bottom and left side in a way that makes it appear to float, but it can draw air from all 4 sides so cooling shouldn’t be an issue. There is a small Corsair logo on the right side near the bottom, but all of the buttons and I/O ports have been relocated to the top.
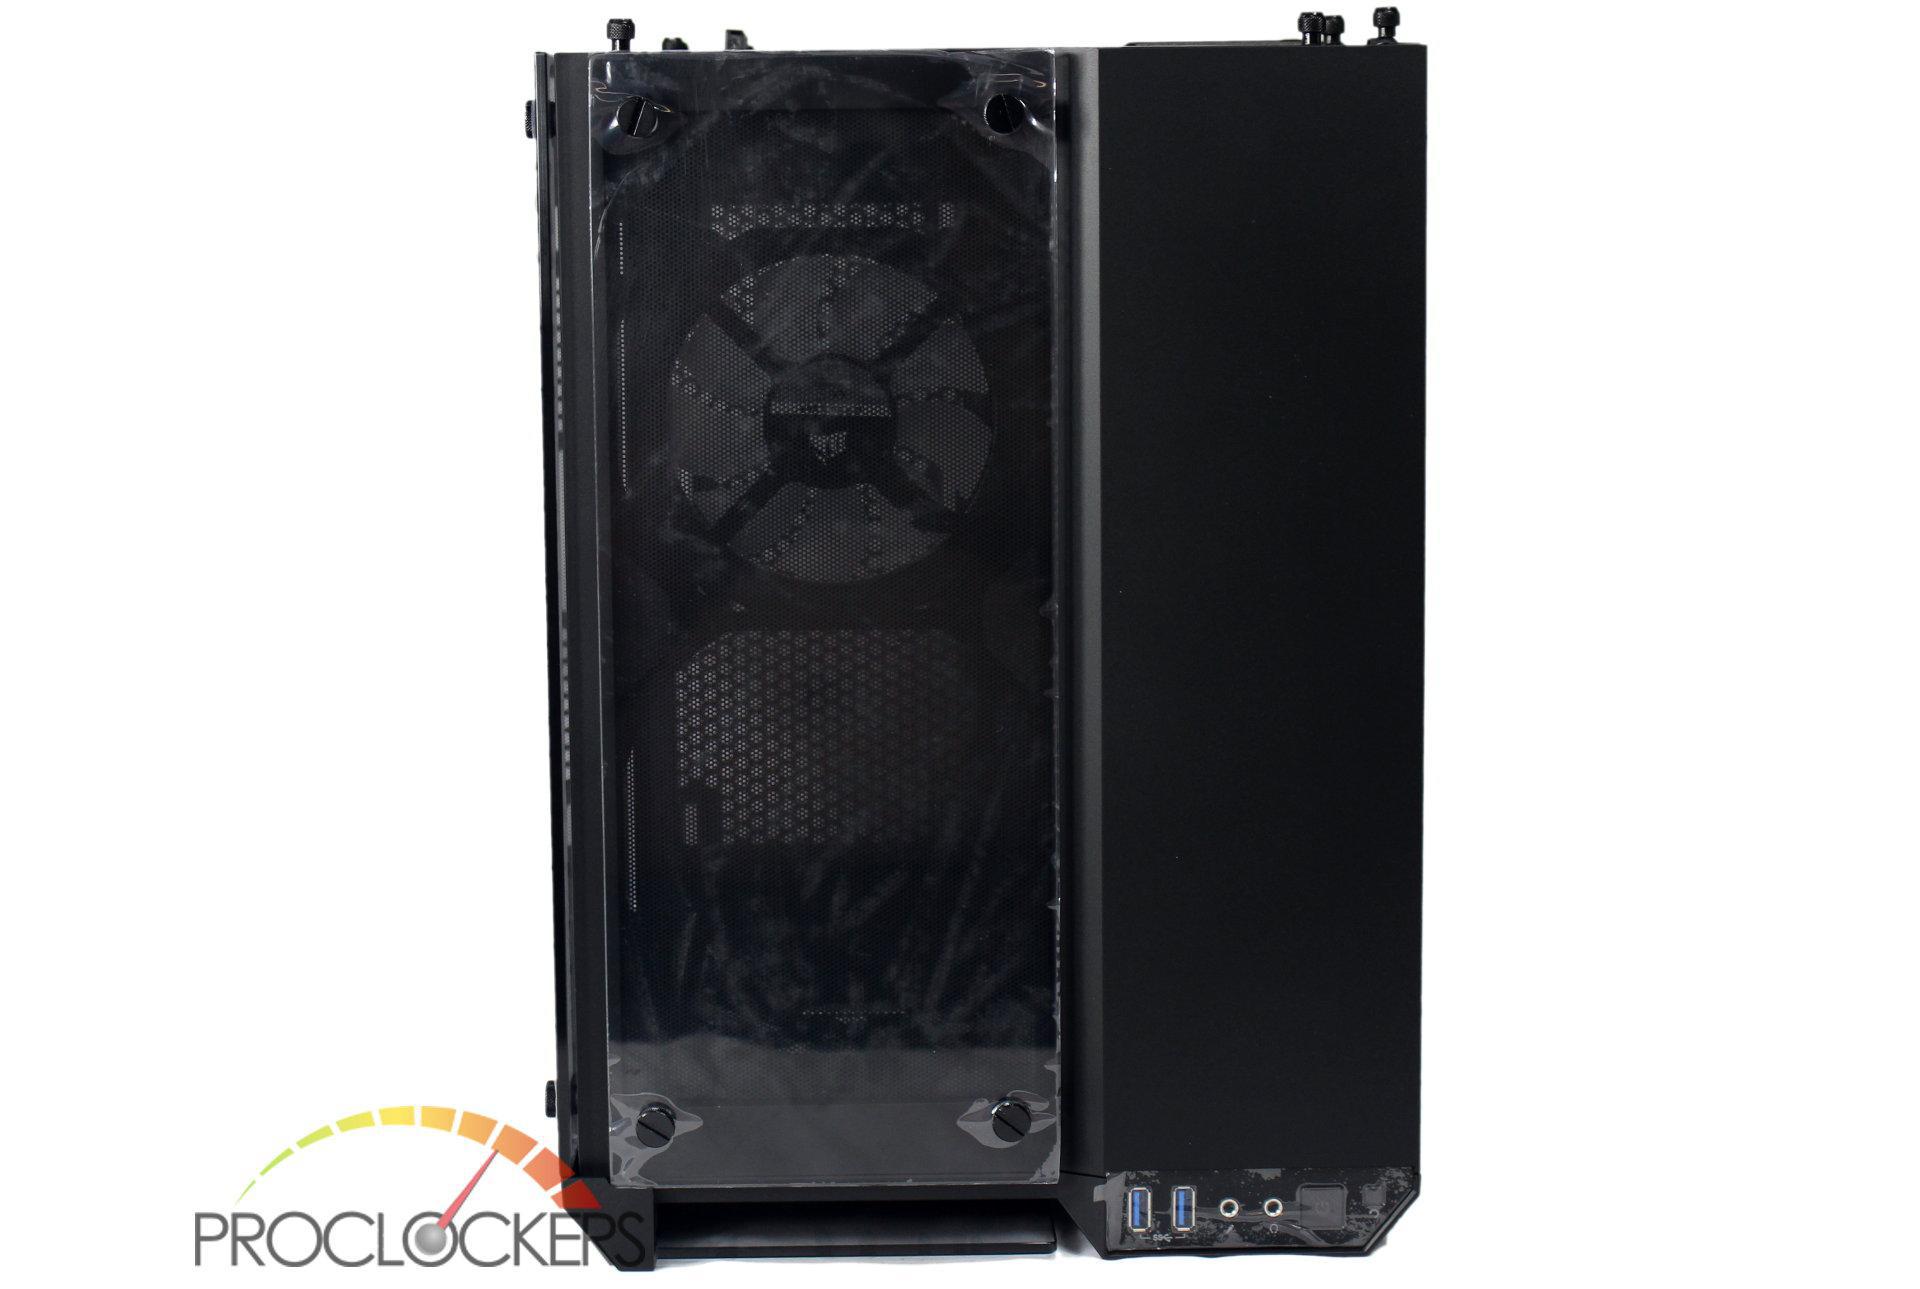
The top again see’s the former grill replaced with a sheet of glass held by four posts.
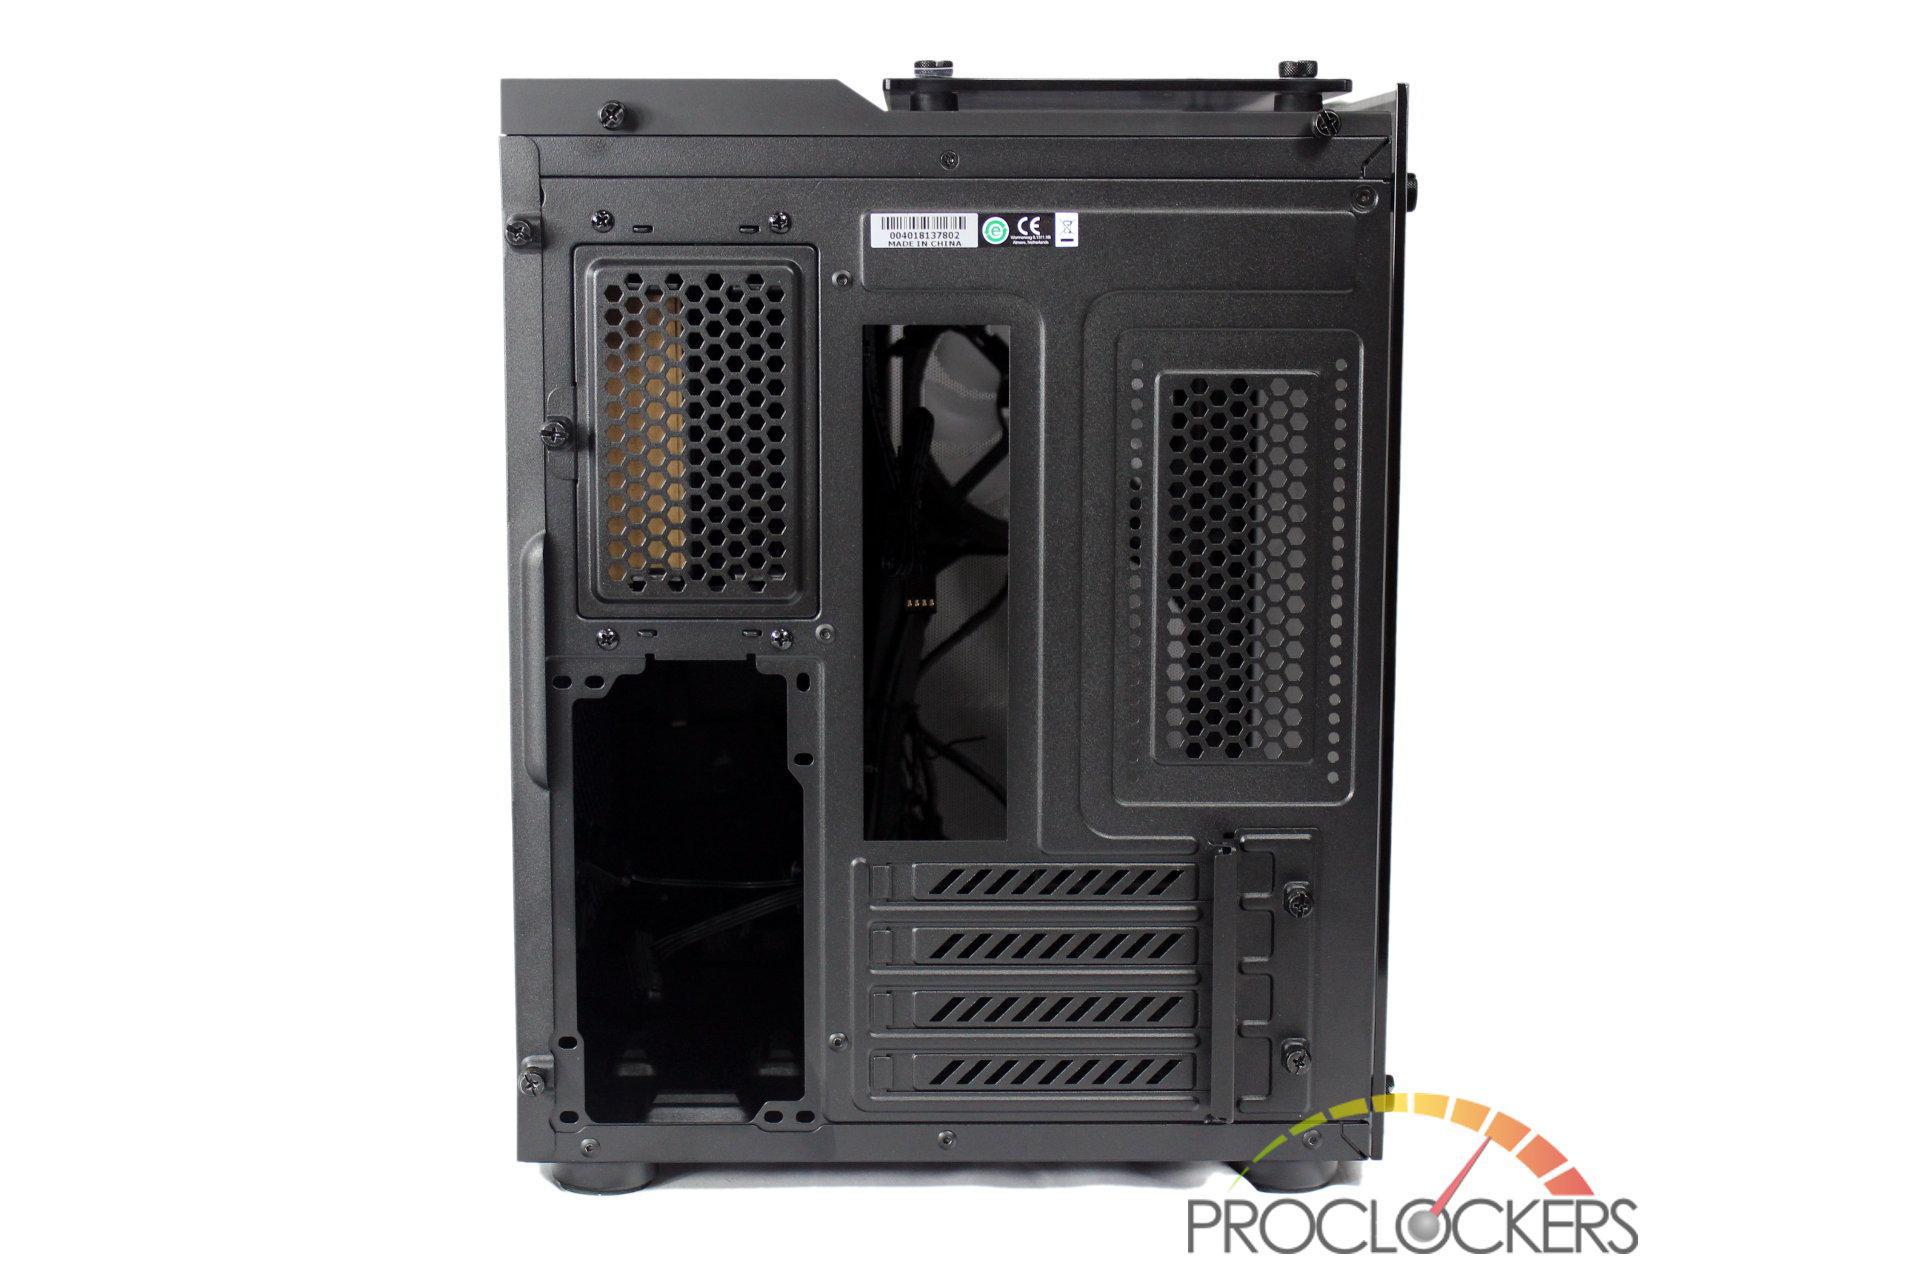
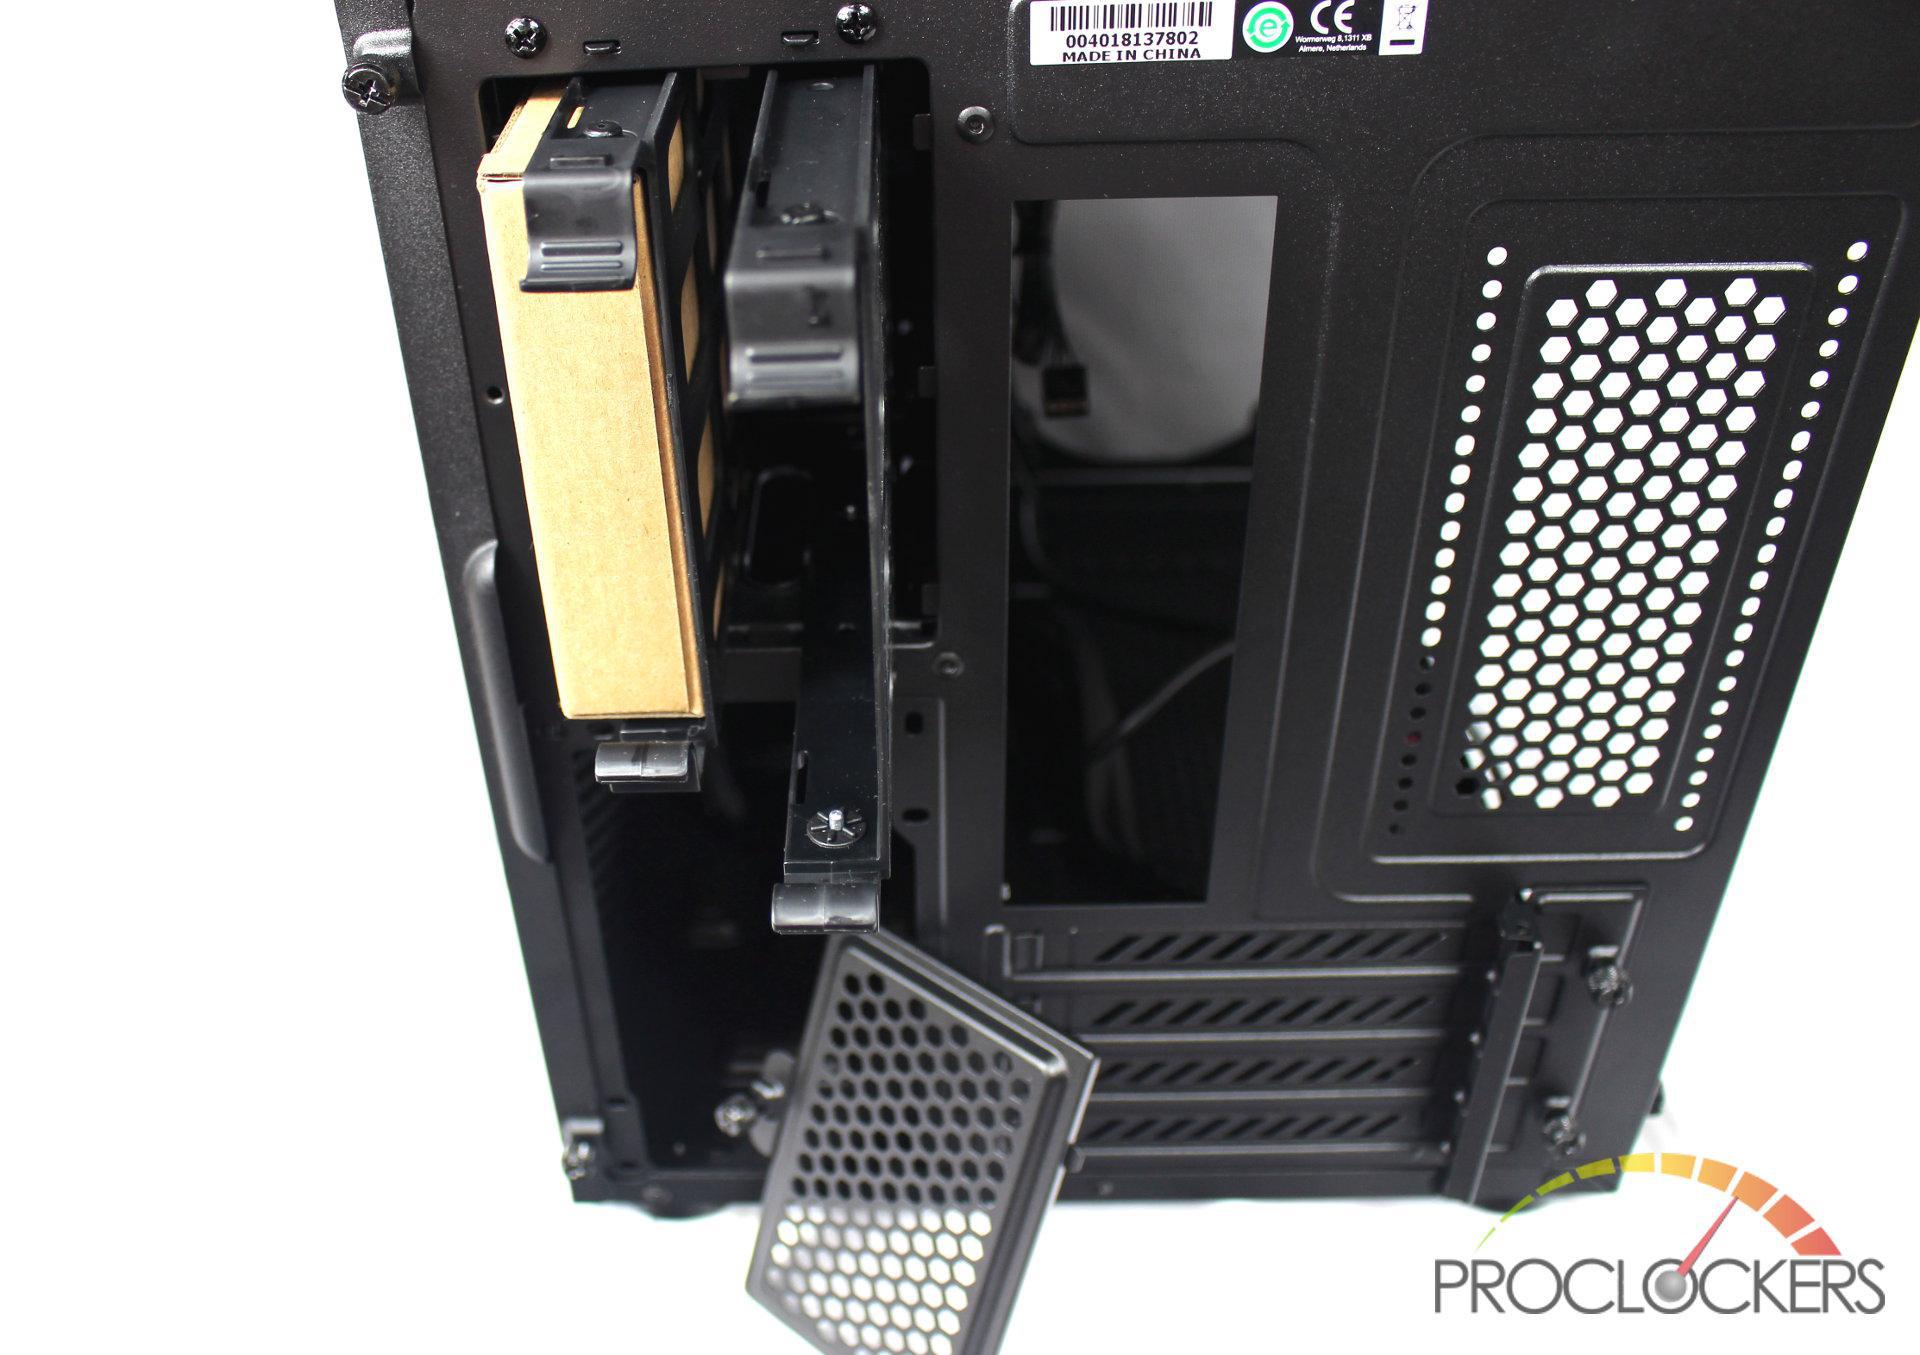
The rear of the case has the motherboard I/O in the center with a center area to the side. The rear chamber has a full ATX power supply cutout with holes for mounting either direction. Just above it is a removable vented panel that gives access to 2.5”/3.5” Drive trays.
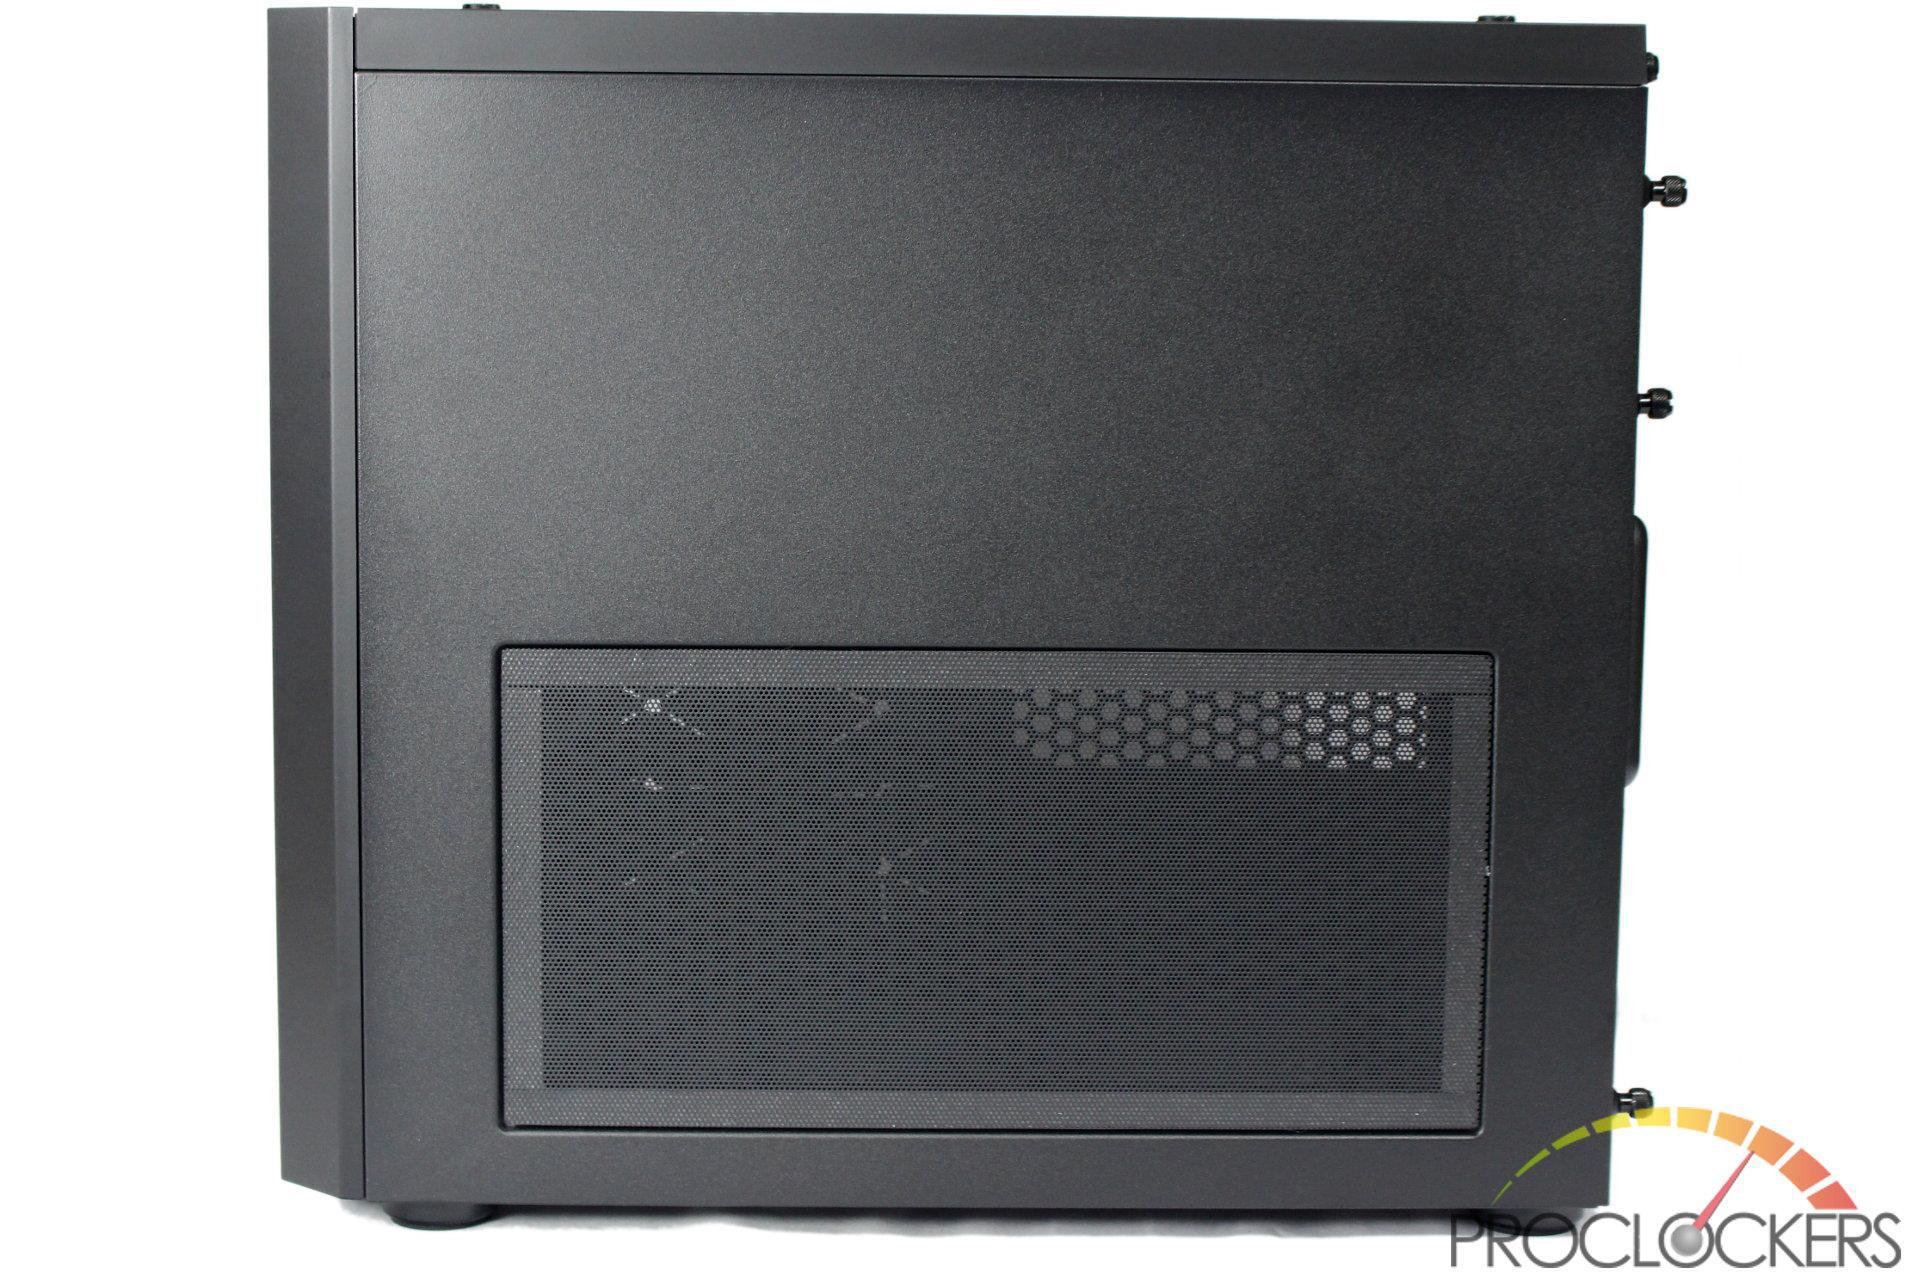
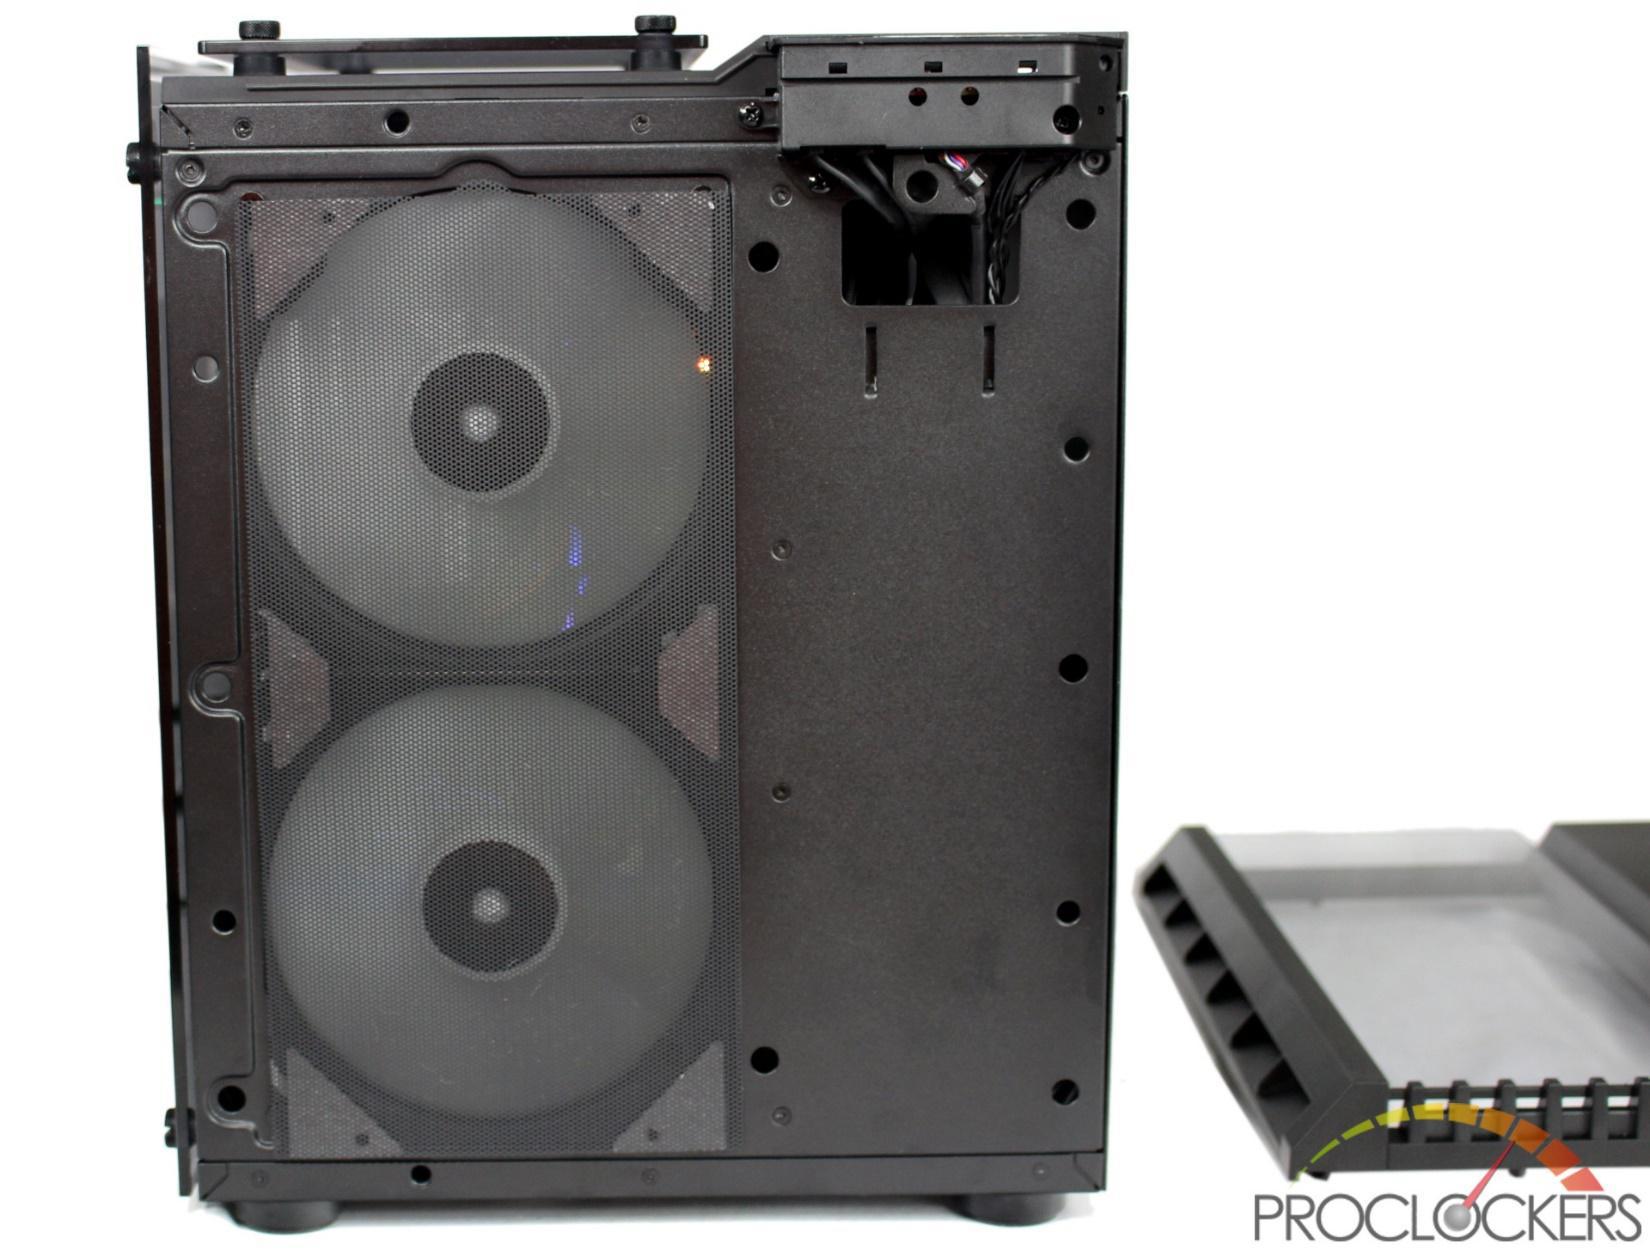
The right side of the case is smooth sans the vented area with magnetic dust filter.
A single 120 or 140mm fan can be mounted in this area. The rear area is mostly for power supply intake.
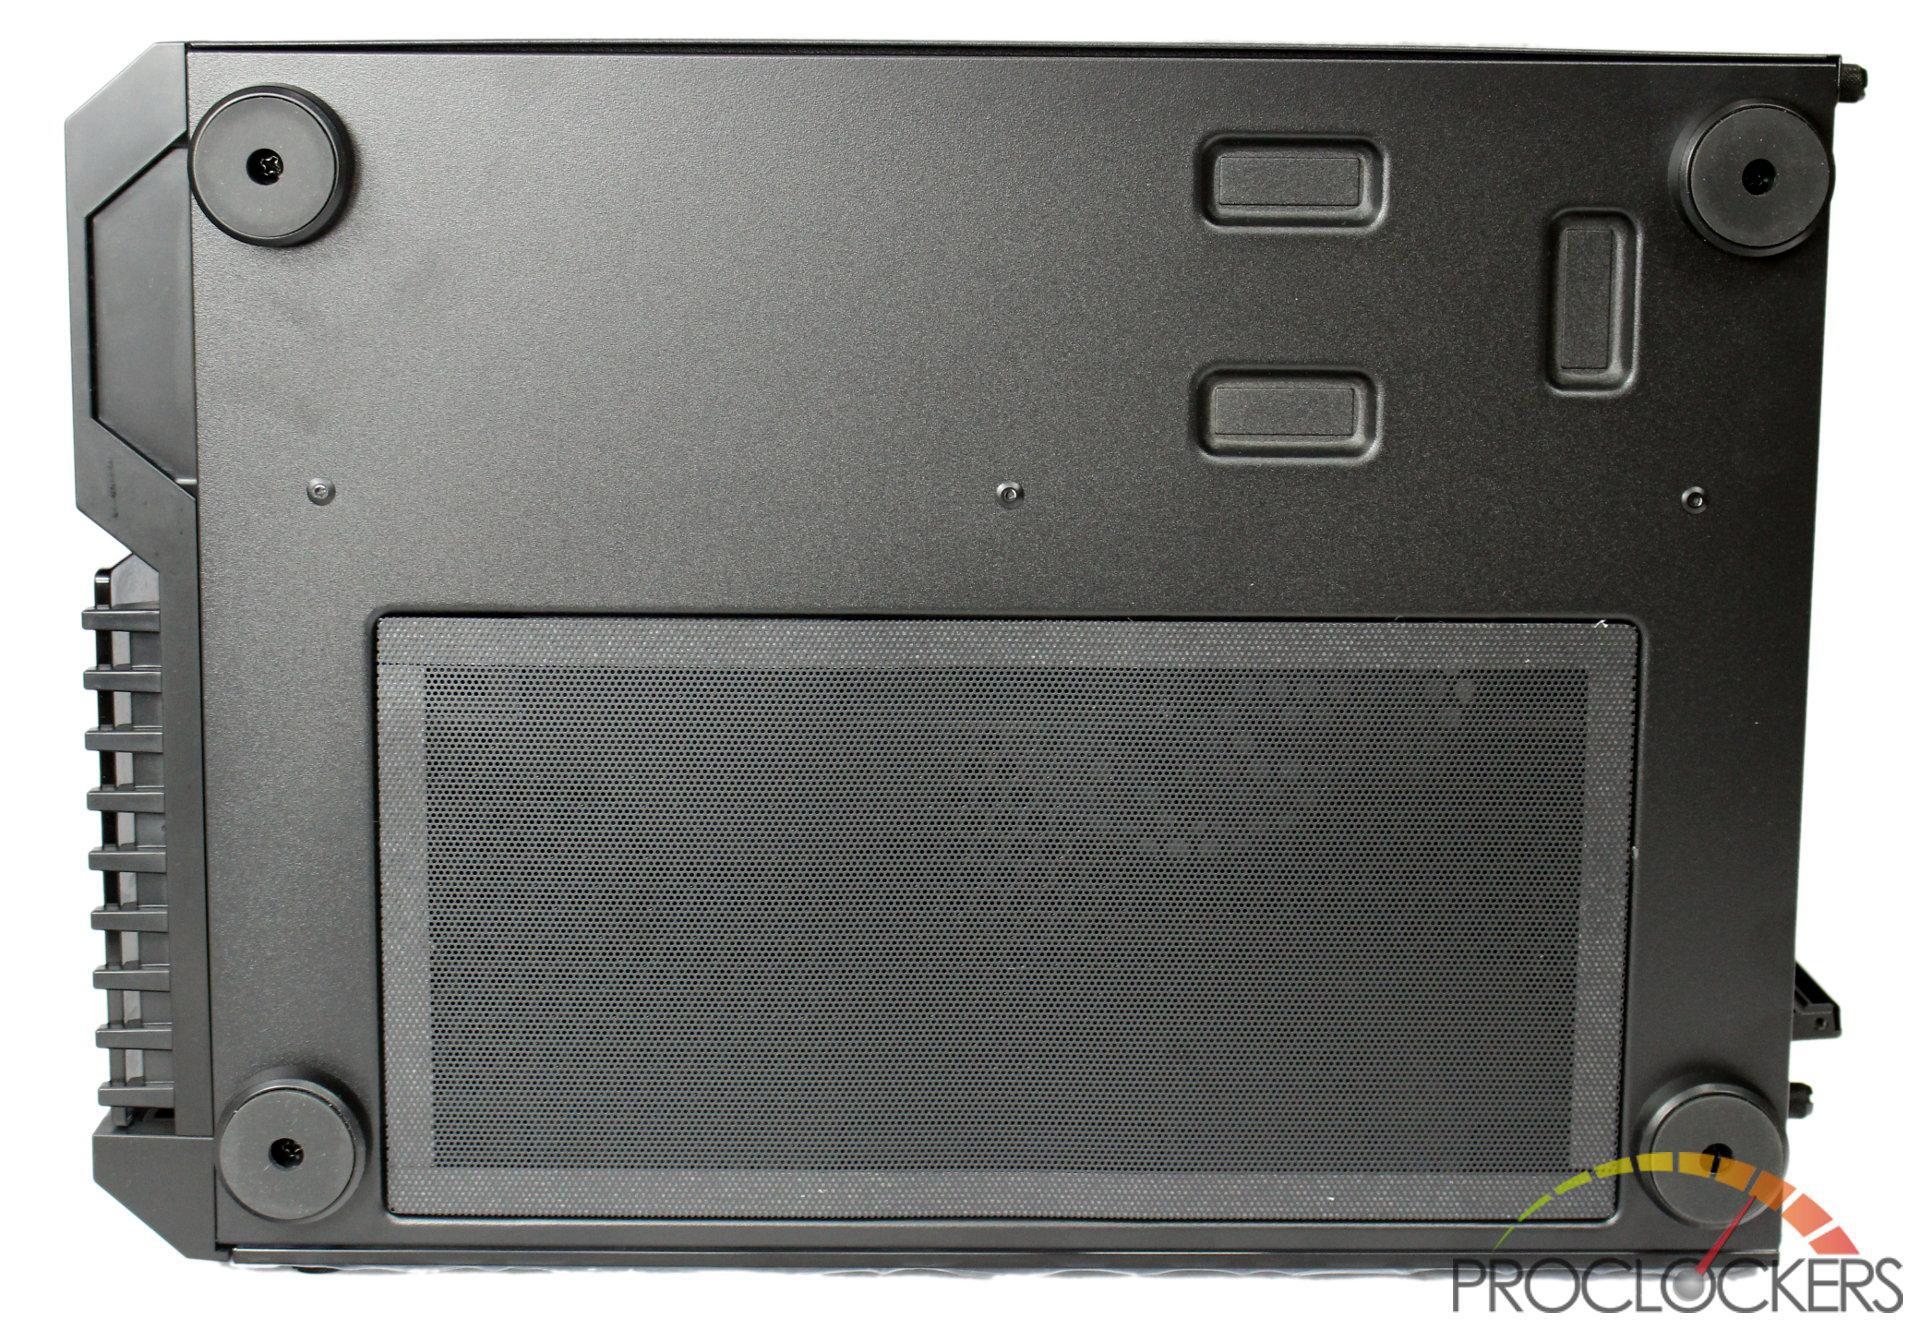
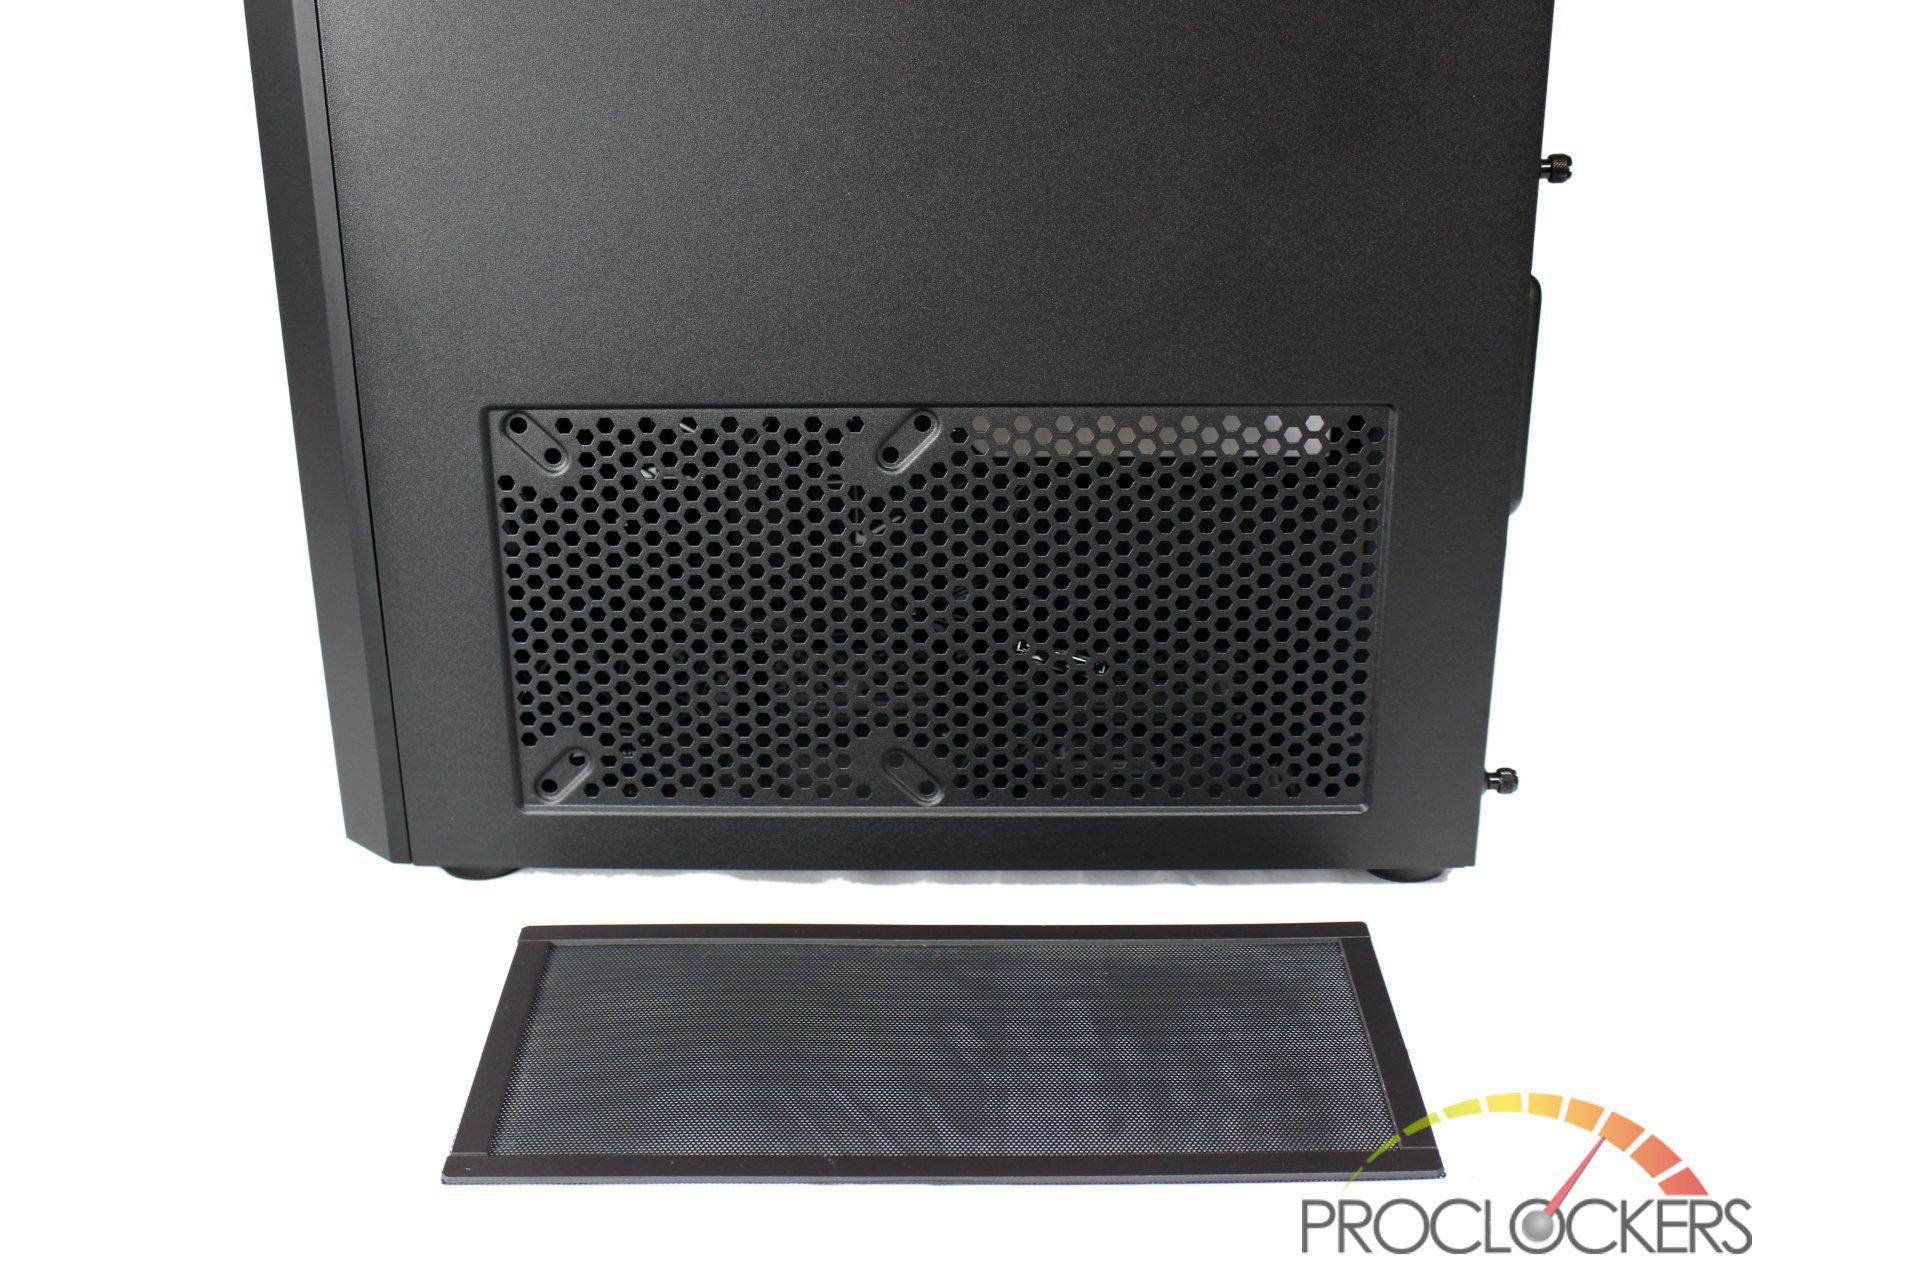
The bottom of the case has four feet with rubber pads. Another magnetic fan filter protects fans here.
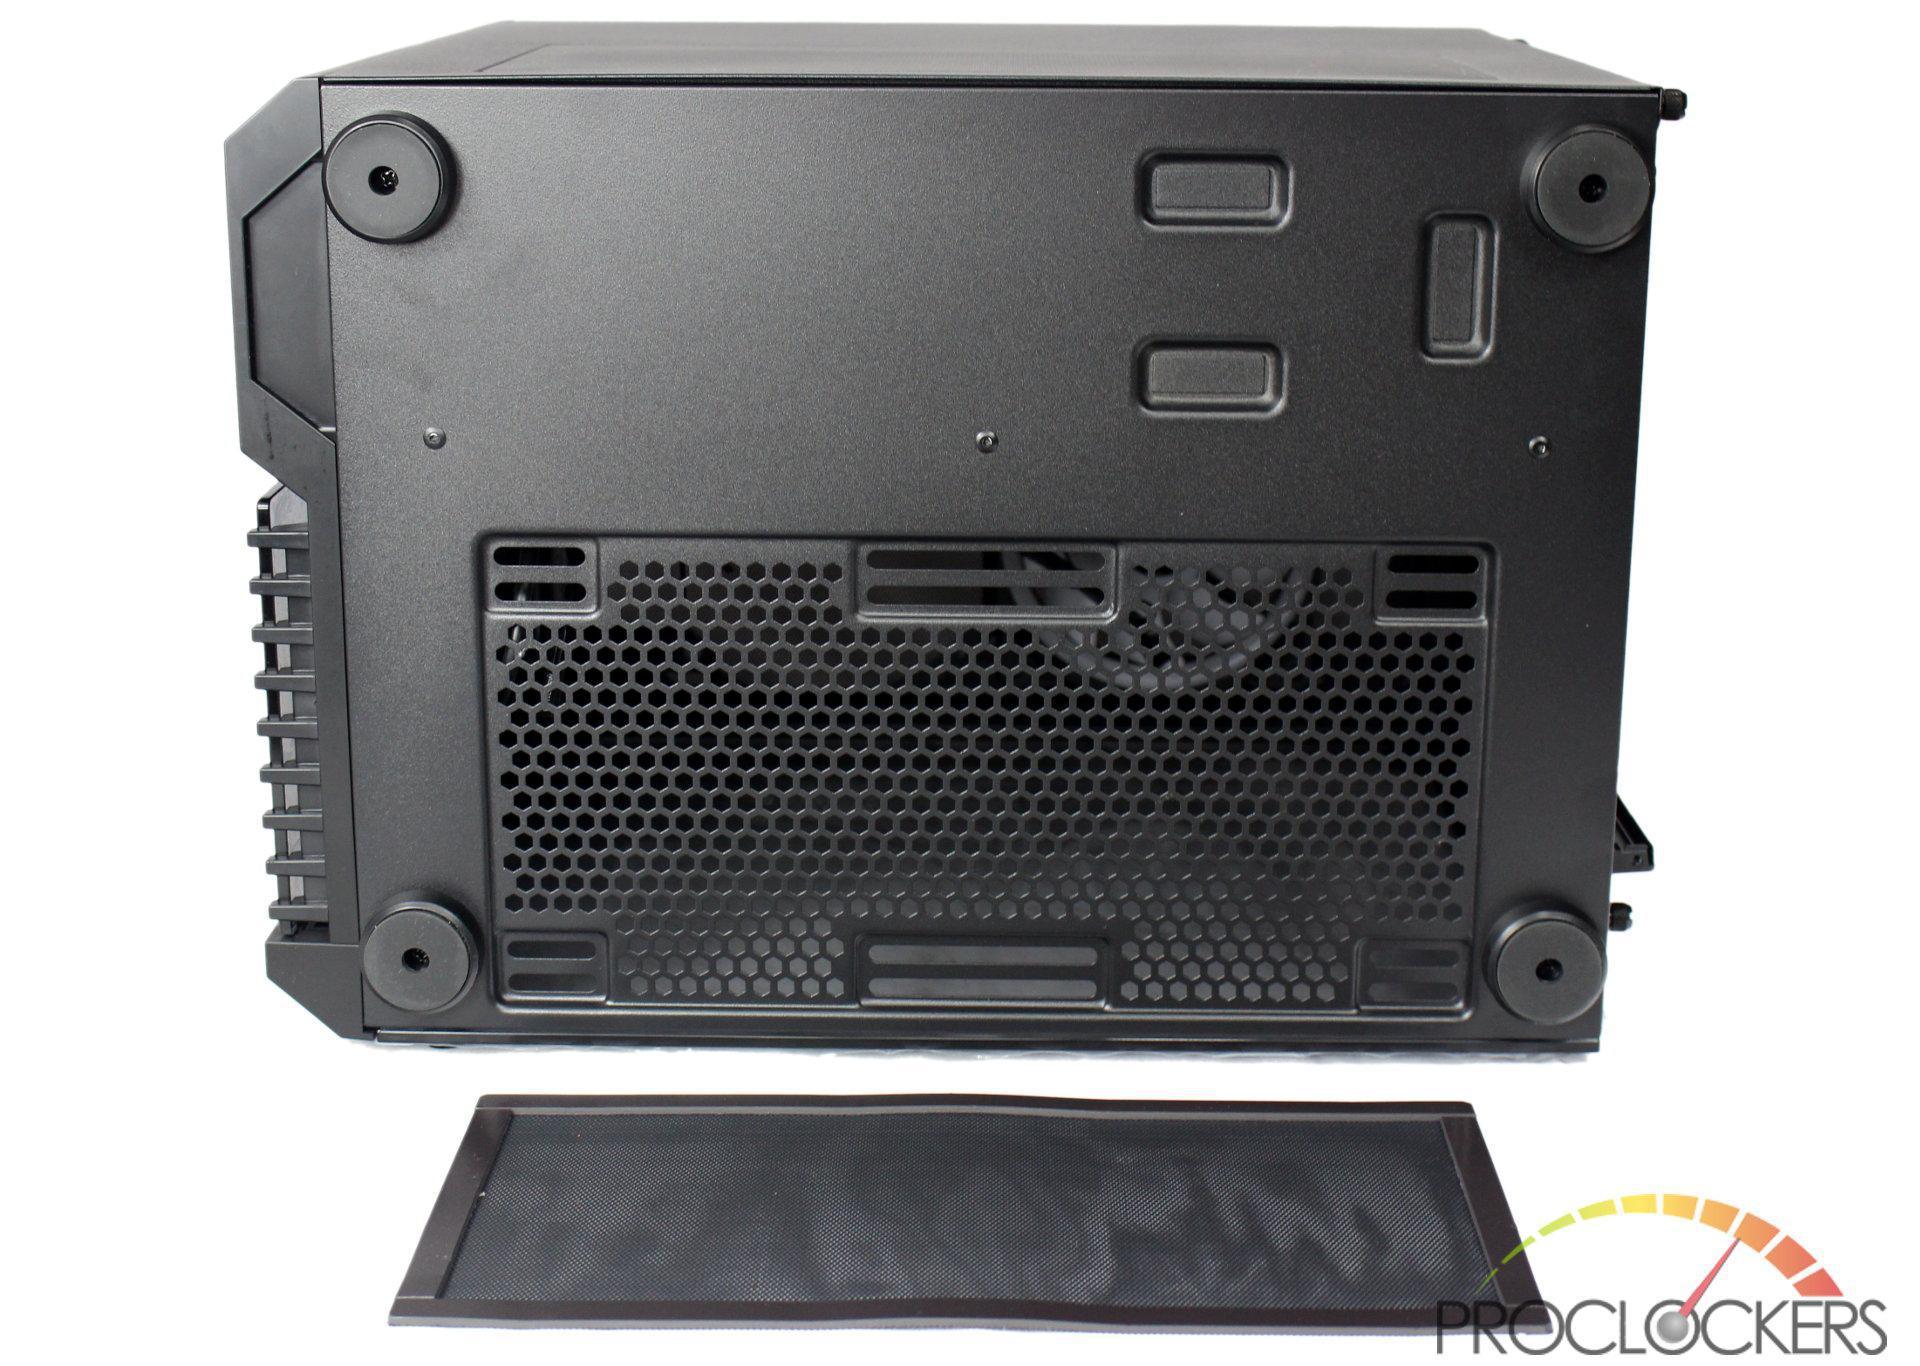
The lower area can handle twin 120 or 140mm fans if you don’t use all the space with graphics cards.
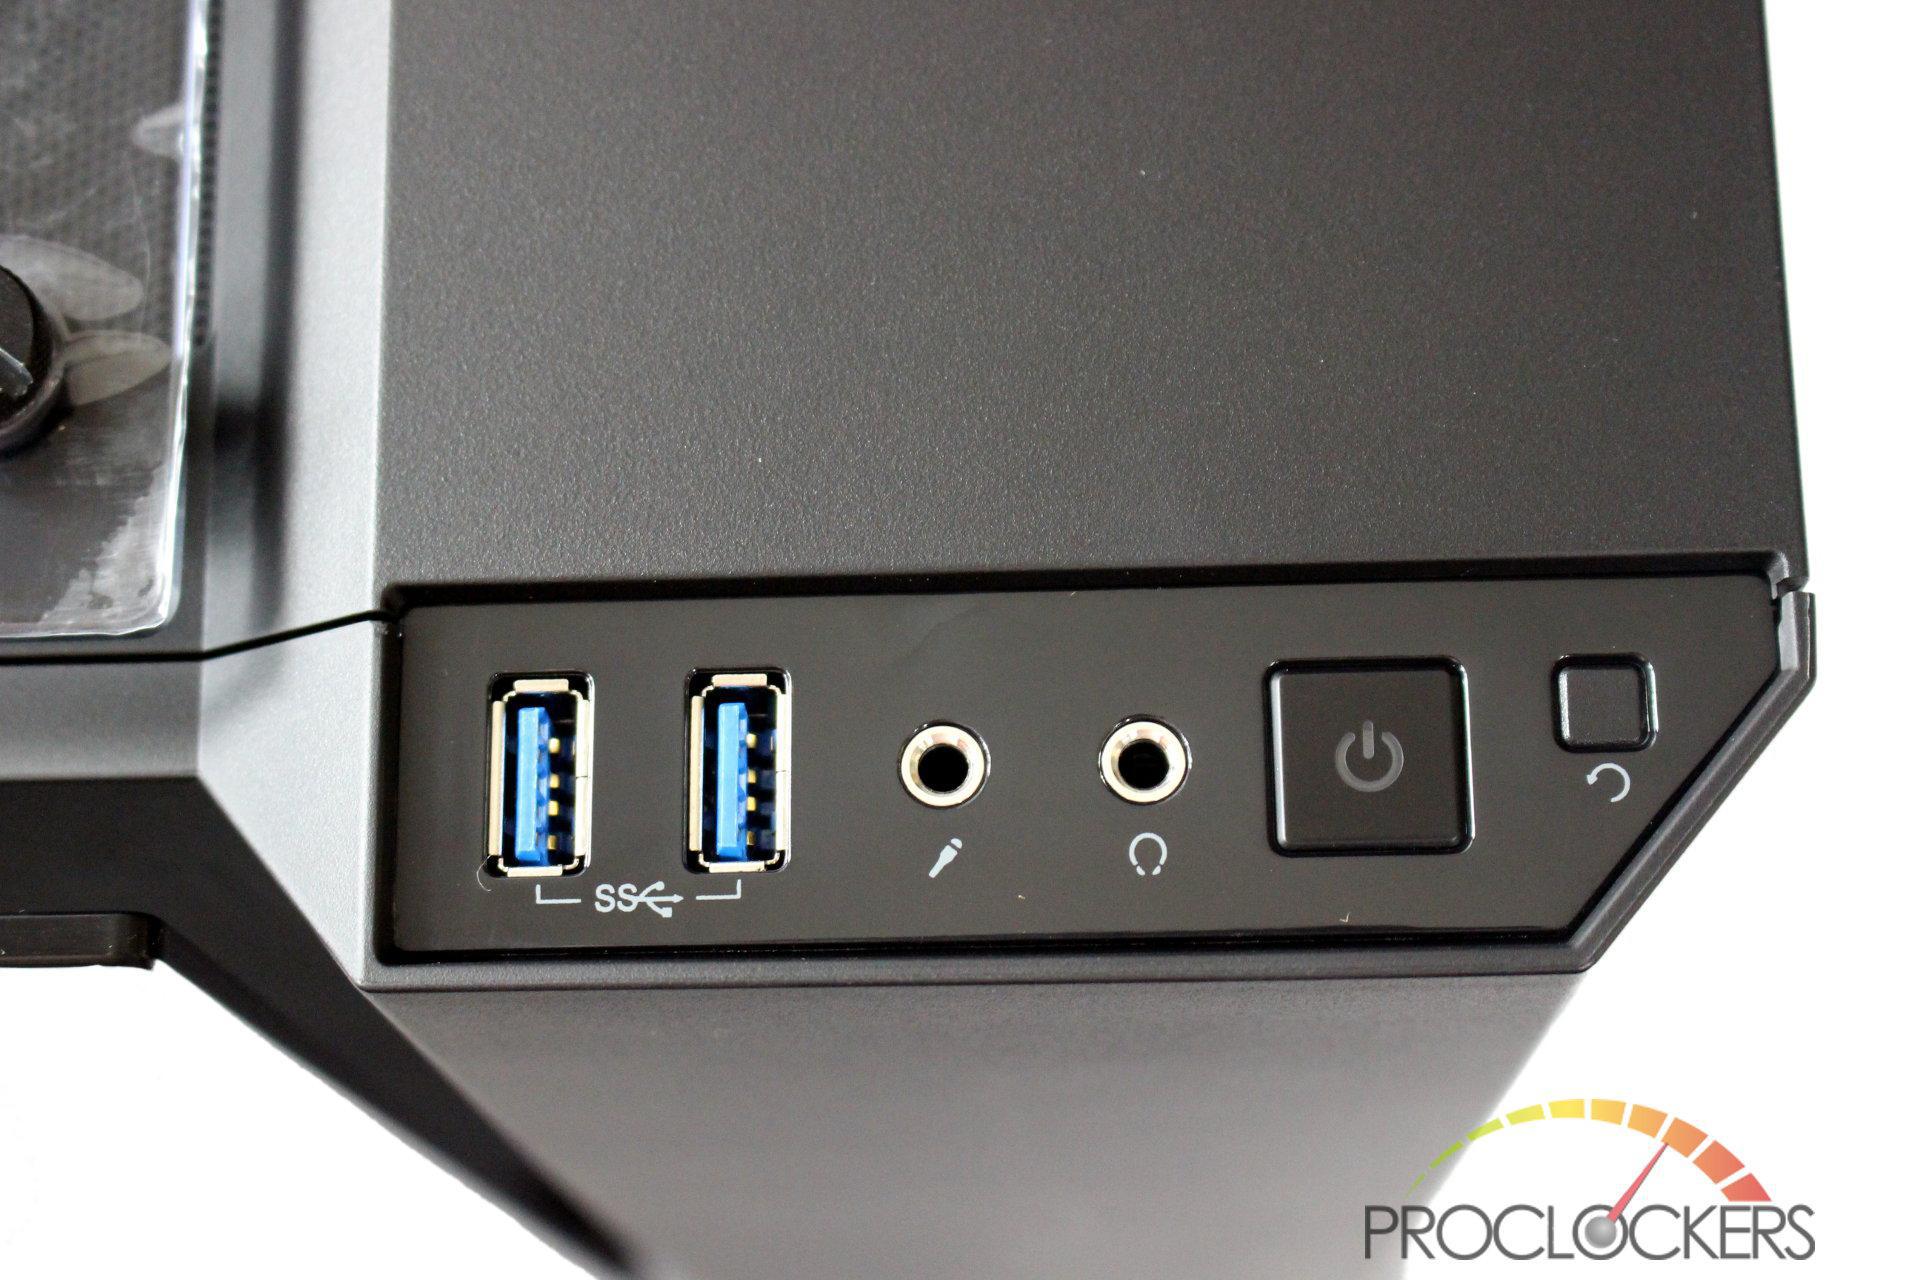
The front I/O and power and reset buttons sit along the very front edge and include headphone and microphone jacks and dual USB 3.0 ports.
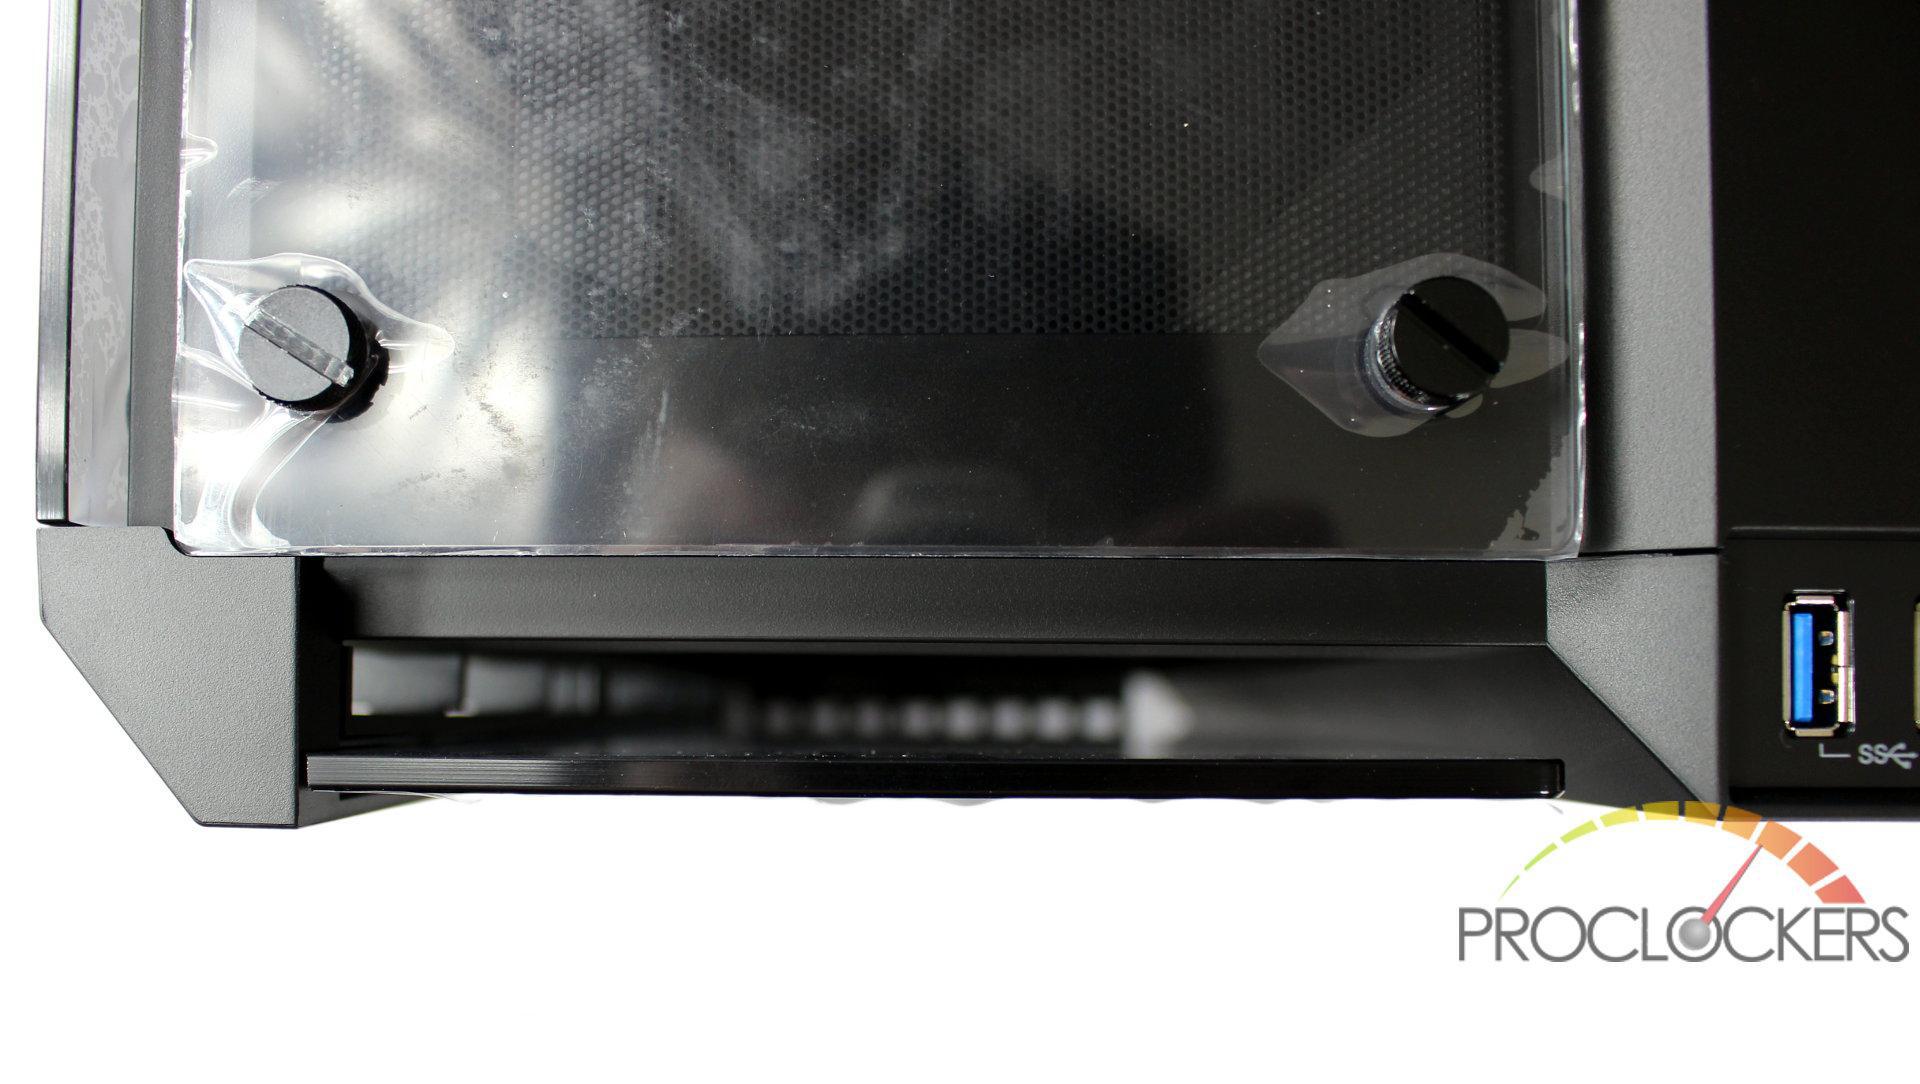
The front glass panel appears to float. All of the glass panels have smooth edges and corners.
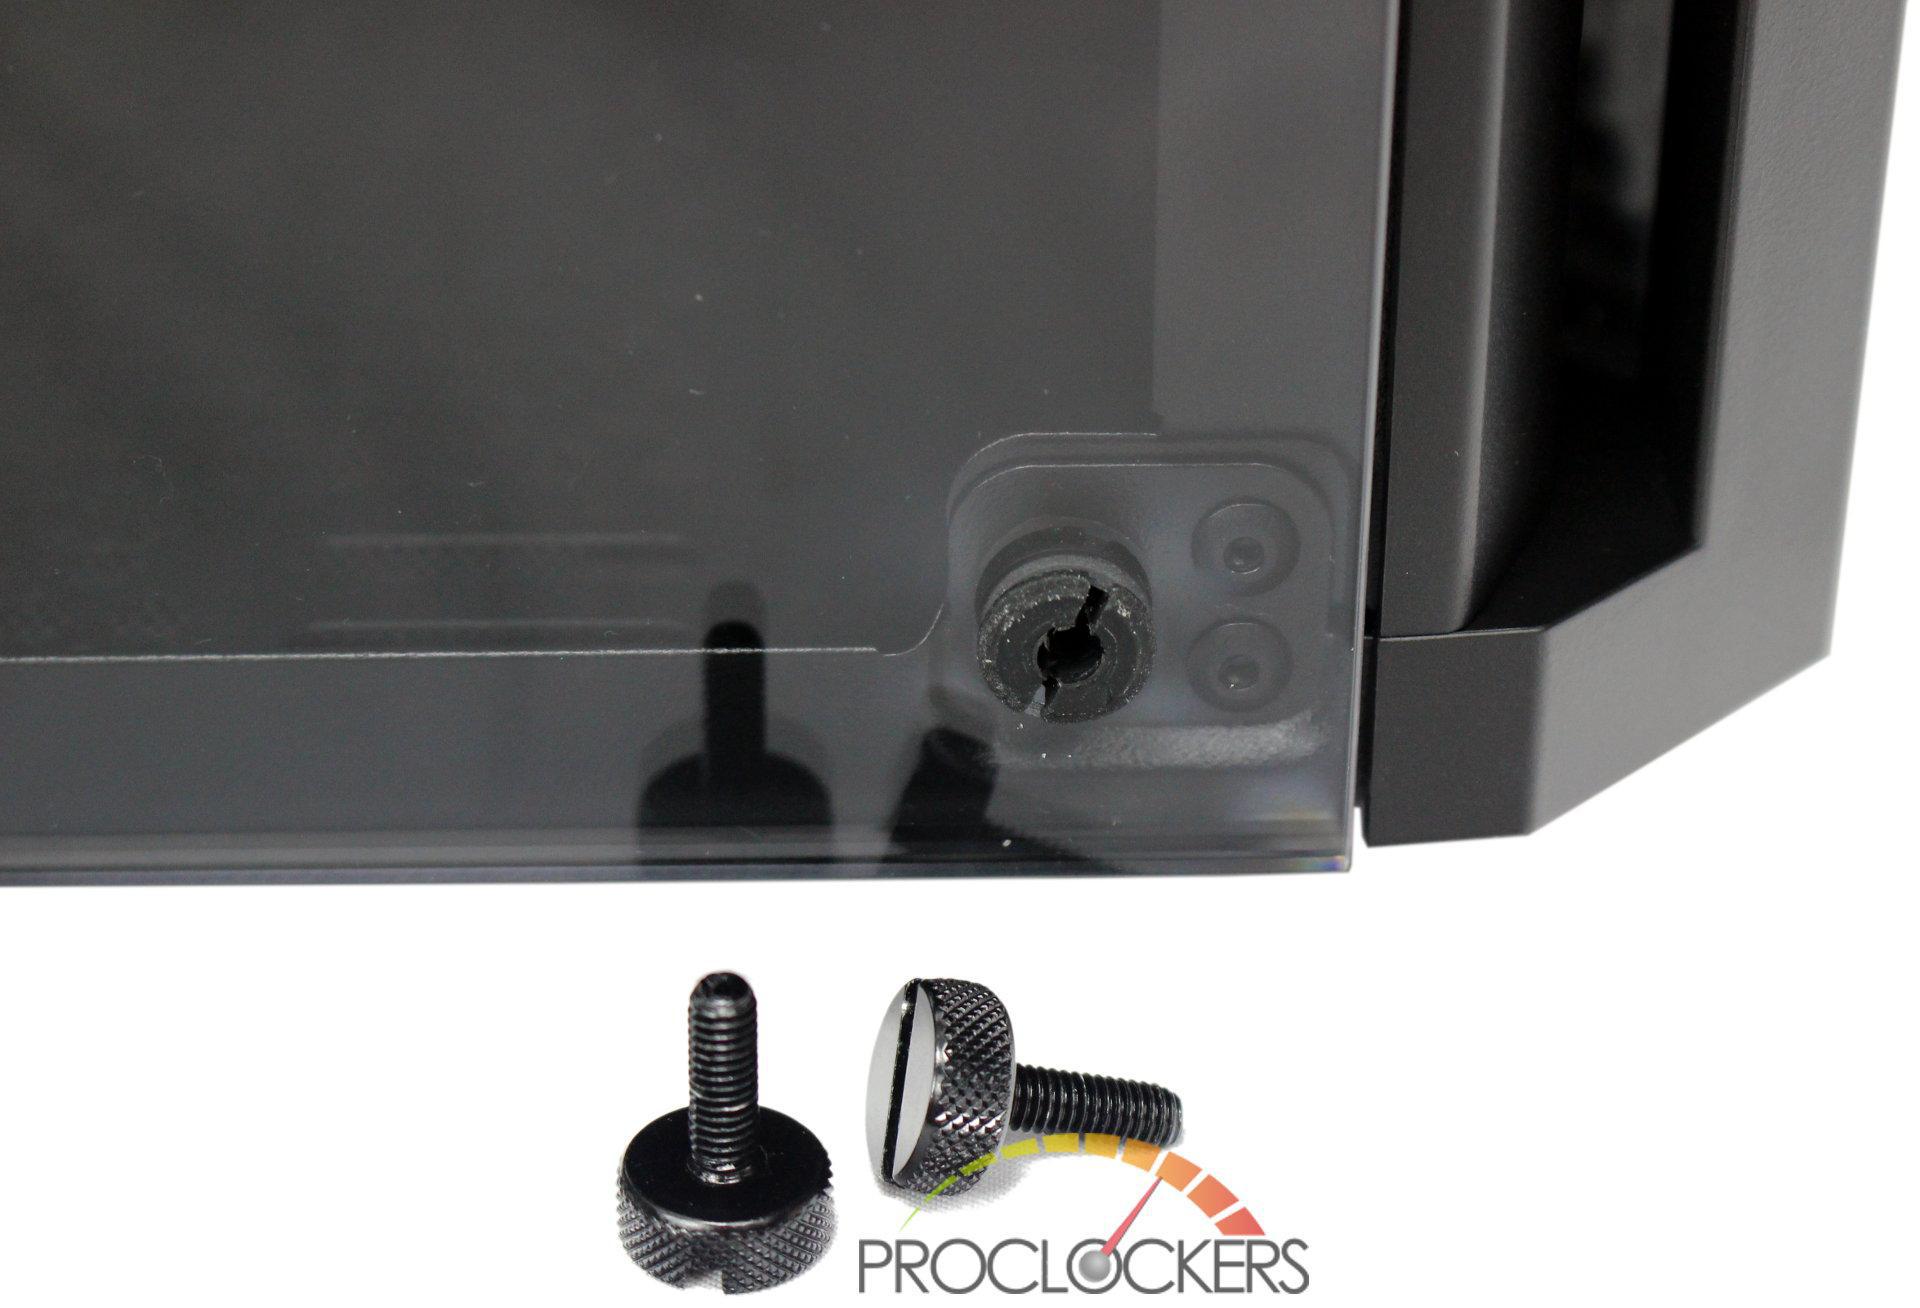
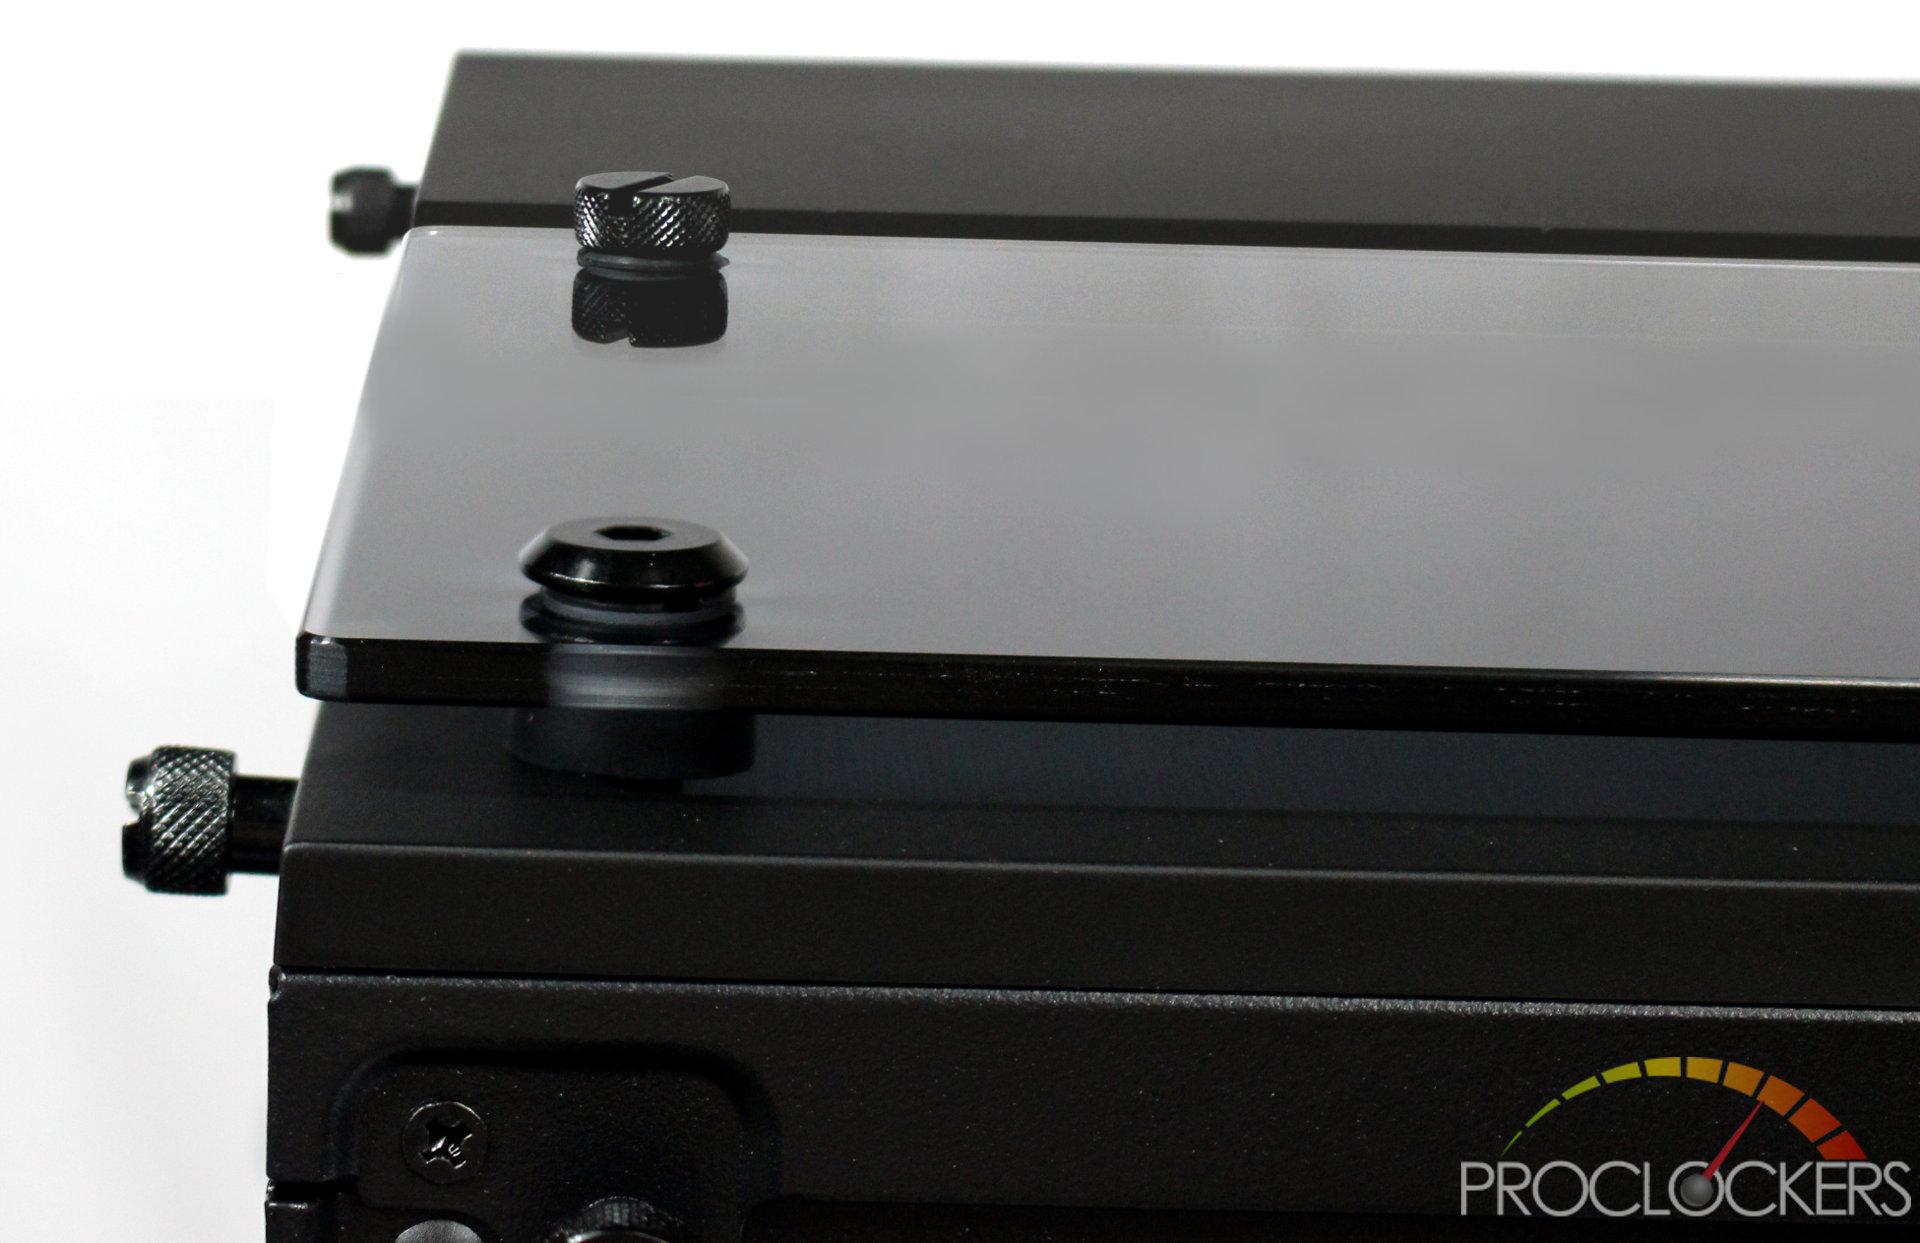
The side and top panels are held in place only by four thumb screws. The glass panel has rubber bushings inserted into the glass.
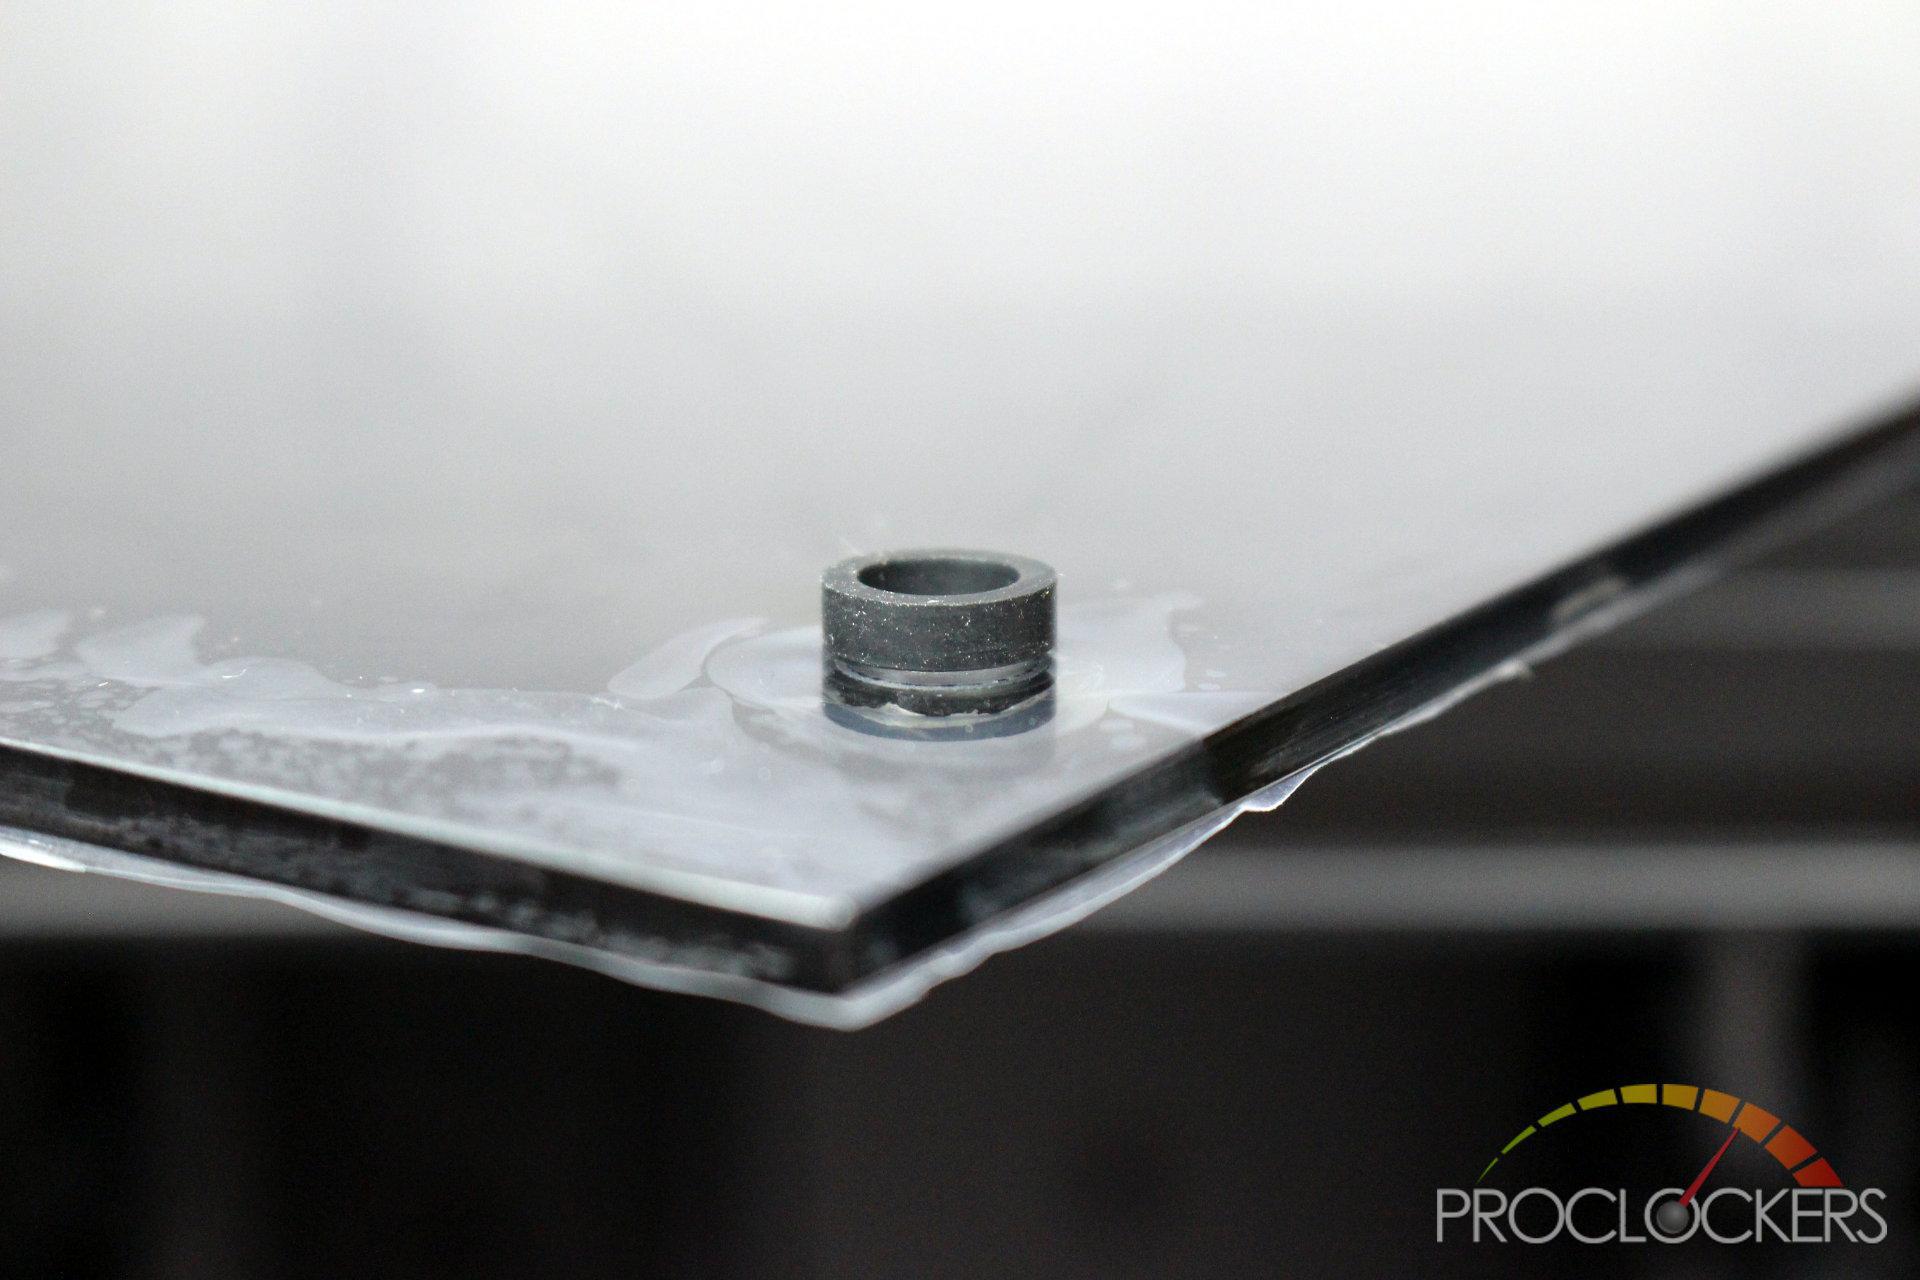
The top panel has taller rubber bushings to give it a little more breathing room.
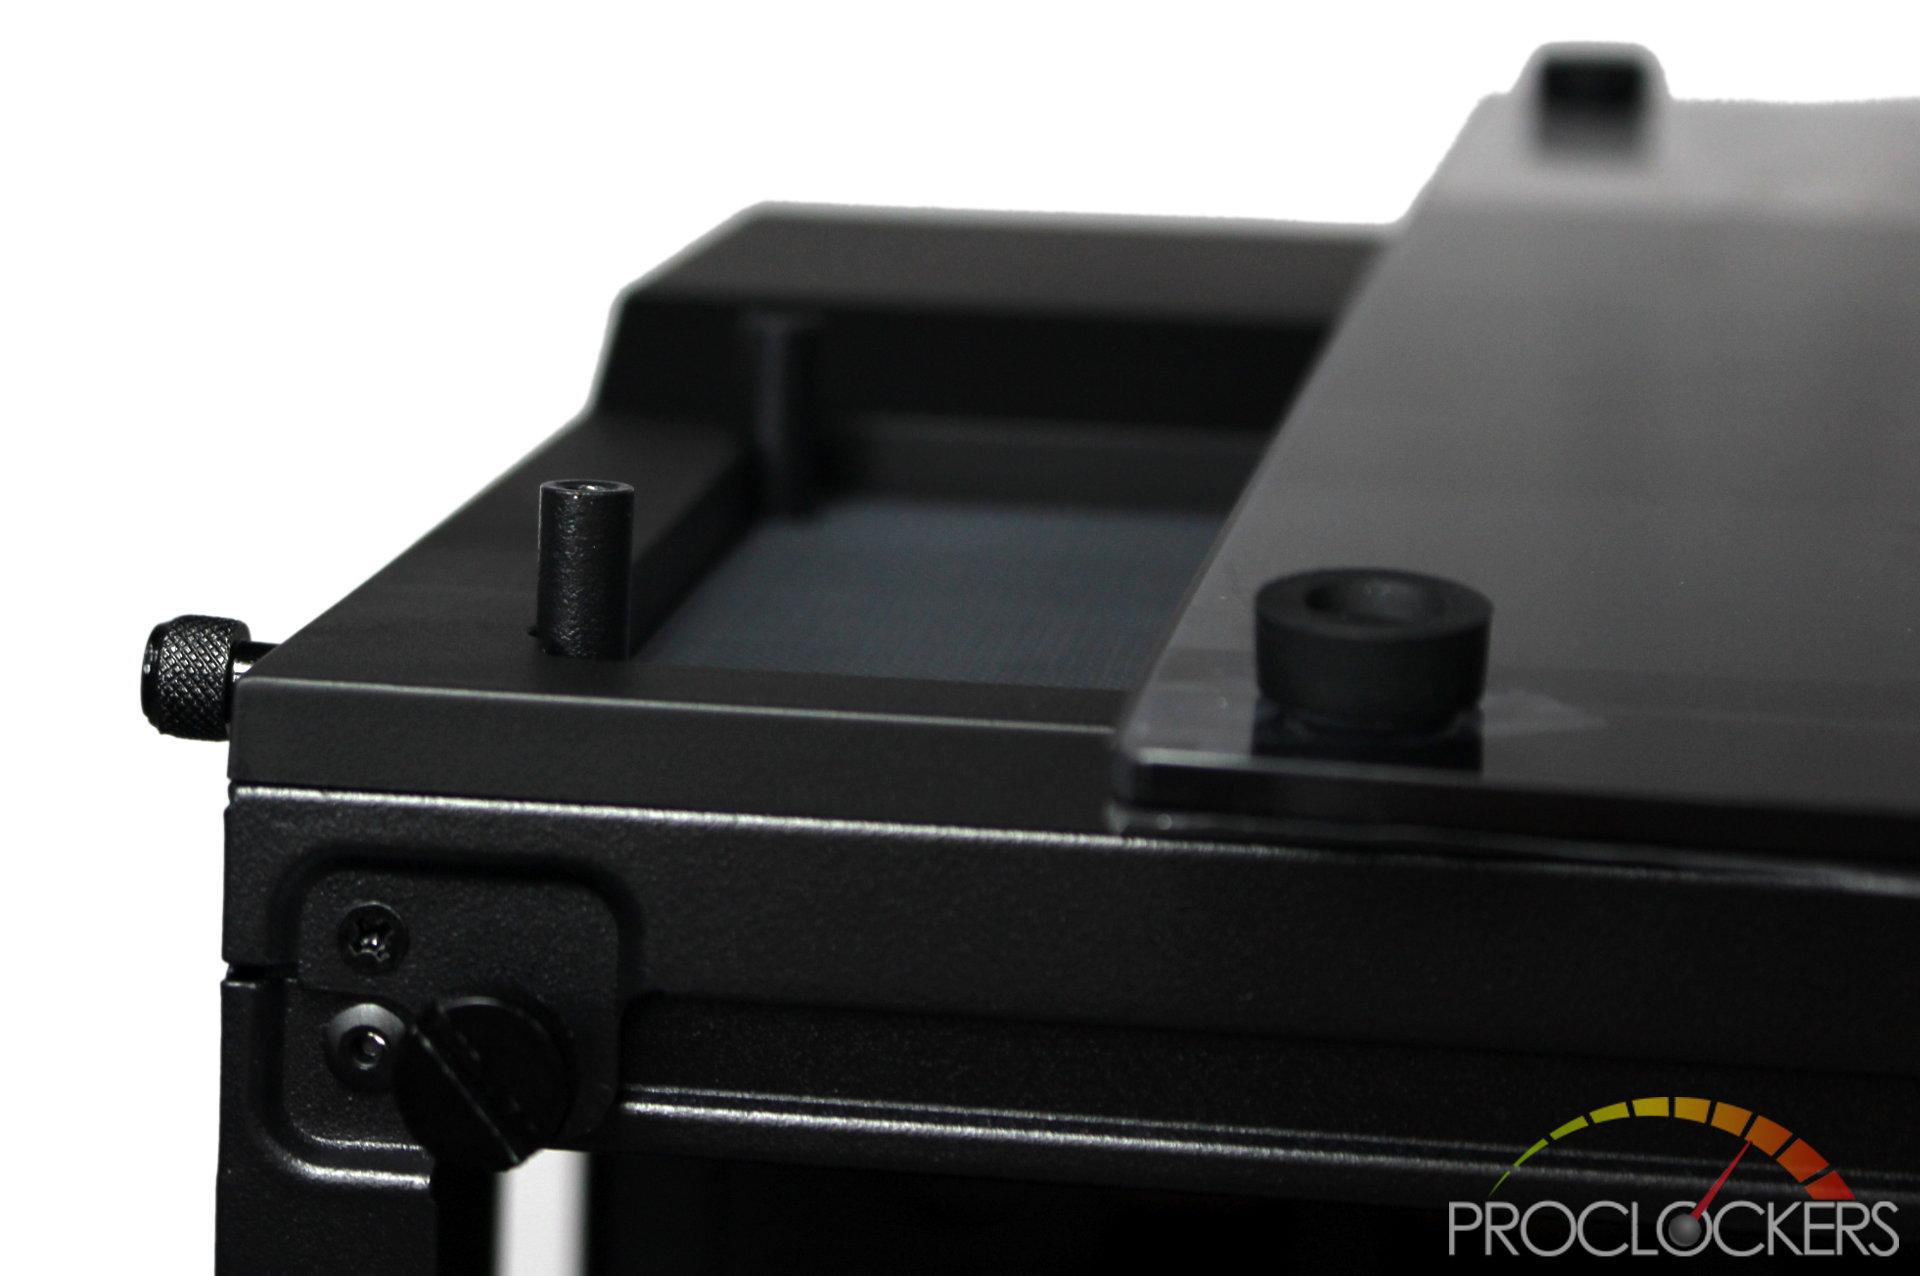
The side panel just screws to the case but the top panel sits over something resembling a stand-off.
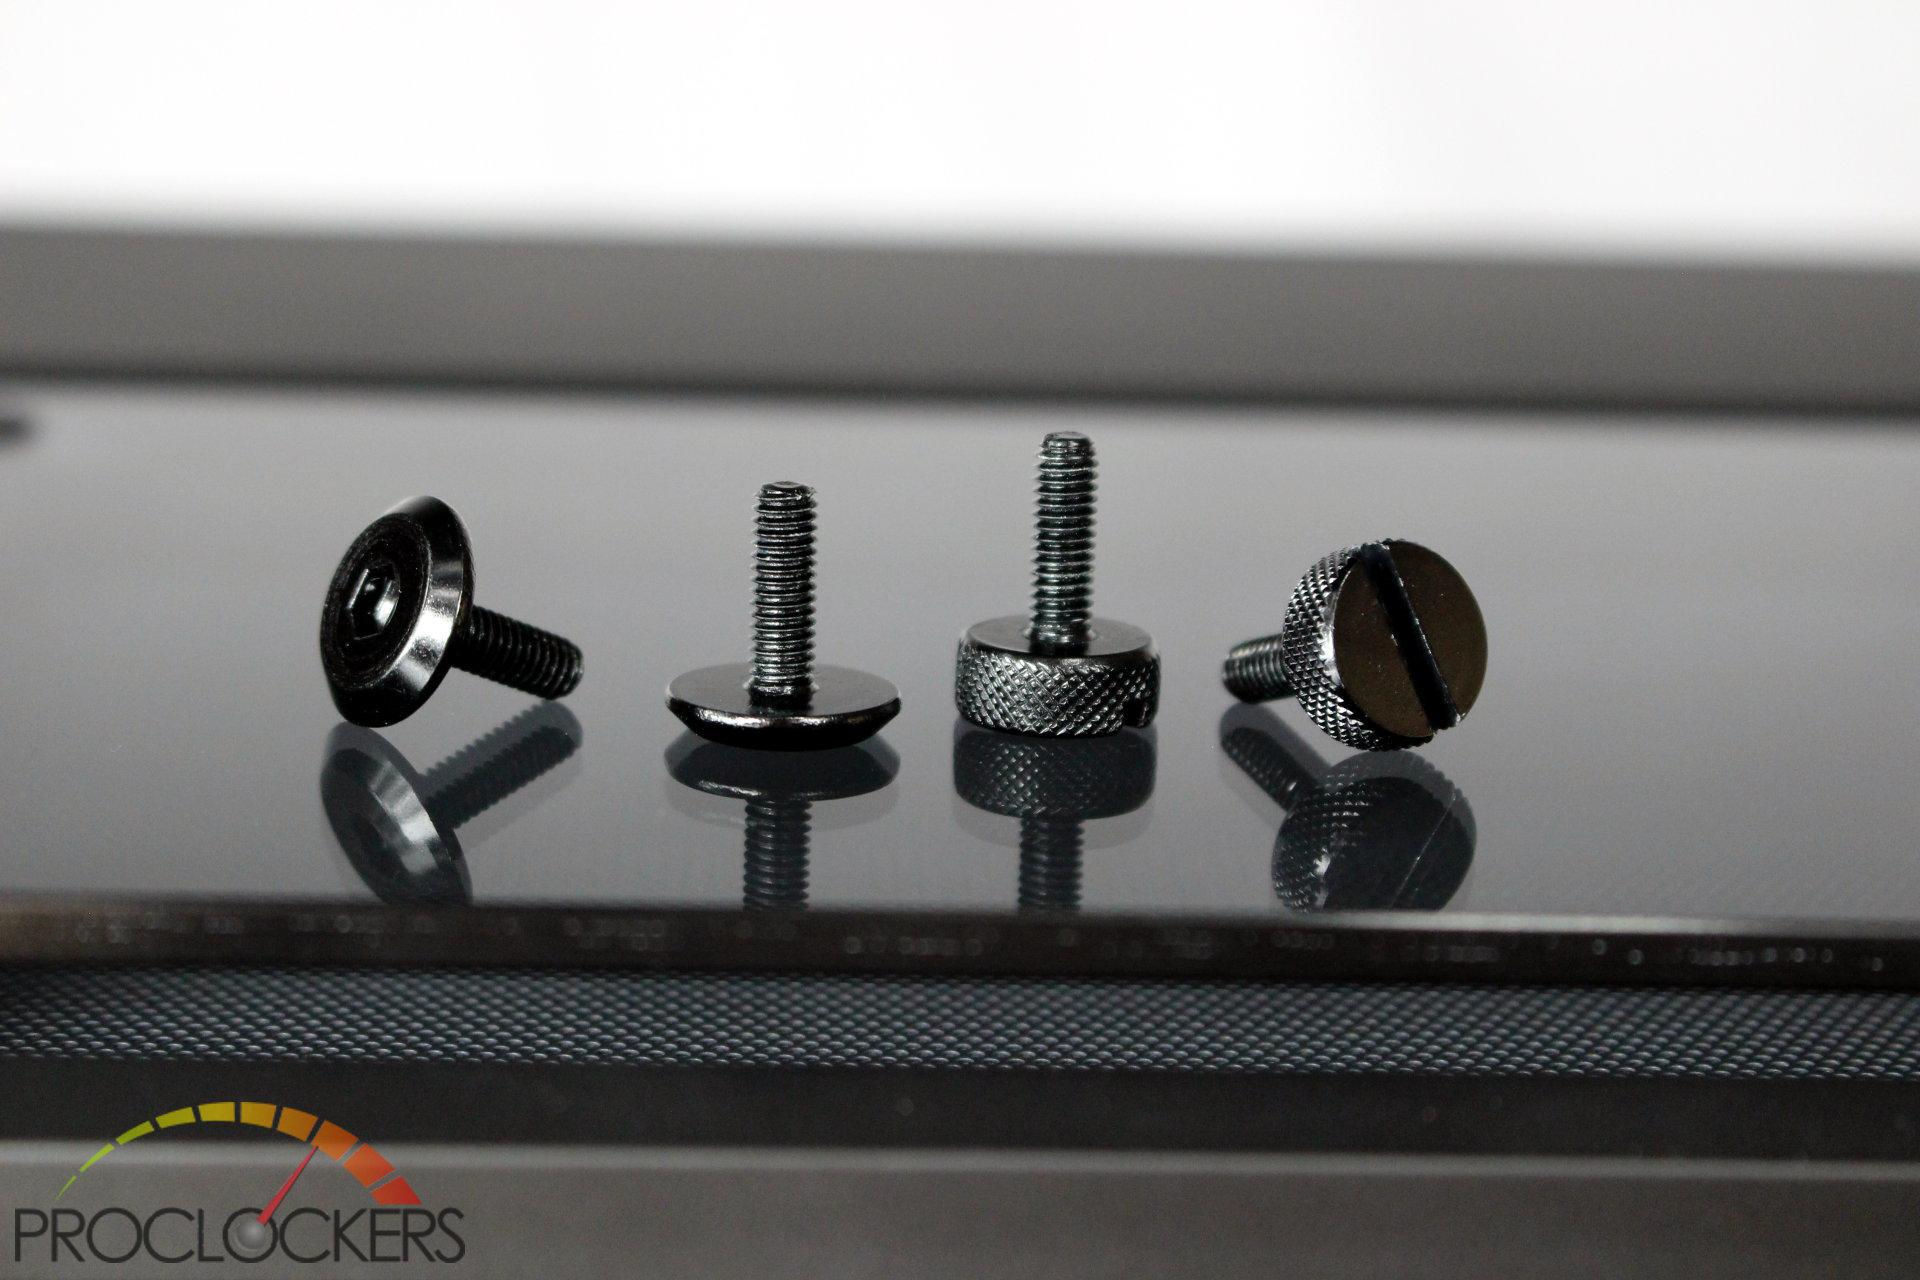
Corsair includes a bag of lower profile screws with an Allen head if you want something a little more clean than the larger thumb screws for the side and top panels.
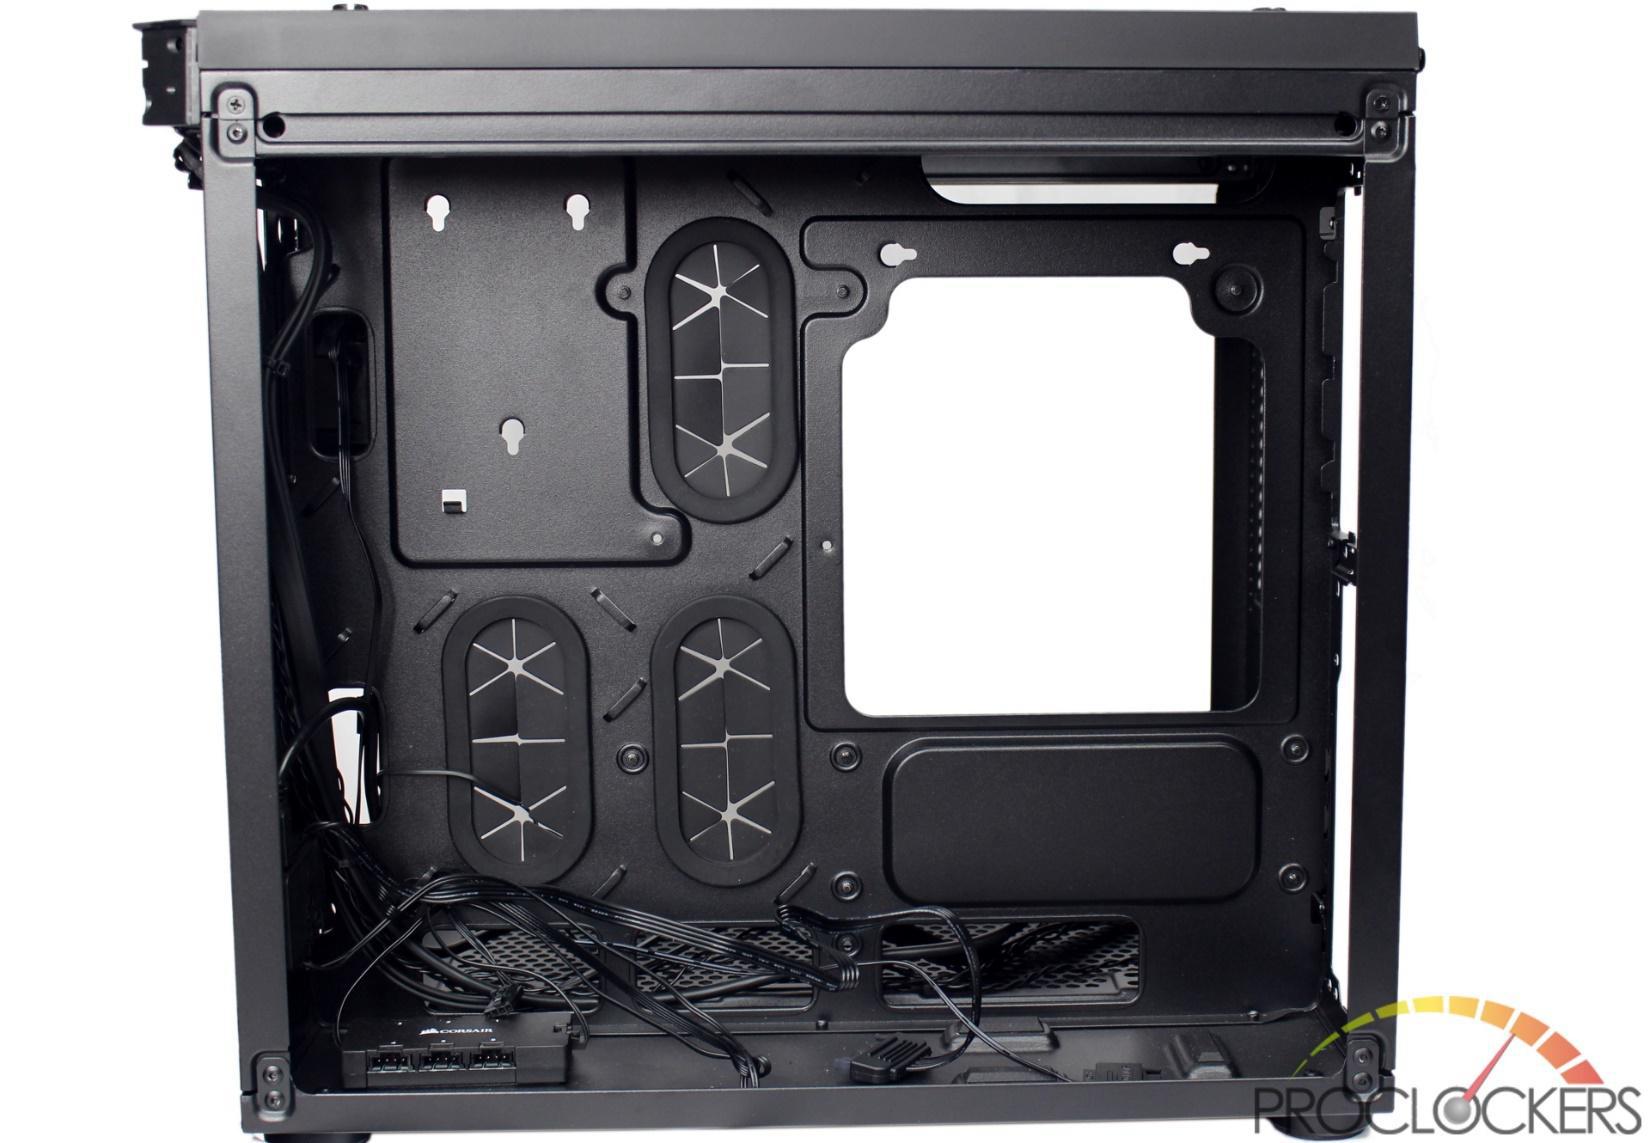
A Closer Look: Interior
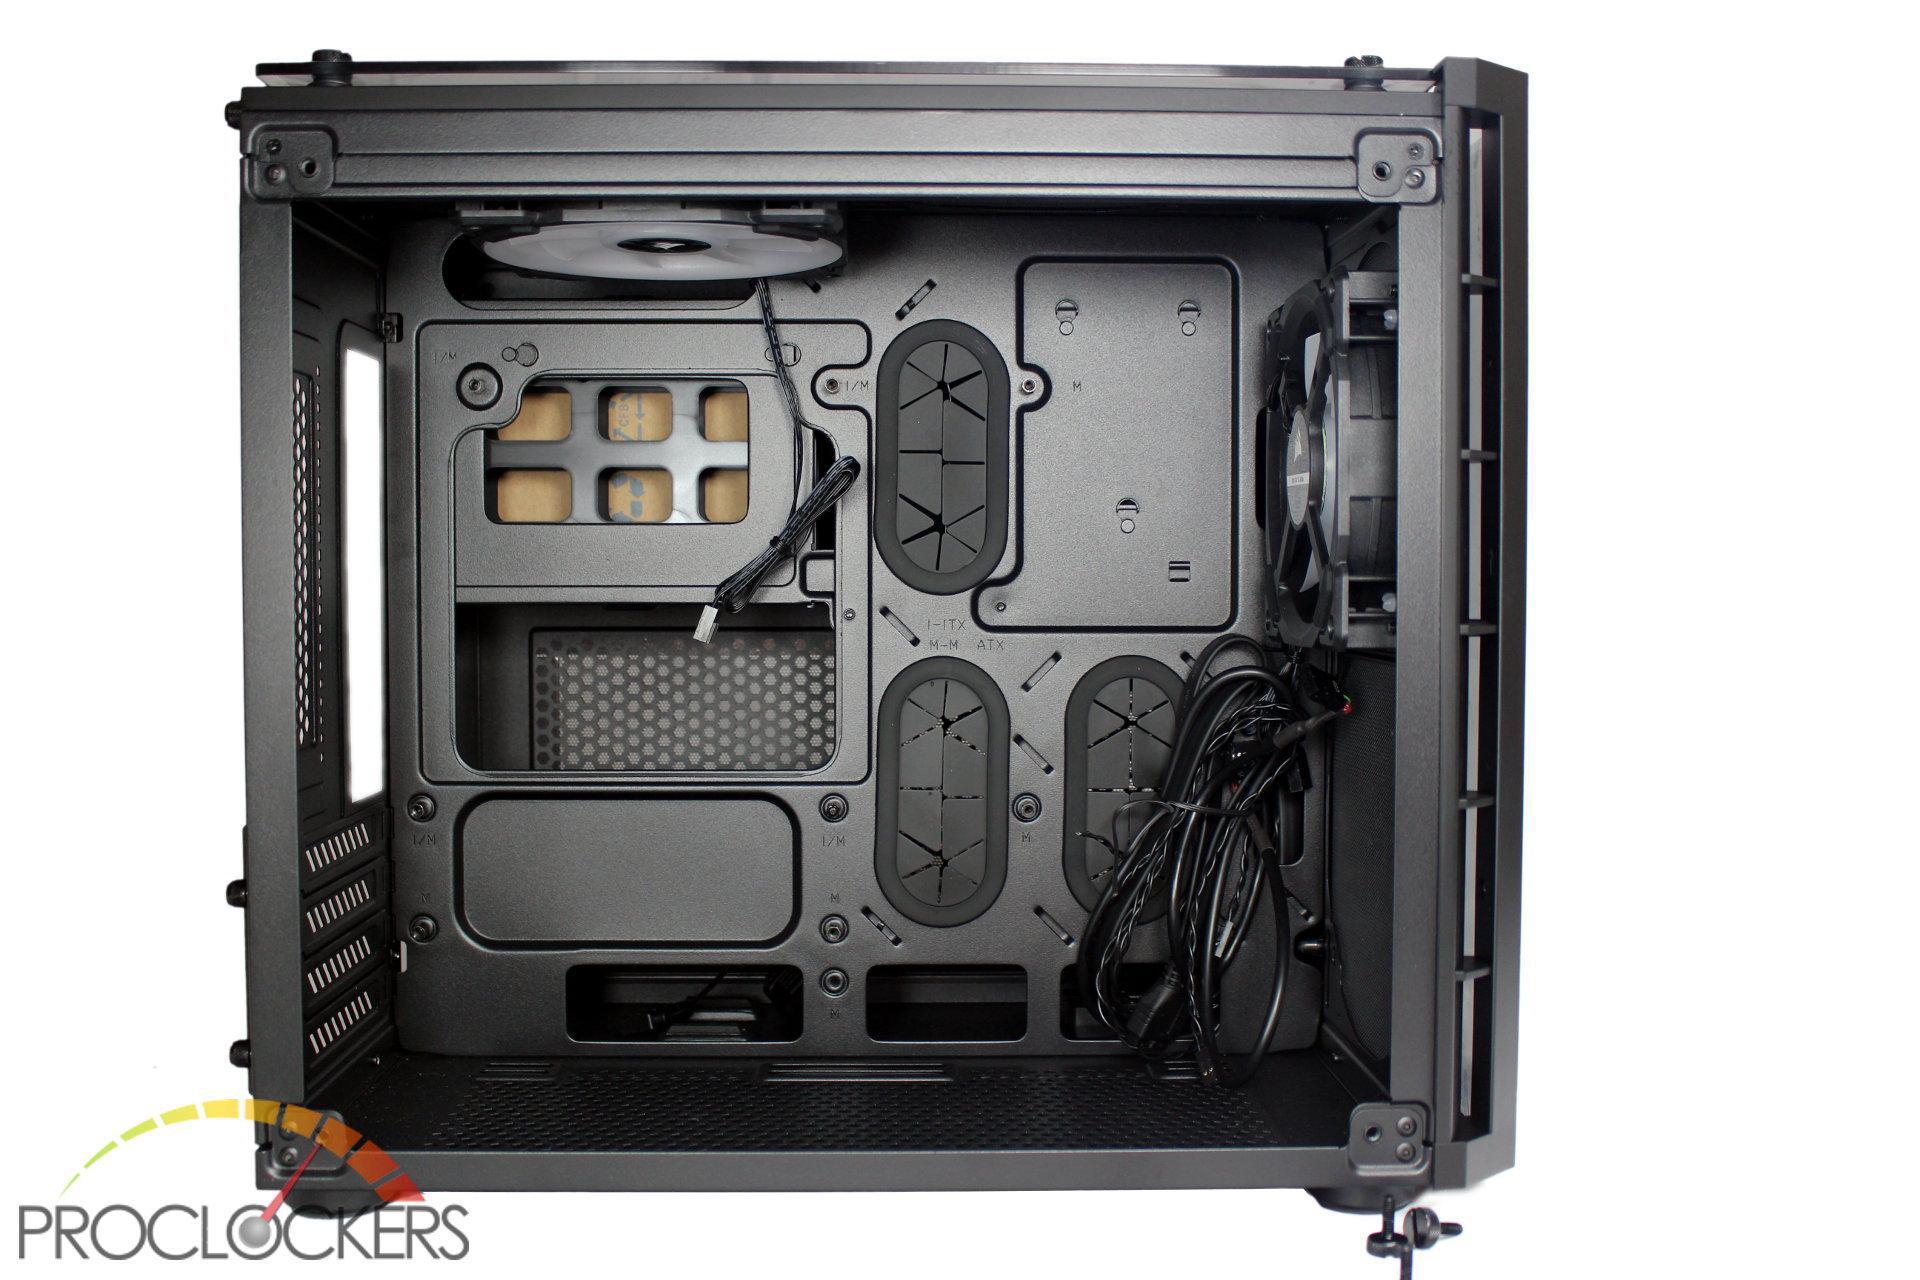
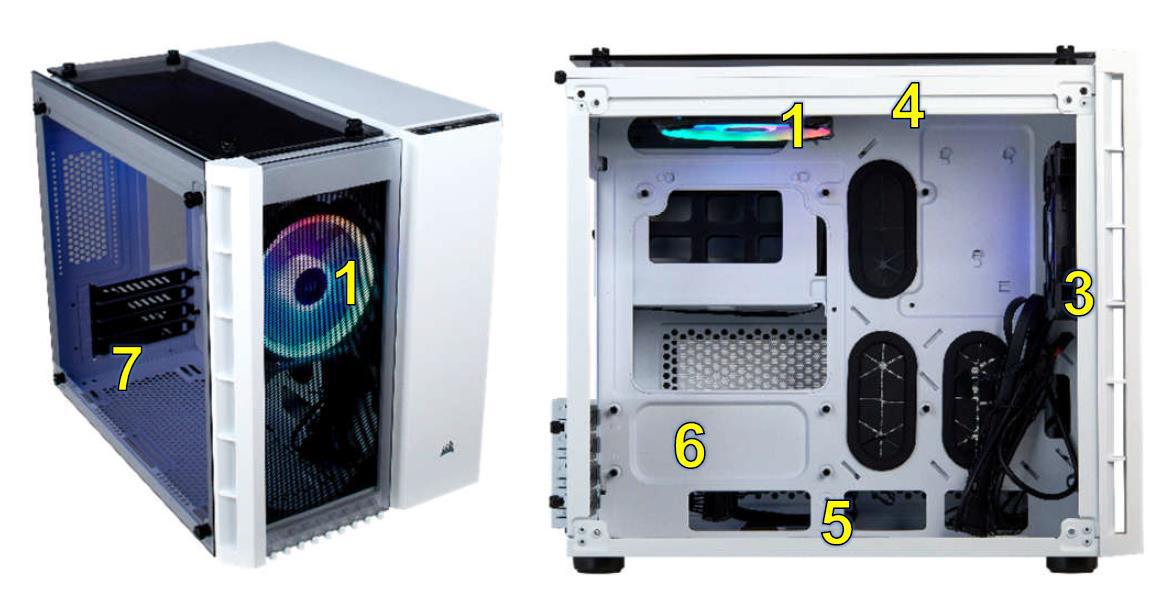
The main chamber of the Crystal Series 280X RGB is pretty open. You get a standard Micro-ATX layout with four rear slots and plenty of room in front of the board for longer graphics cards or radiators. Speaking of radiators, you can install 120mm to 280mm rads in any of the 3 locations, top, front or bottom.
The front of the case pops off by pulling firmly to access the front dust filter.

The 280X RGB version comes with two Corsair ‘Light Loop’ LL120 fans, one preinstalled in the top and one in the front.
Under the top glass plate is a magnetic dust filter.
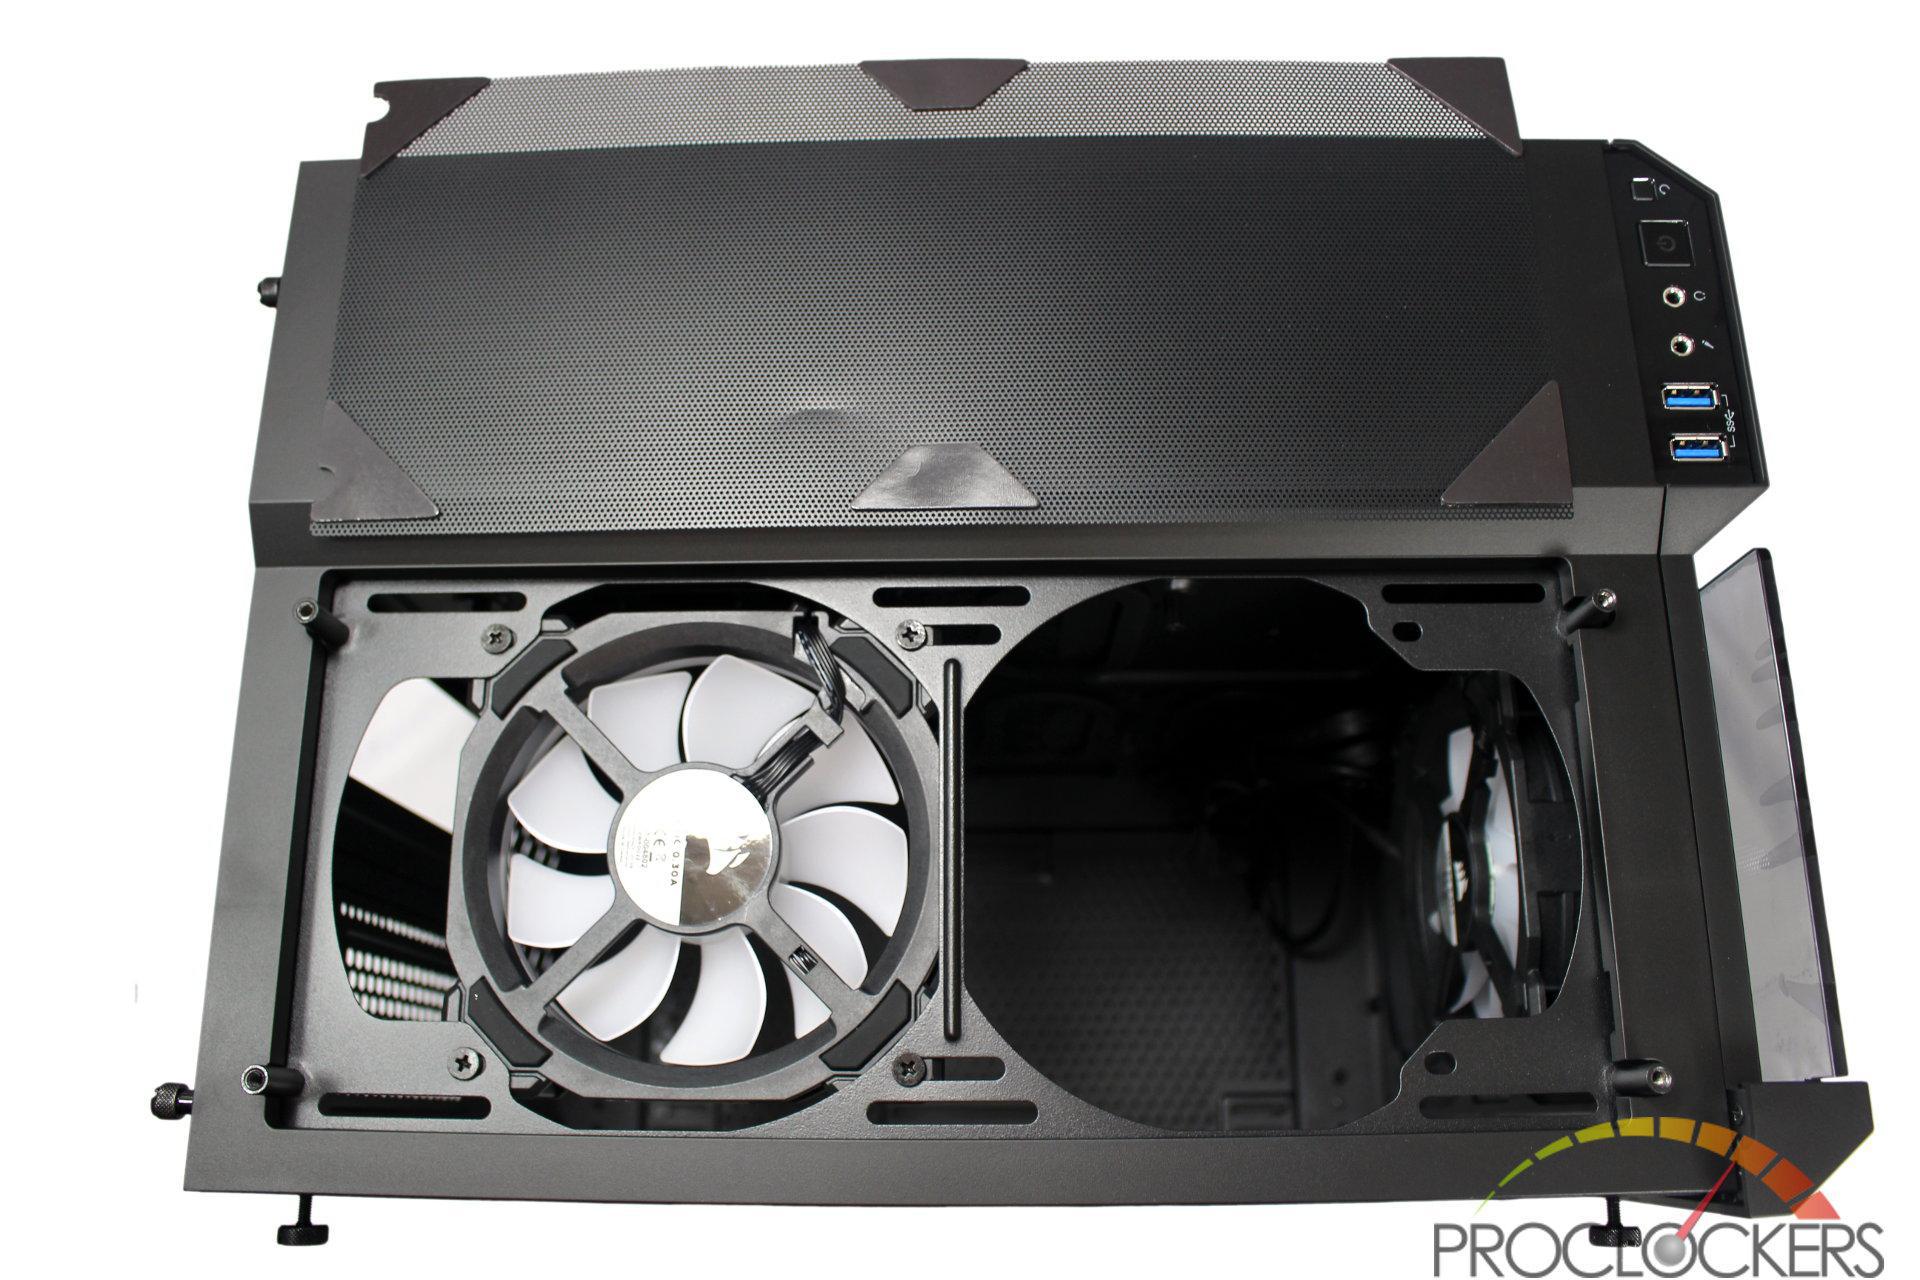
Under the filter is one of the LL120 fans, pre-wired to the included controller.
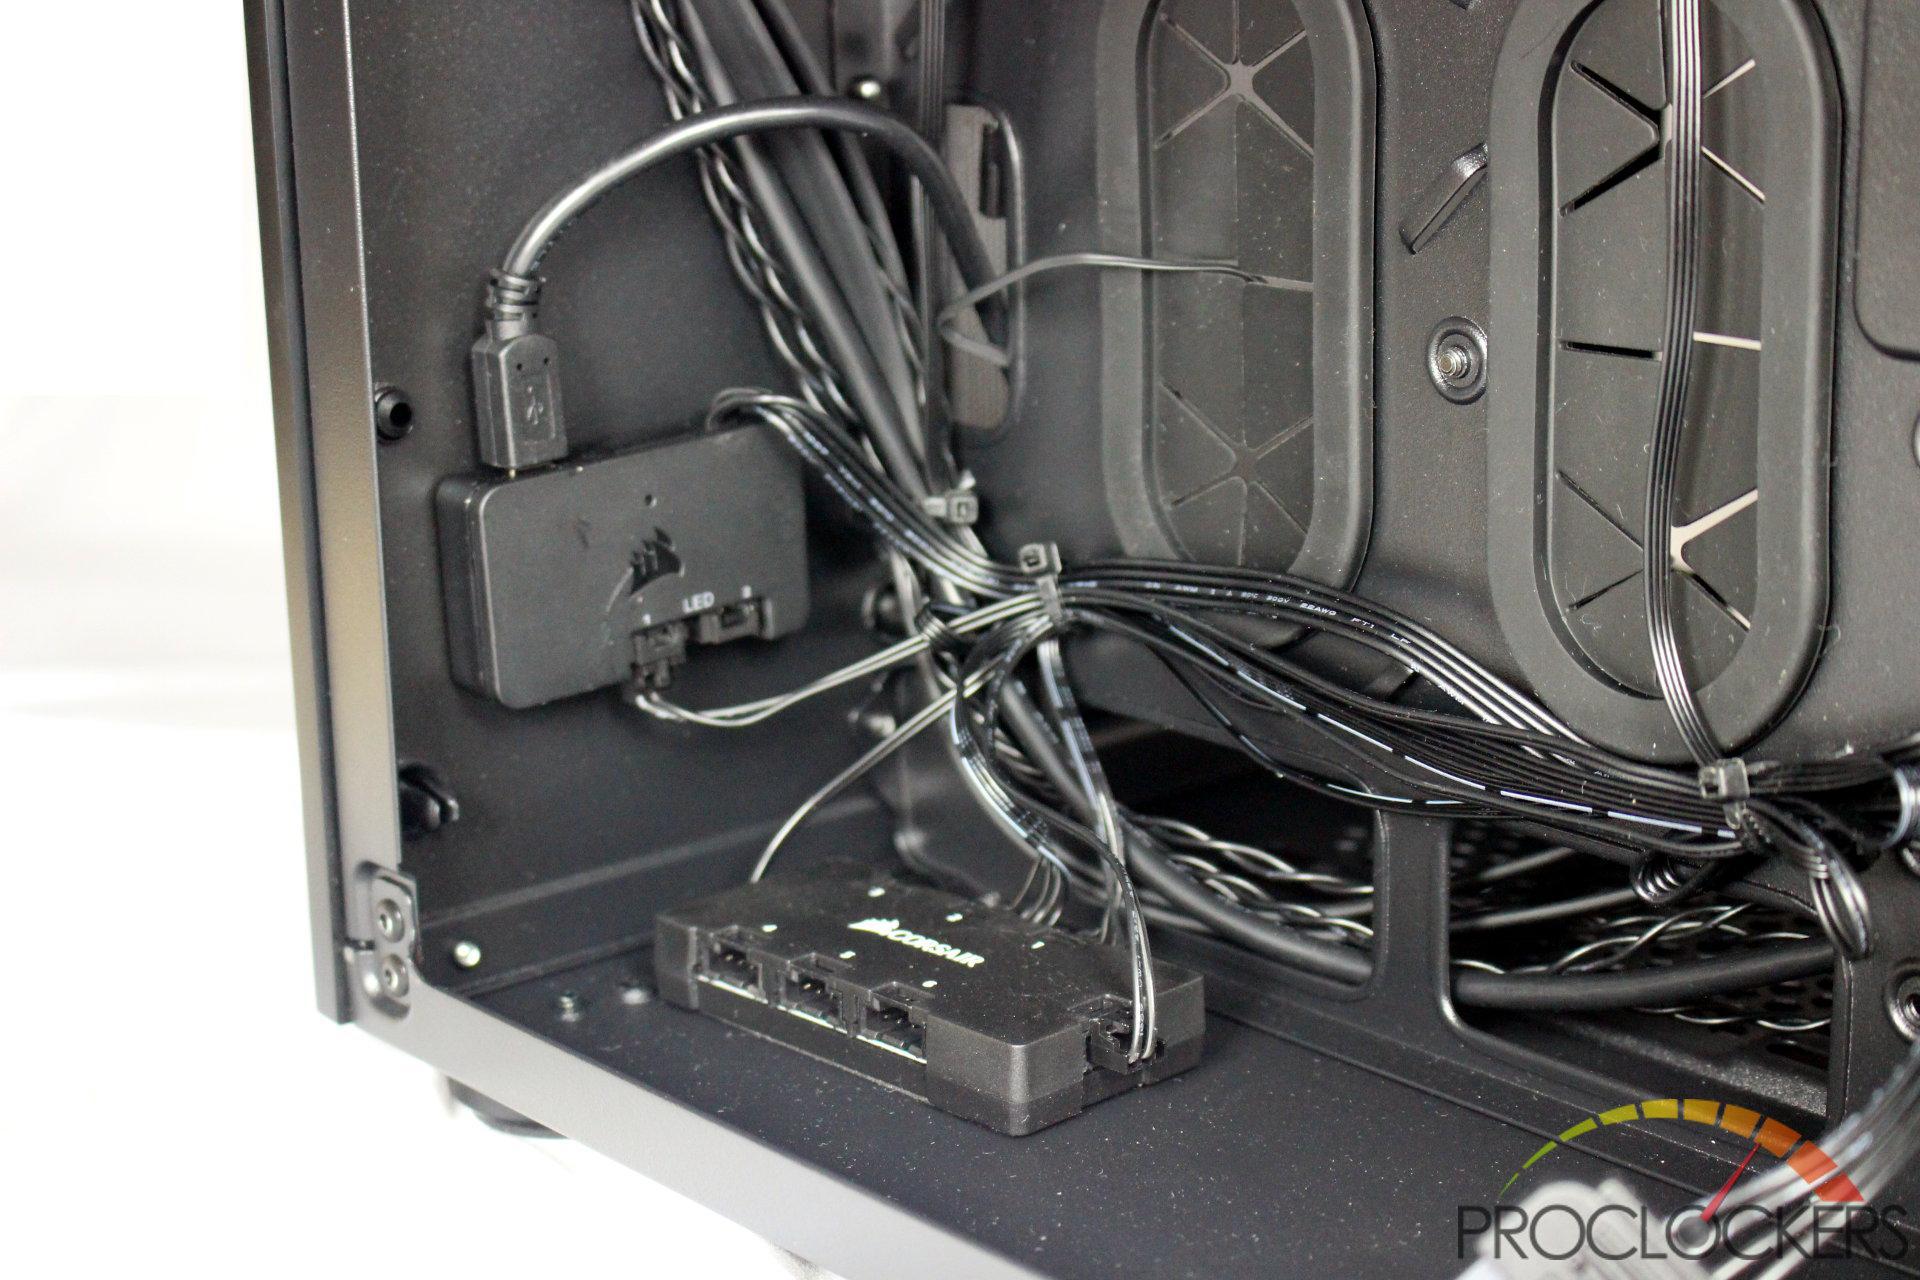
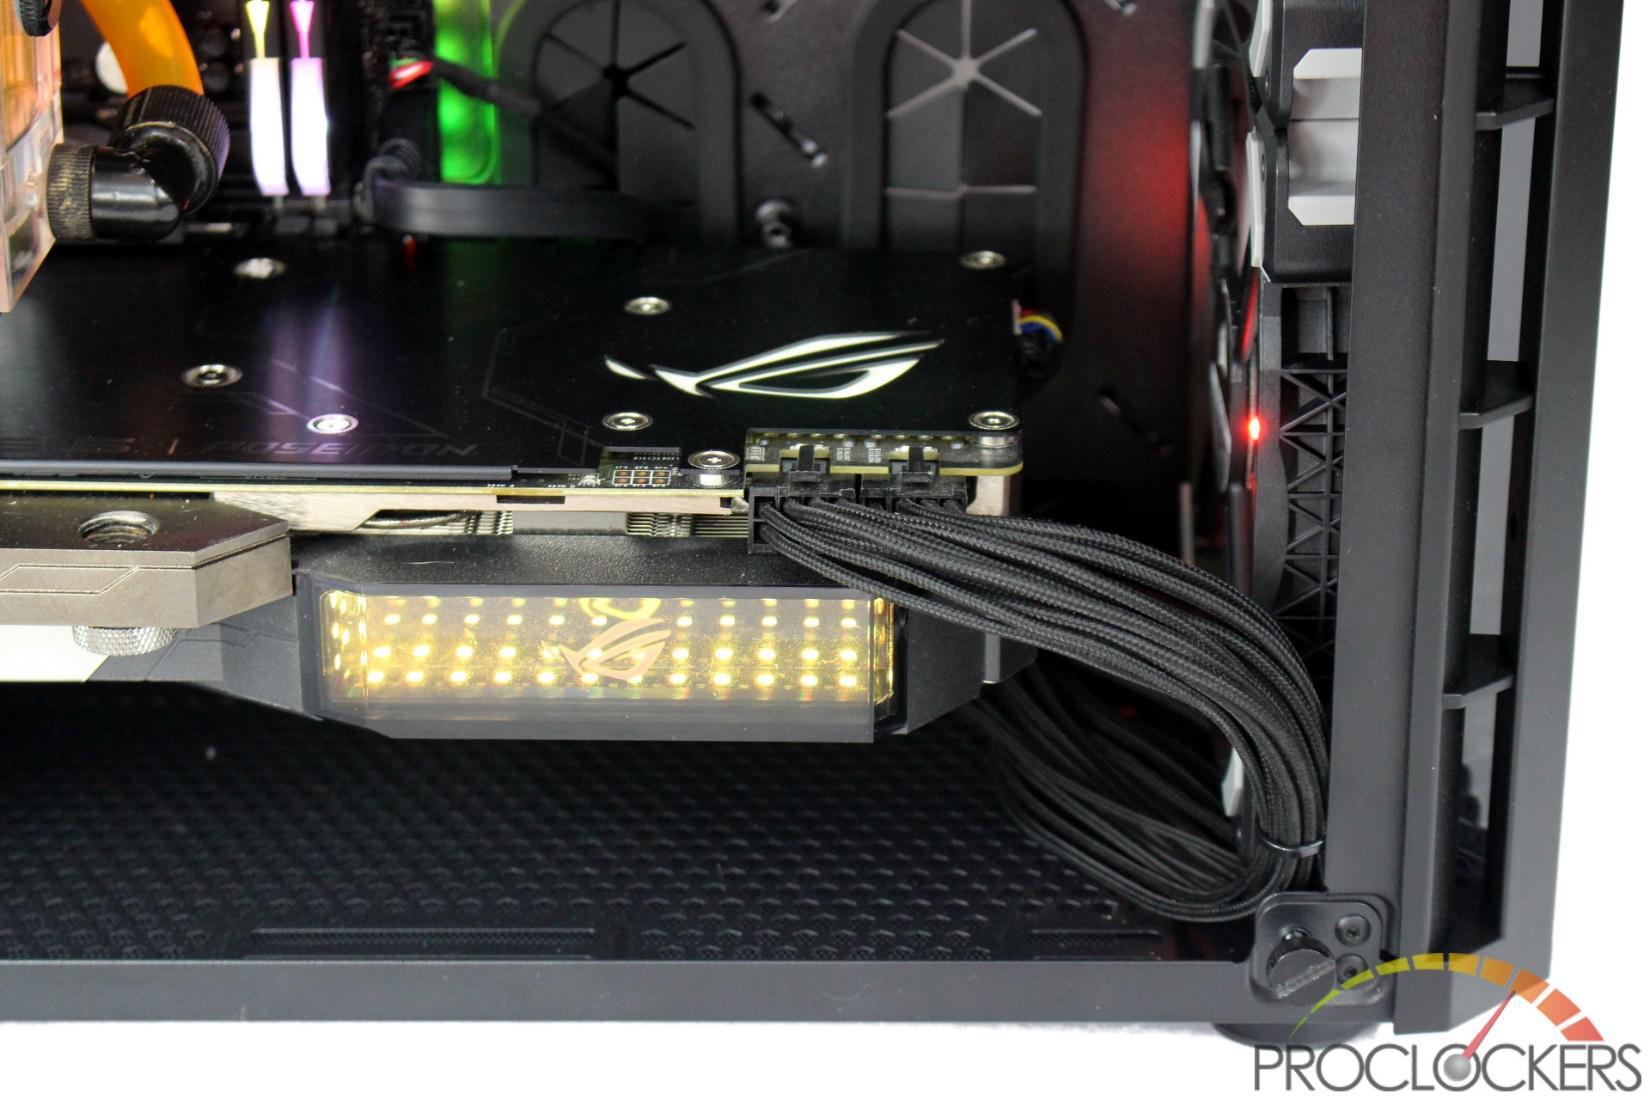
Speaking of the controller, in the rear of the case hides the Corsair Lighting Node Pro and an RGB fan lighting hub. Both fans are pre-wired to this and cable managed.
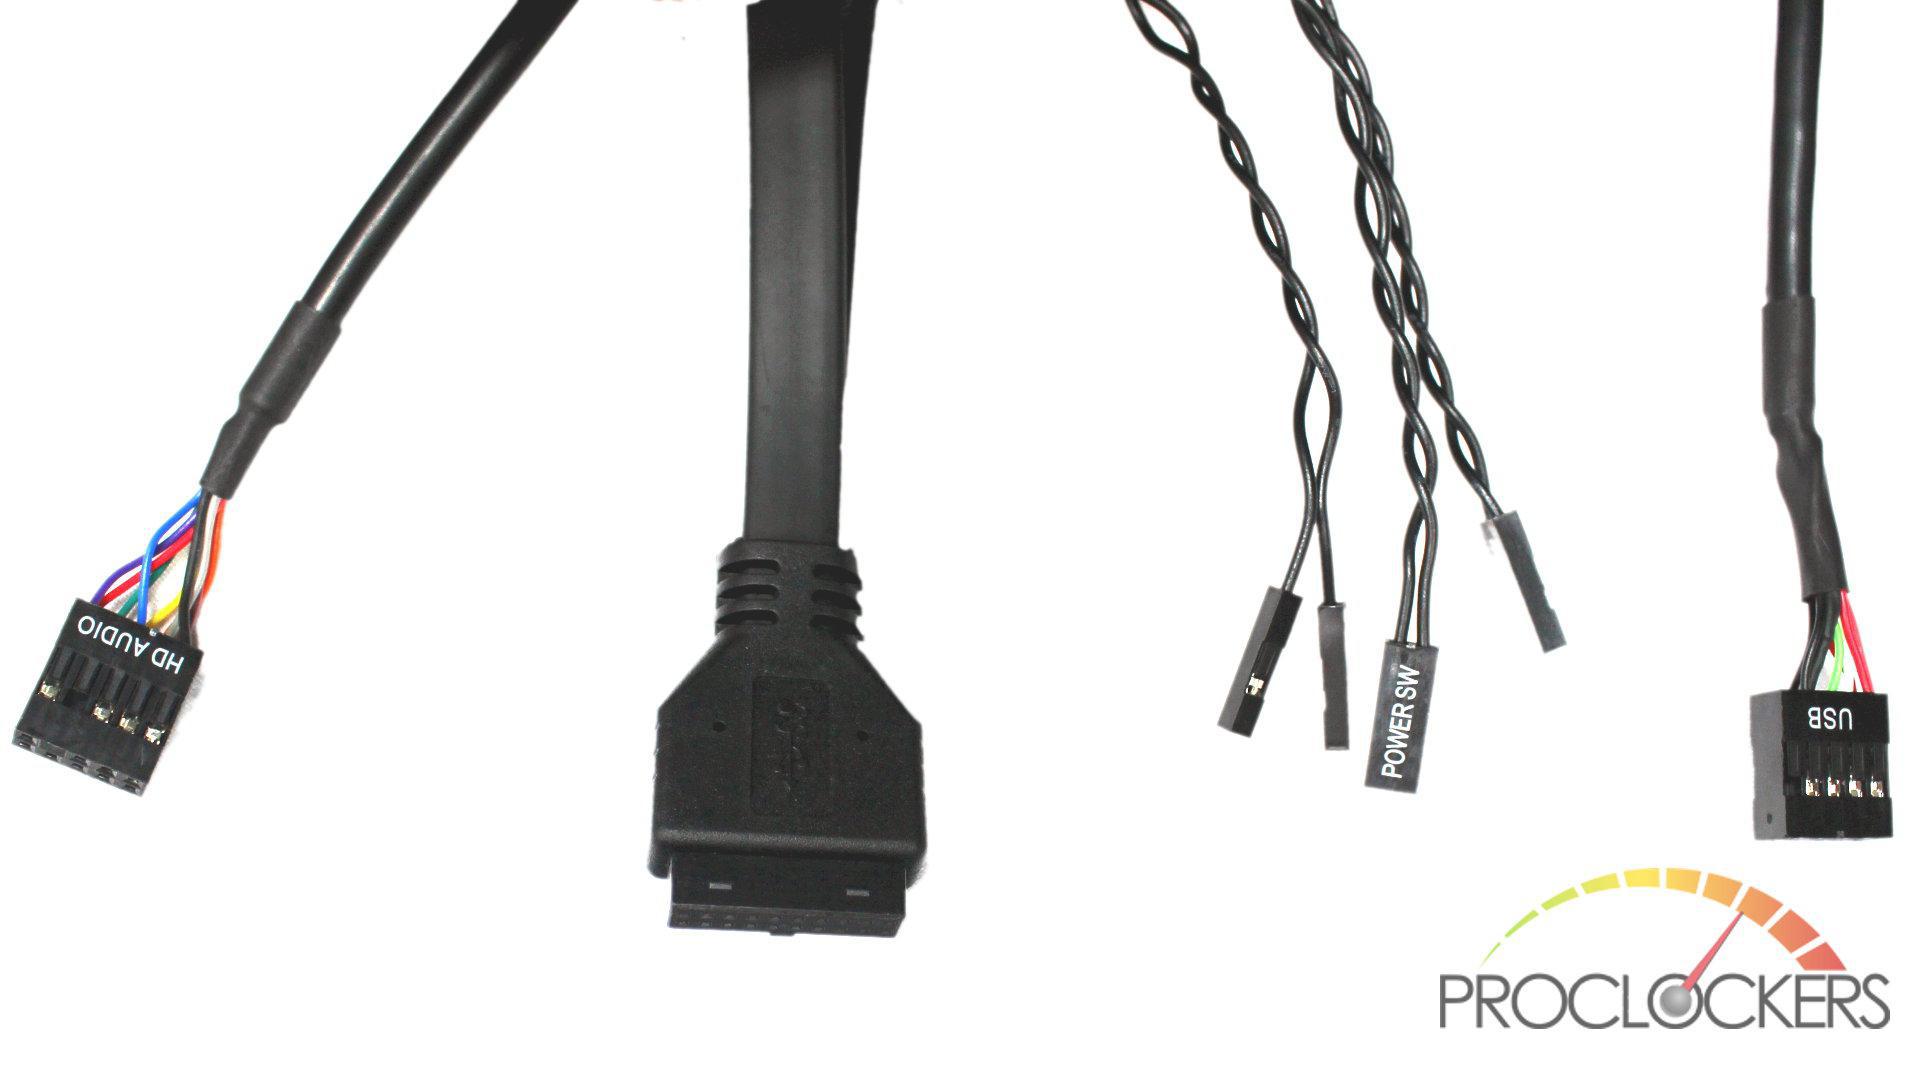
The front I/O includes an audio cord, USB 3.0 cord, power switch, reset switch and power light, and a USB2.0 cord from the Lighting Node Pro.
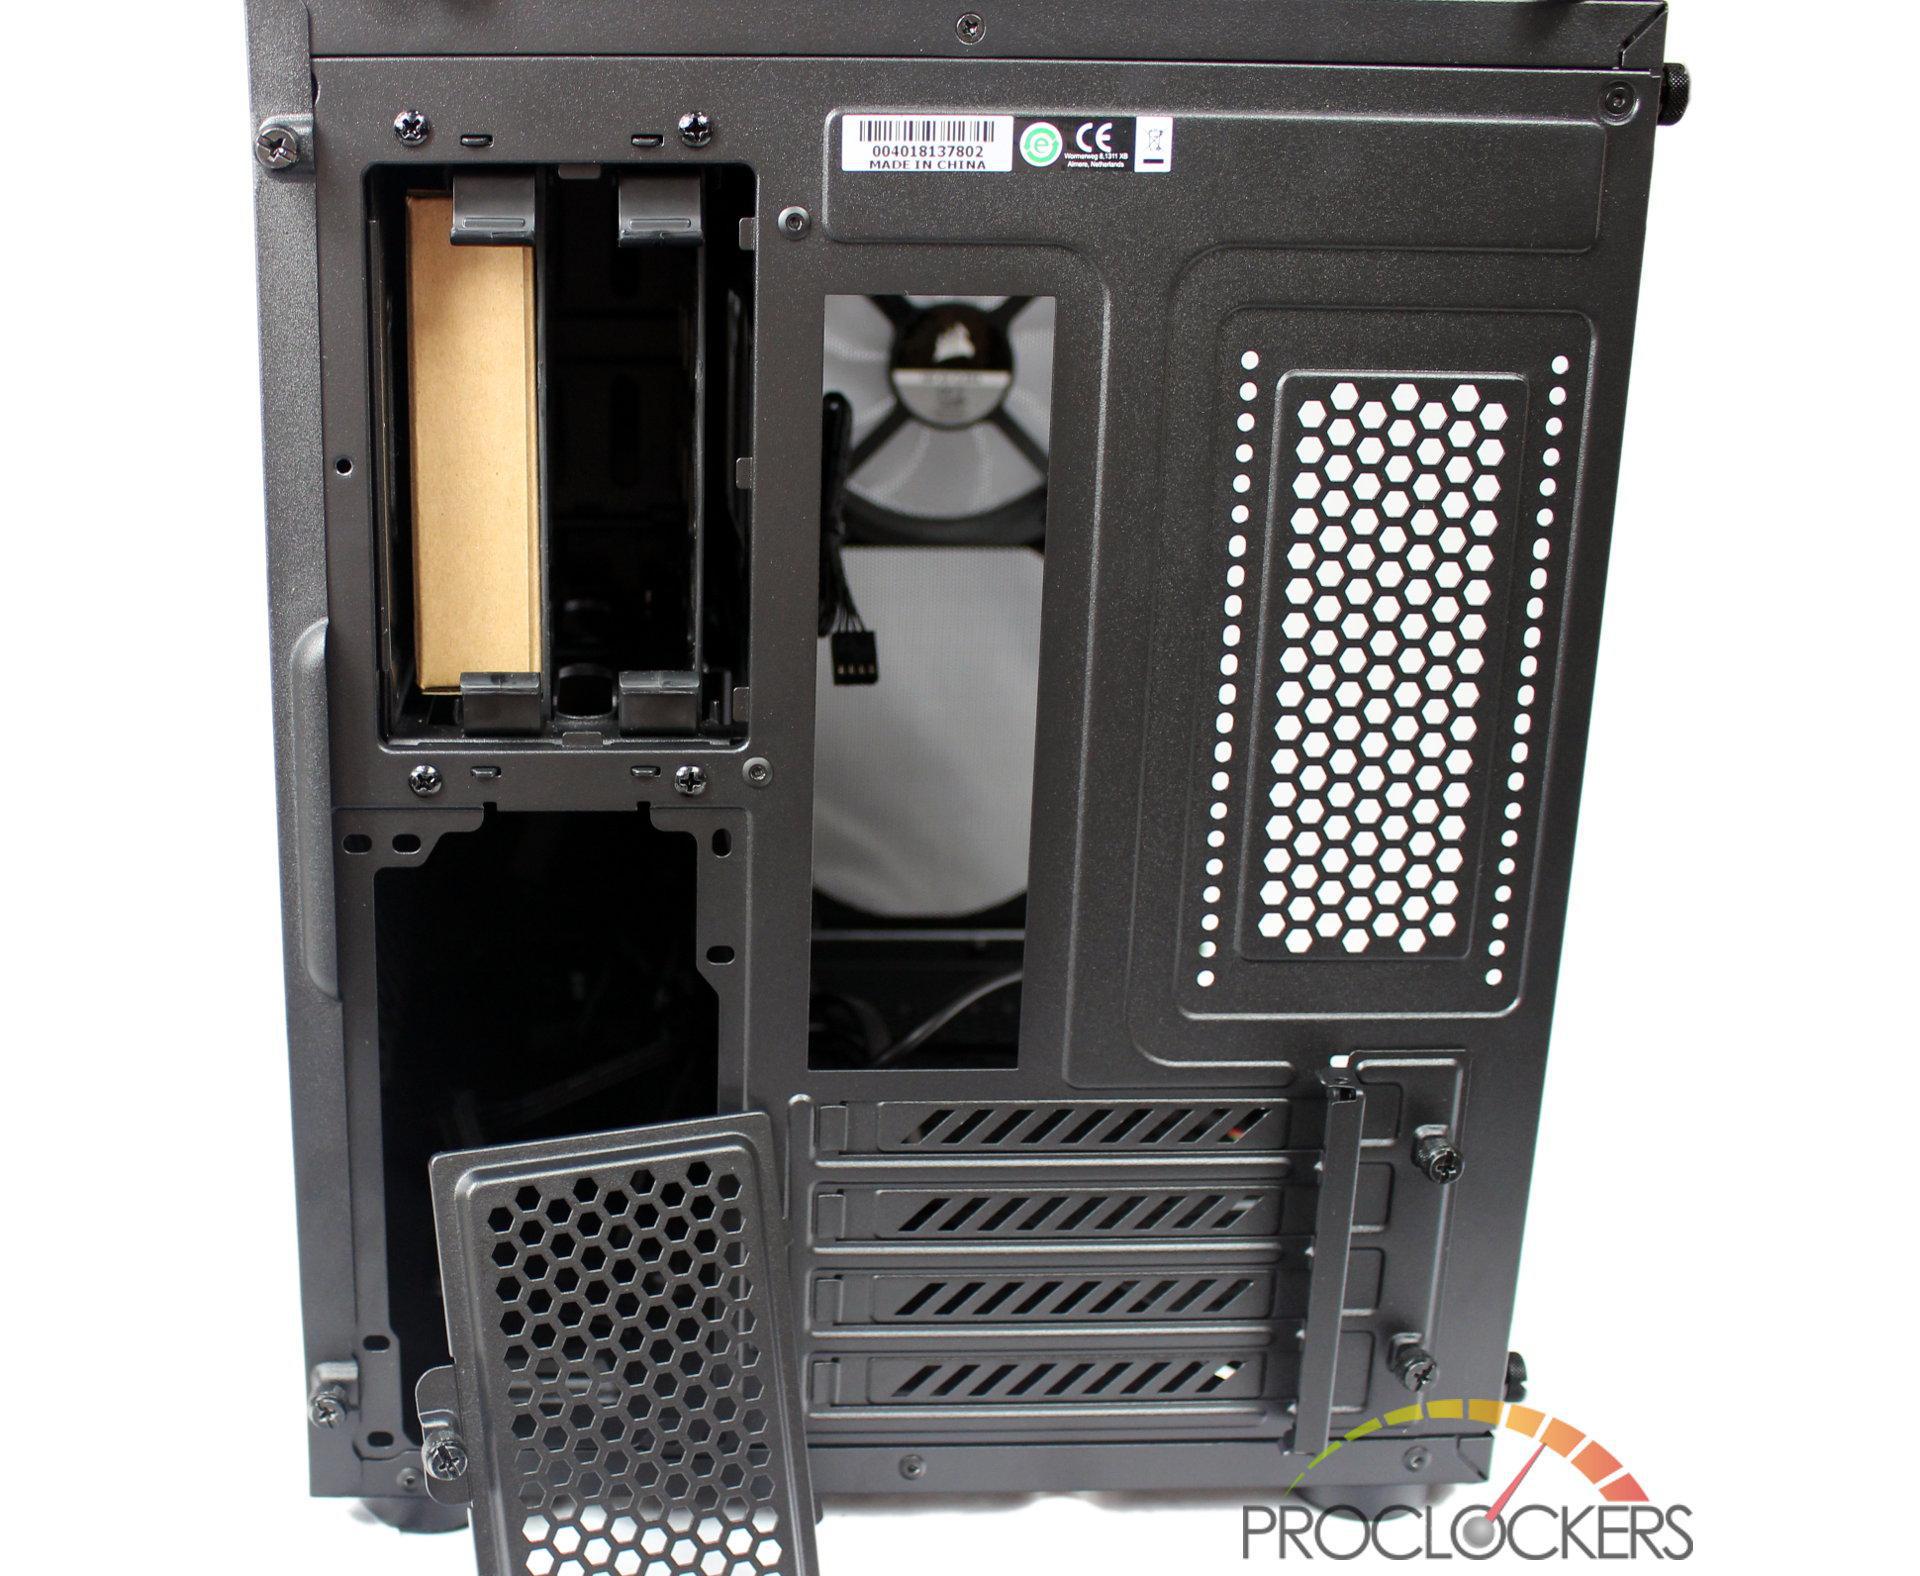
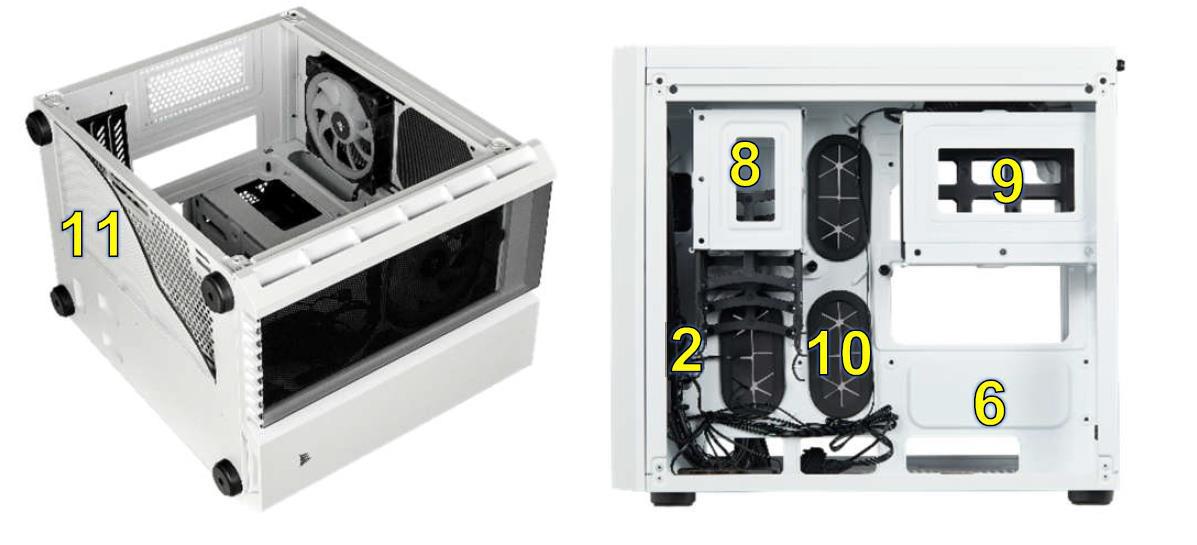
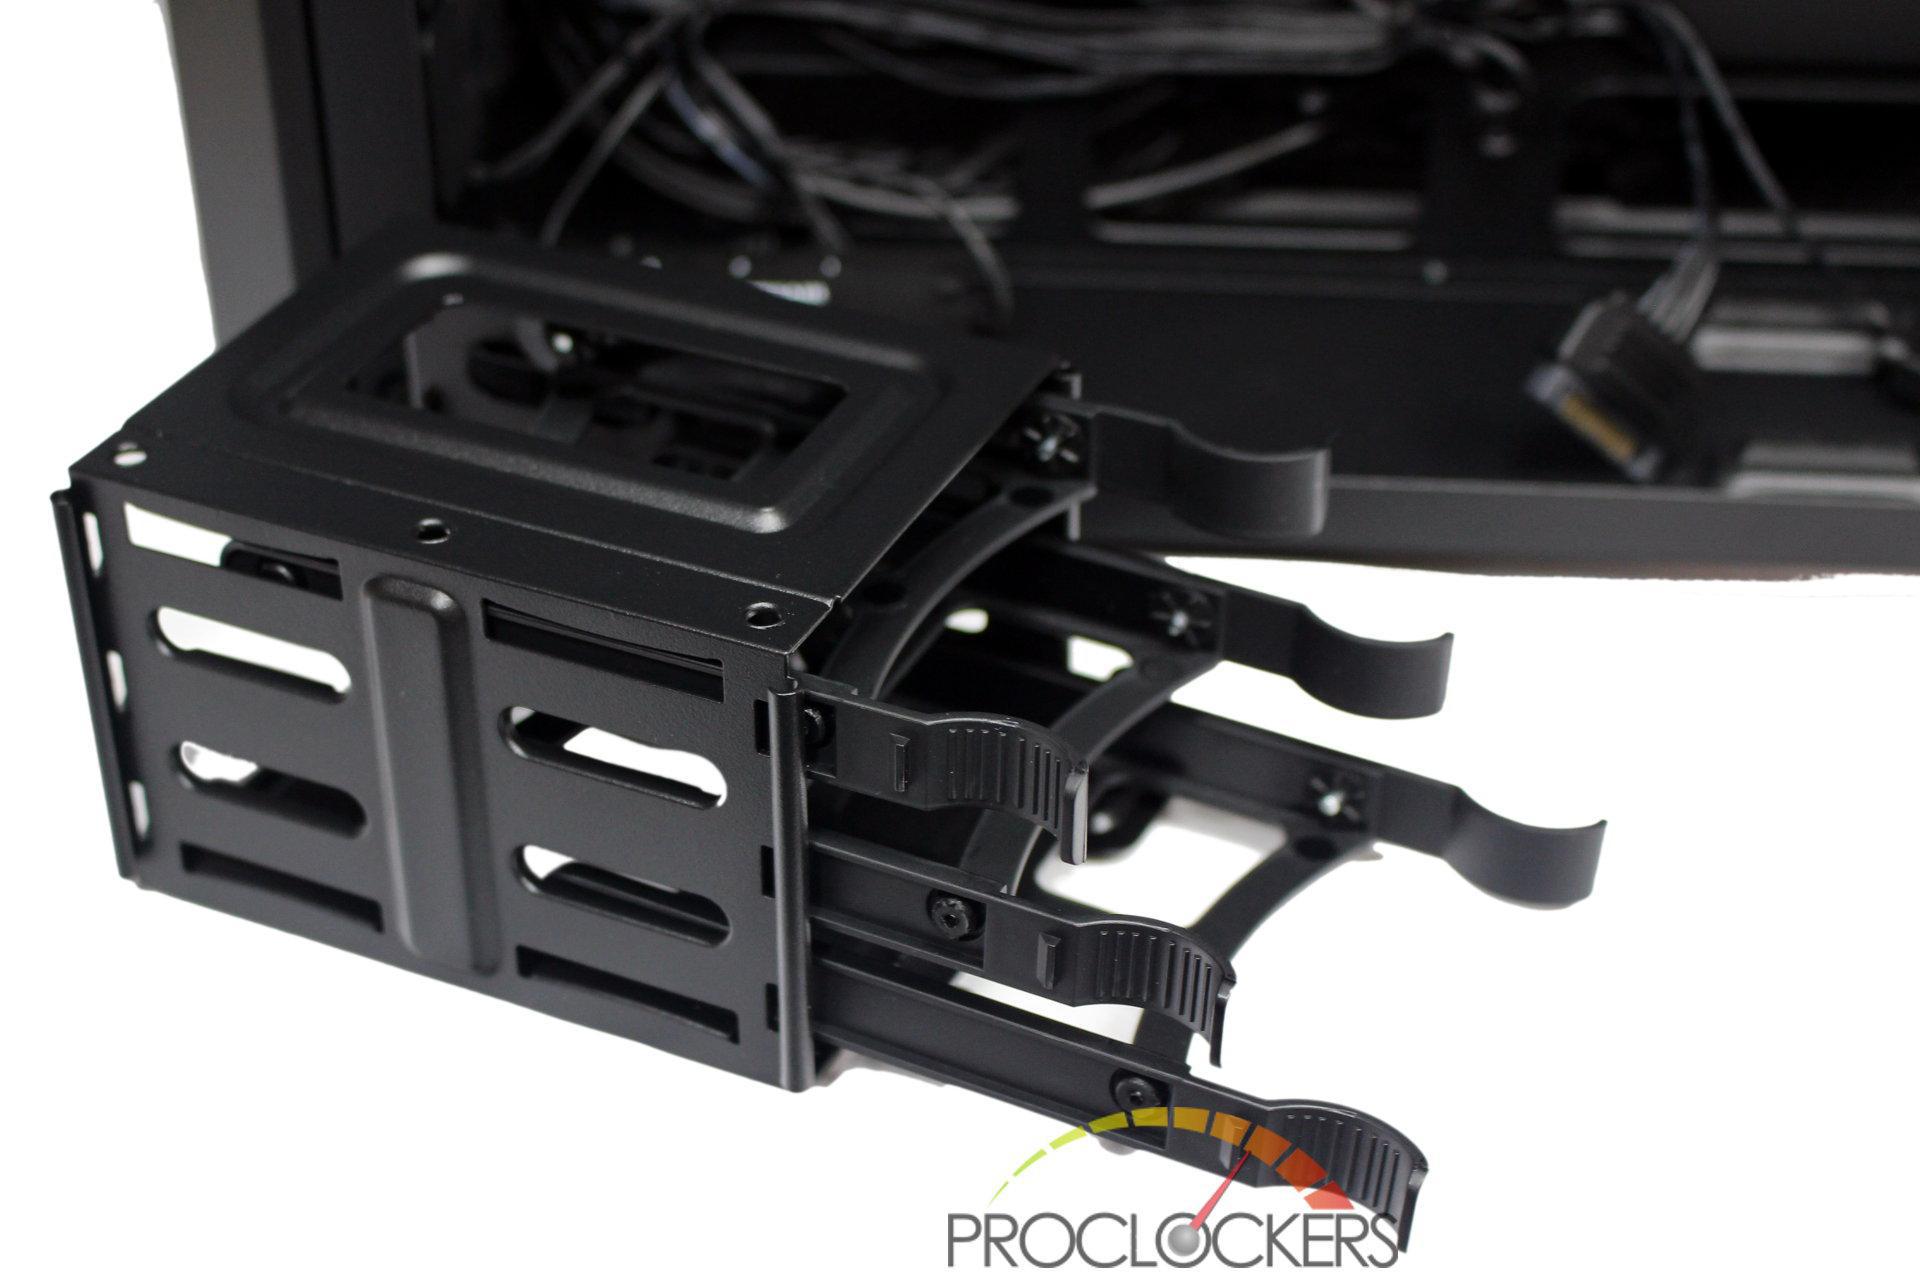
A single thumbscrew on the rear of the case lets the drive access cover be removed easily.
There are two hot-swap style trays, one of which has a box stuck in it with all of the case hardware in it.
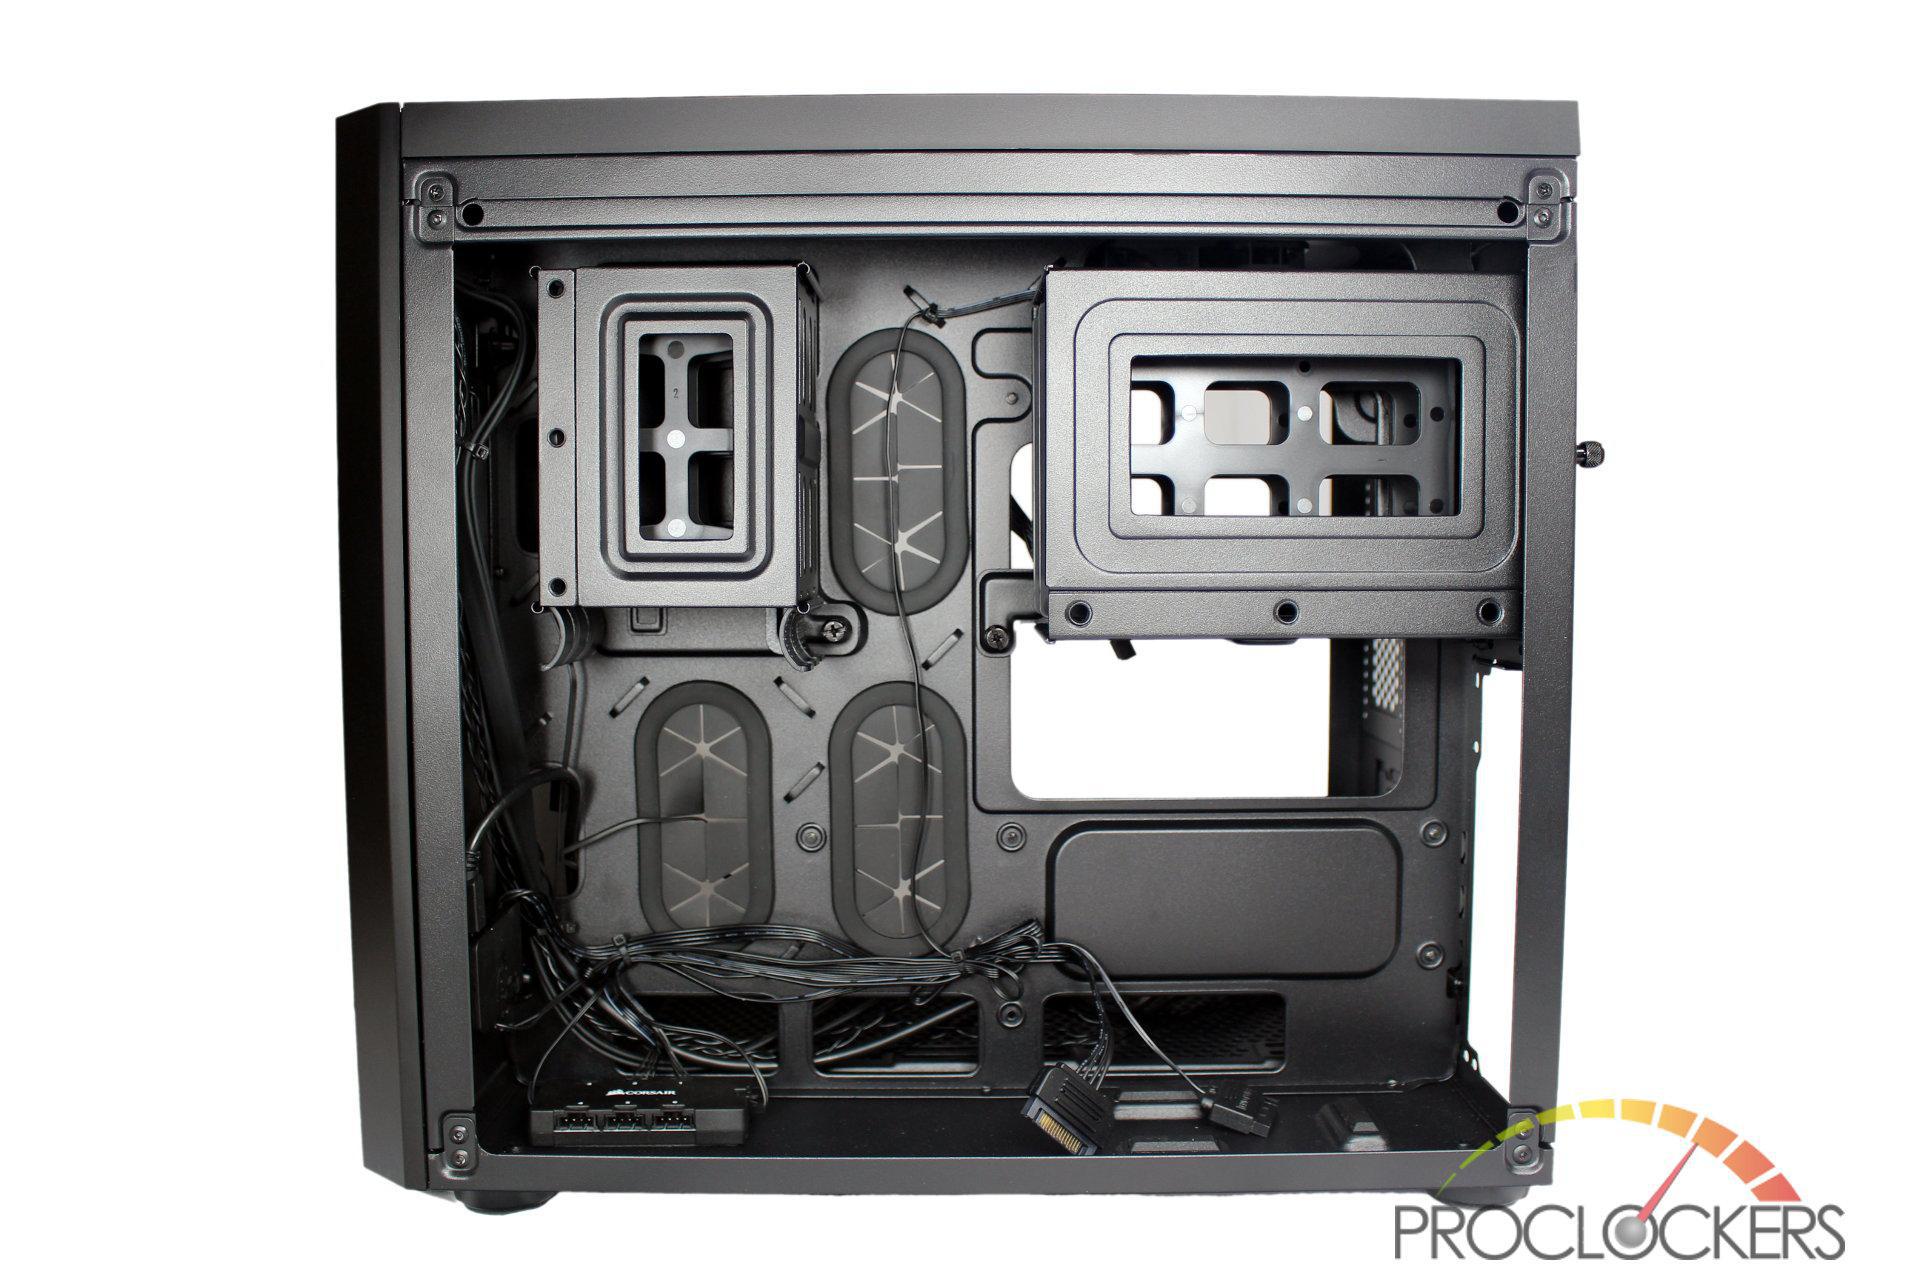
The rear of the case has two drive areas along the top, a 2.5” tray with space for three drives, and a 3.5” tray for two drives just above the power supply area.
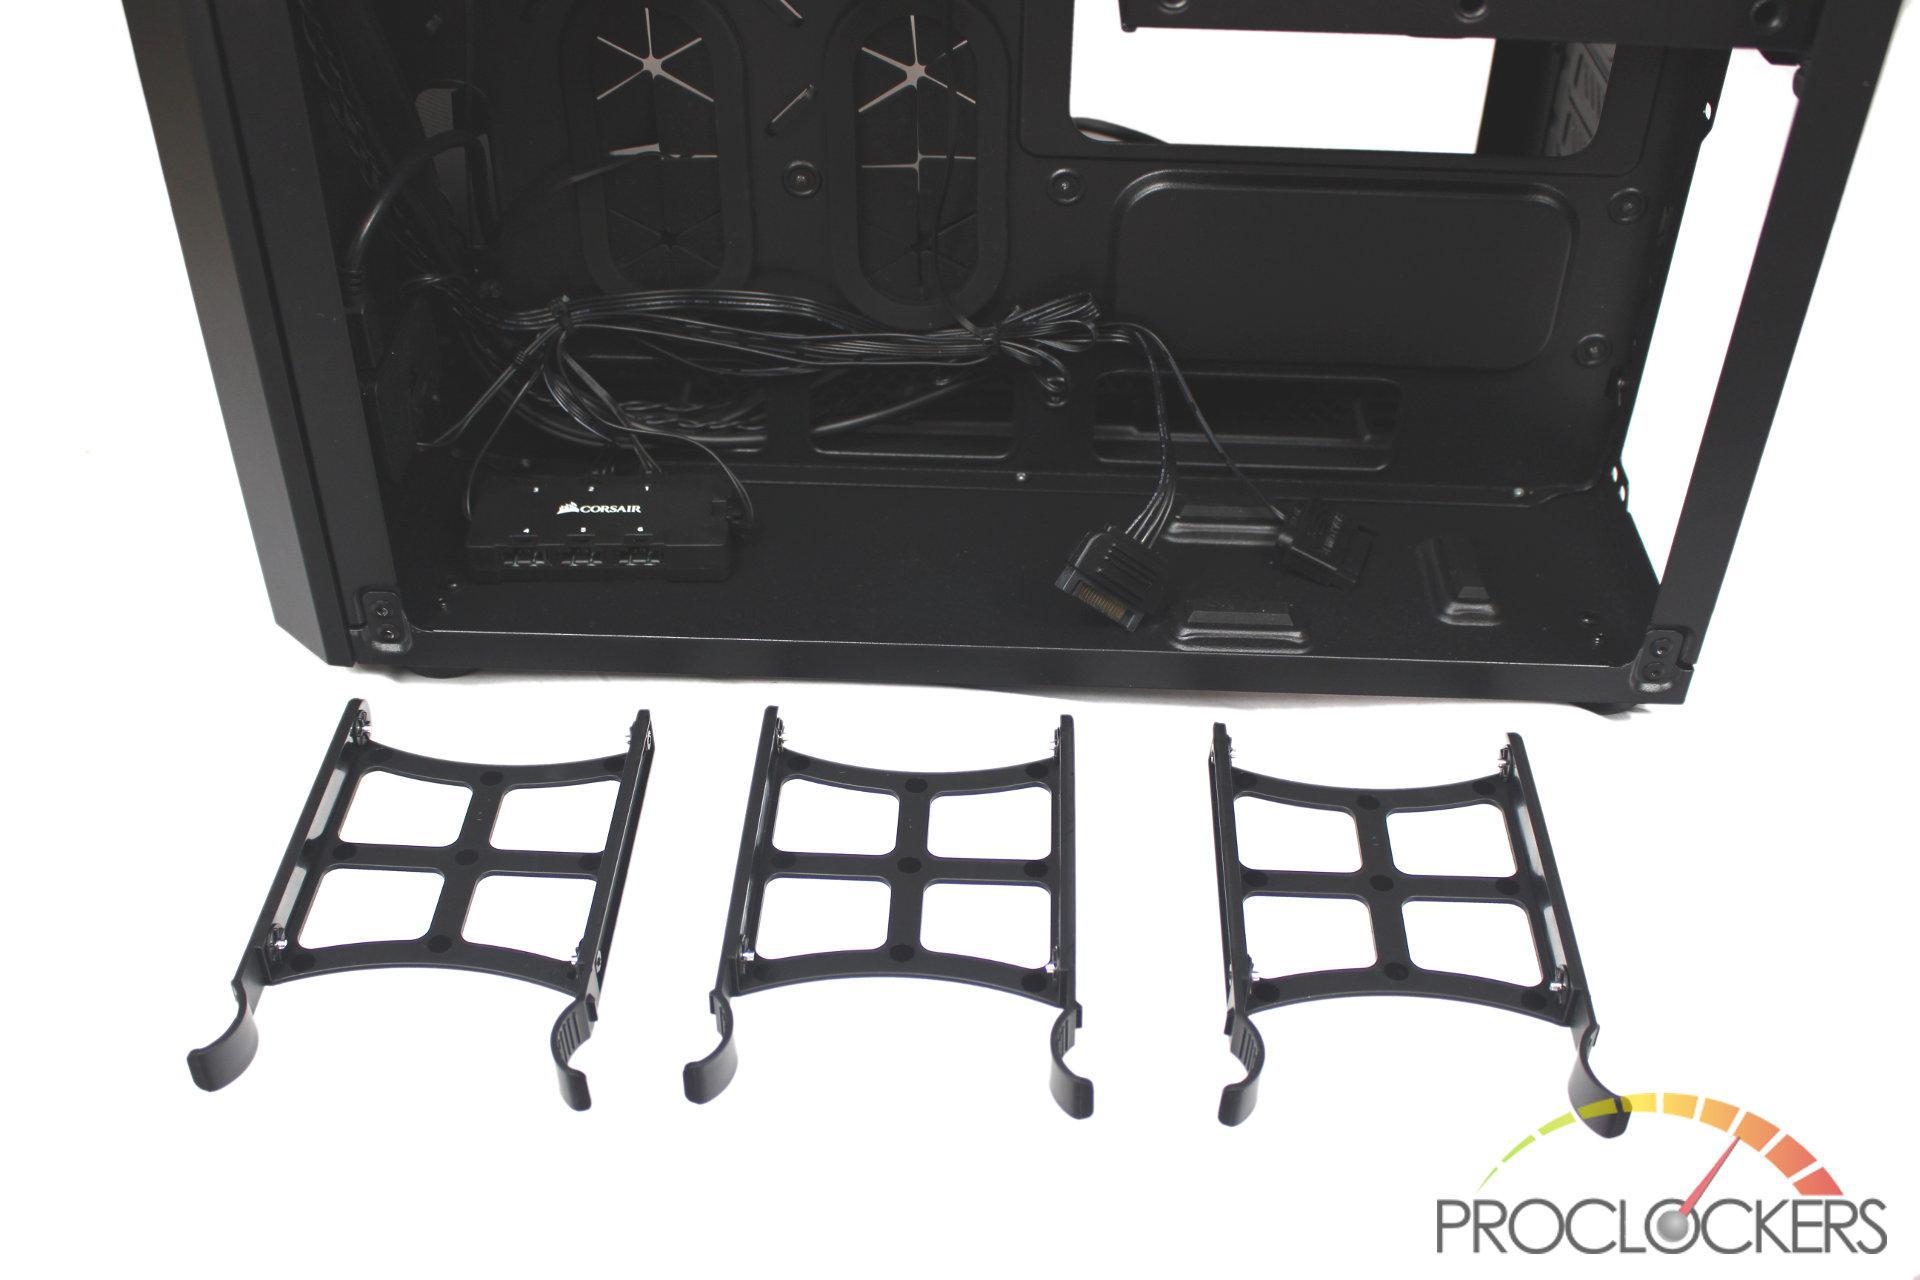
The 2.5” trays are also tool free.
If you don’t need them, a single thumb screw holds the tray in place and it can easily be removed.
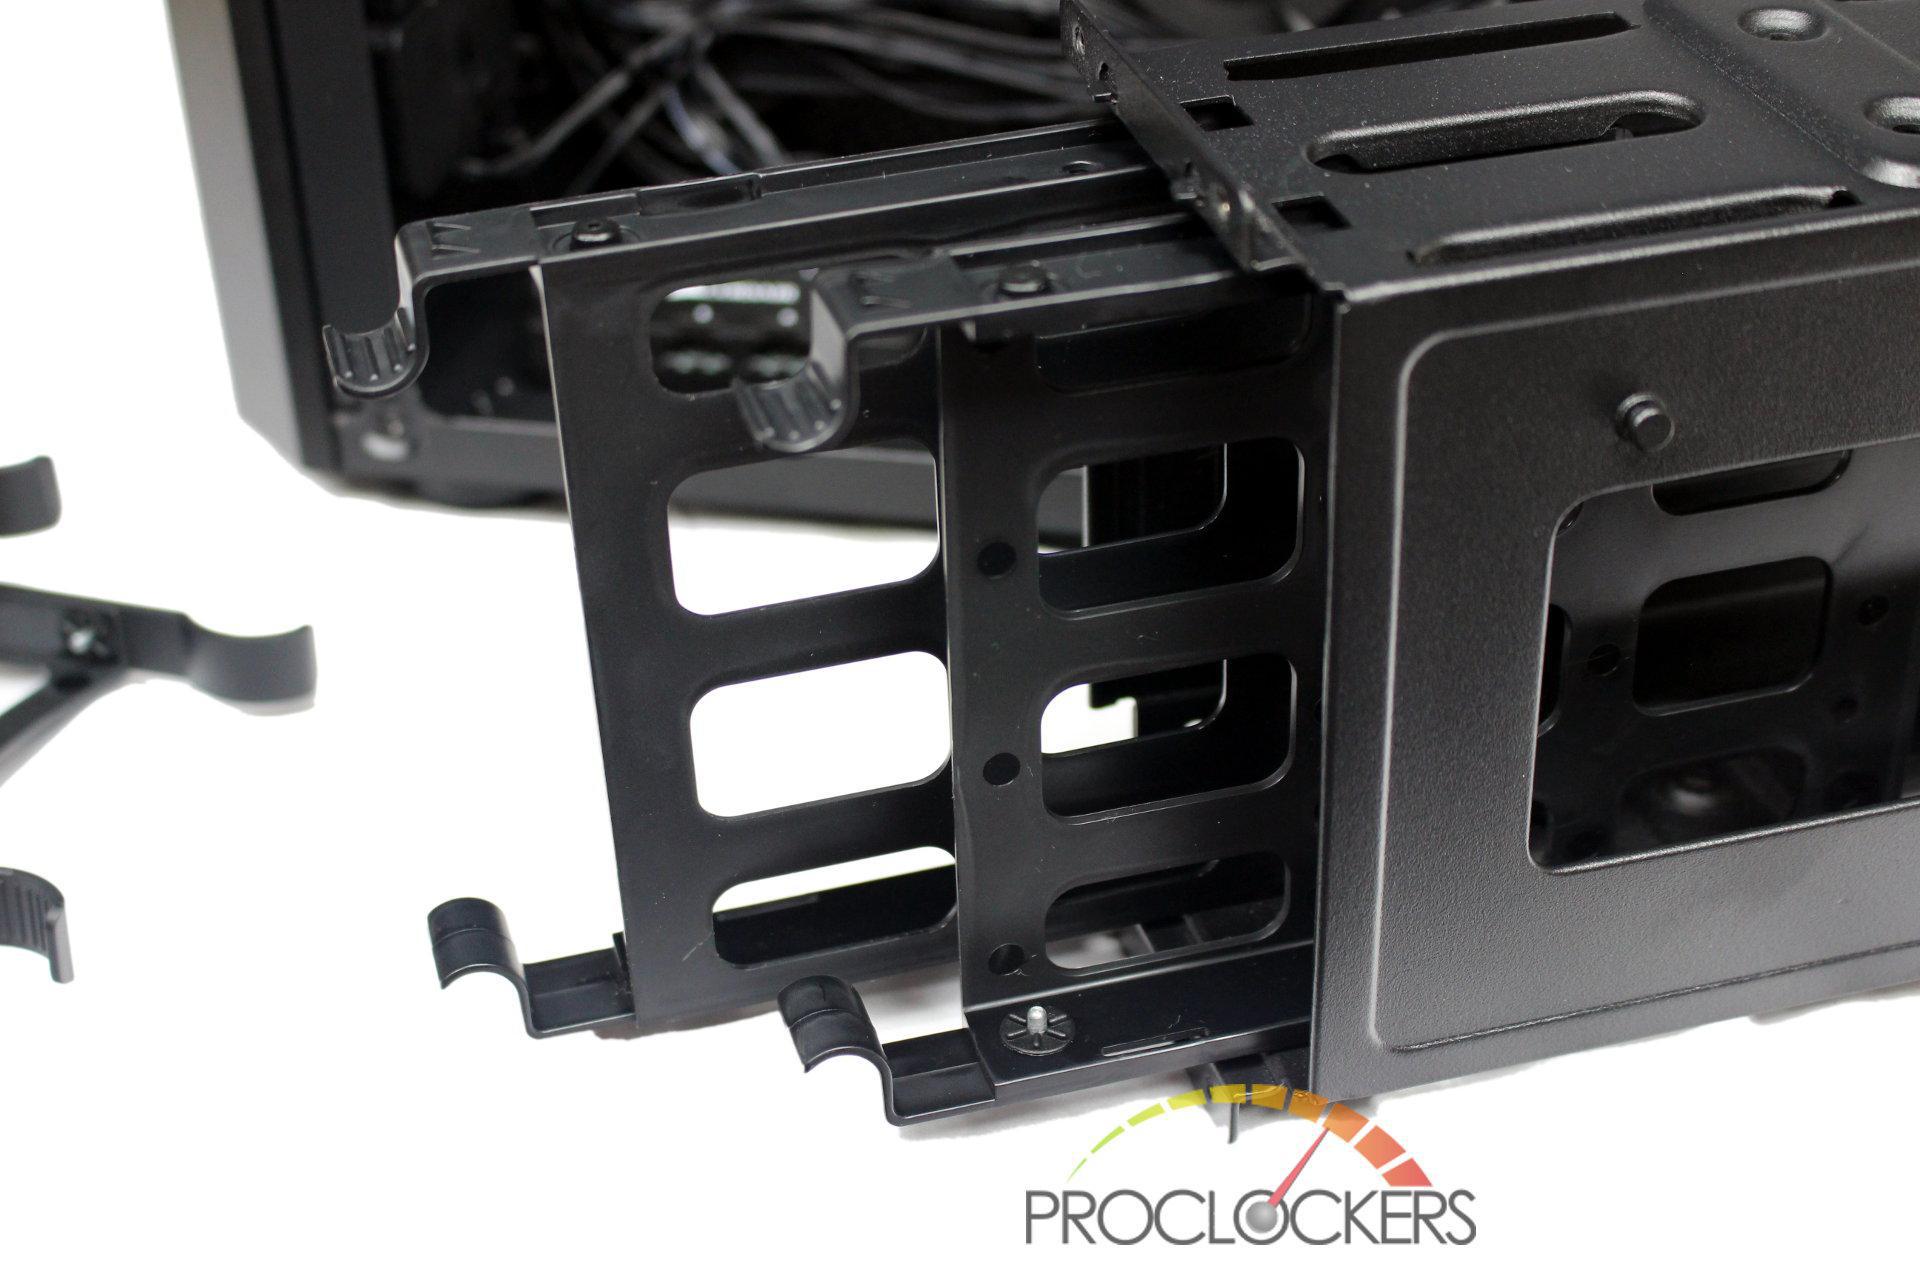
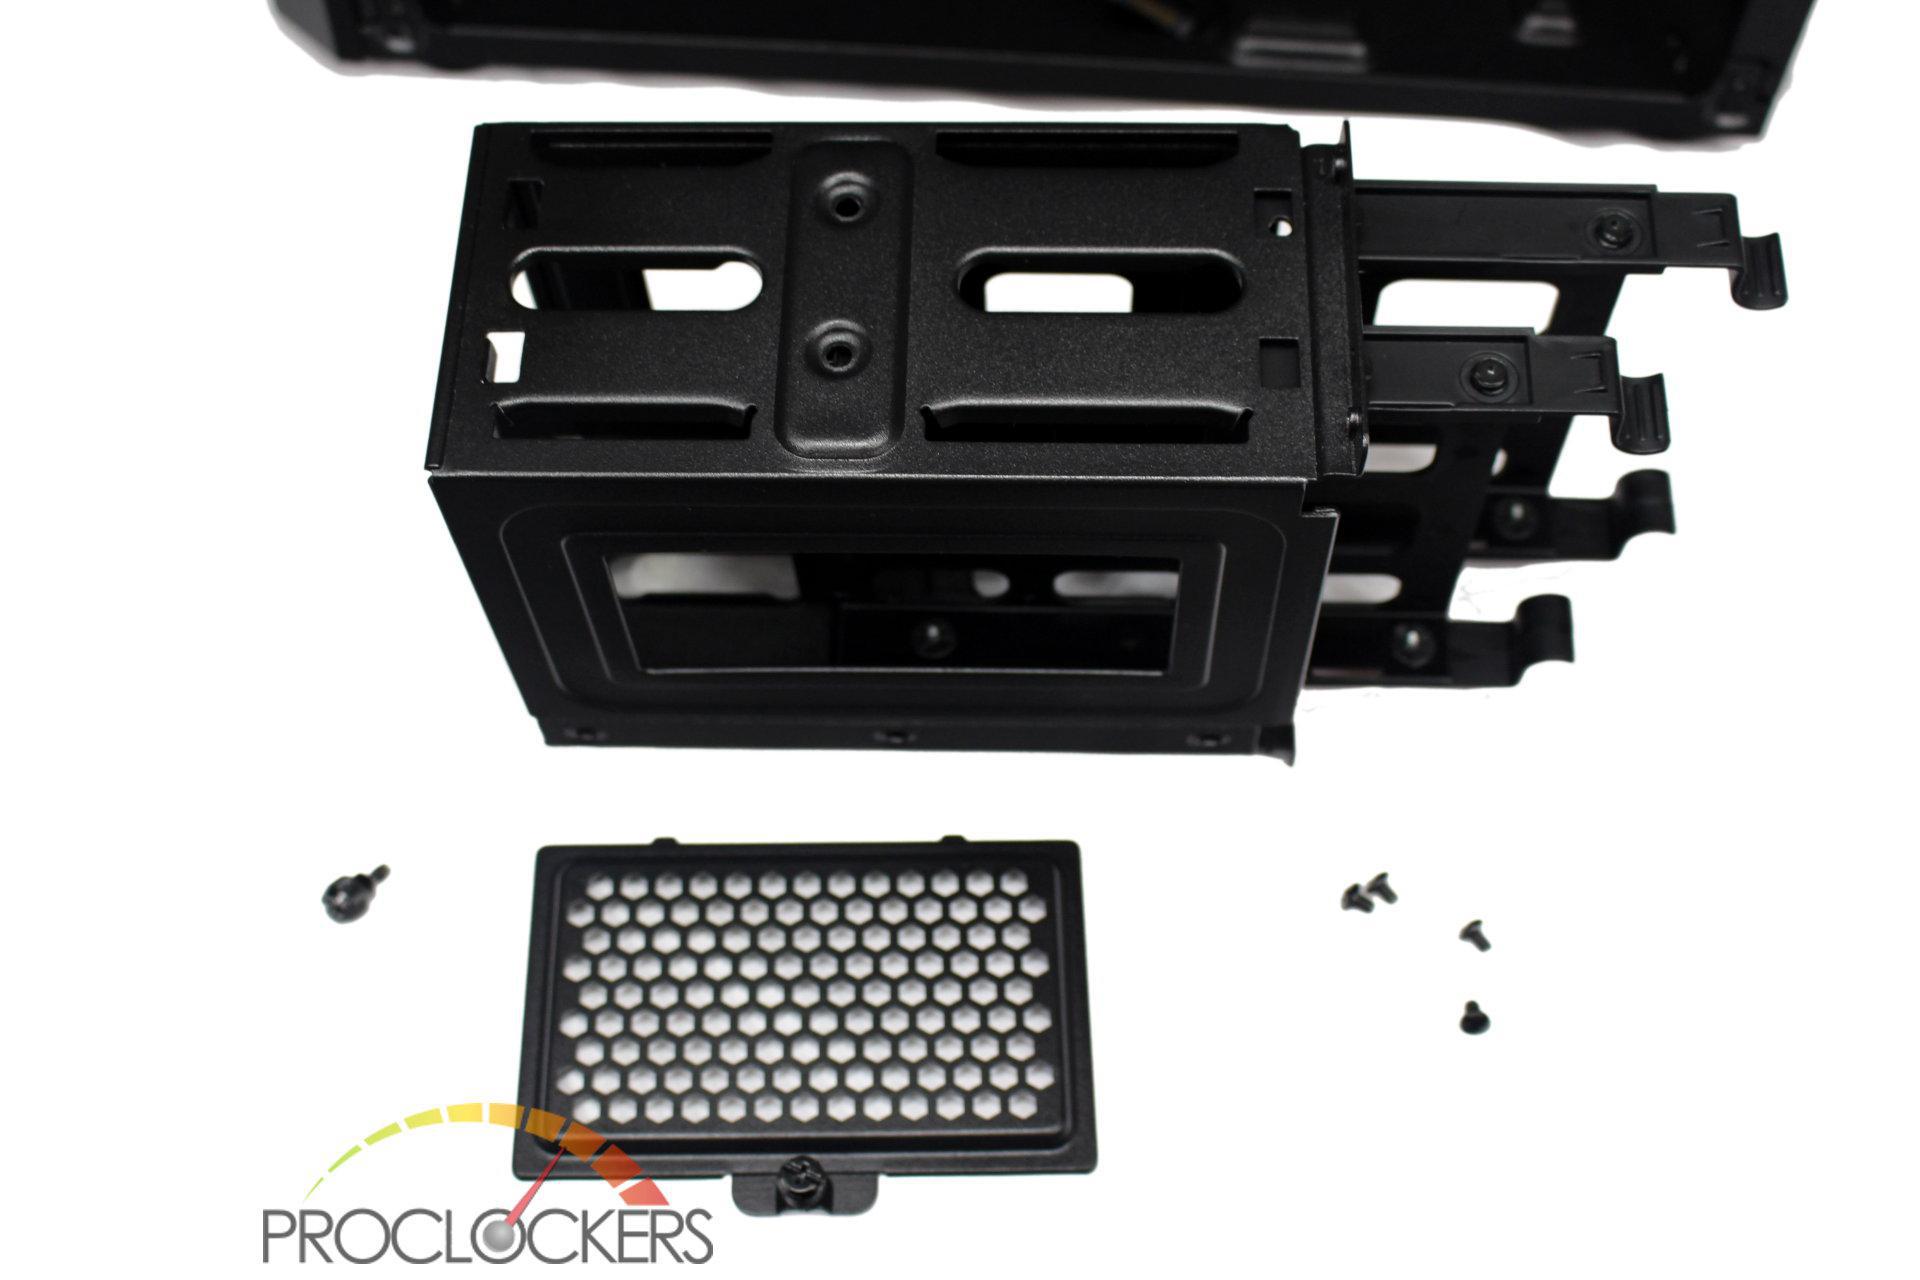
The rear 3.5” tray can also be removed with one thumb screw inside and four small screws through the rear face of the case.

With the drive trays removed, you have a ton of space in the rear of the case. The power supply area has three rubber topped stands stamped into the case to keep the PSU level and absorb any vibration.
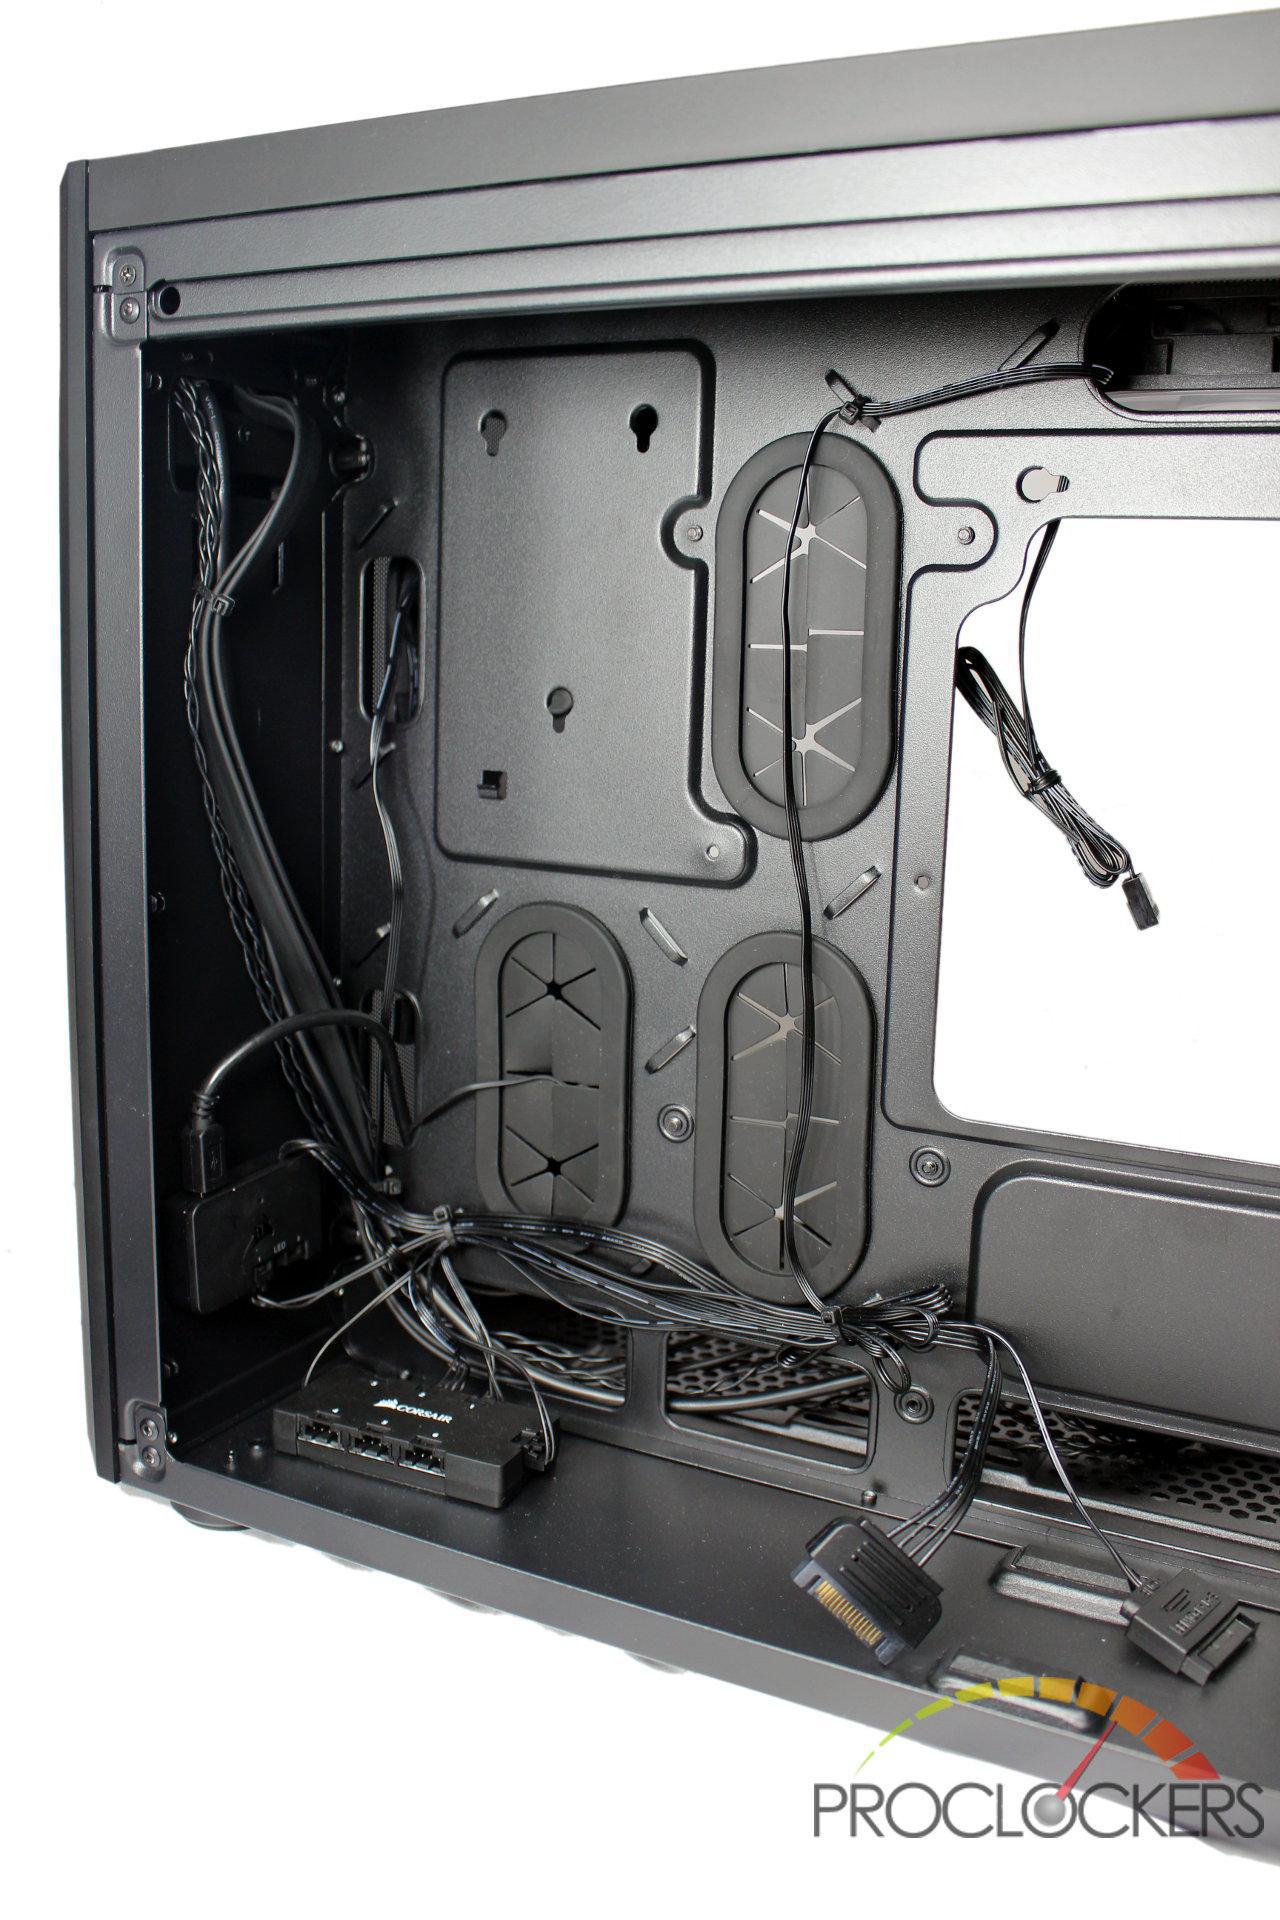
Corsair ships the case with the fans and related already reasonable cable managed to save you some effort. We are a little torn on this, experienced users or modders will likely rip most if not all of it back out during install to move things around, but newer users may just leave it as-is.
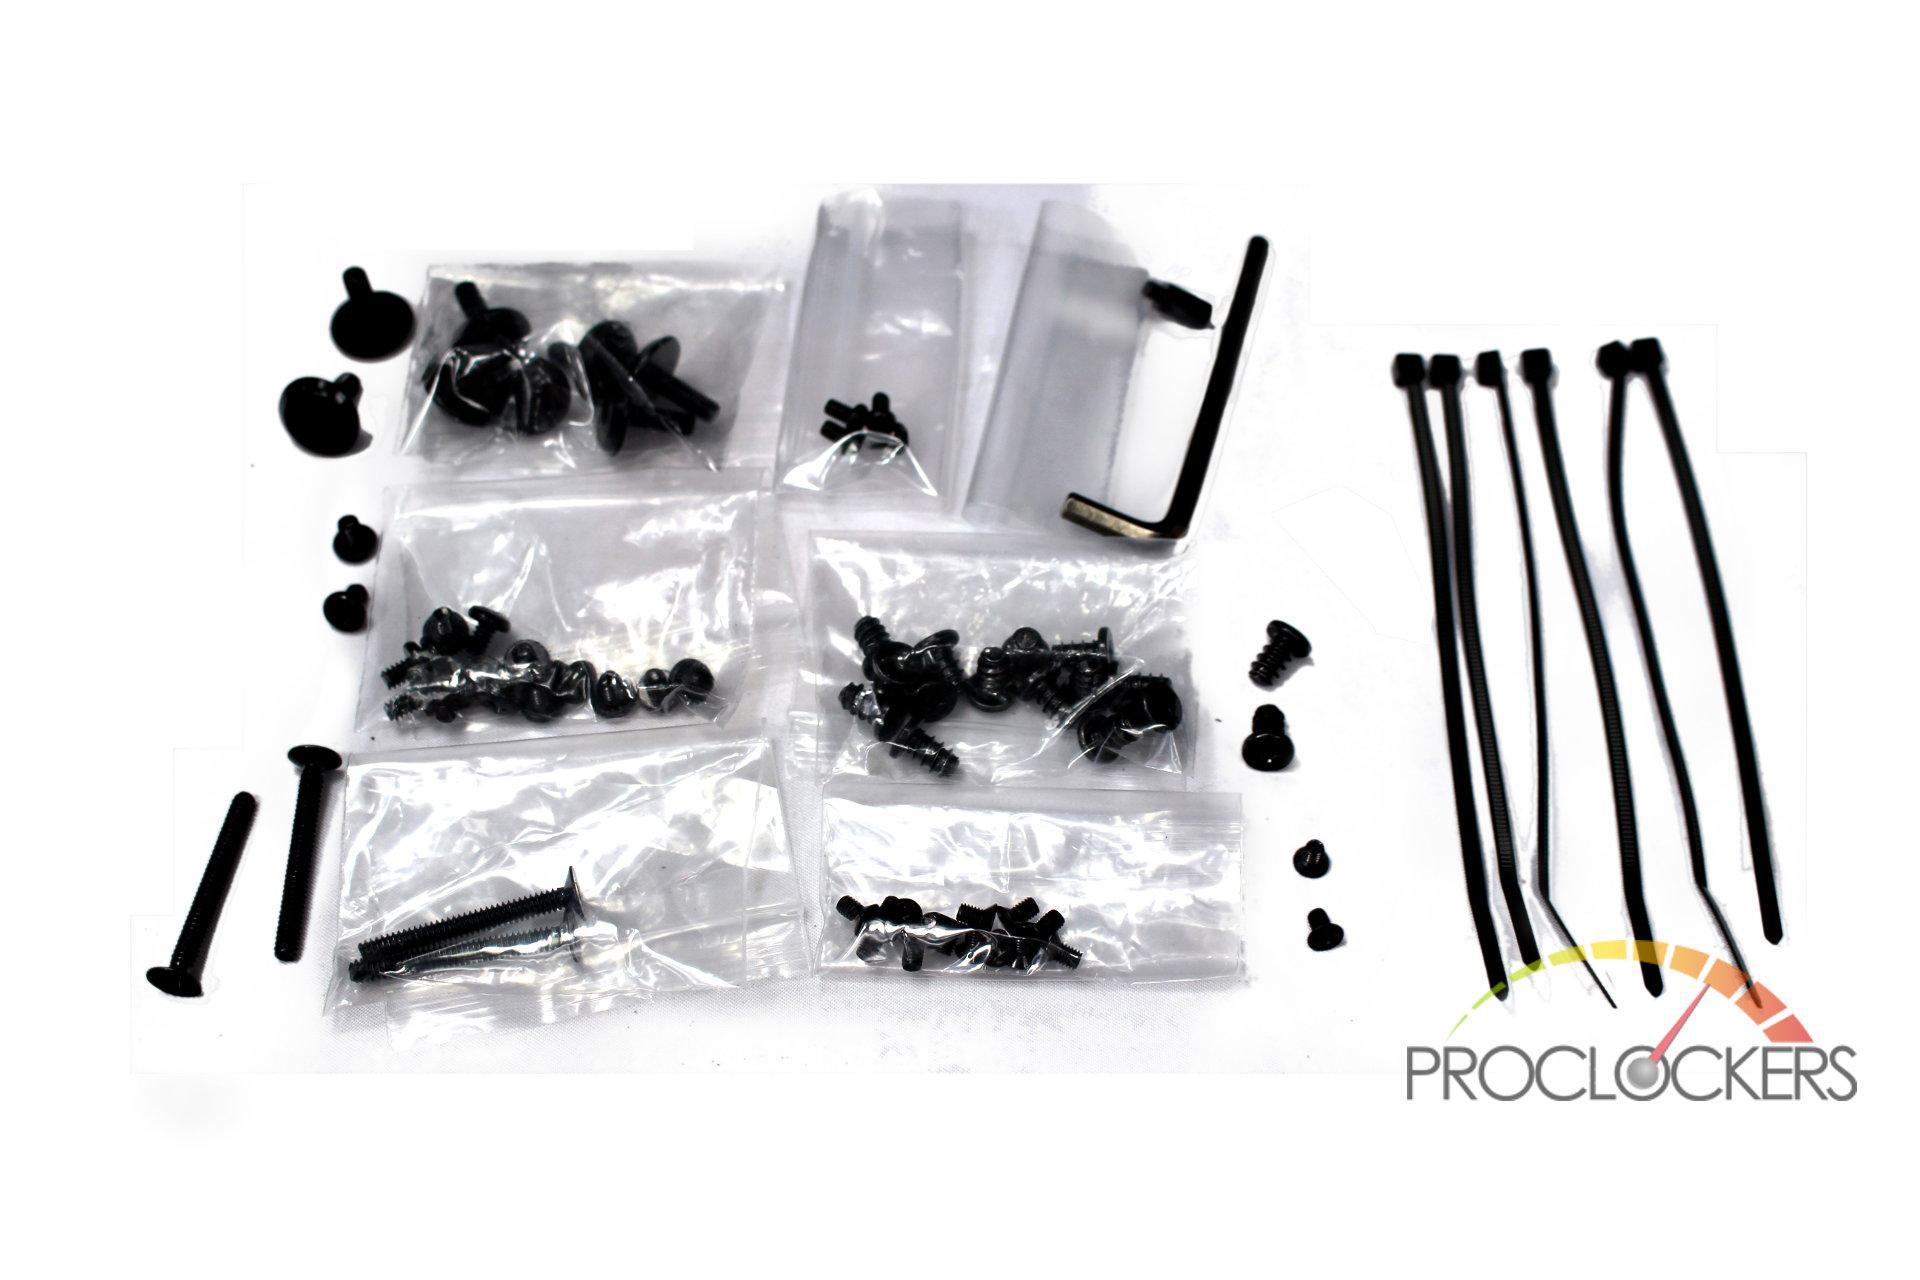
The box of hardware has quite a pile of screws for fans, drives and related, it also comes with lower profile mounting screws and an Allen-wrench to install them. You do get half a dozen zip-ties for cable management as well.
Software & Hardware
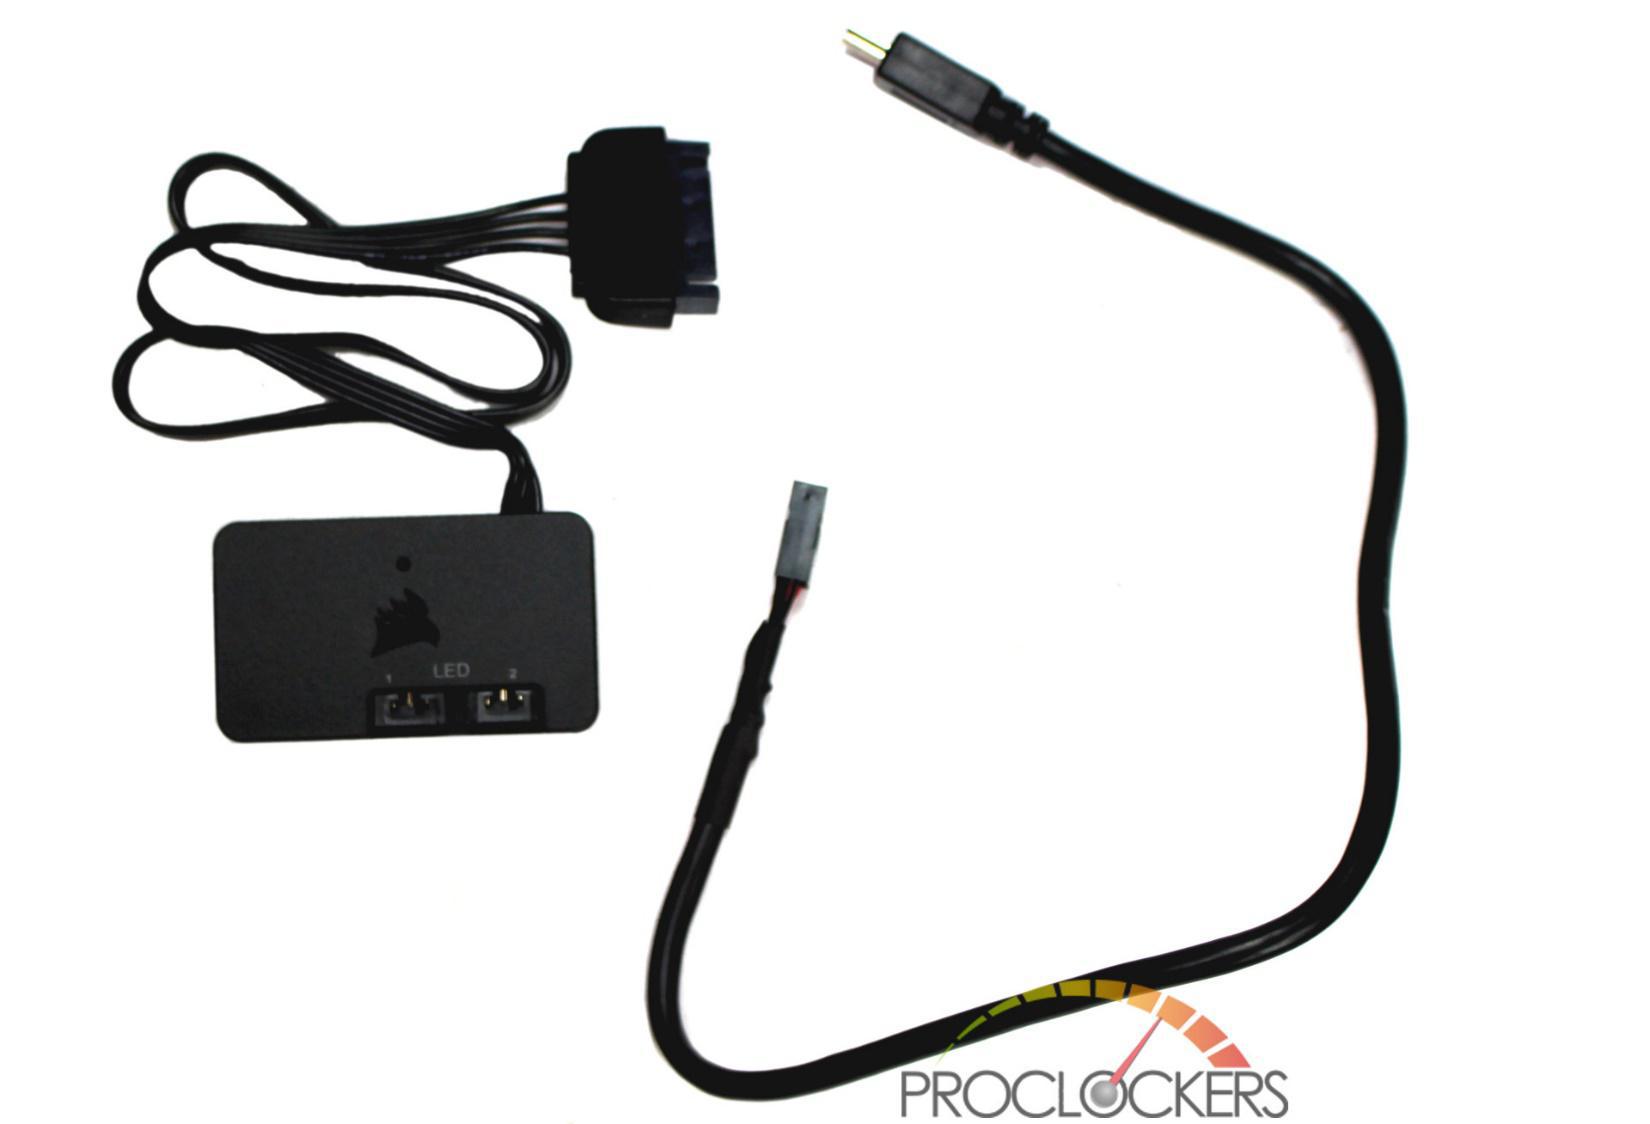
The Crystal 280X RGB comes with a Corsair Lighting Node Pro installed. It connects to your motherboard via an internal USB 2.0 header.
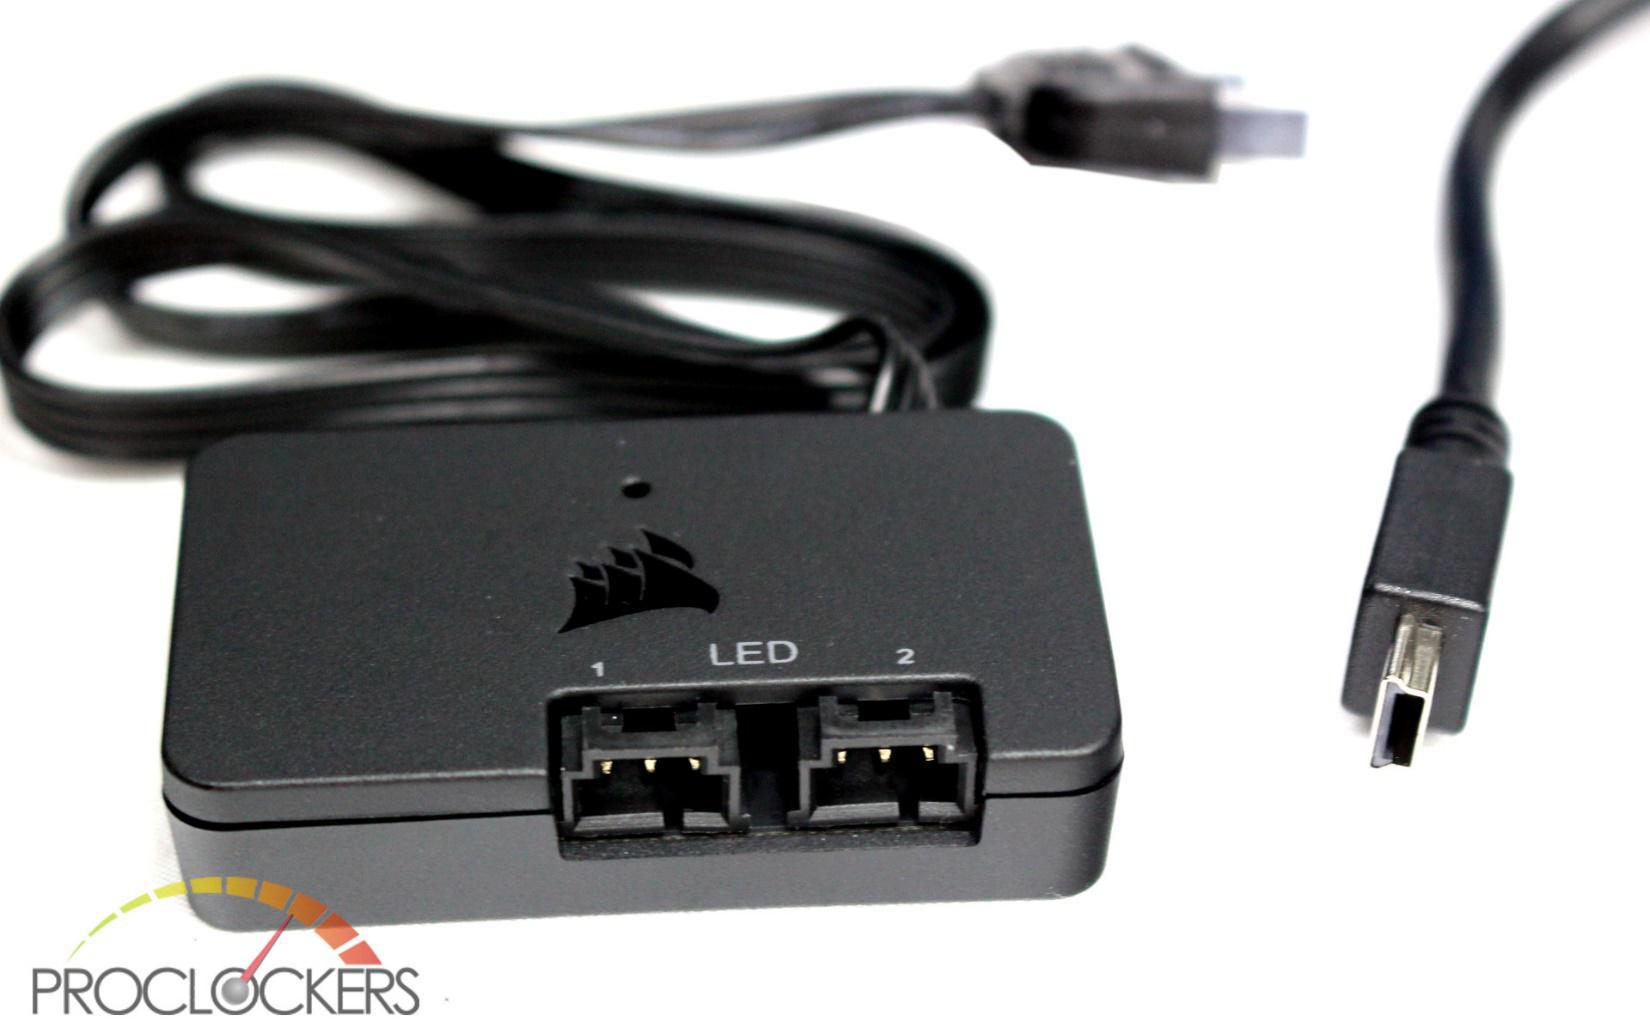
It is a small device that takes power and feeds it out over two entirely independent digital channels. These channels can connect directly to Corsair’s PRO RGB strips or to any of the RGB fans through an RGB Fan LED Hub. The USB connection to the Hub itself is mini-USB.
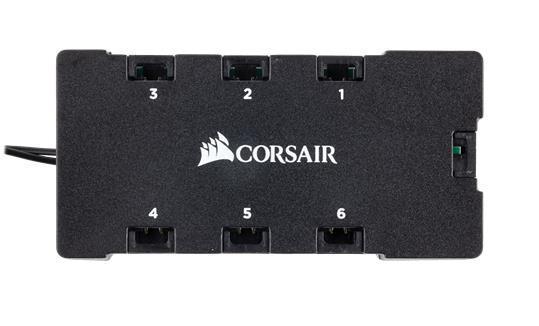
In this case, there is also the Fan LED hub installed which converts a Corsair Digital RGB channel into six 4-pin proprietary connectors that all of Corsairs RGB fans use. Fans such as the ML RGB, HD, SP RGB, and LL series fans.
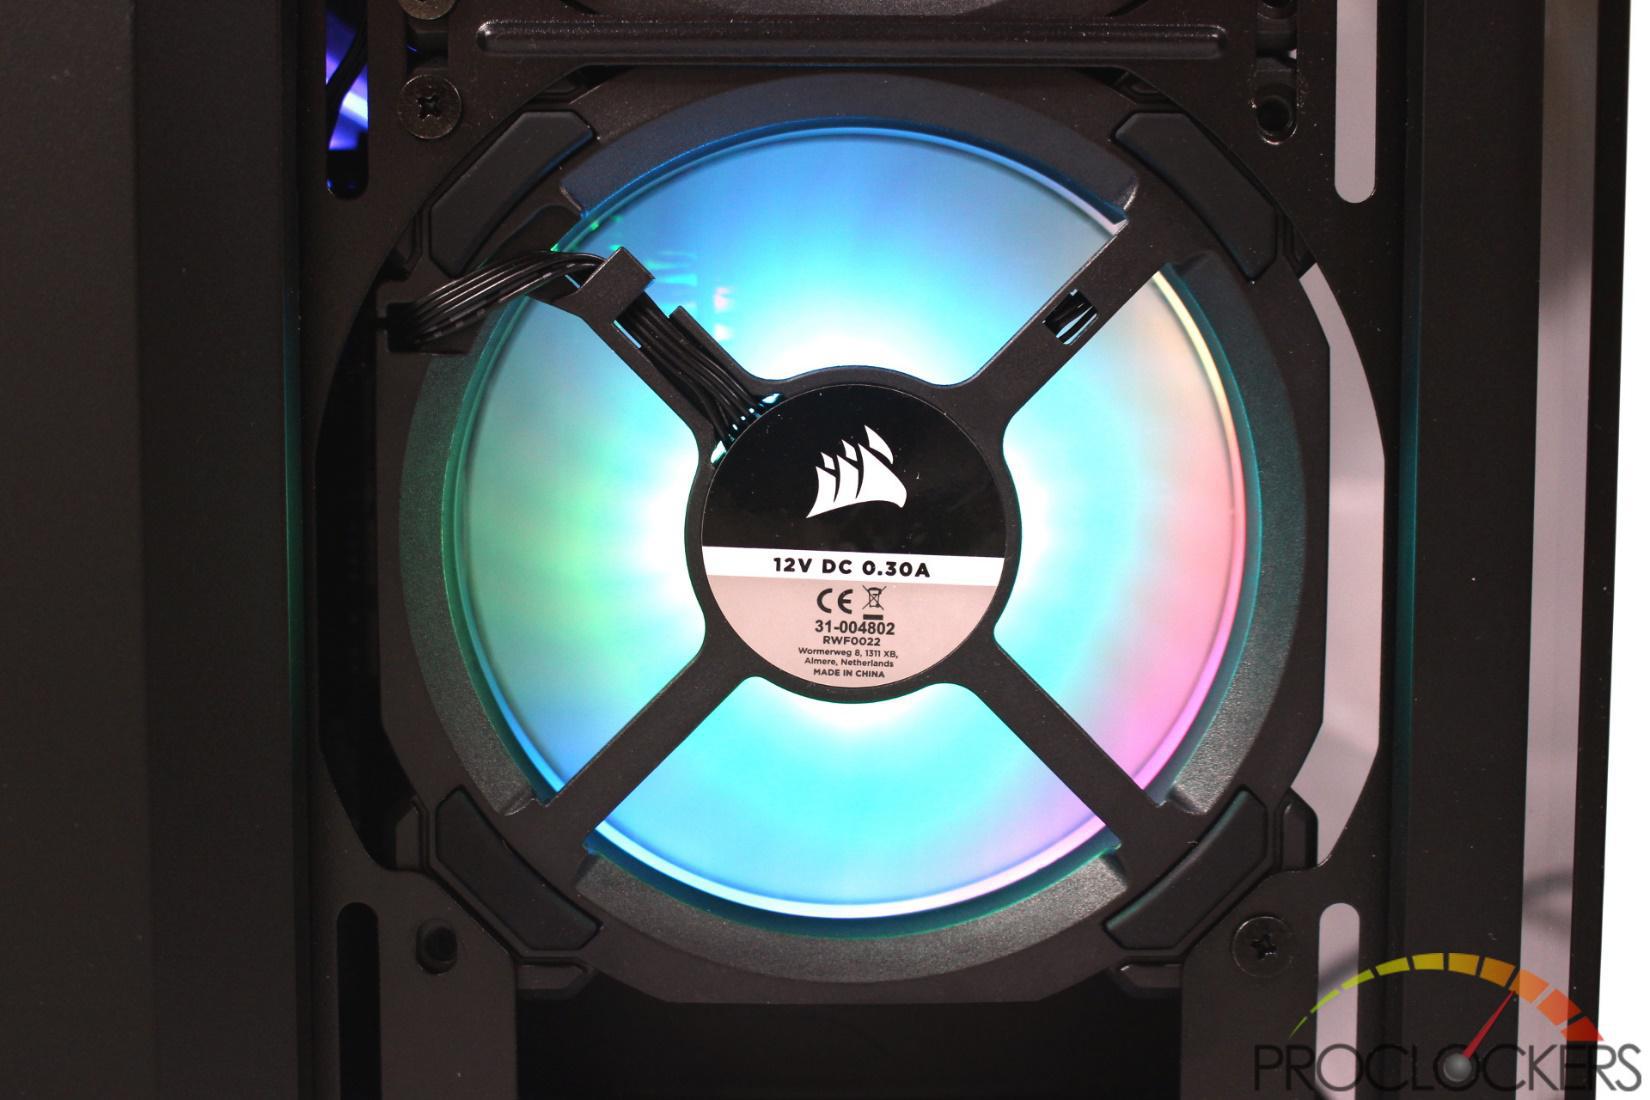
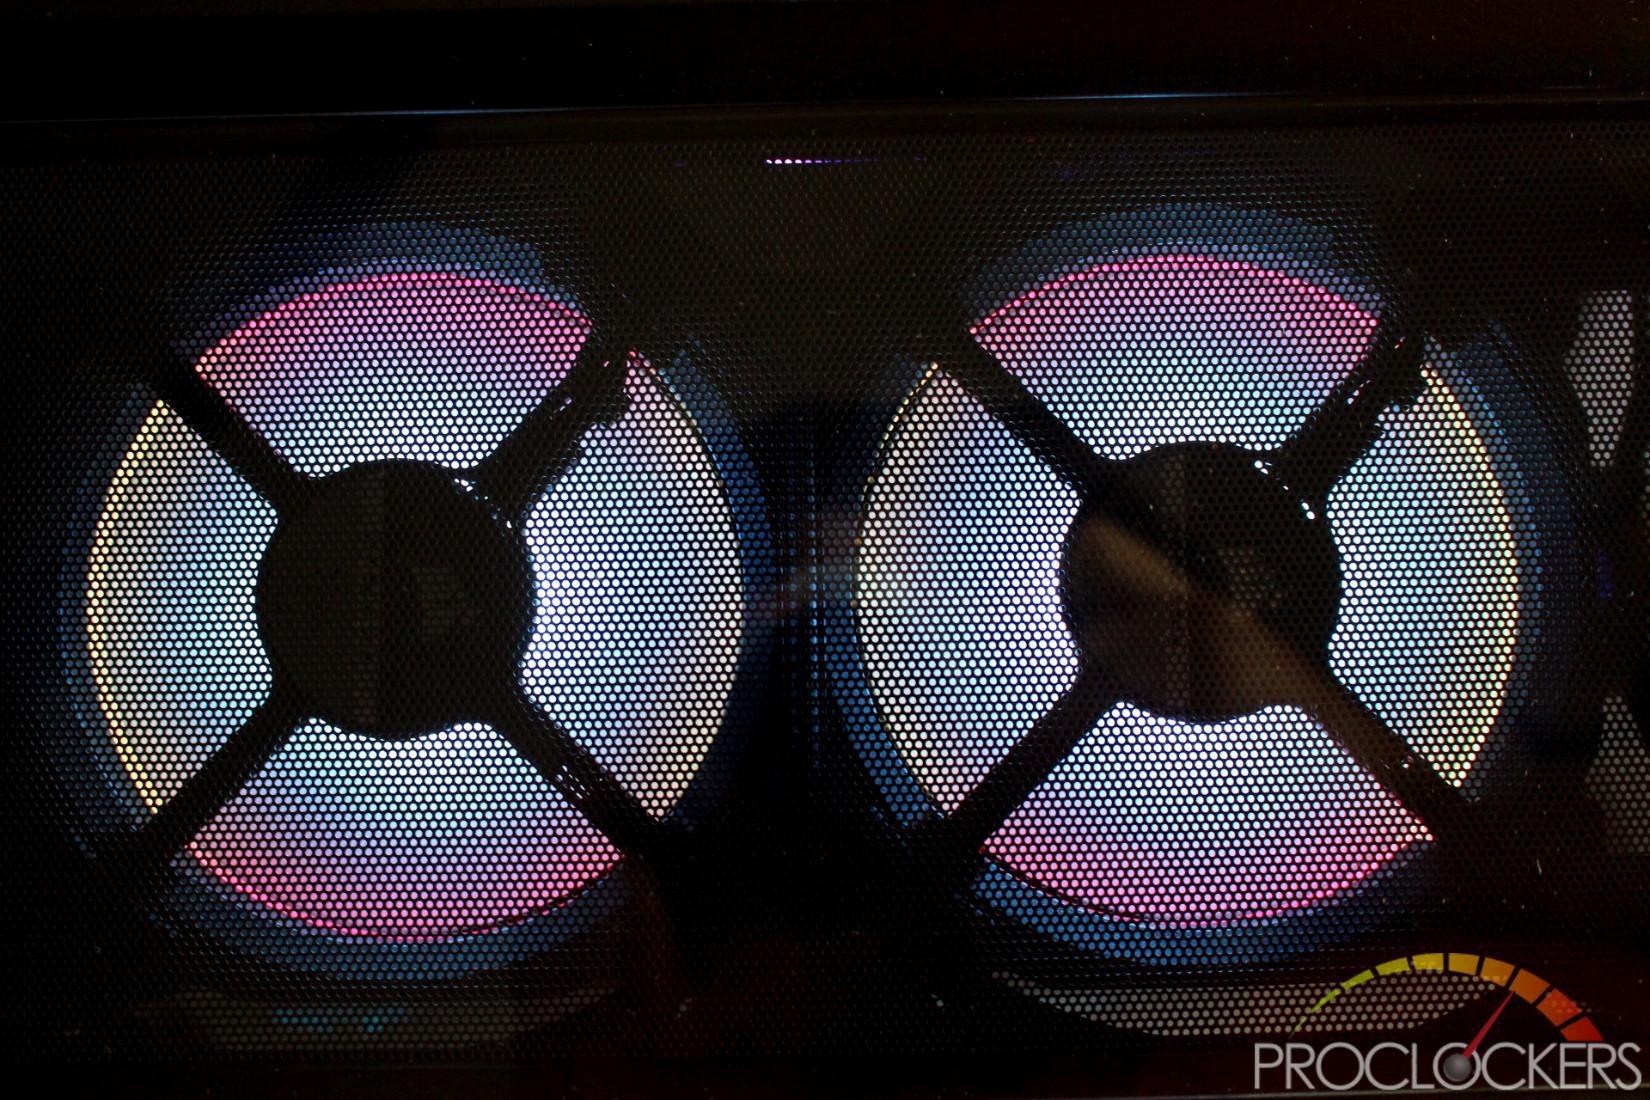
The Crystal 280X RGB comes with a pair of the 120mm Light Loop fans that have a dozen addressable LED’s in an outer ring, and four addressable LED’s in the center hub.
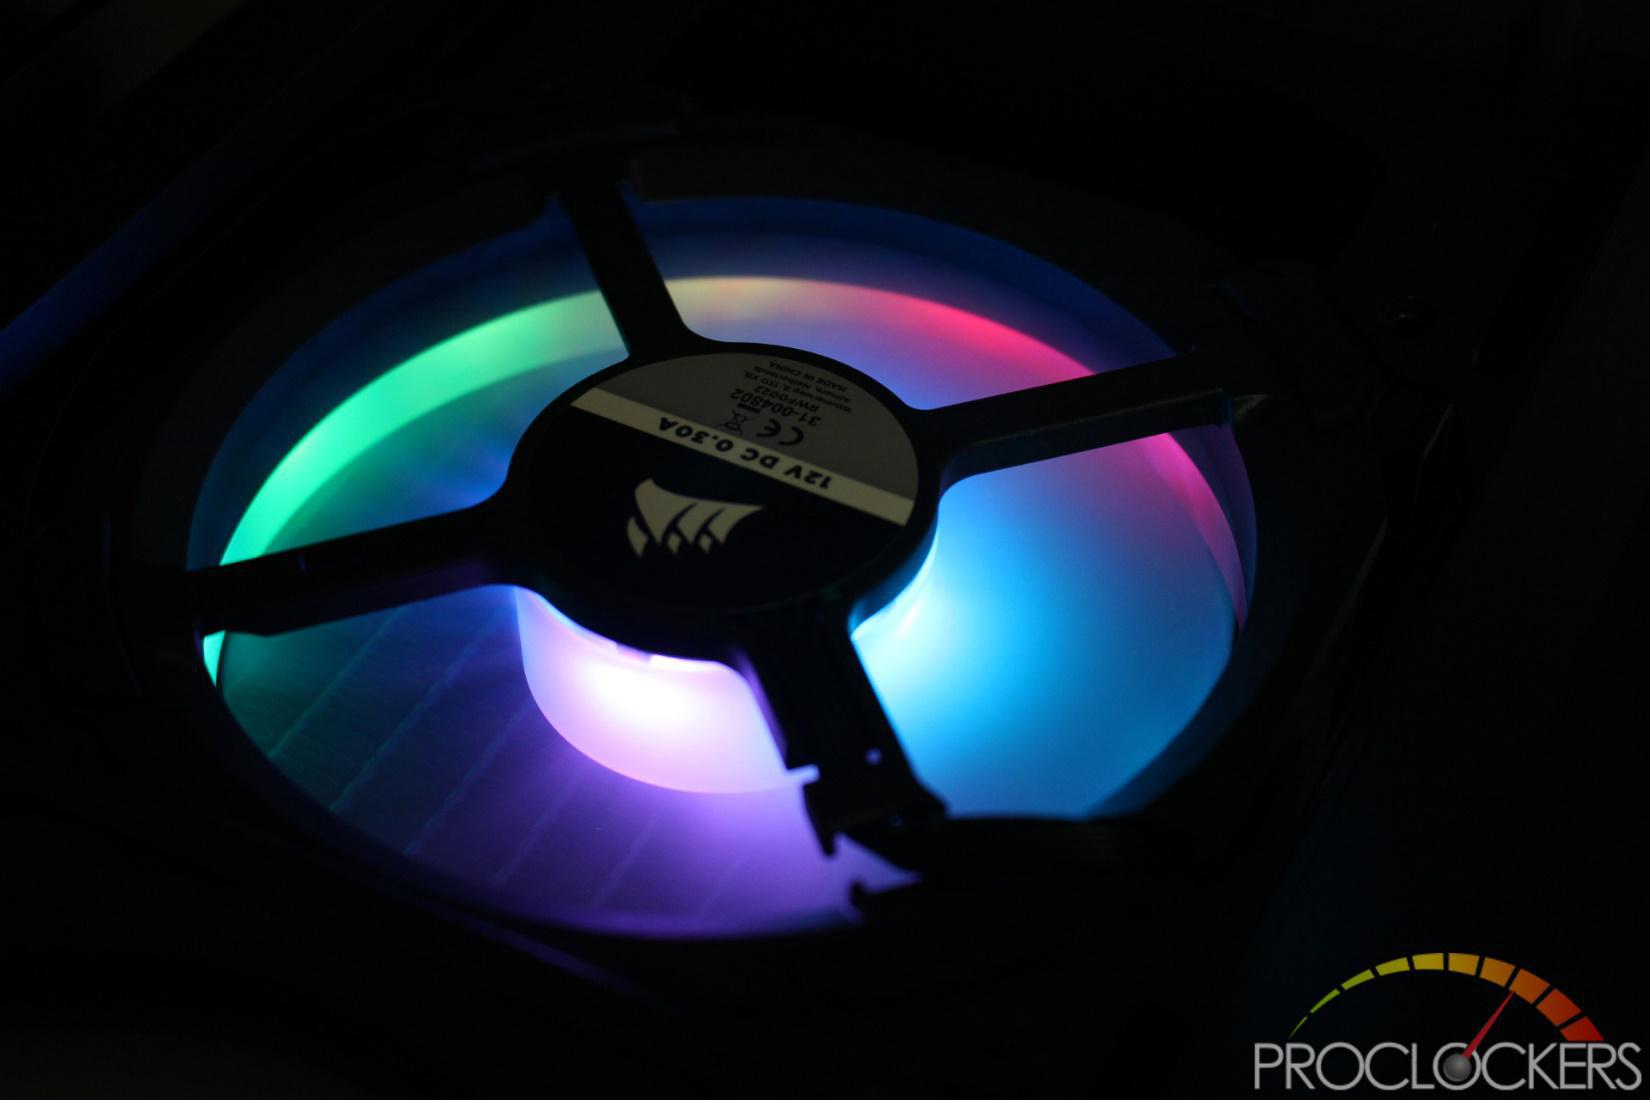
You can see here that that makes an almost infinite number of lighting combinations you can achieve and is a very unique look found nowhere else in the industry.
Corsair iCUE

UNLIMITED POSSIBILITIES AT YOUR FINGERTIPS
Bringing together the full range of CORSAIR products into a single intuitive interface, iCUE software powers everything from CORSAIR keyboards, mice, and headsets to fans, coolers, and PSUs.
iCUE users can instantly synchronize RGB lighting across all their compatible CORSAIR products, monitor system performance from a customizable dashboard, and control hardware temperatures with fan and pump speed adjustment with a single click. At the heart of everything CORSAIR, iCUE offers intelligent control with unlimited possibilities.
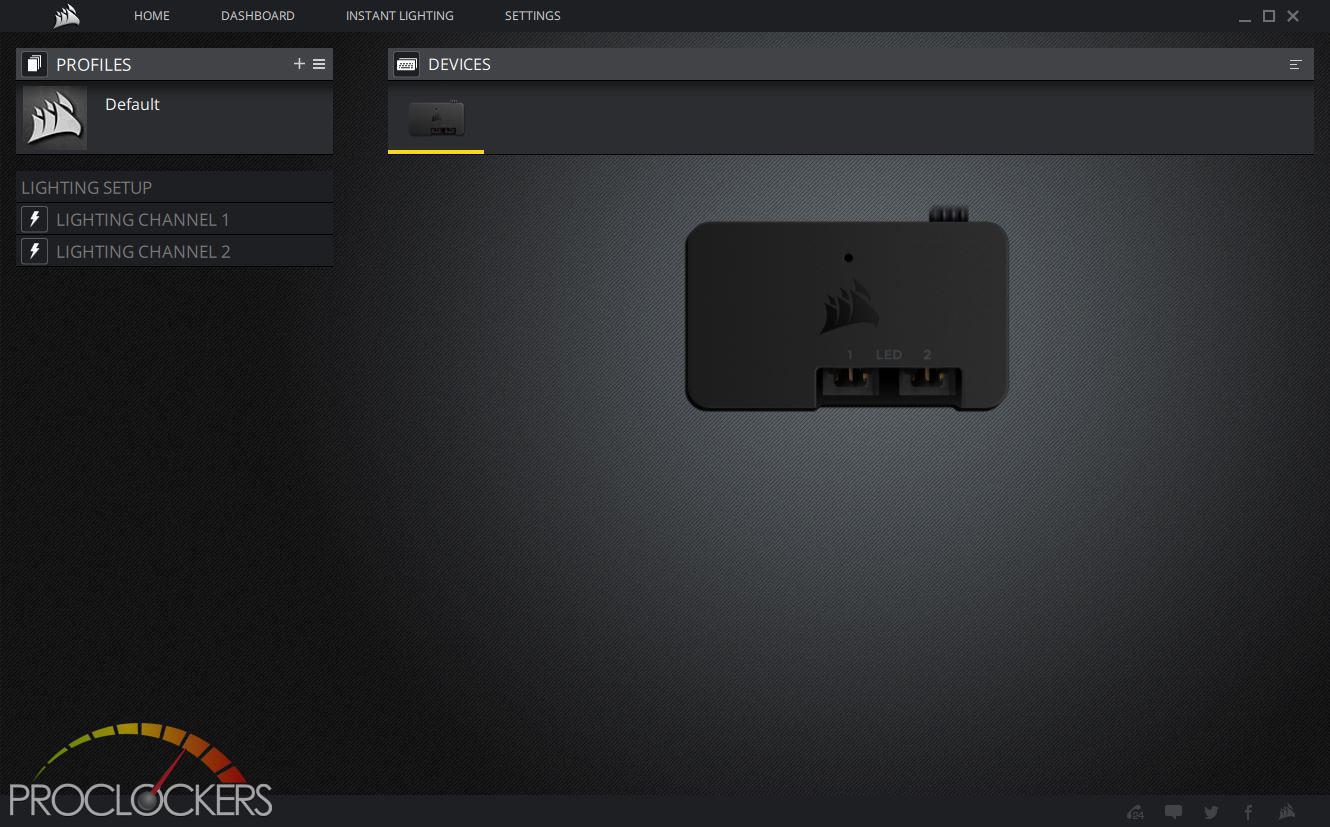
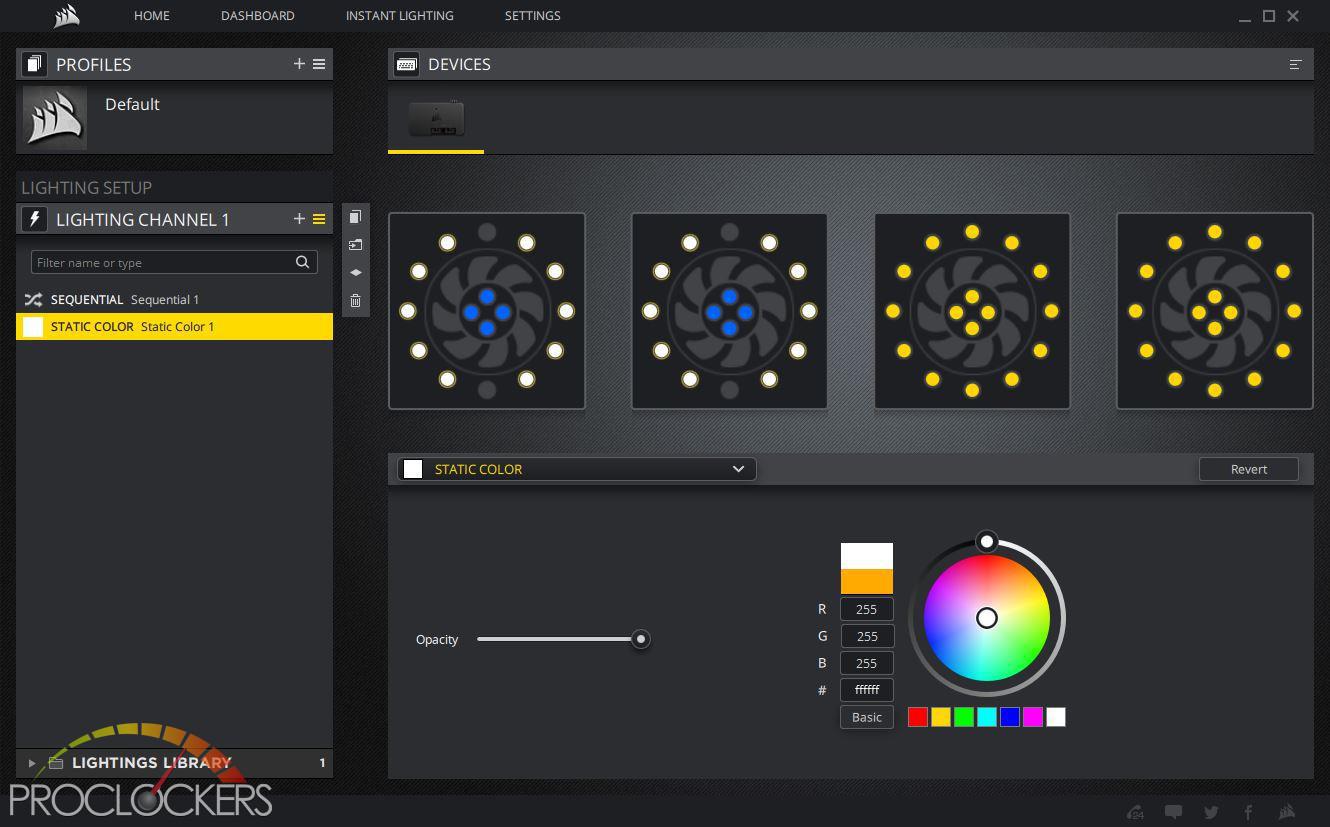
Corsair iCUE works will all of Corsair’s lighting, control, audio and input systems but will be looking only at the Lighting Node Pro today. When you first open up iCUE, you show a list of compatible Corsair Devices detected, in this case, only the Lighting Node Pro.
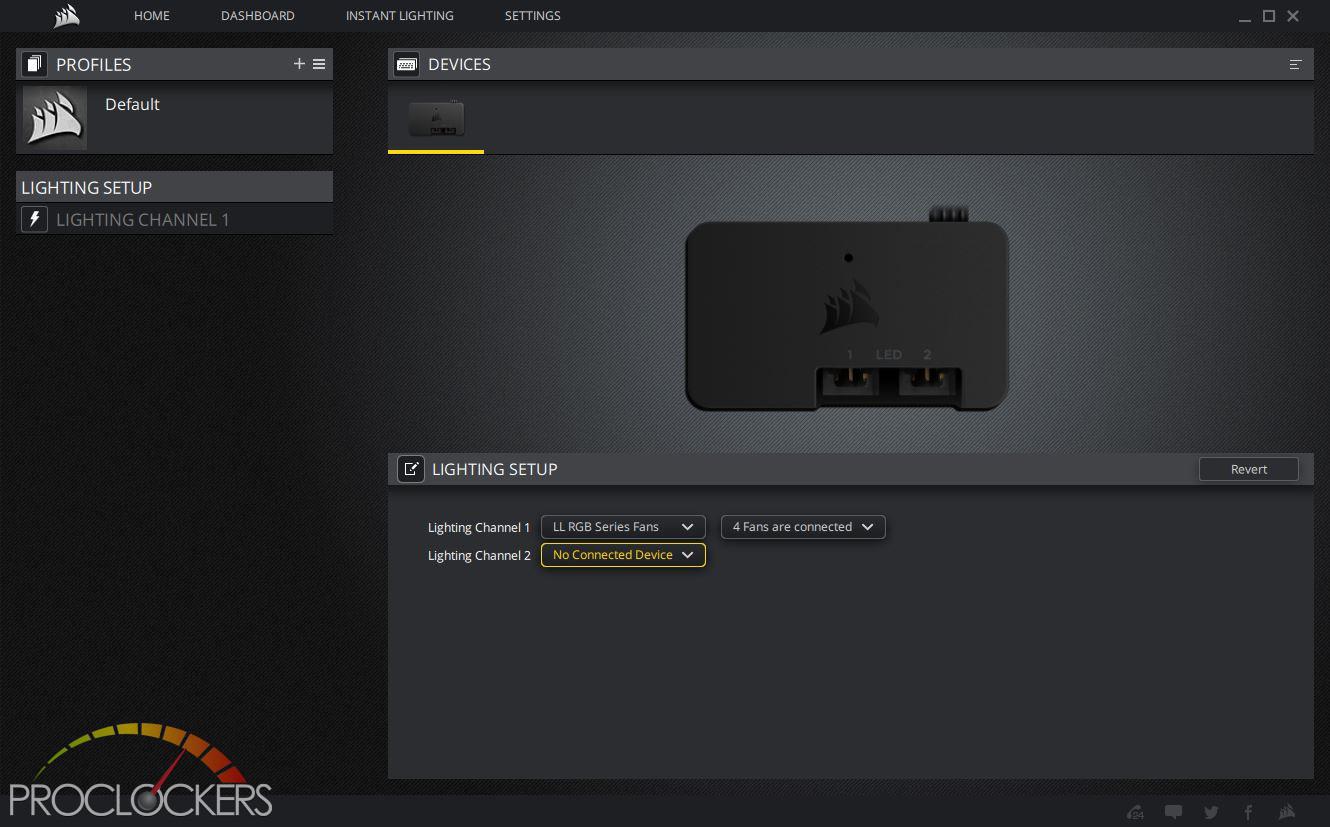
You’ll need to do a basic configuration of the Node initially that is comprised of selecting what is connected to each channel and how many of that given device is connected. In our case, we are using one channel with LL series fans. We do have two ML RGB fans in use, but since they have less LED’s they will still work but the pictorial of them won’t correspond to the real fan. We’ll have to play with them a bit to get which lights we want to be set the correct way.
In our case, we are using one channel with LL series fans. We do have two ML RGB fans in use, but since they have less LED’s they will still work but the pictorial of them won’t correspond to the real fan. We’ll have to play with them a bit to get which lights we want to be set the correct way.
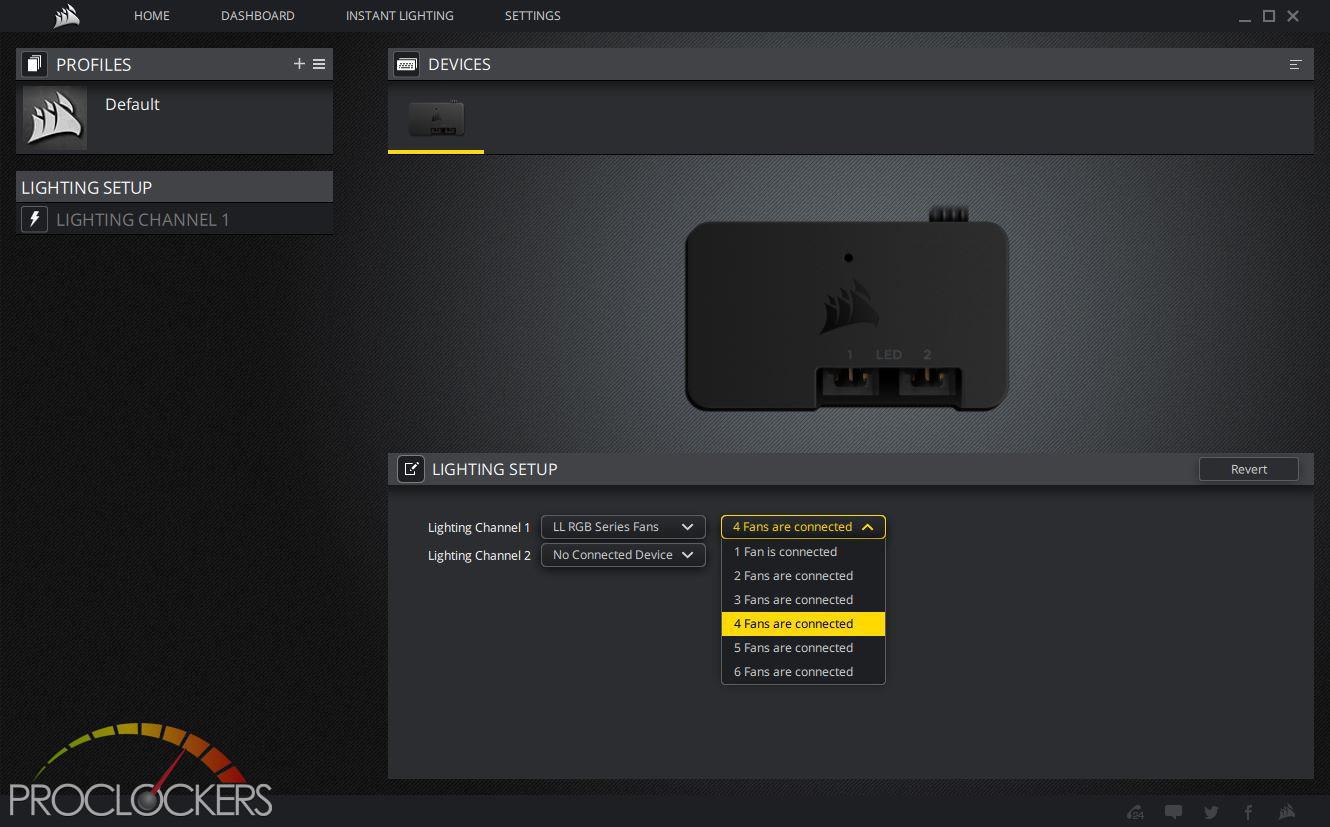
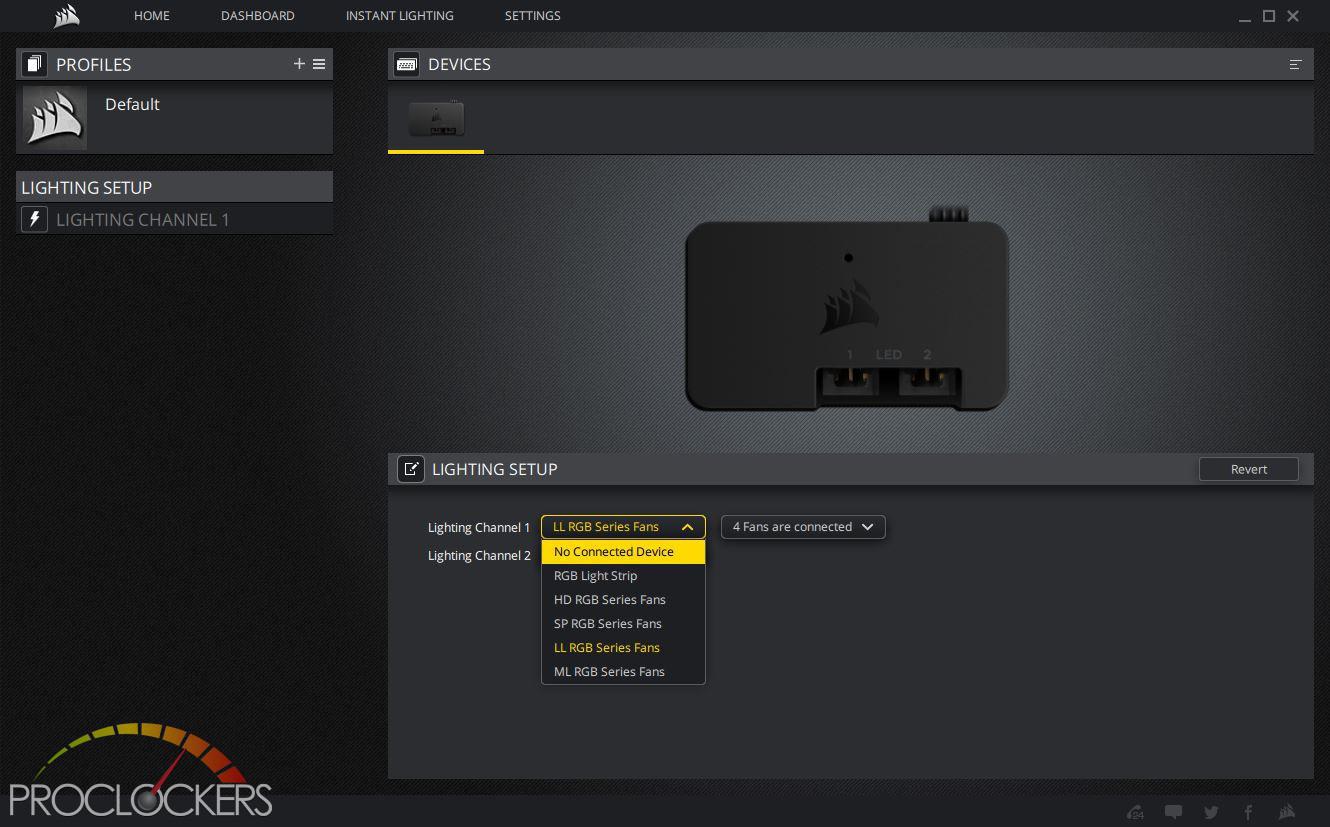
We have 4 fans connected and they must be connected to the fan lighting hub in order on ports 1-4. Ports 5 and 6 will go unused for now.
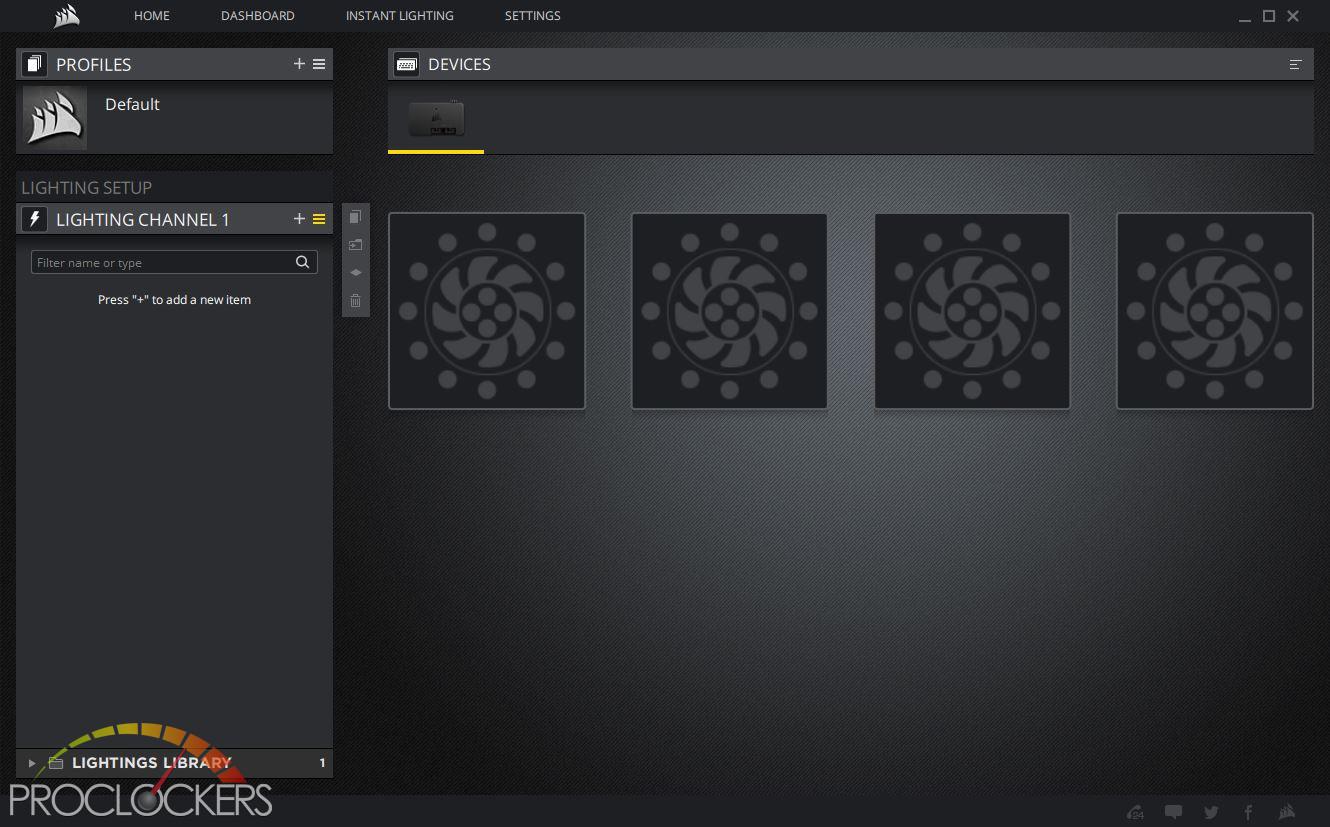
With that done we can select Lighting Channel 1 to configure it. Notice it has pictorials of four LL series fans.
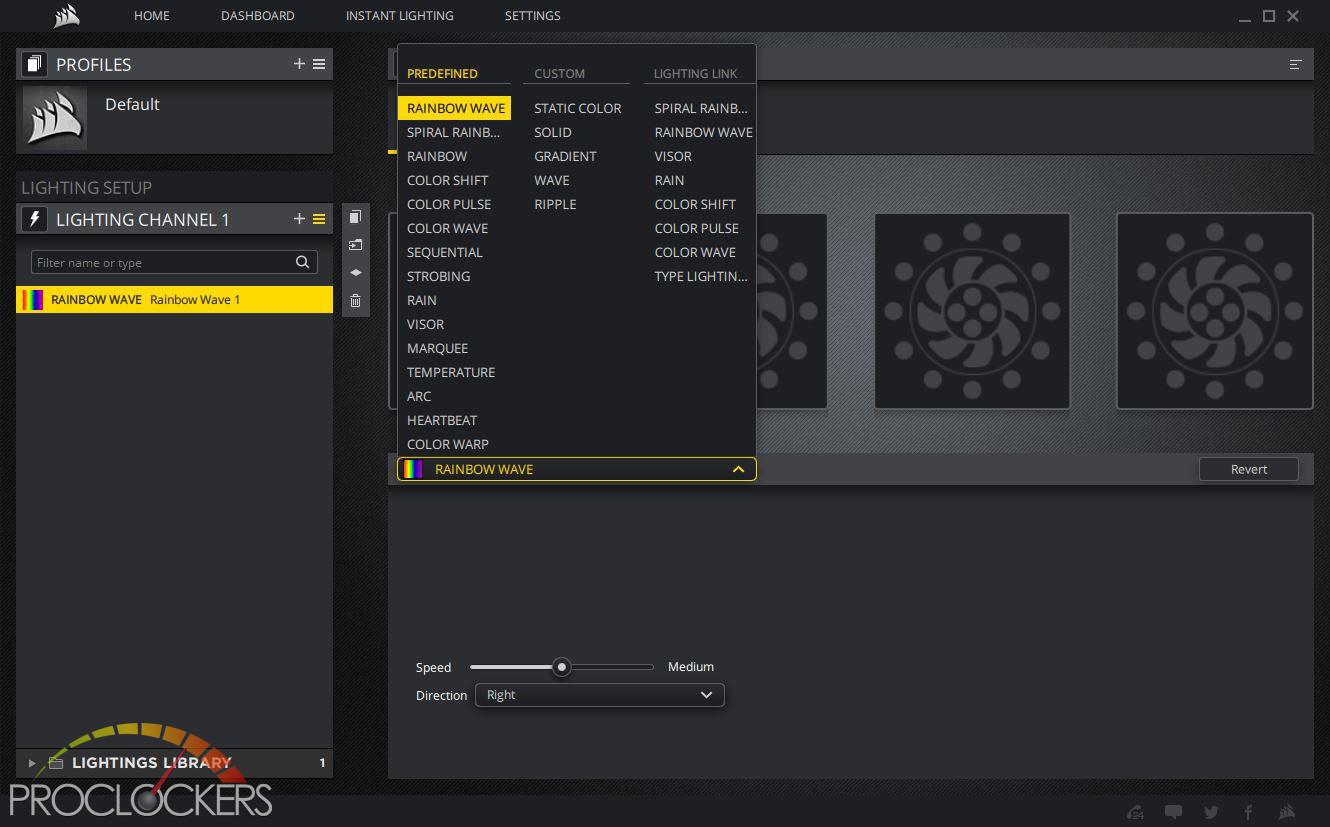
We’ll start by hitting the plus sign to create a new lighting mode. The default is a rainbow wave that shows off the capabilities of a digital system, but you have a ton of options to choose from.
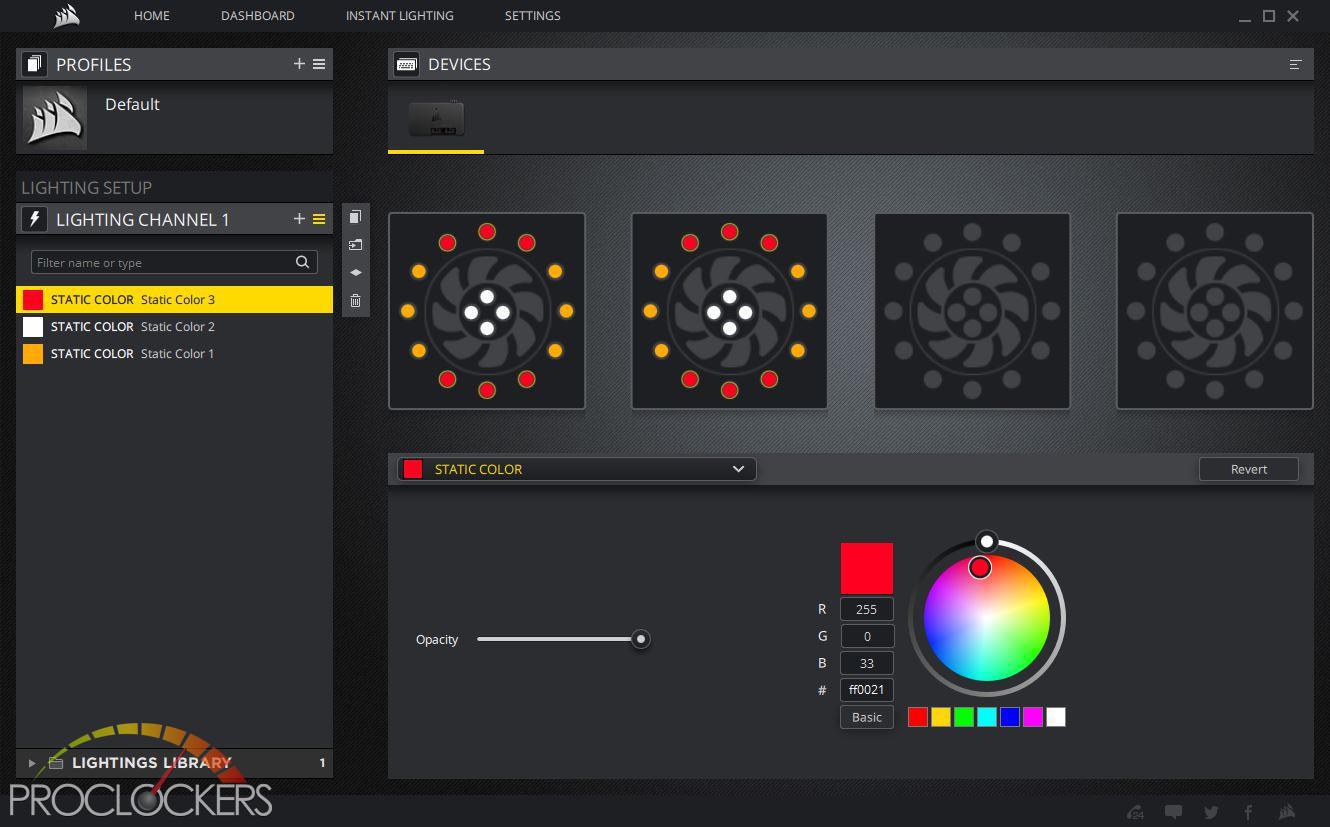
New to the iCUE software over the older CUE is the ability to apply lighting modes to every single connected LED independently. You can have some LED’s in the fan going in a rainbow, a few on solid and 1 reacting to CPU temperature if you wish. Here we set the center hub LED’s too solid white, and the outer LED’s to a pattern of red and yellow.
The end result is a bit more spectacular than the pictures give justice for.
Here we set the outer ring solid white and the center hub LED’s in a sequential rainbow. The options are nearly limitless.
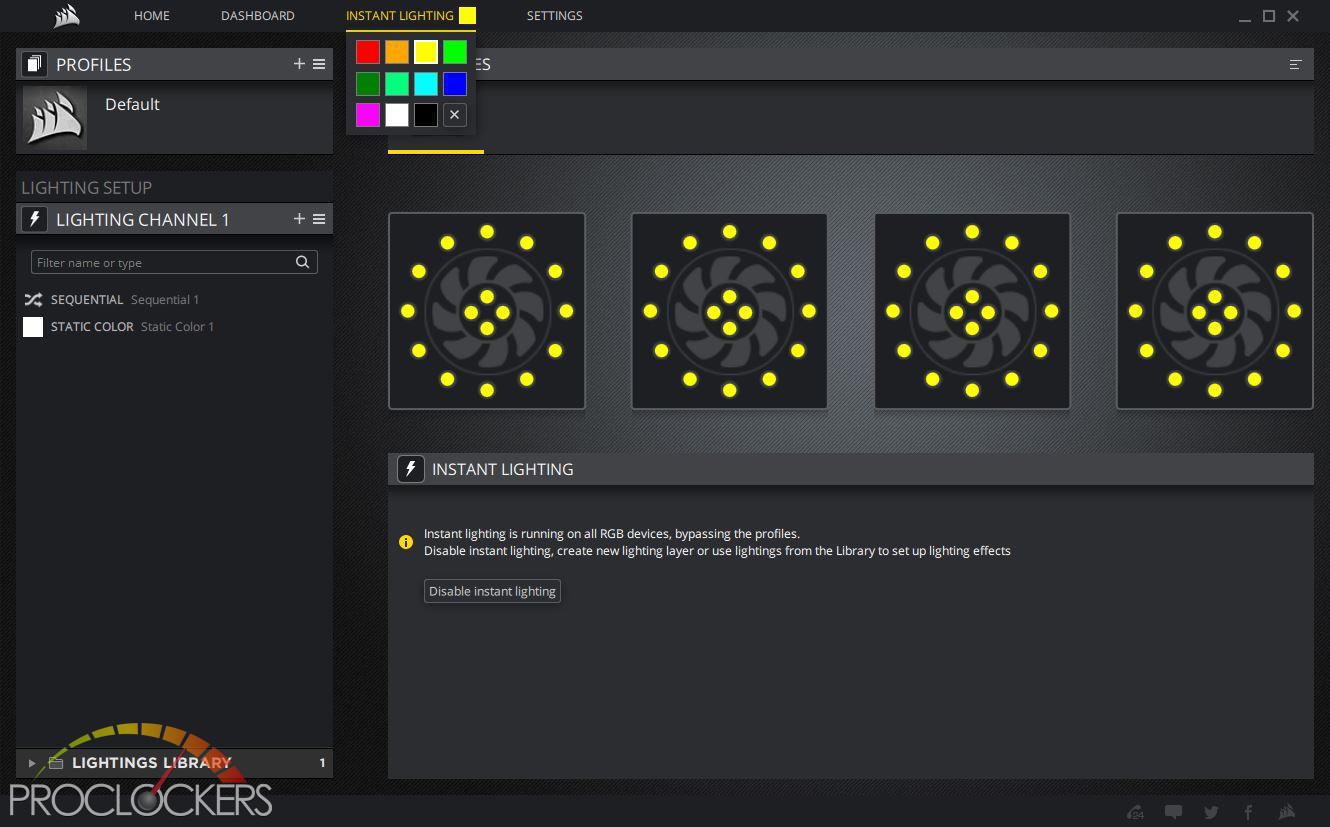
If you don’t want all the crazy lighting or don’t want to mess with it, for now, you can hit the Instant Lighting drop down and pick a color (or the grey X for off) and instantly turn every connected light on every device a static color.
In this case, we went with the Corsair Yellow.
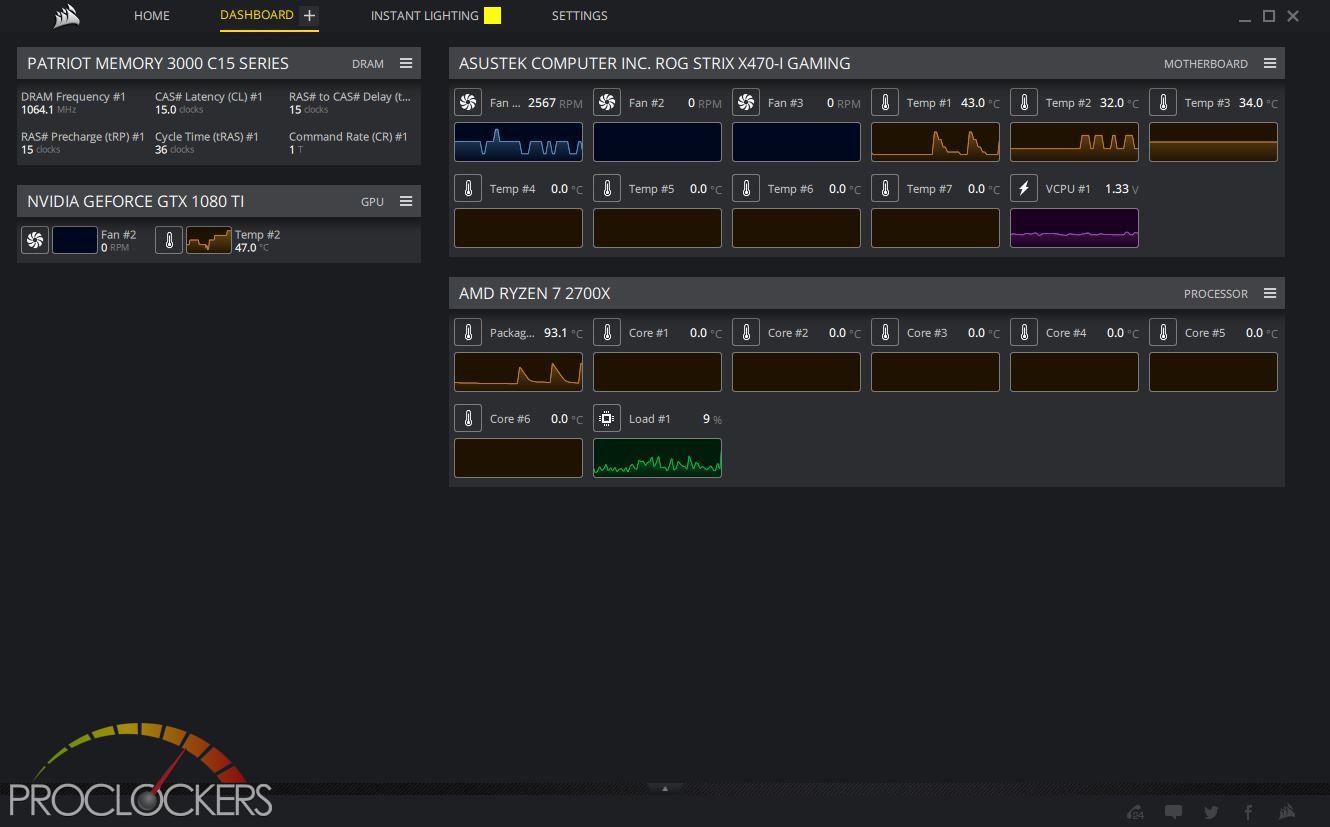
The Dashboard lets you monitor other items in your system, here we have some Patriot memory, the ASUS motherboard and GPU, and the Ryzen 2700X CPU.
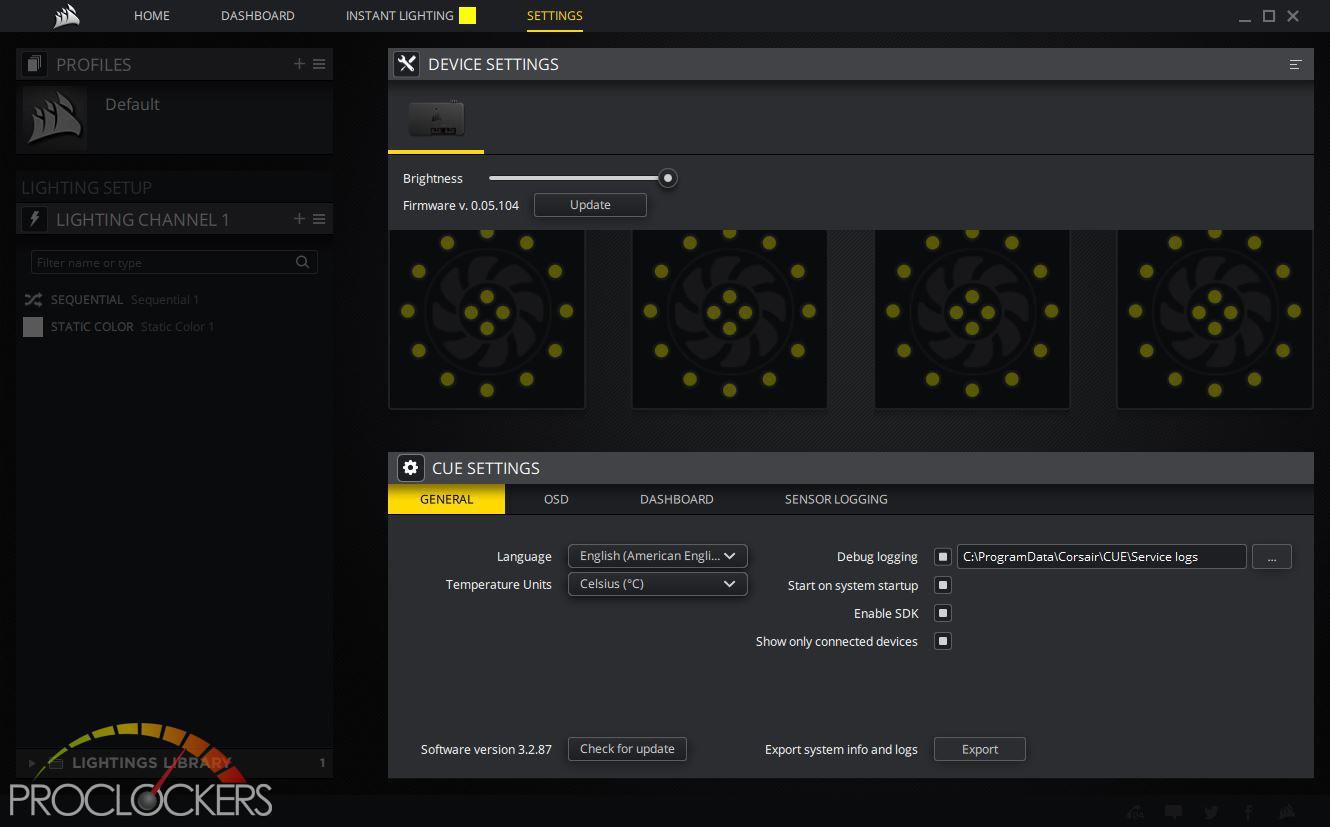
The settings menu lets you adjust program settings like what to do on system startup, or check firmware revisions and even update corsair device firmware with a single click.
System Build
Specs:
CPU: AMD Ryzen 7 2700X
Mobo: ASUS ROG Strix X470-I Gaming
Ram: 16GB Patriot Viper RGB 3000Mhz
GPU: ASUS GTX 1080Ti Poseidon Platinum
SSD: Samsung 960 Pro 2TB
PSU: Corsair RM1000
Case: Corsair CRYSTAL 280X RGB
Fans: Corsair LL120 x2 (Included) & Corsair ML140 RGB 2x
Cooling: Alphacool DC-LT pump, top, and reservoir, 240mm radiator. EKWB Supremacy Evo water block.
Since we are planning on throwing a simple liquid loop in the case and moving everything around, we removed the factory installed fans which required us to remove all of Corsair’s carefully wire-managed cables. We also removed the drive trays as we will be running a M.2 drive on the board itself.
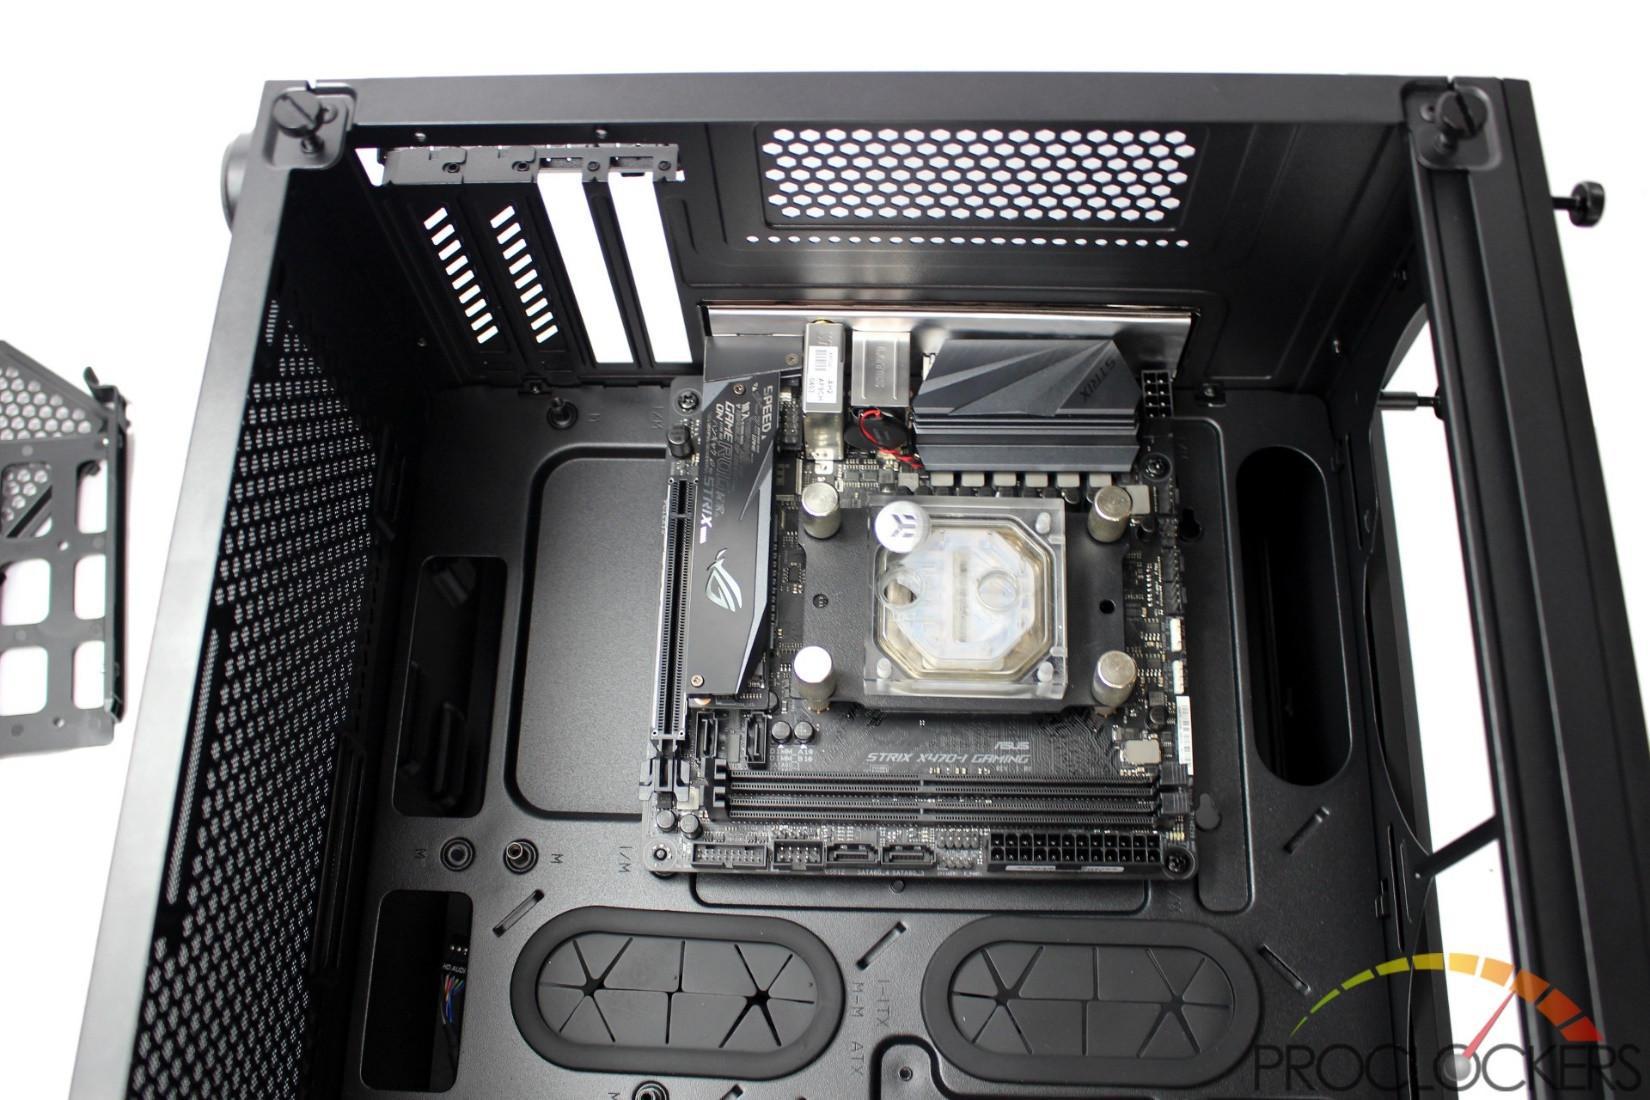
The motherboard standoff’s are preinstalled in the most common locations so we were able to drop our board right in and screw it down with no issues.
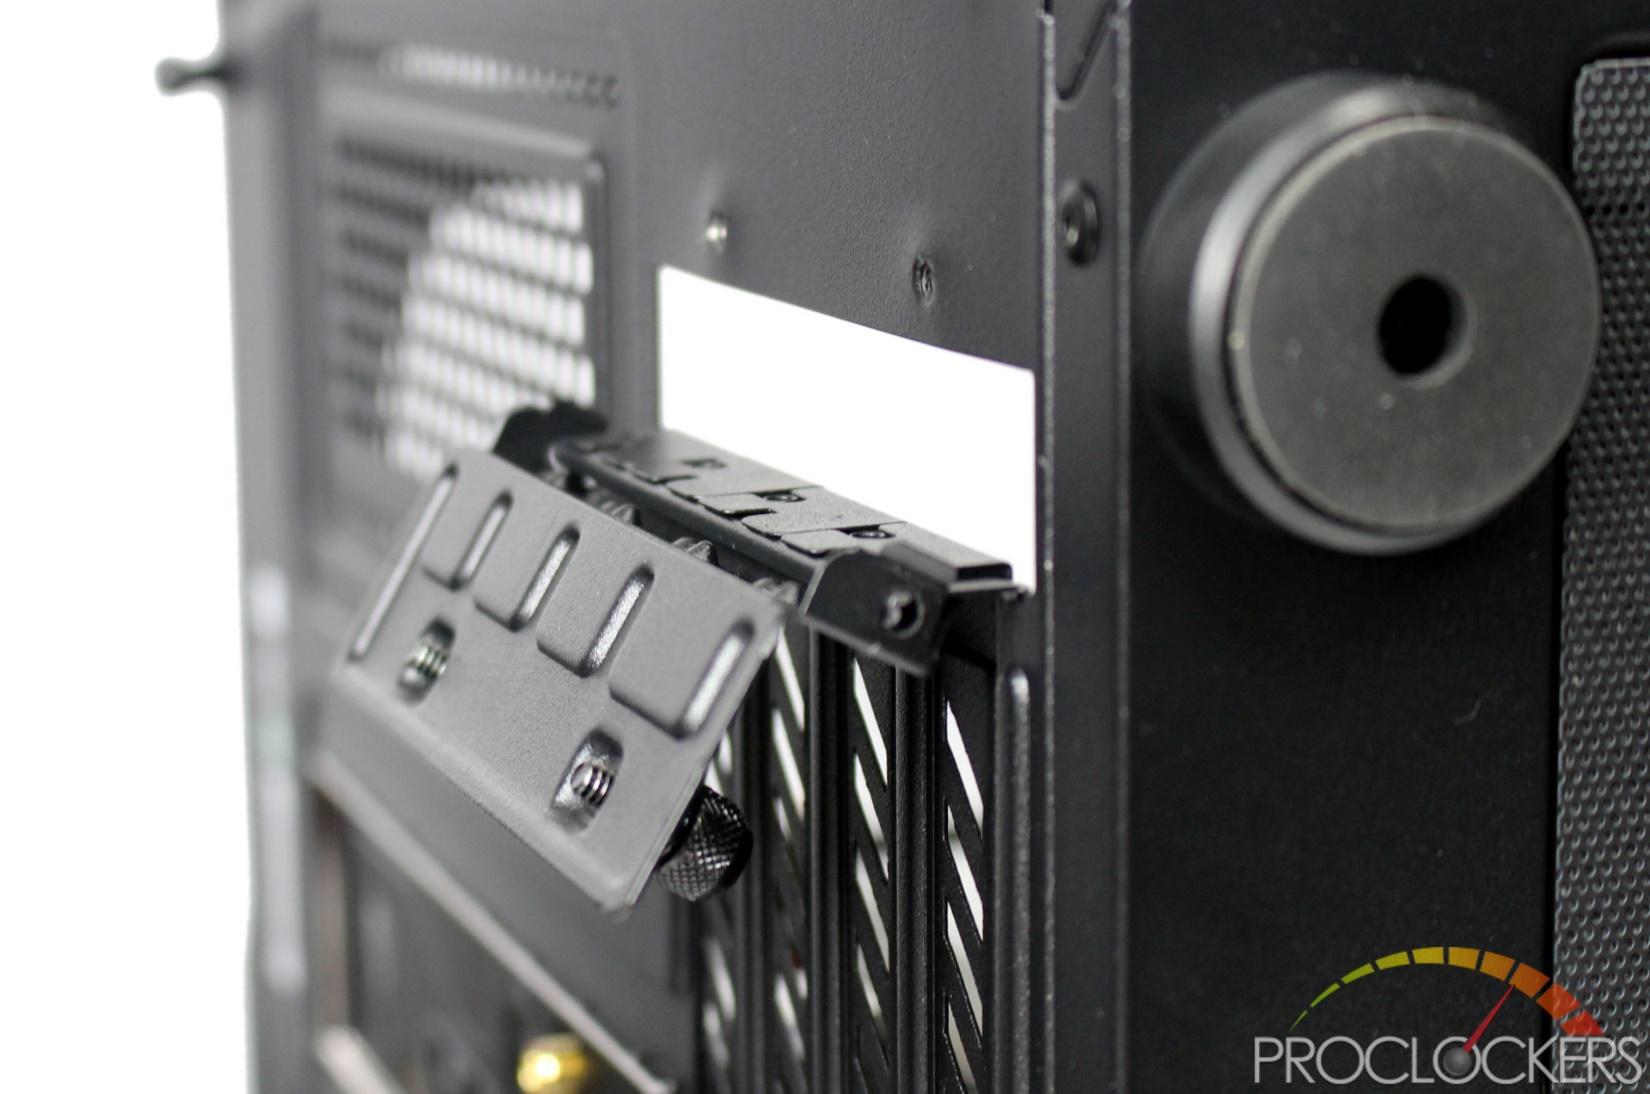
Next we popped open the expansion cover to remove two of the blanks and install our GPU.
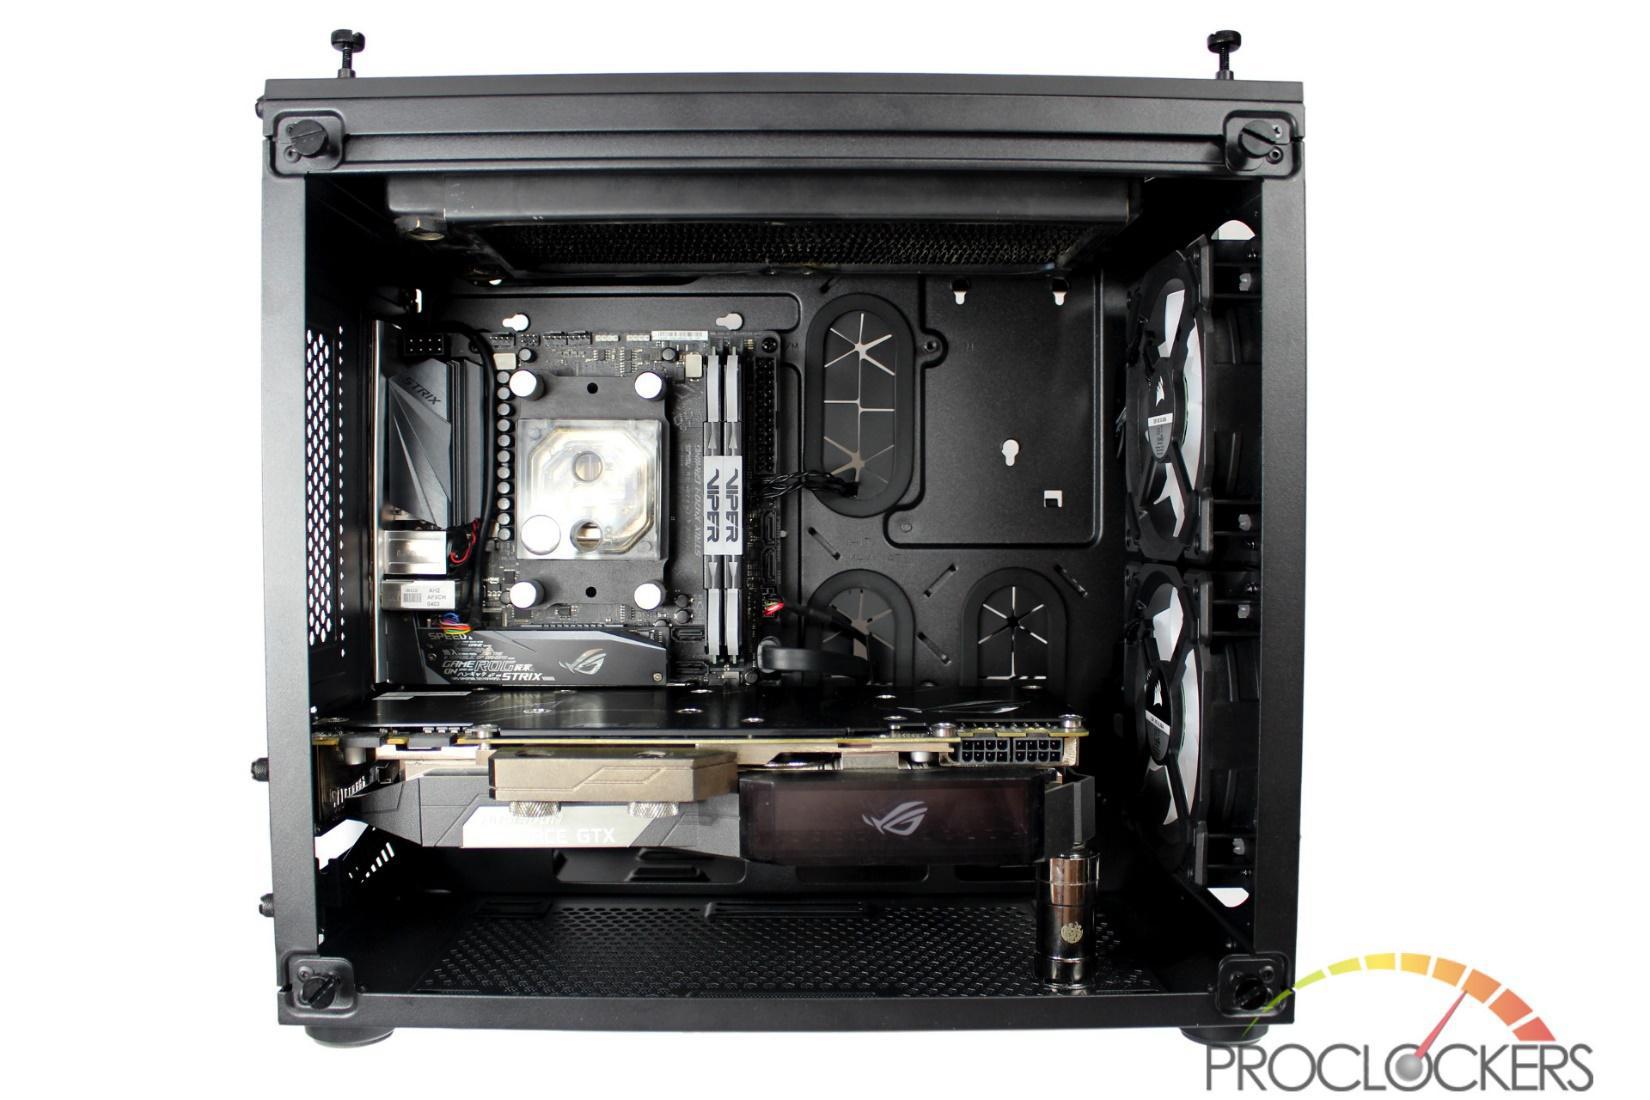
With the GPU installed we put our ram kit and radiator in. the Two supplied LL120 fans are on top of the radiator in a pull configuration. Two ML140 fans provide general case airflow from the front. As the GPU we are using is very heavy, we used half of a quick connect fitting to brace it while we’re flipping the case around in the build so as not to damage the GPU. The ASUS ROG GTX 1080Ti Poseidon Platinum is the biggest card we have and have touched. If it can fit, almost anything else can fit.
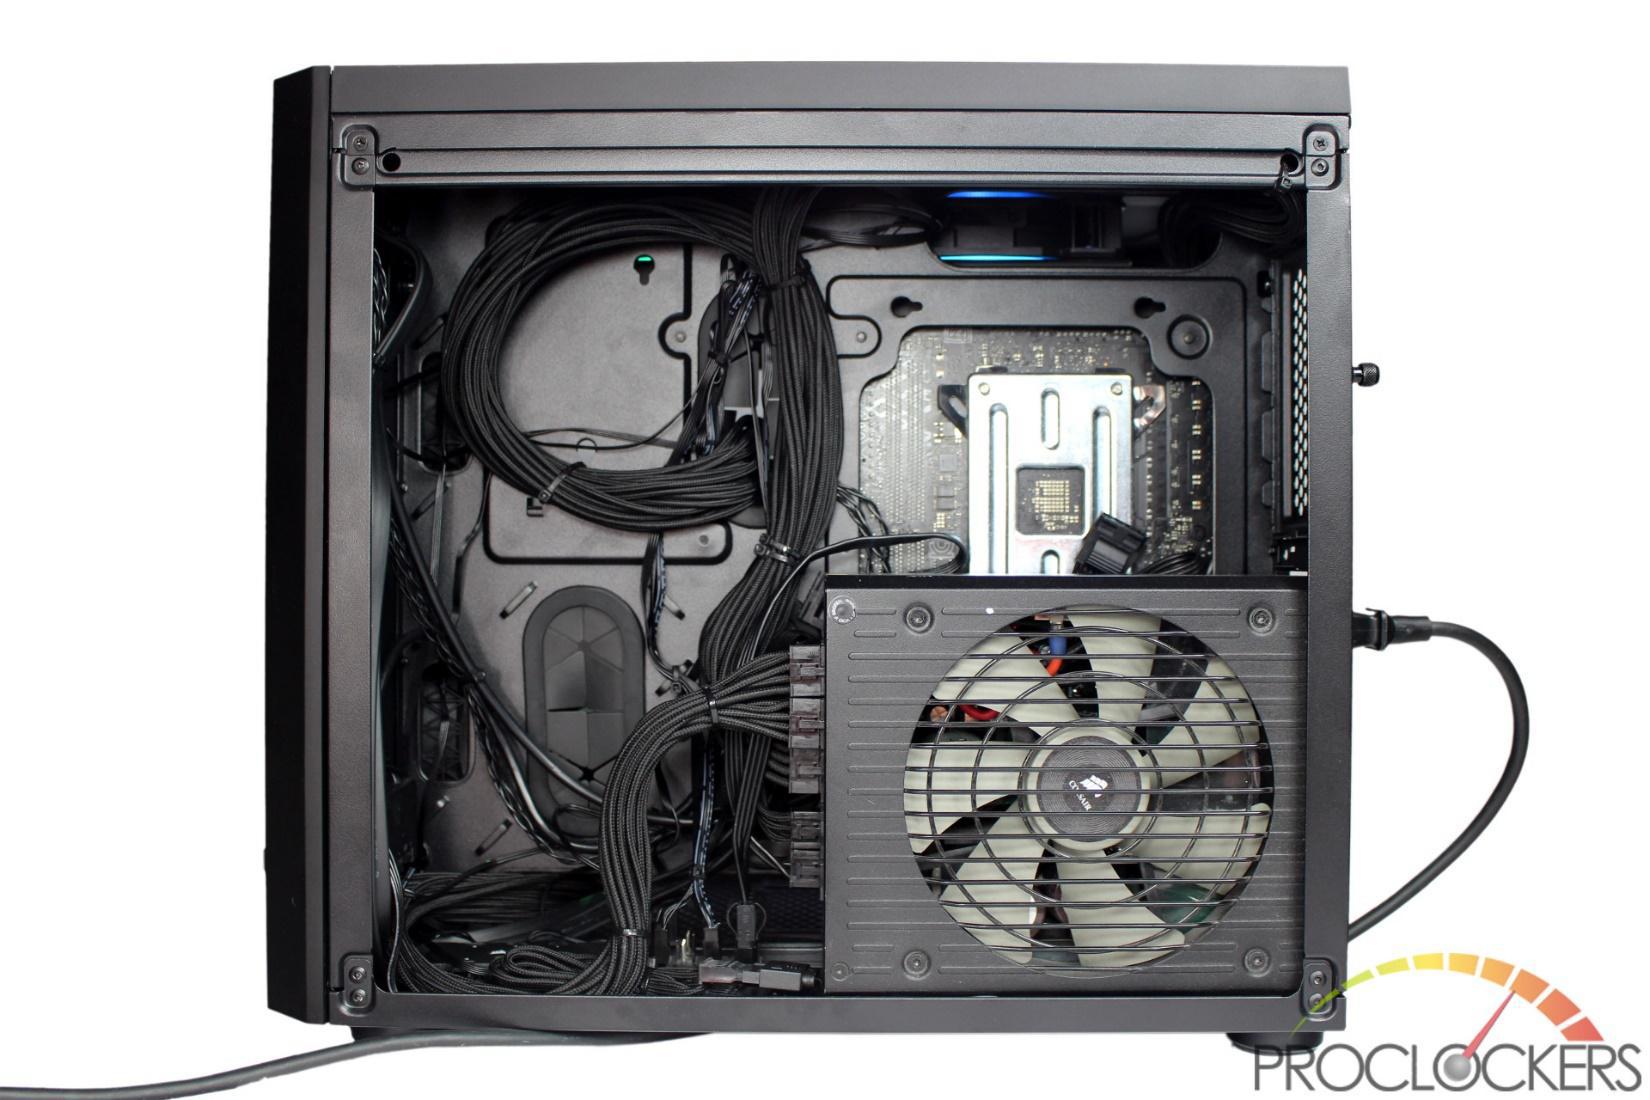
Next, we installed the Corsair RM1000 PSU in the rear and ran the cables. There are tons of little loops stamped into the motherboard tray everywhere so cable management with zip ties is a breeze.
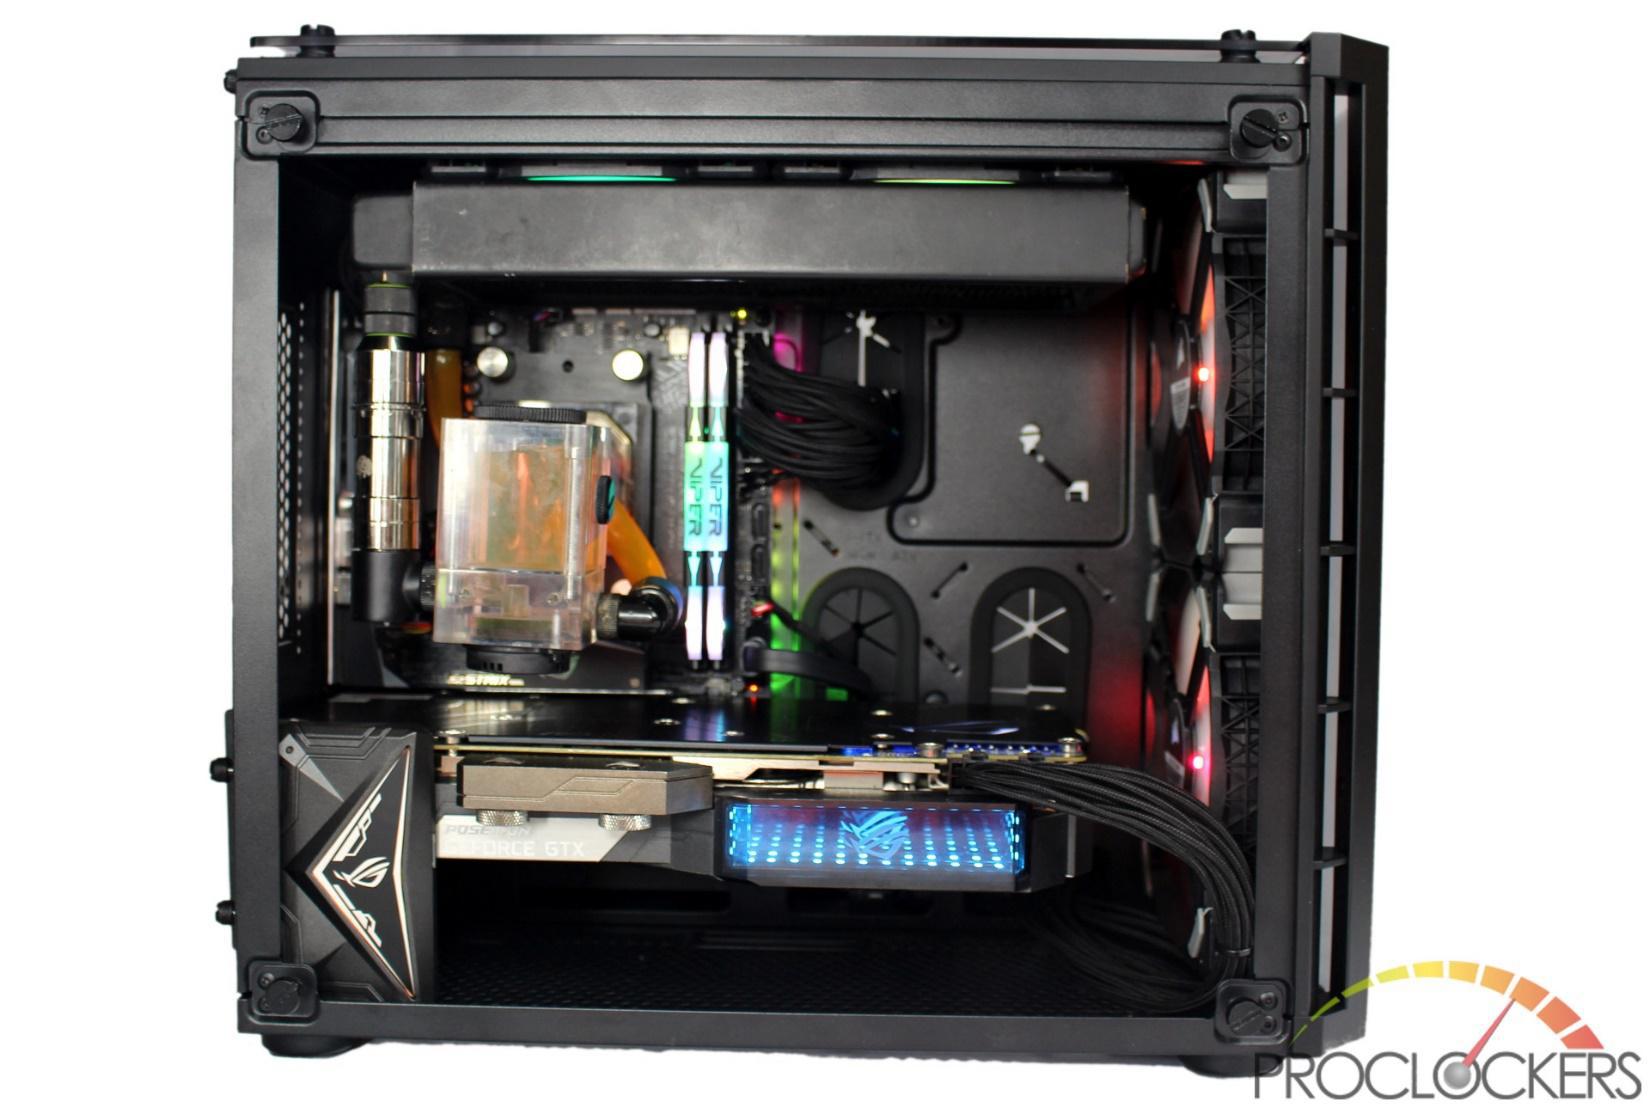
Lastly we installed our simple Loop hanging directly from the Radiator and added a matching ROG SLI bridge. We only have one card, but it is the perfect length to support the GPU from the case floor for a little extra piece of mind. We ended up not liquid cooling the GPU this time since we would really need more than a single slim 240mm radiator for this hardware combination and we don’t have another on hand. Luckily, this GPU does just fine on air only.
Even with larger 140mm fans, there is plenty of room to run cables.
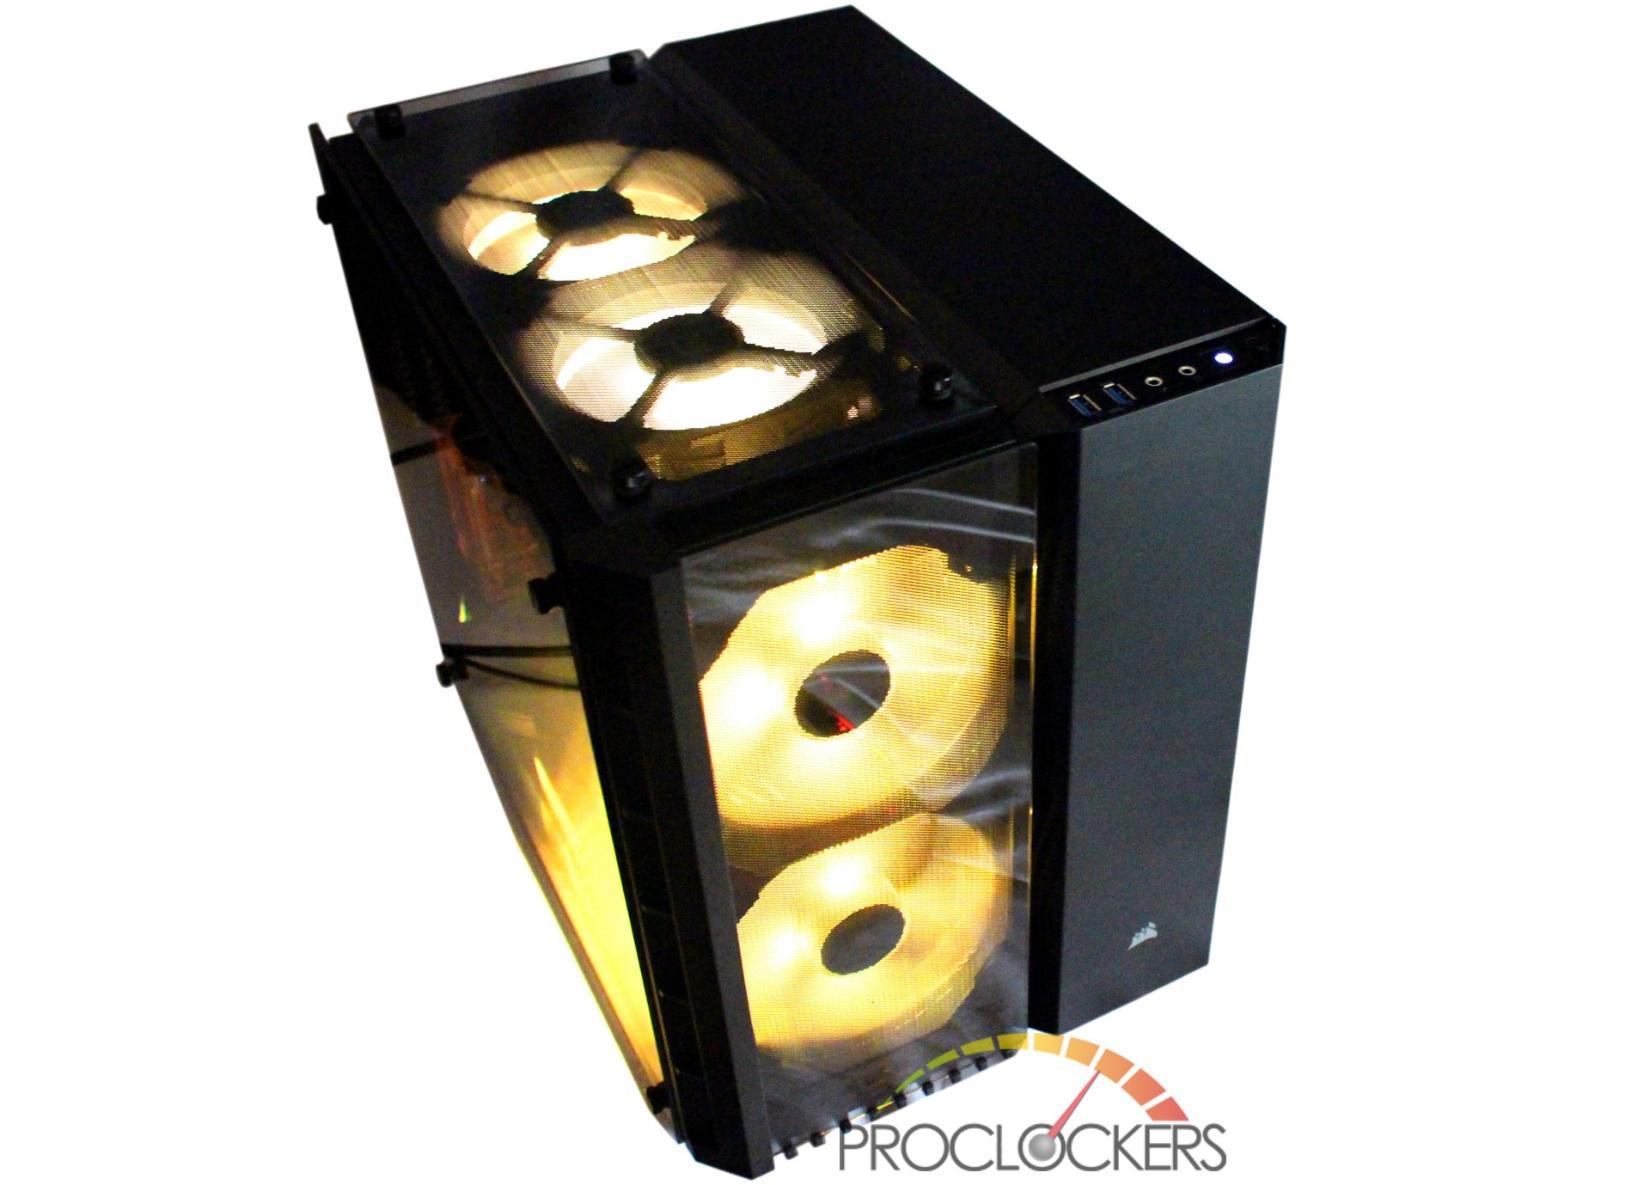
The final test is putting the glass door on. This GPU is massive and almost touches the door but does fit. We ramped the fans up to 100% and felt around and there is a ton of airflow coming out around the glass panel on top so cooling shouldn’t be an issue. The fan filters do create a bit of air noise, but the glass panels block that added noise enough that you get a very quiet system.
Final Thoughts & Conclusion
Corsair’s Crystal 280X is a beautiful marriage of the beloved dual-chamber cube cases made popular by the Carbide Air 540 half a decade ago and the tempered glass and sleek lines of the more modern Crystal series cases. The case is a breeze (pun intended) to build in and we were able to go from a fresh out of the box state to a running build in an hour flat. A MicroATX build would limit your cooling options a bit. Don’t plan on putting monster 60mm+ thick radiators in here, but you can get some serious cooling with slim radiators all day long.
Since we really like this case, we’re going to nitpick a bit. Does that even make sense? Well, yea, the Crystal 280X is so dangerously close to being perfect, we want to point out just a few small things just in case someone from R&D sees this. First is cable management. It’s not the lack of it, or options to do it, it’s that it’s already done for you. Any build is going to get some level of cable management, and one fan on top and one in the front is just an odd configuration. If you don’t add any other fans, you likely either move them both to the front or to the top depending on what you’ll see the most of on your desk, so you have to break all the zip ties to move them. If you add more fans, you’ll have to manage the wiring on those anyway.
The only other thing is the fan/radiator mounting. All 120mm mounts are dead center of the 140mm mounting locations. That doesn’t sound bad in and of itself, but if you are getting tight on space with large components, it would be nice to have 120mm sized radiators farther from the motherboard tray so you can plug in fans and RGB headers or shifted one way or another for fitting clearance. Slotted mounts would solve that. Those are super minor things, and we see modders having a field day with this case. There are SO many possibilities, and it probably won’t be long before you see some very creative builds.
Not bad for a $20 case right? Wait, but we said the MSRP is $159? If you add up all of the extras like the Lighting Node Pro and the beautiful Light Loop fans, you get the entire setup for $20 more than the internals alone.
Given how fun this case is, and how much value you really get, it’s hard to do anything but highly recommend this case if you are in the market for a smaller end build with higher-end capabilities.
Awesome job Corsair!


The 25 Best Anime Cats, Ranked
What are the best anime cats? Cats are something you either love with every fiber of your being or vehemently...


The 25 Best Anime Teachers, Ranked
Who are the best anime teachers? With high school being such a prevalent setting in anime, it makes sense that...


The 25 Best Orange Hair Anime Girls, Ranked
Who are the best orange hair anime girls? Orange hair is interesting in anime because it can either be a...