
Hardware
Gigabyte Z390 Aorus Pro Motherboard Review
Introduction
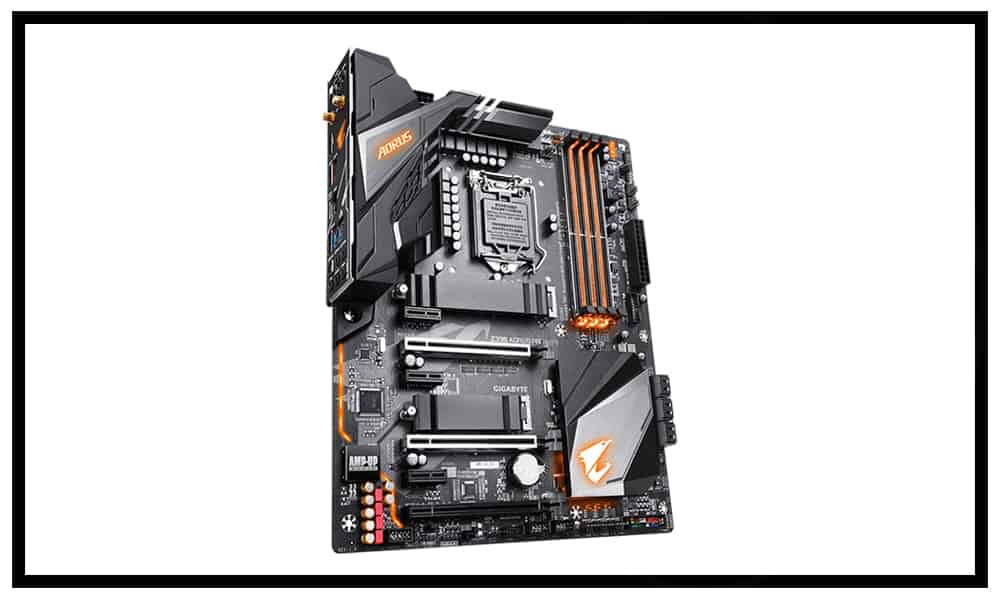
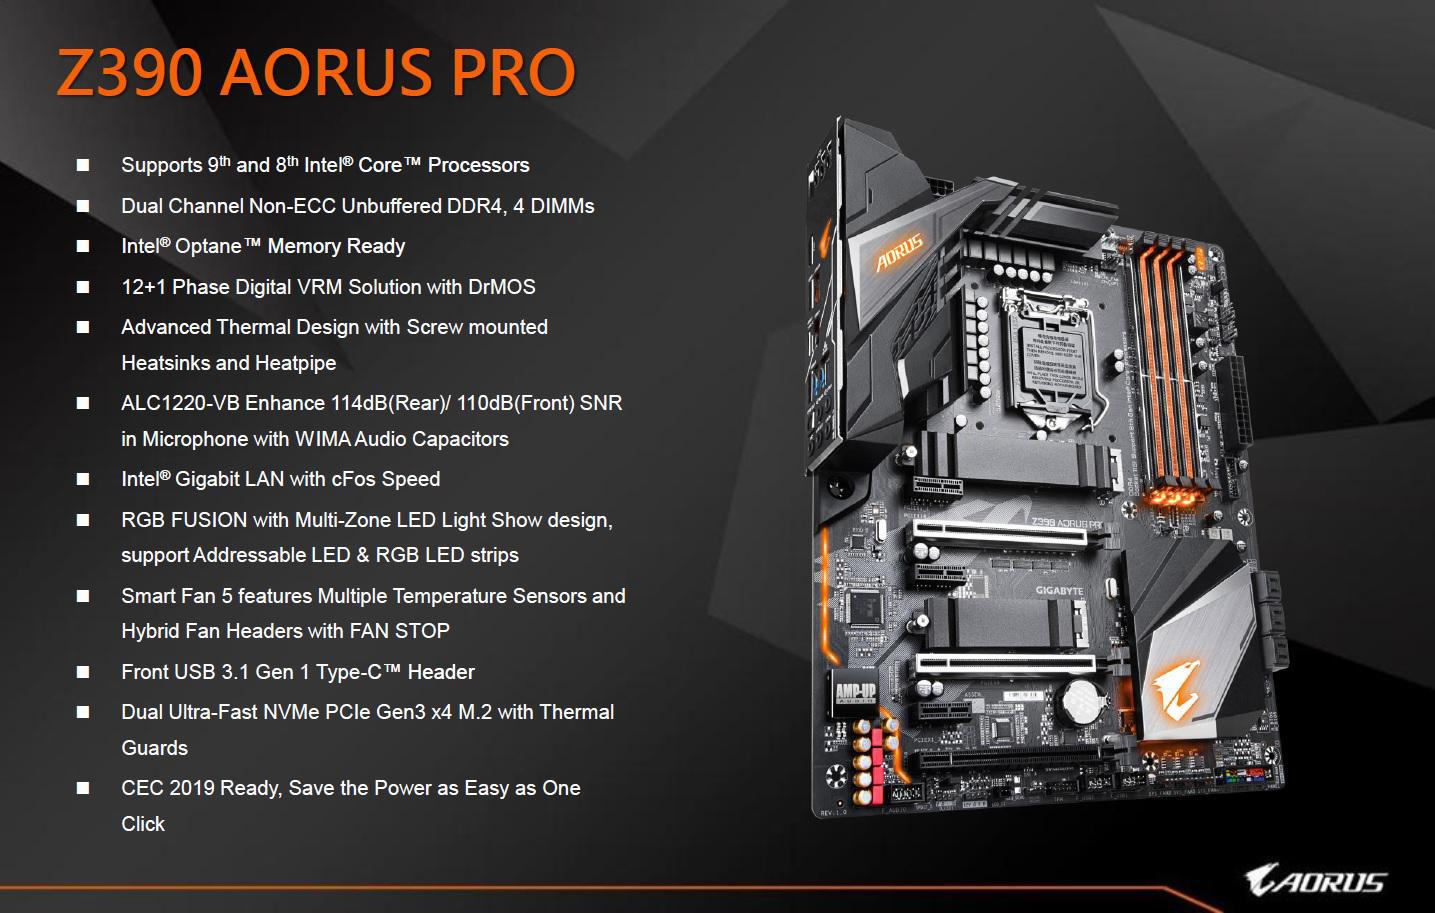
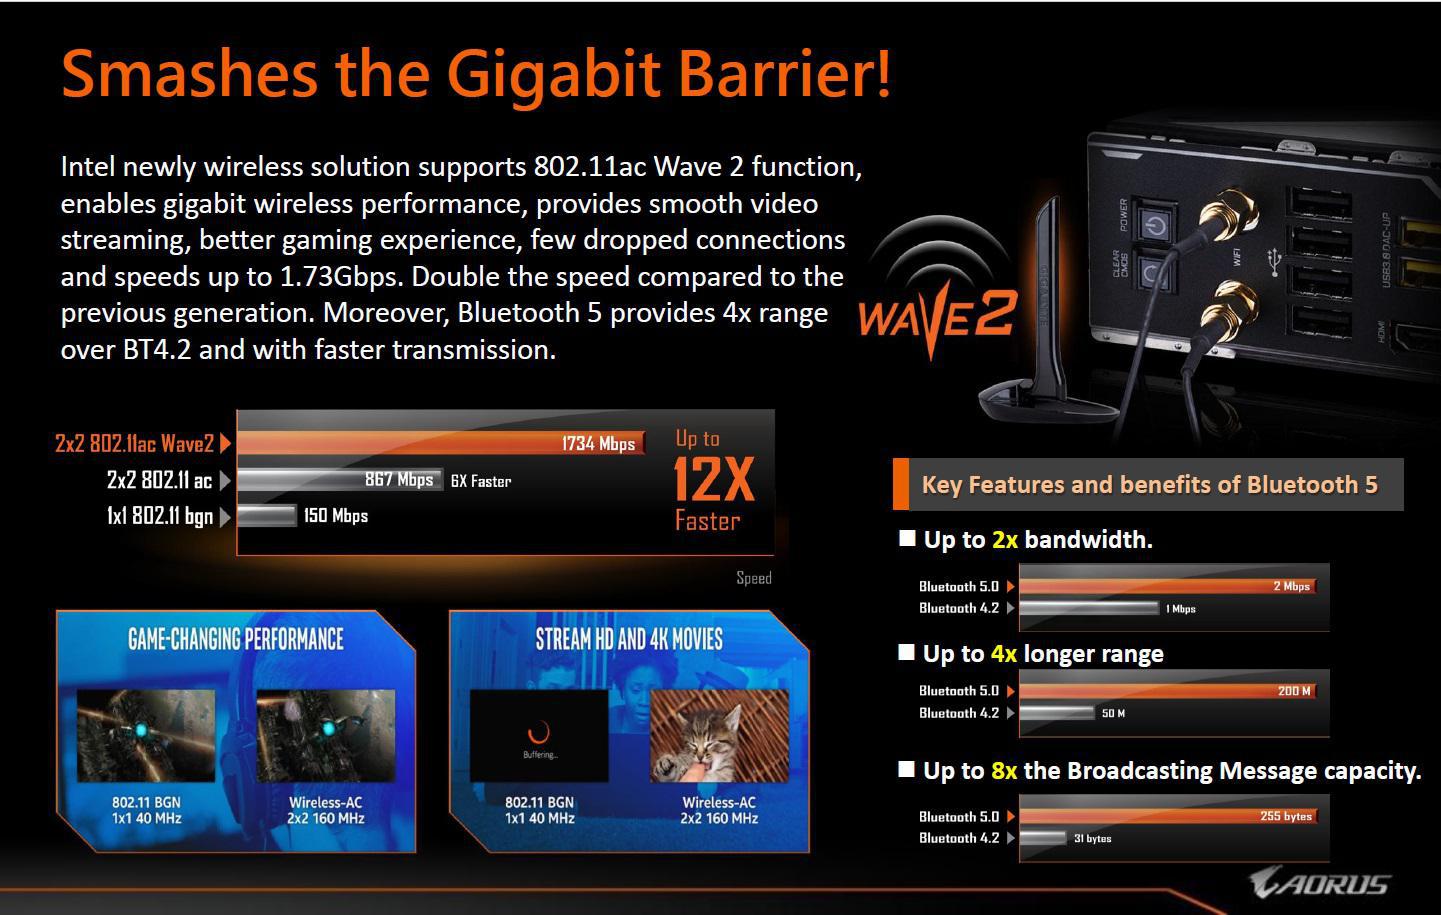
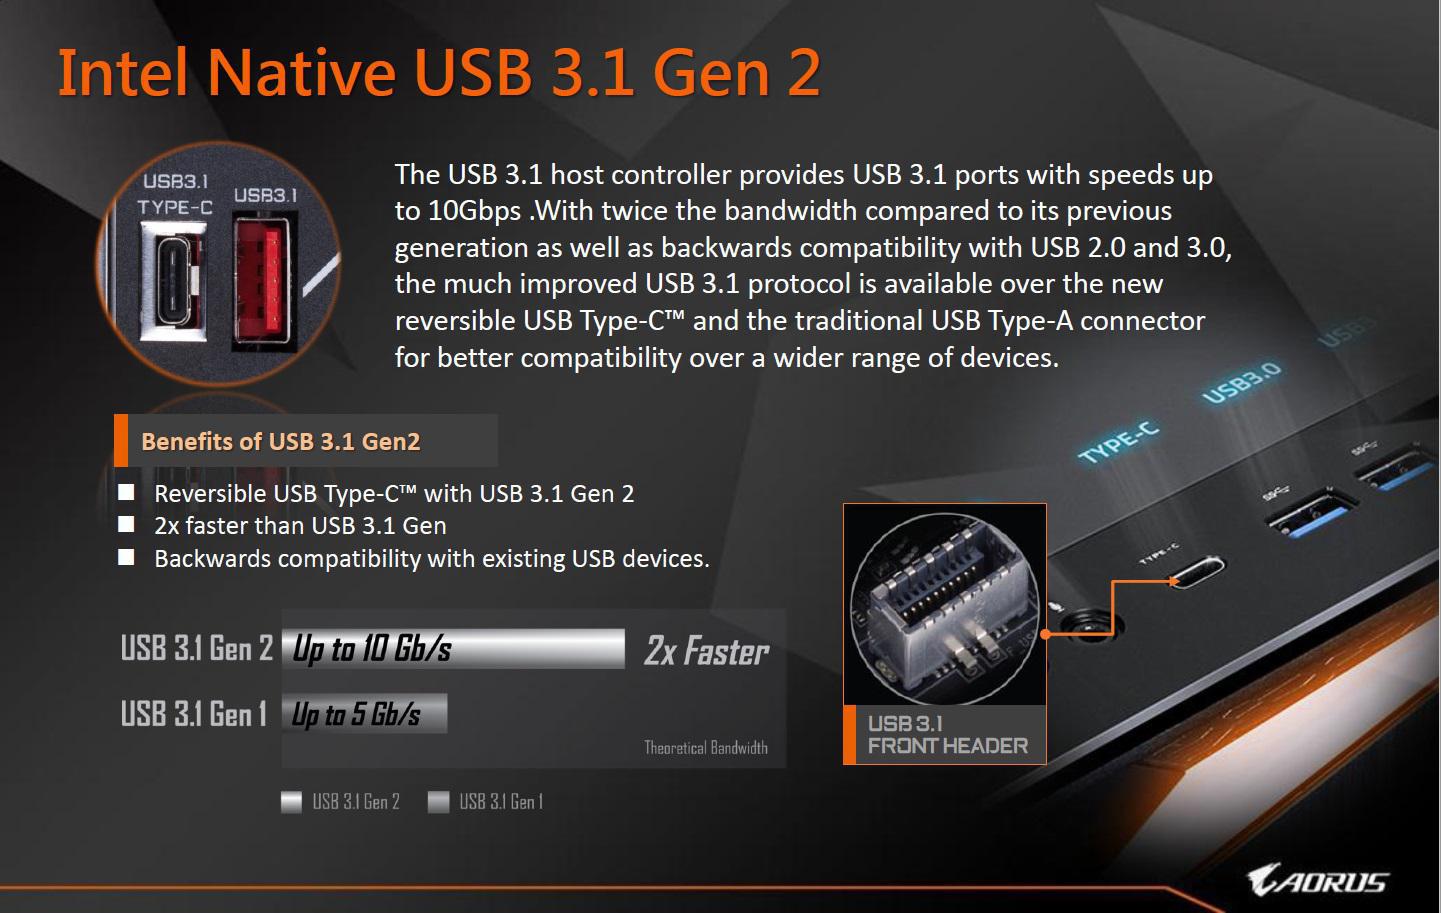
Intel’s new Z390 was a bit of a surprise to most and is more of an update to the Z370 than an entirely new chipset. The Z390 chipset adds support up to 6 USB 3.1 gen 2 on the chip, which up until now would have to be included as a separate chip and added integrated WiFi 802.11ac support. In addition to these new features, it has also been designed to handle Intel’s 9th generation processors, which now tops out at 8 cores. With a new chipset comes motherboard refreshes and Gigabyte’s Aorus line is no different. We will be reviewing Gigabyte’s Aorus Pro which boasts the same stylish Aorus design with some new features such as a 12+1 phases digital VRM solution with DrMos, 2x copper PCB with an enlarged power plane, and M.2 thermal guard covers. The Aorus Pro lands itself in the middle of Aorus’s new Z390 lineup and has an MSRP of $180.
ProClockers would like to thank Gigabyte for sending us the Z390 Aorus Pro to review.
Gigabyte Take on Aorus Z390
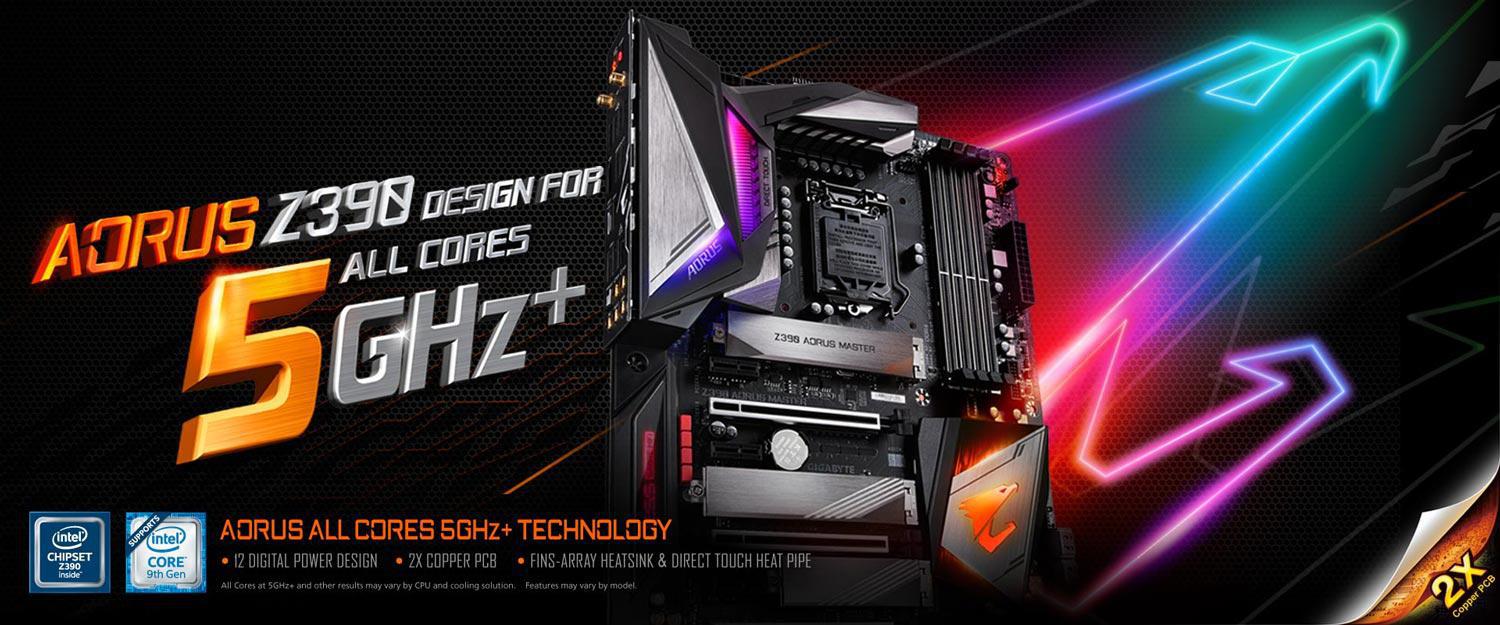
The Z390 AORUS Gaming motherboards, optimized for users to skyrocket the new 8-core Intel® Core™ i9-9900K processors to 5GHz+ across all cores via overclocking. They offer a diverse range of features through the implementation of the aforementioned technologies. By utilizing renowned GIGABYTE Ultra-Durable Technology components, all-solid capacitors, and all digital power designs with intelligent fan control design, these motherboards are both energy-saving and environmentally friendly while offering impressive performance and durability for the best user experience. With a 12-phase digital VRM design and robust heat dissipation, the latest iteration of AORUS Gaming motherboards offers exceptional power and temperature management for maximizing the performance and overclocking potential of these new processors. GIGABYTE Z390 AORUS Gaming motherboards are perfect for users seeking a platform that fires on all cylinders.
Features & Specifications


Packaging & Unboxing
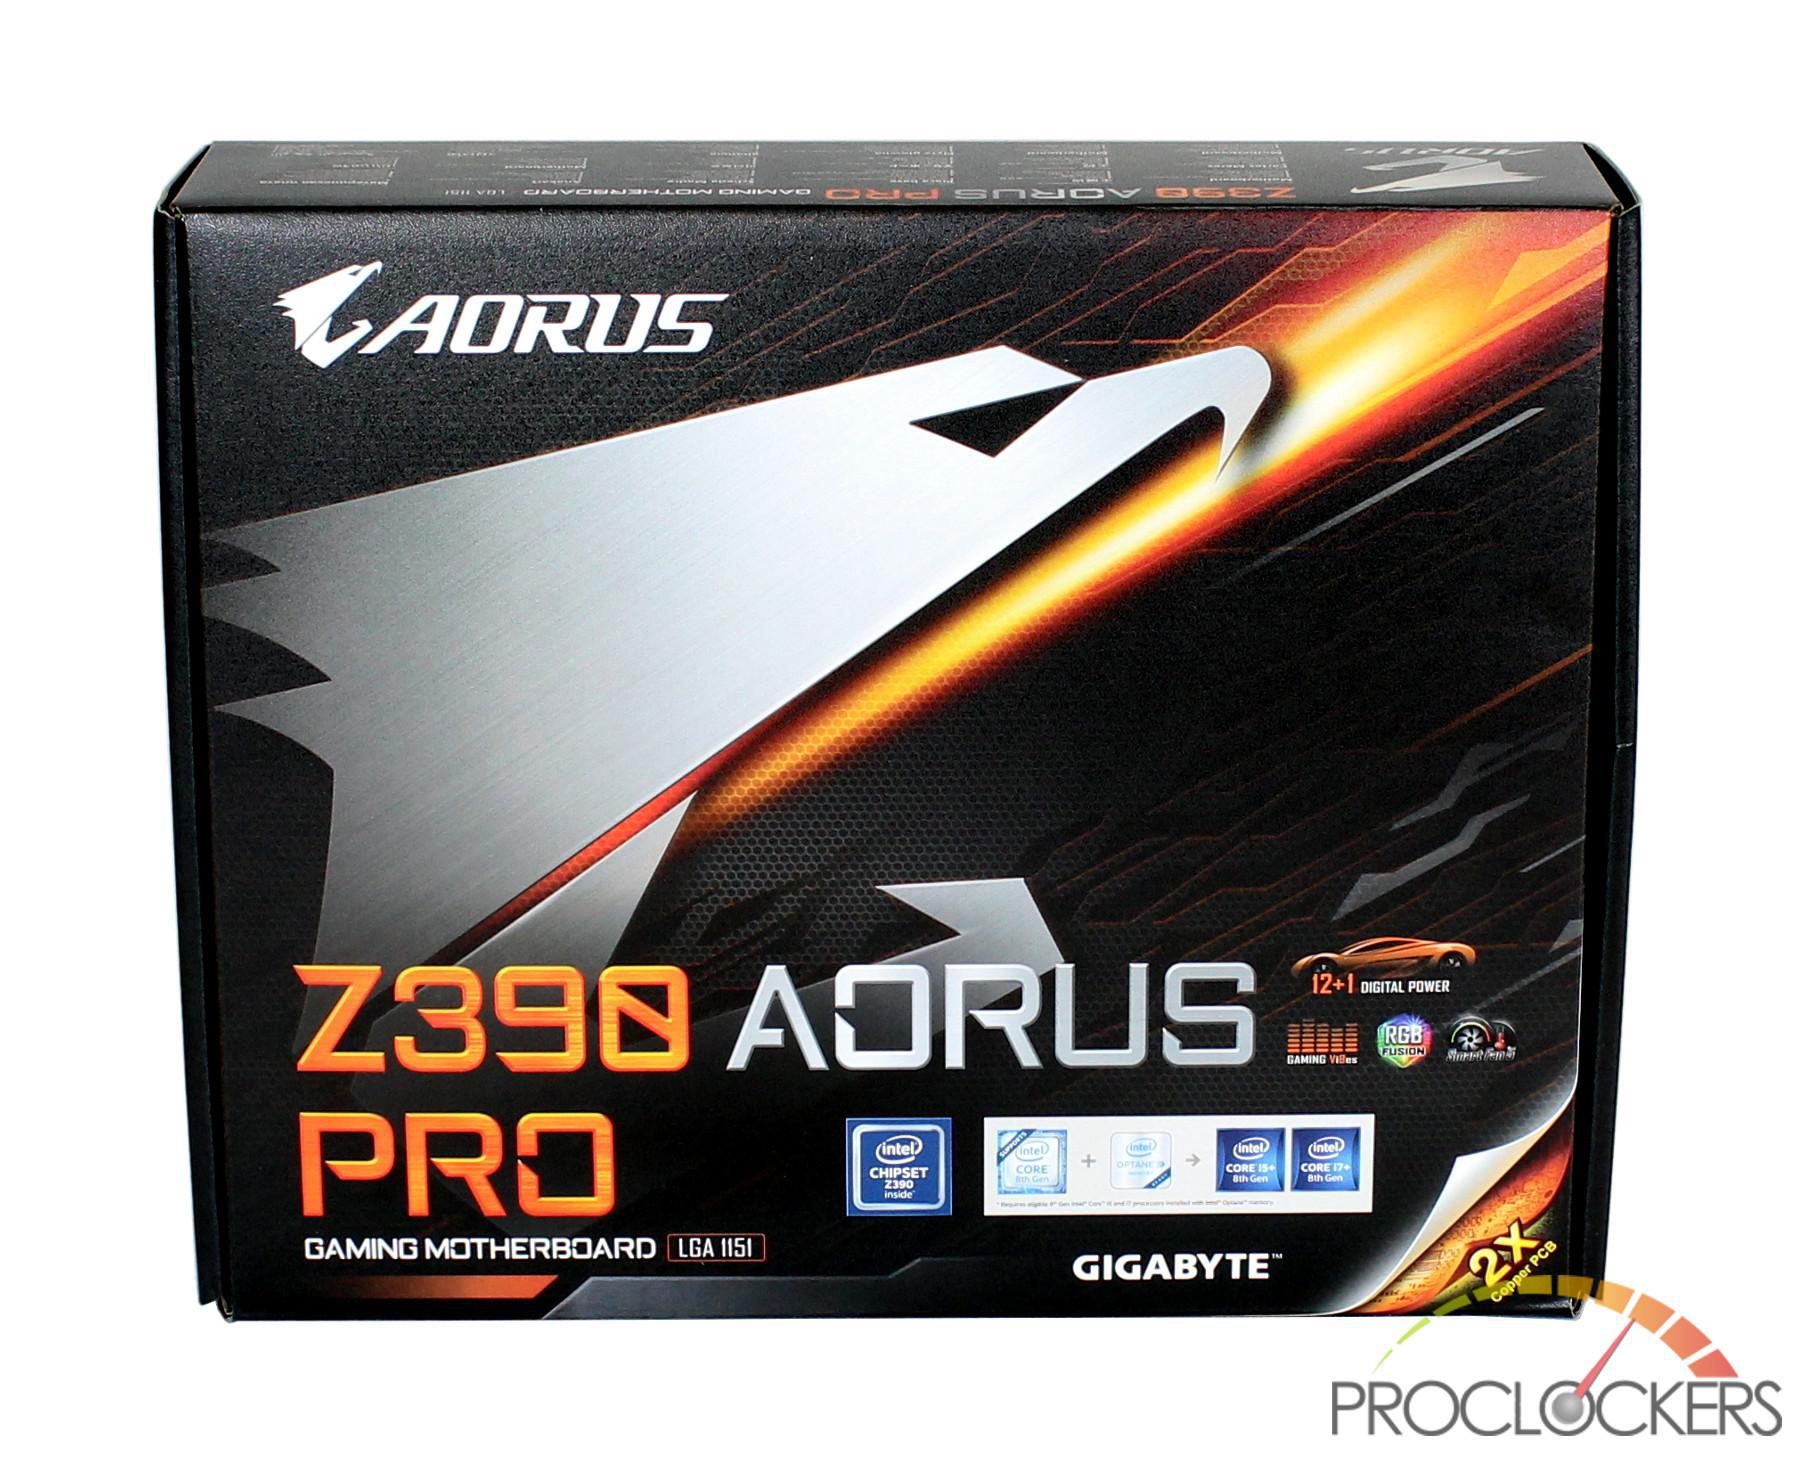
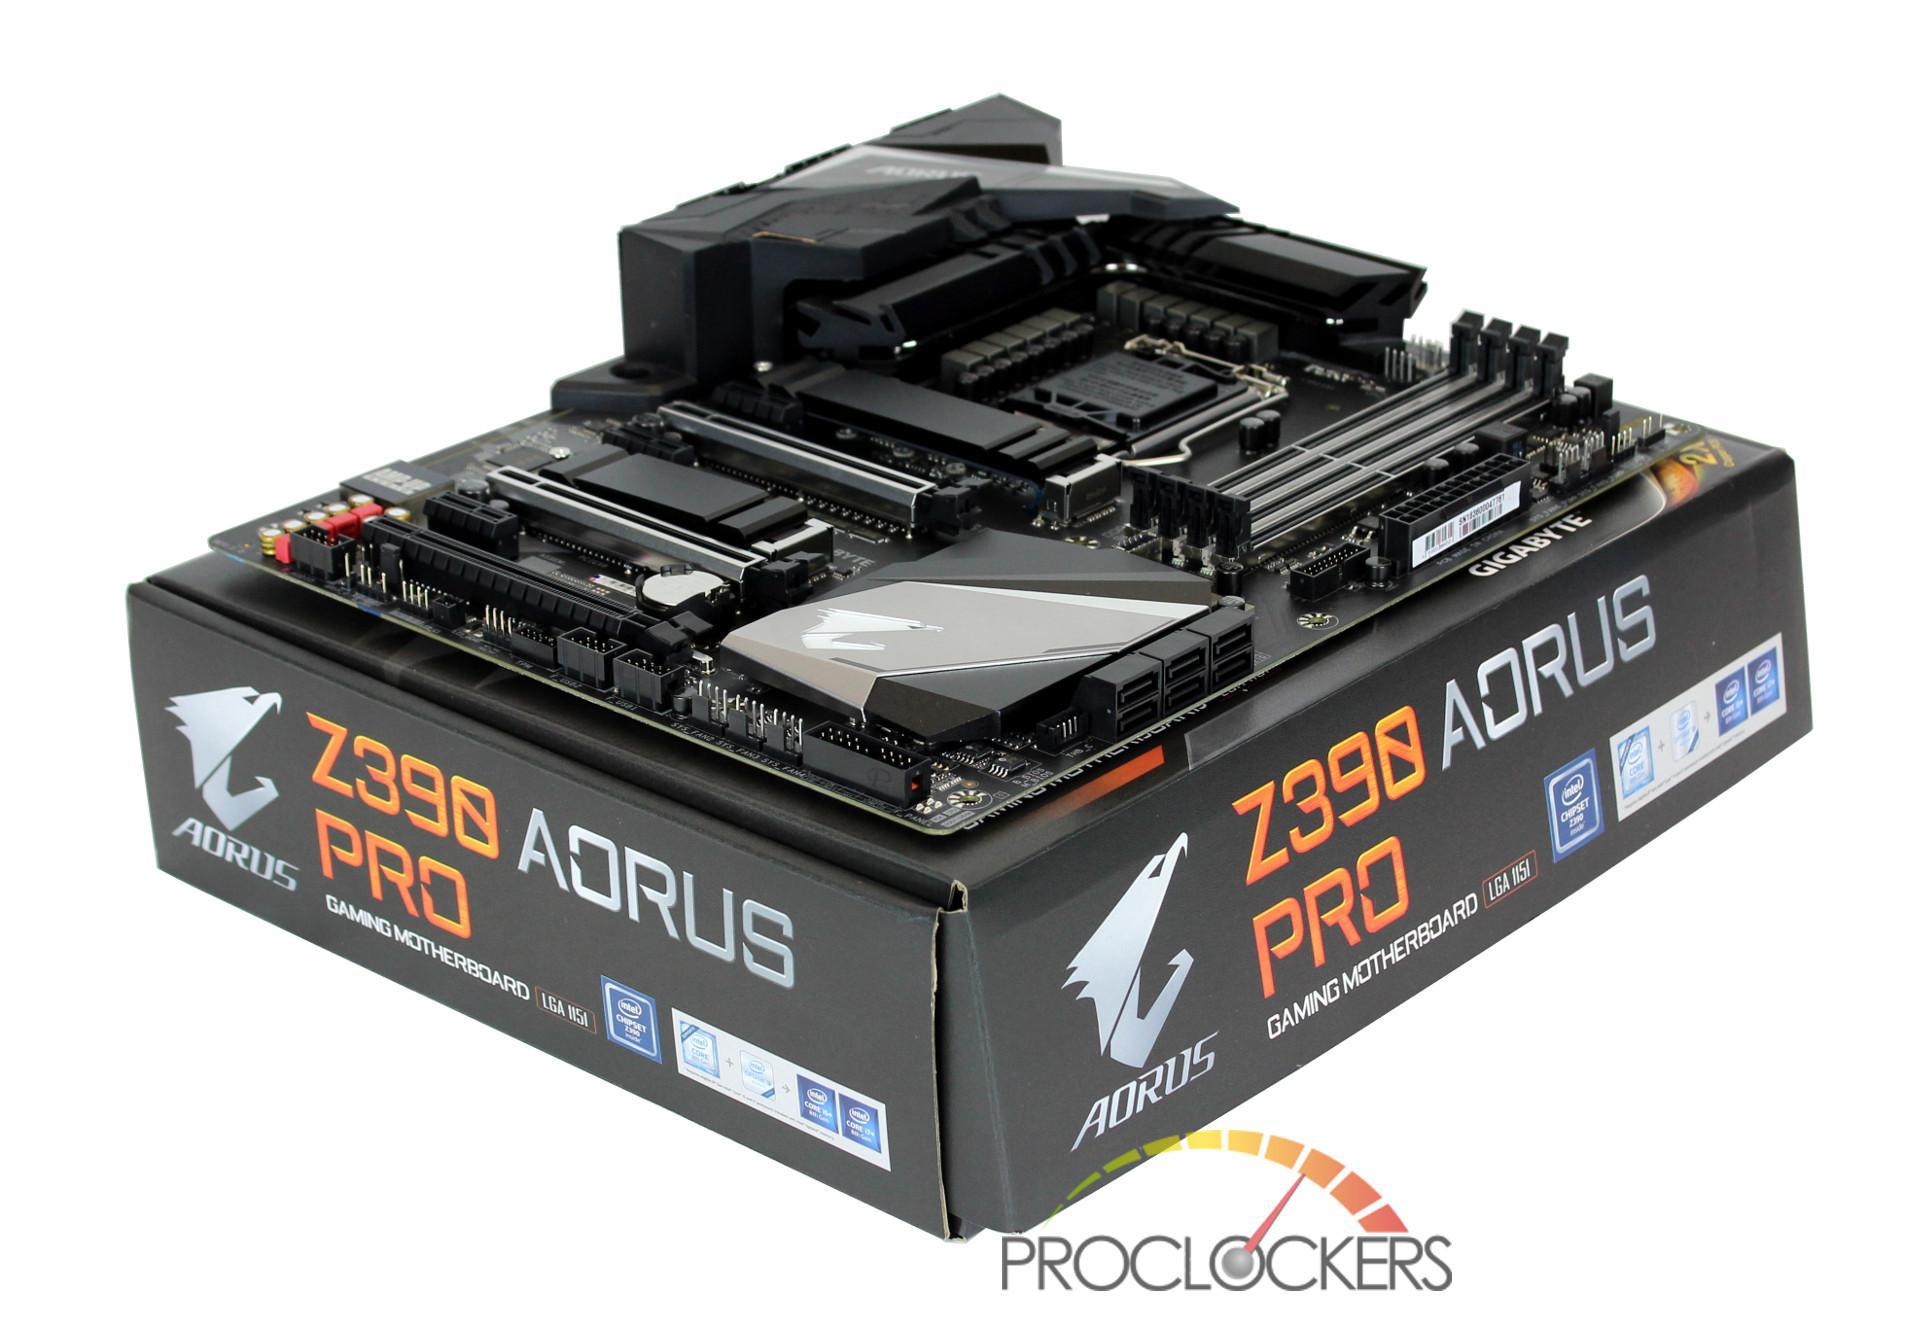
The Z390 Aorus Pro comes in a black box with orange accents with a textured matte finish. On the front, you have the Aorus branding in the top right corner and an extra-large Aorus logo which is almost the size of the whole box. Looking toward the bottom, it’s labeled as a Z390 Aorus Pro gaming motherboard and highlights features such as 12 + 1 digital power, RGB Fusion compatibility, and 2x copper PCB.
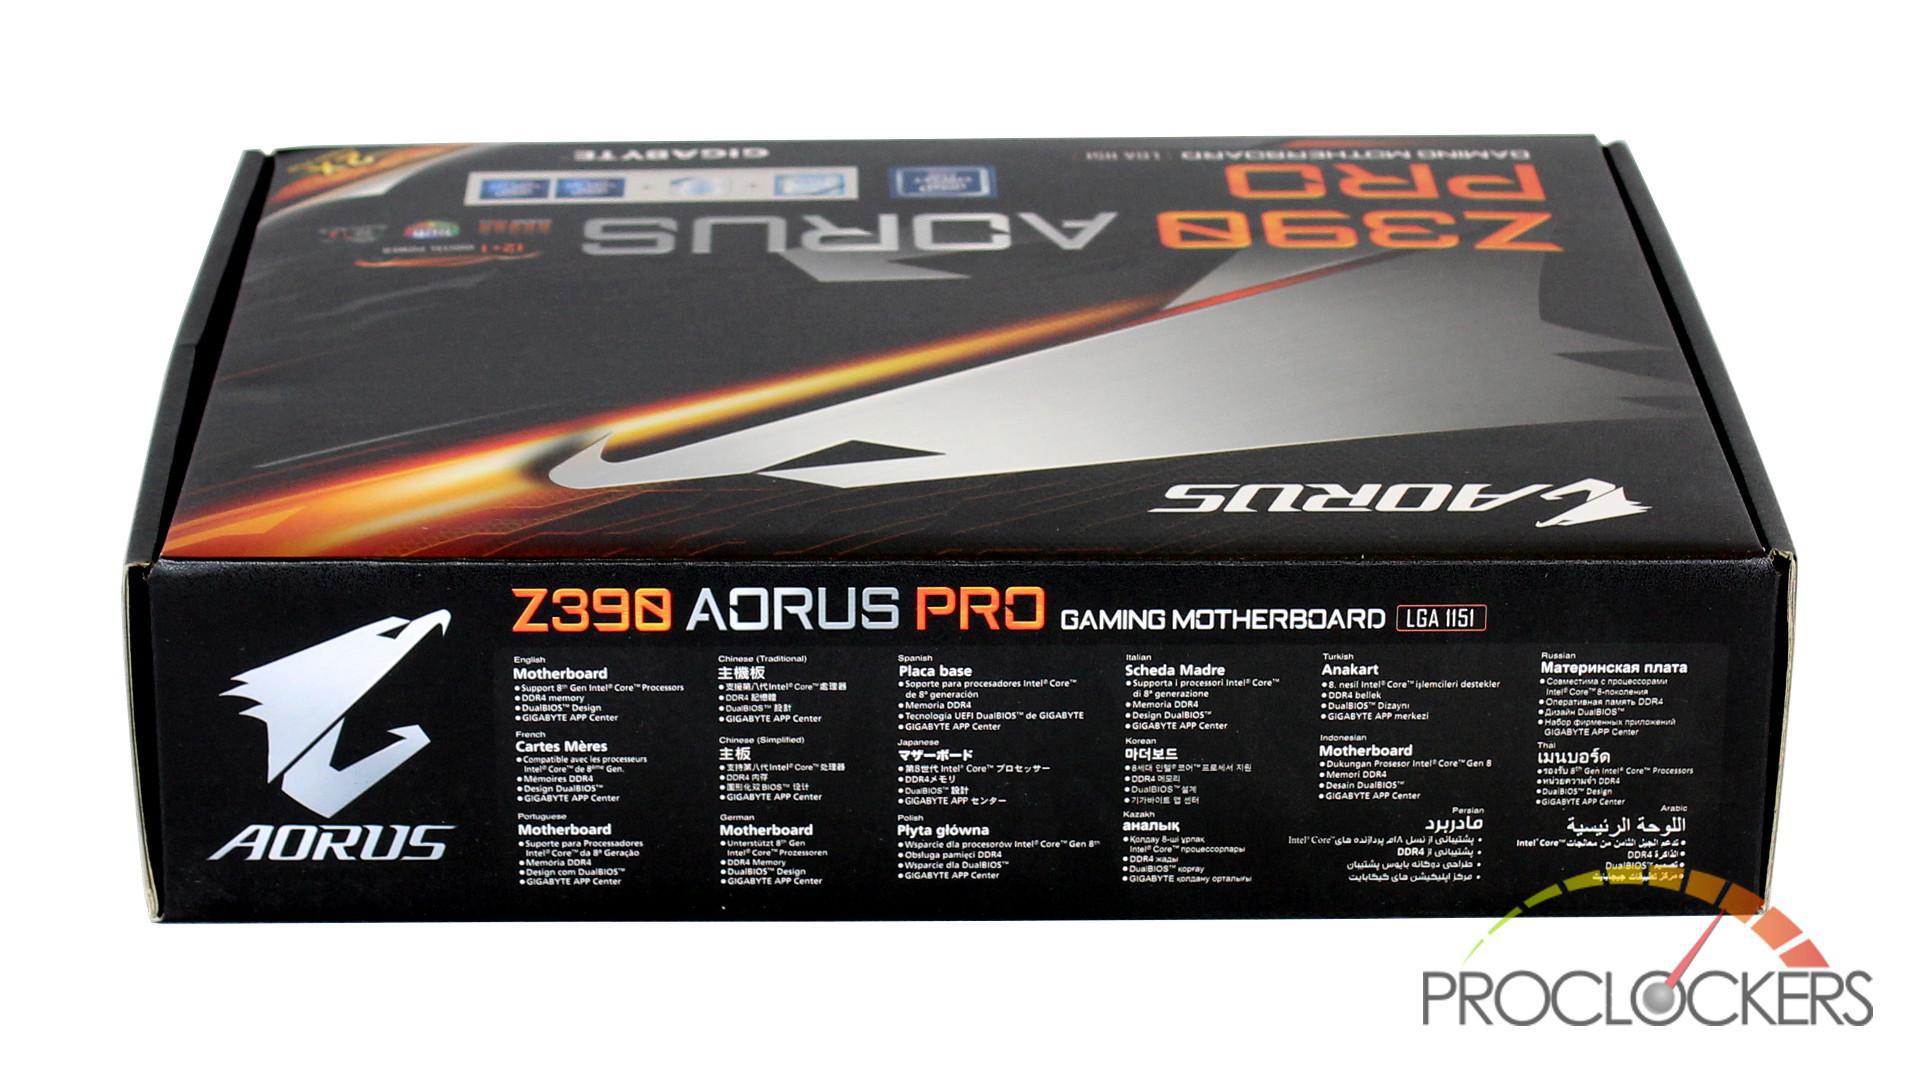
On the side, it highlights some more features such as 8th Intel processor support, DDR4 memory, dual BIOS and Gigabyte APP Center in 18 different languages.
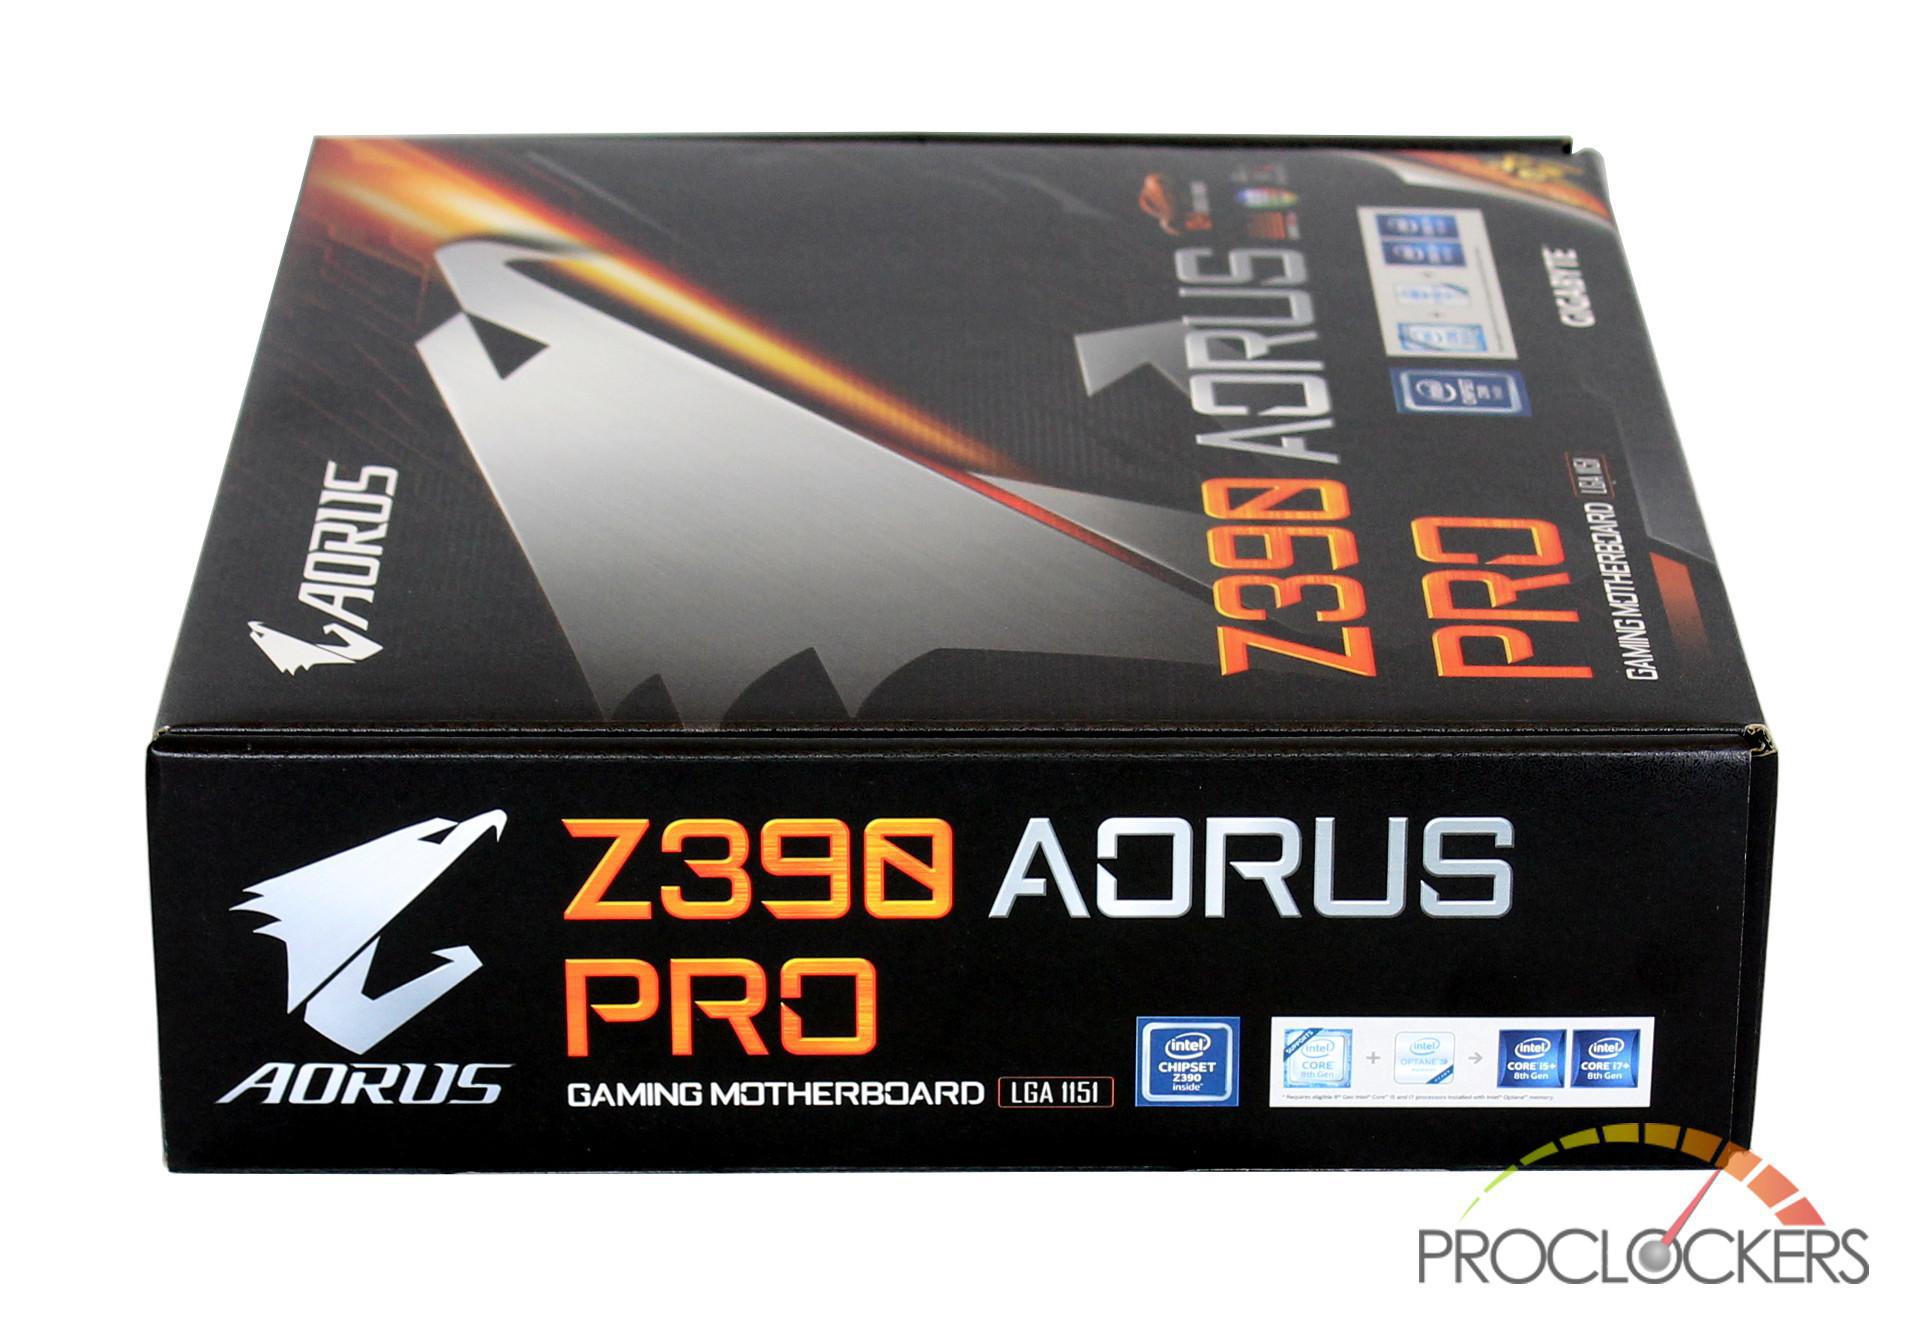
On the other side, it again specifies this is the Aorus Pro version that has an LGA 1151 socket with the Z390 chipset.
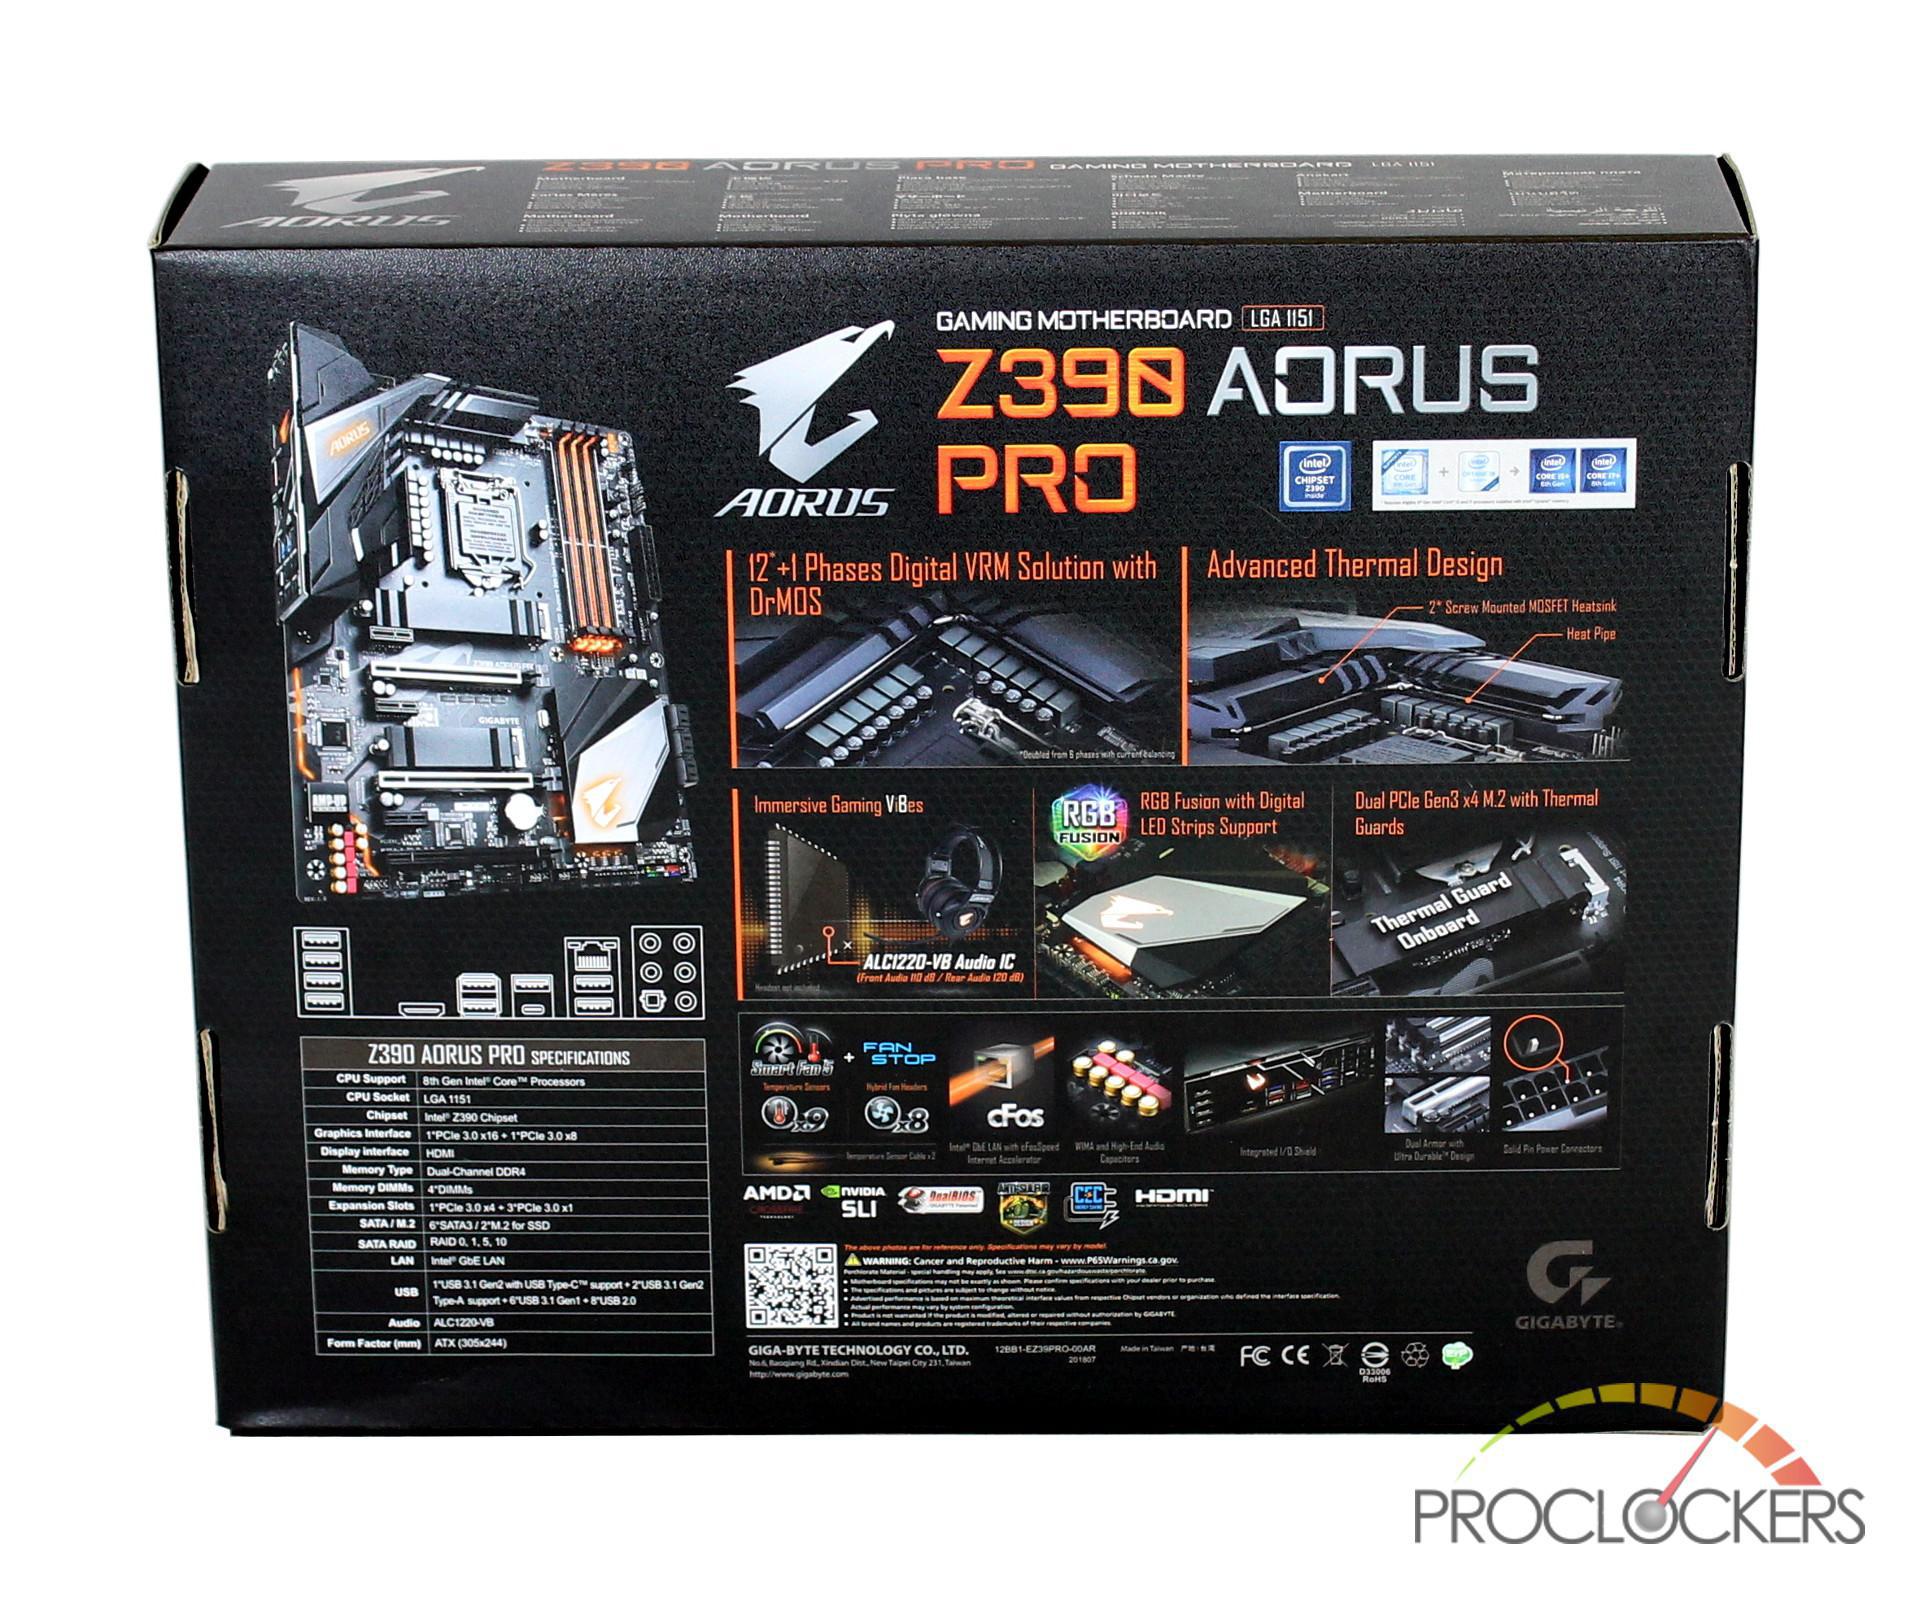
On the back of the box, you get your first look at the Aorus Pro, which has a fully black PCB and accents of silver. Also visible on the motherboard are the various RGB elements which include the Aorus badge in the lower right corner, lit up DDR4 slots, and the Aorus name on the MOSFET heatsink and I/O cover. Below the photo of the Aorus Pro, you have a wireframe of the I/O showing off its various USB, Network and audio connectors. Some of its highlighted features can be found on the right side of the box and its technical specifications are in the lower left-hand corner.
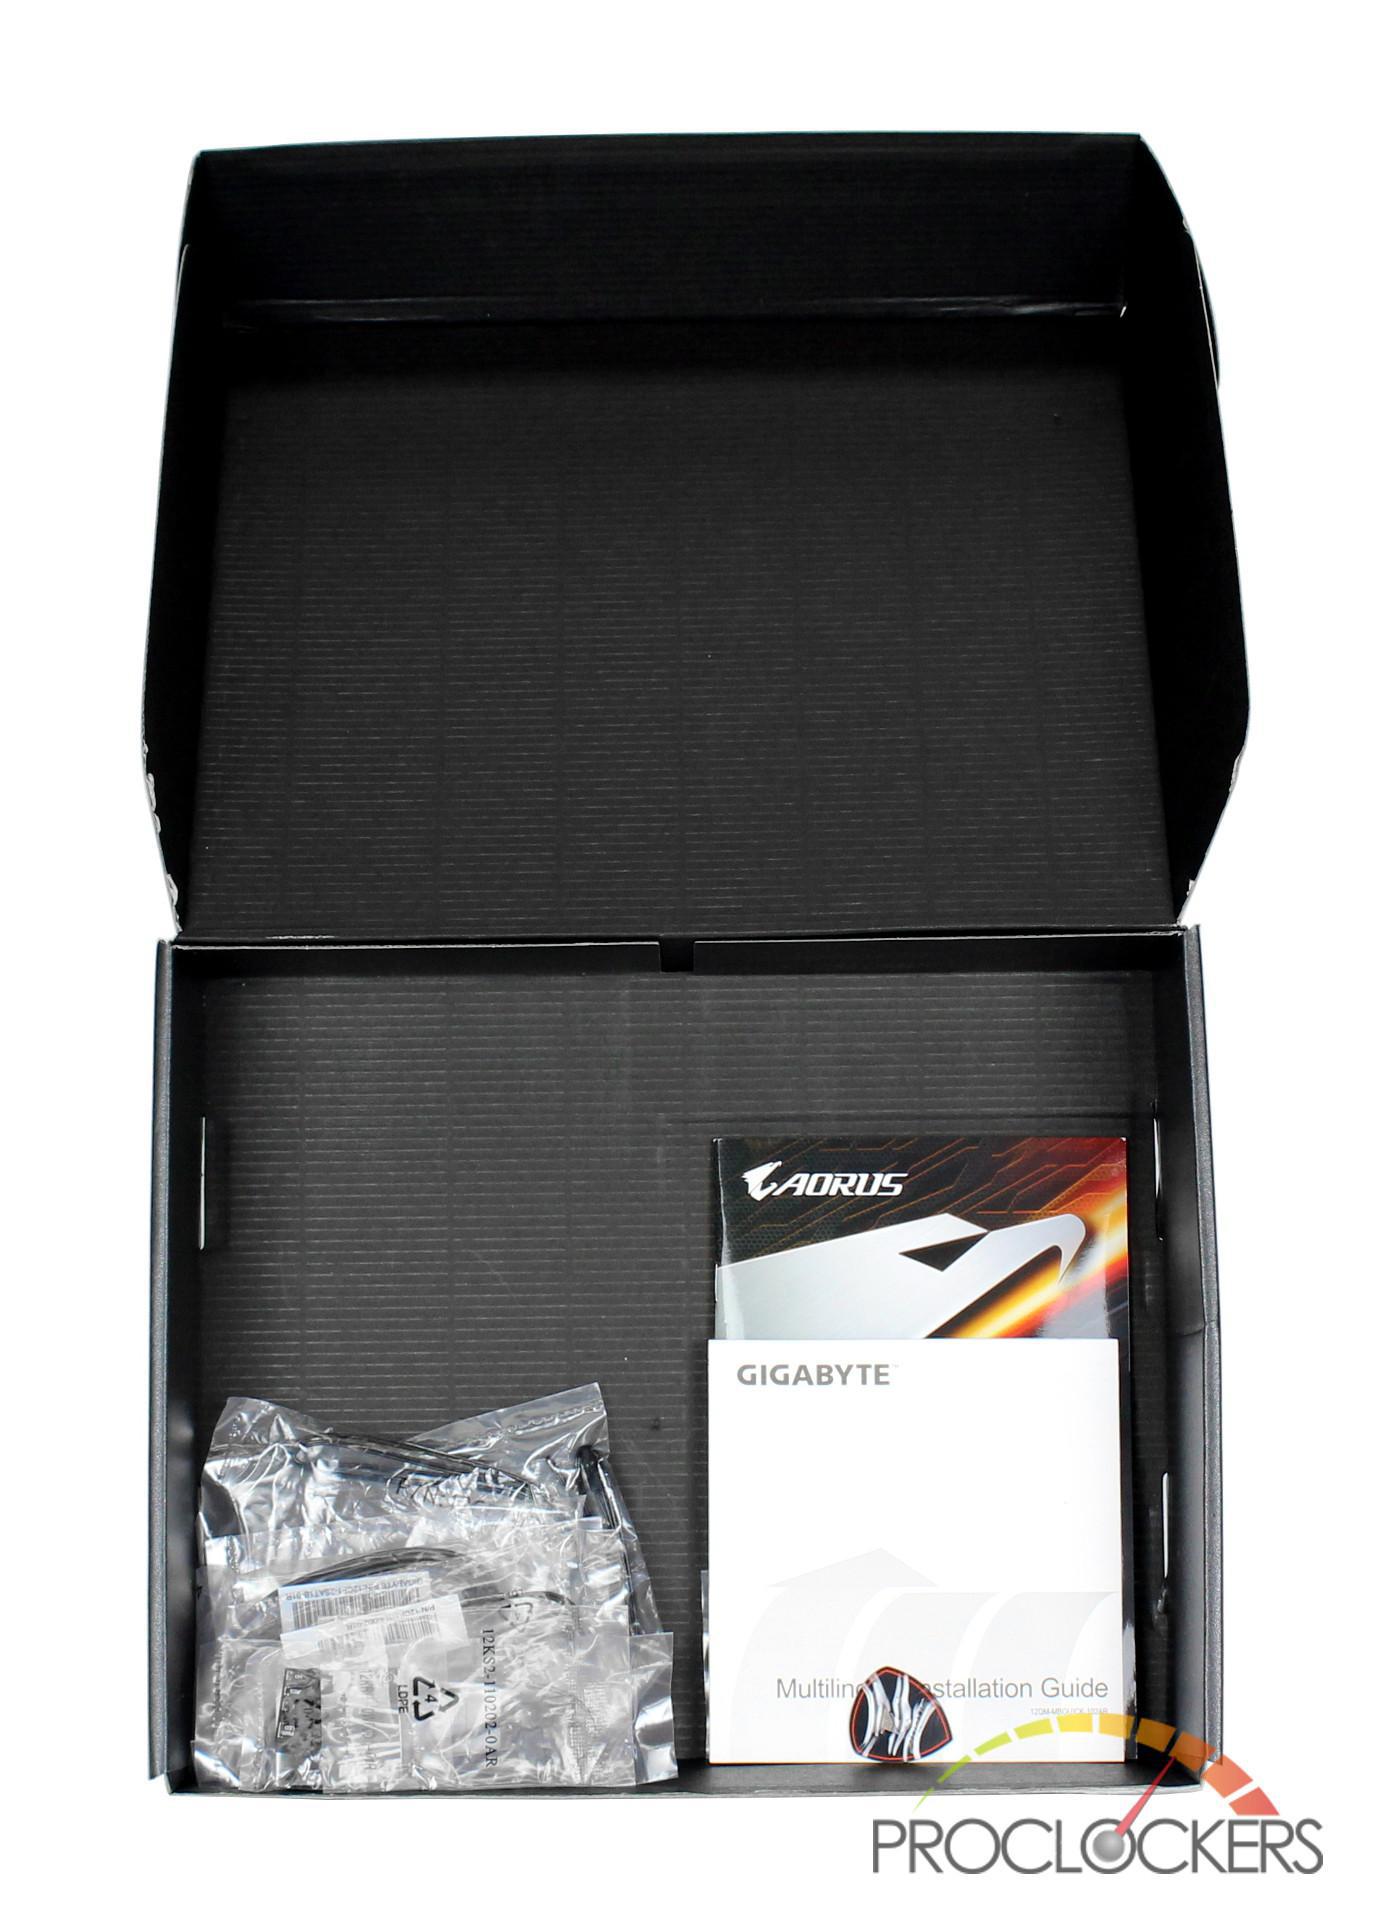
Opening the box, you find the Aorus Pro stored in an antistatic bag in a removable cardboard tray.

Removing the tray reveals the motherboard’s manual, various accessories and an Aorus case badge.
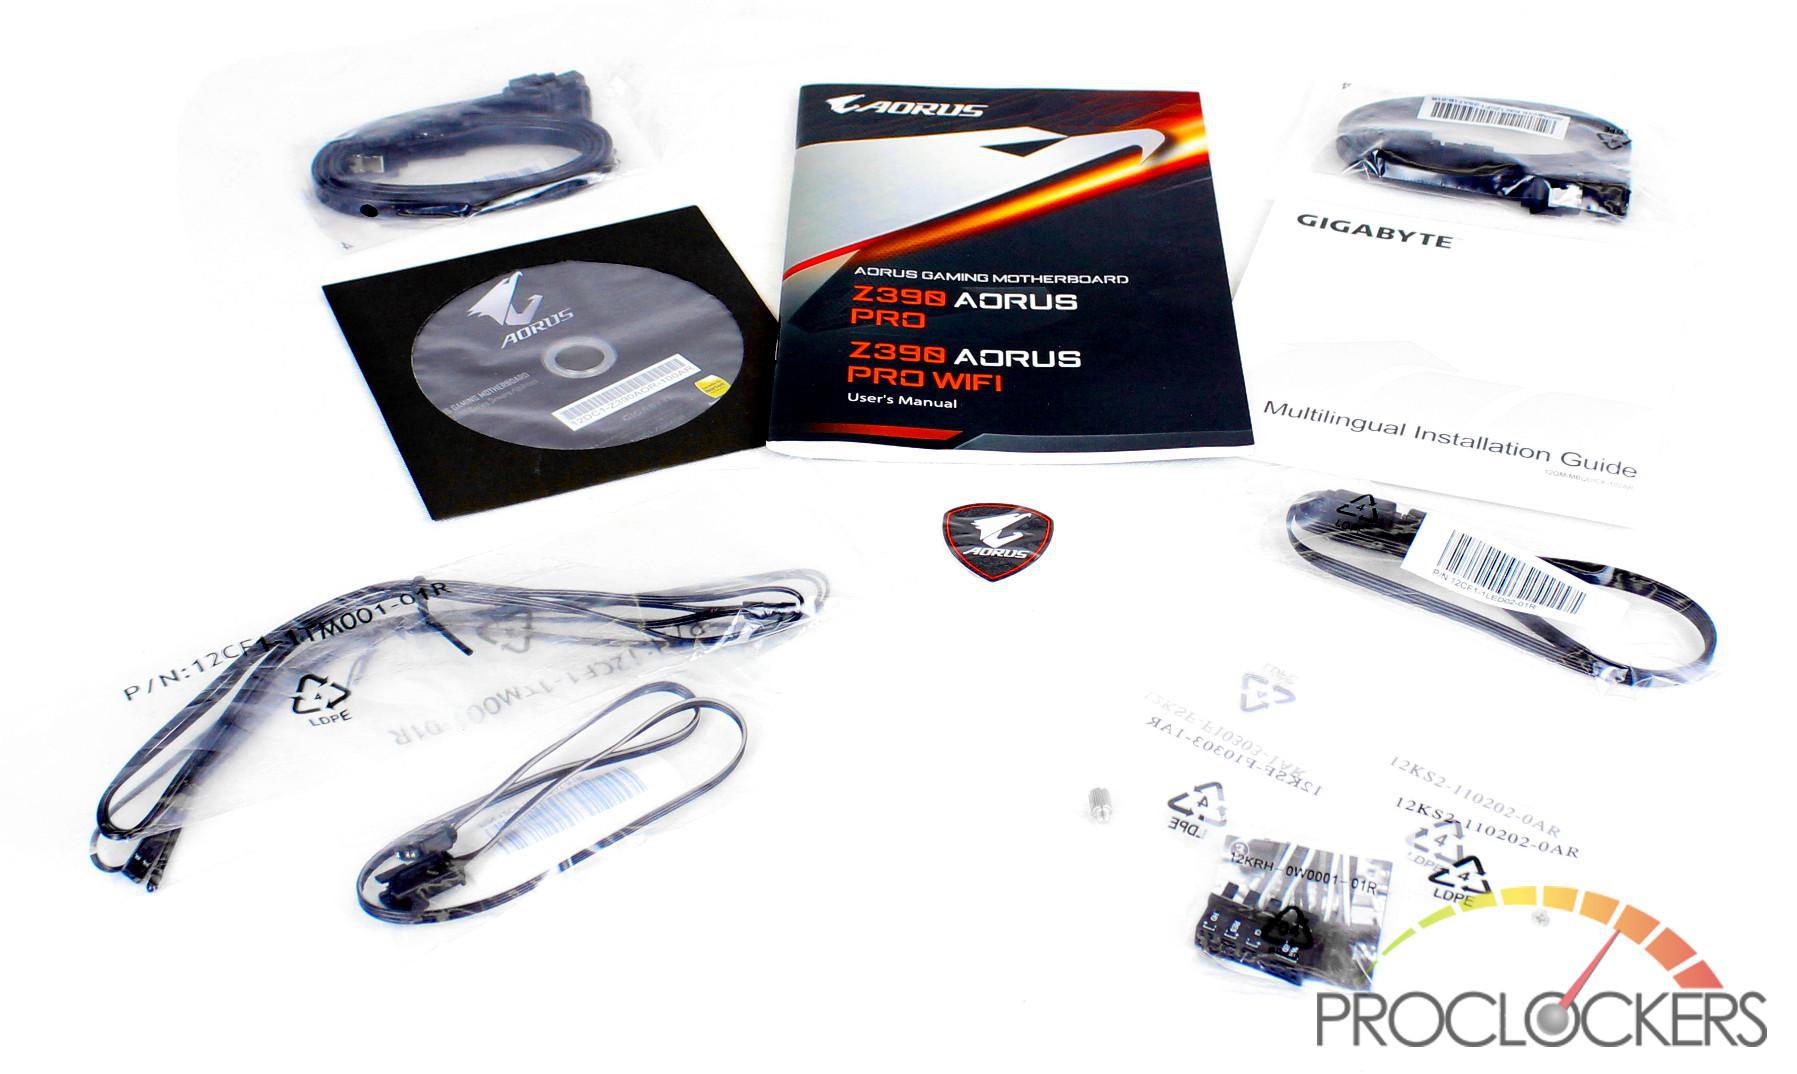
Materials and accessories included in the box are:
- User’s Manual
- Installation Guide
- Drivers CD
- 4 x SATA Cables (2 x straight connectors and 2 x angled connectors)
- 2 x M.2 standoffs and screws
- Motherboard case I/O connector
- Digital LED strip adapter cables
- RGB LED strip extension cable
- G connector
- 2 x Thermistor cables
- Aorus case badge
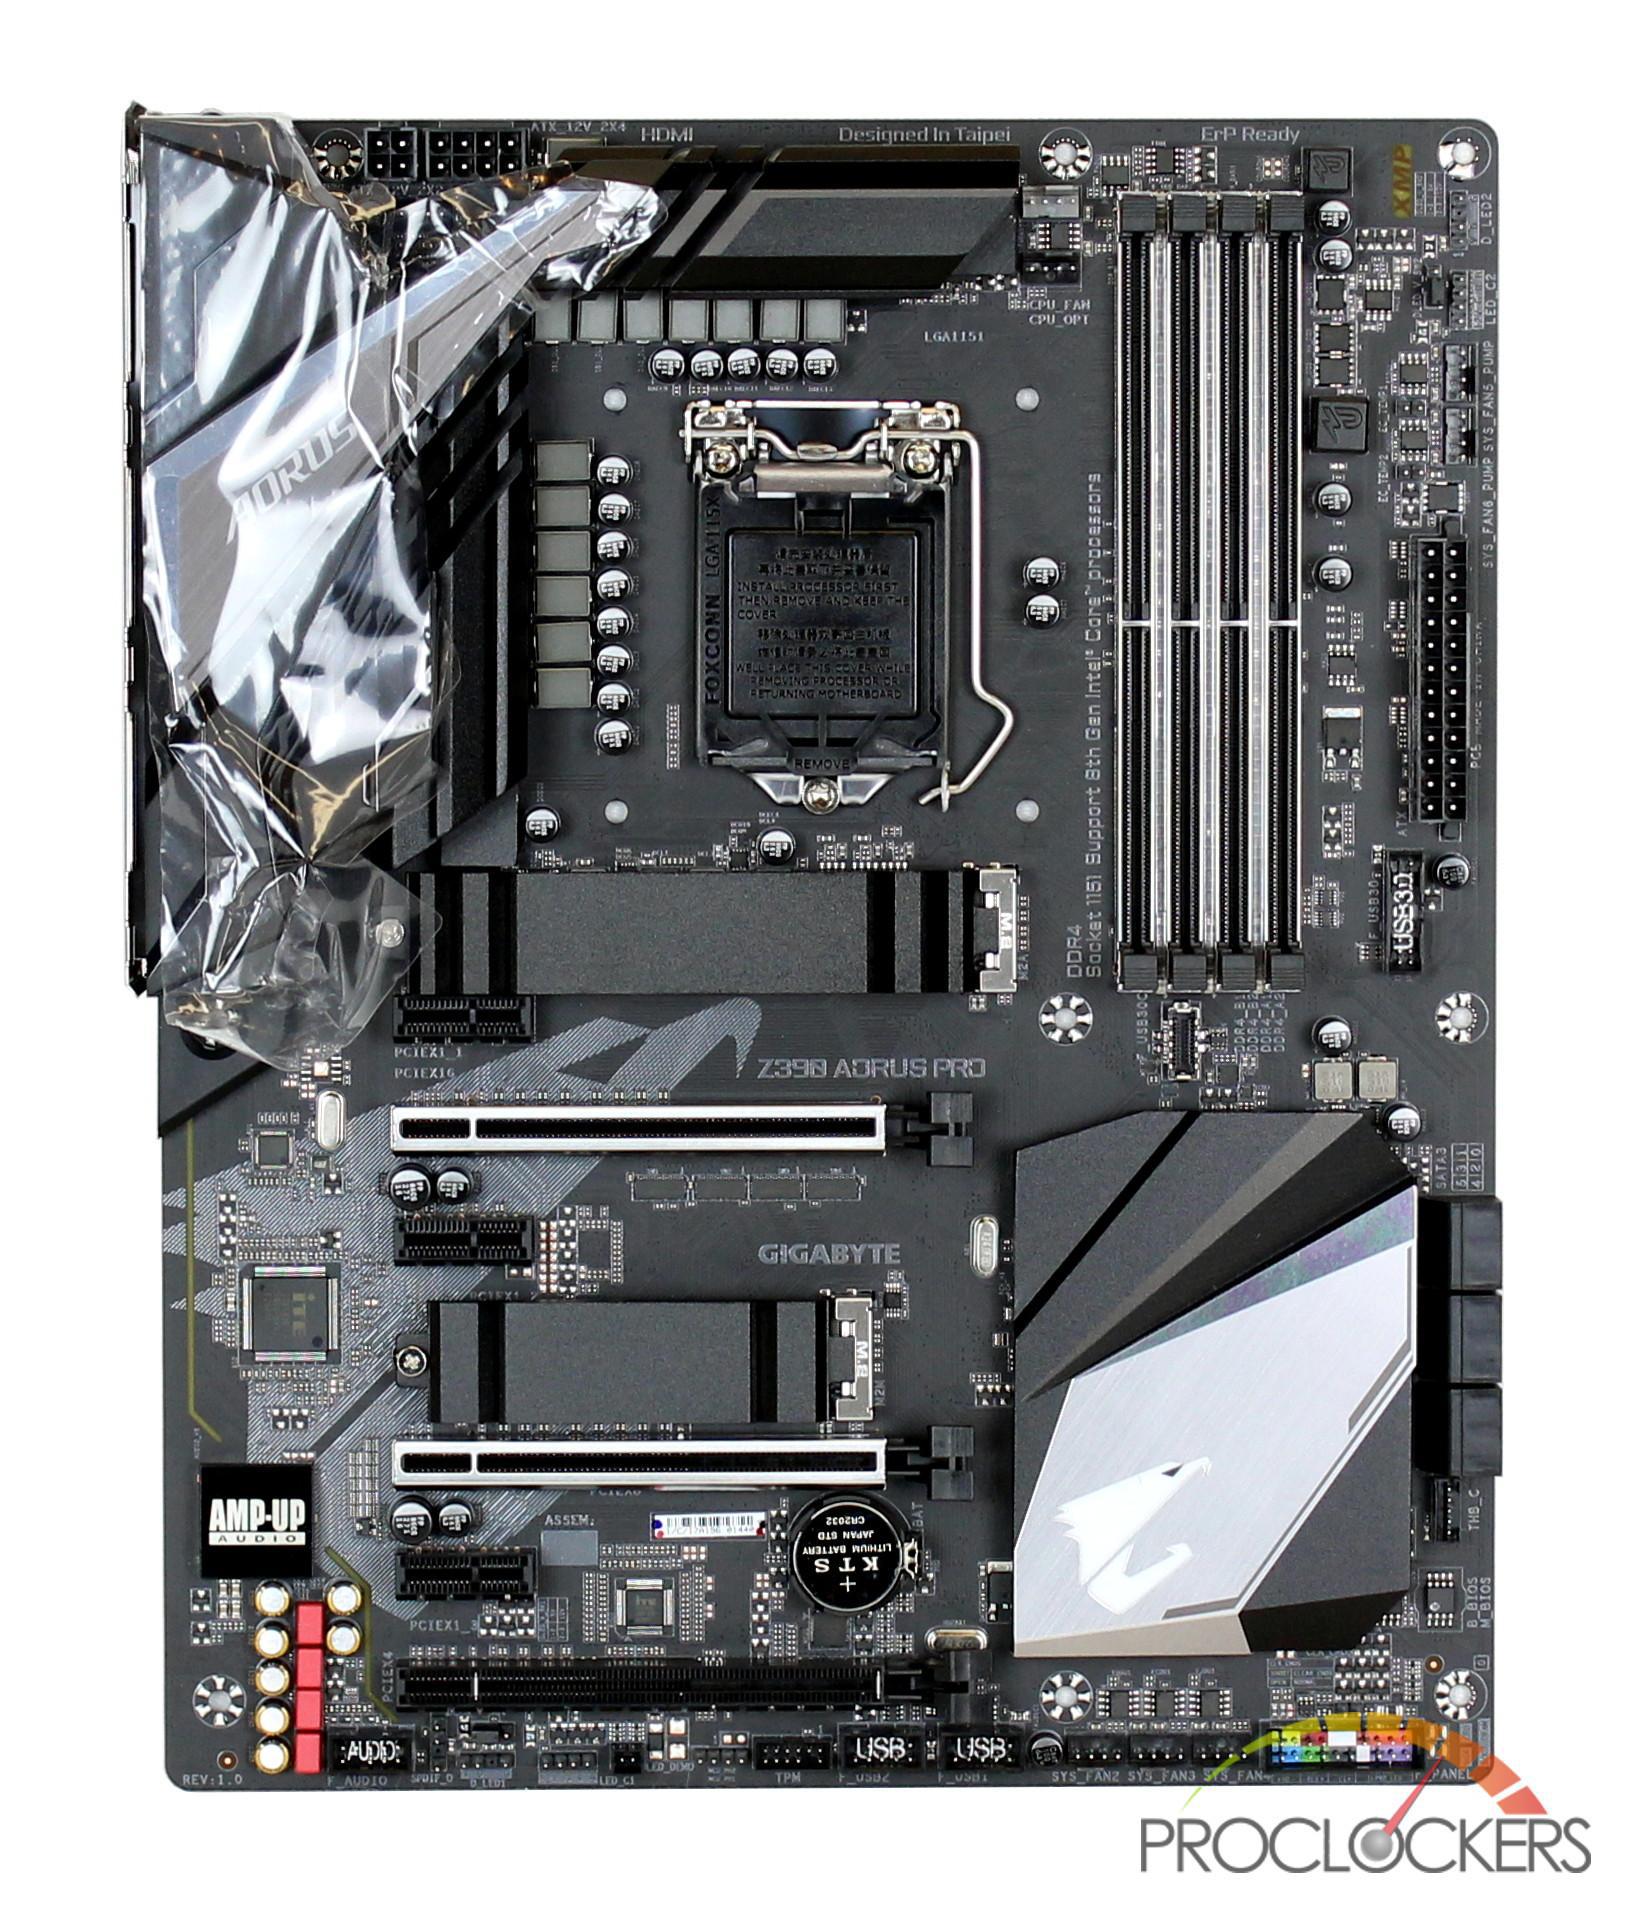
Taking the motherboard out of its anti-static bag is your first in-person look of the Aorus Pro. All that’s left to do is remove the protective film from the upper heat sink.
A Closer Look
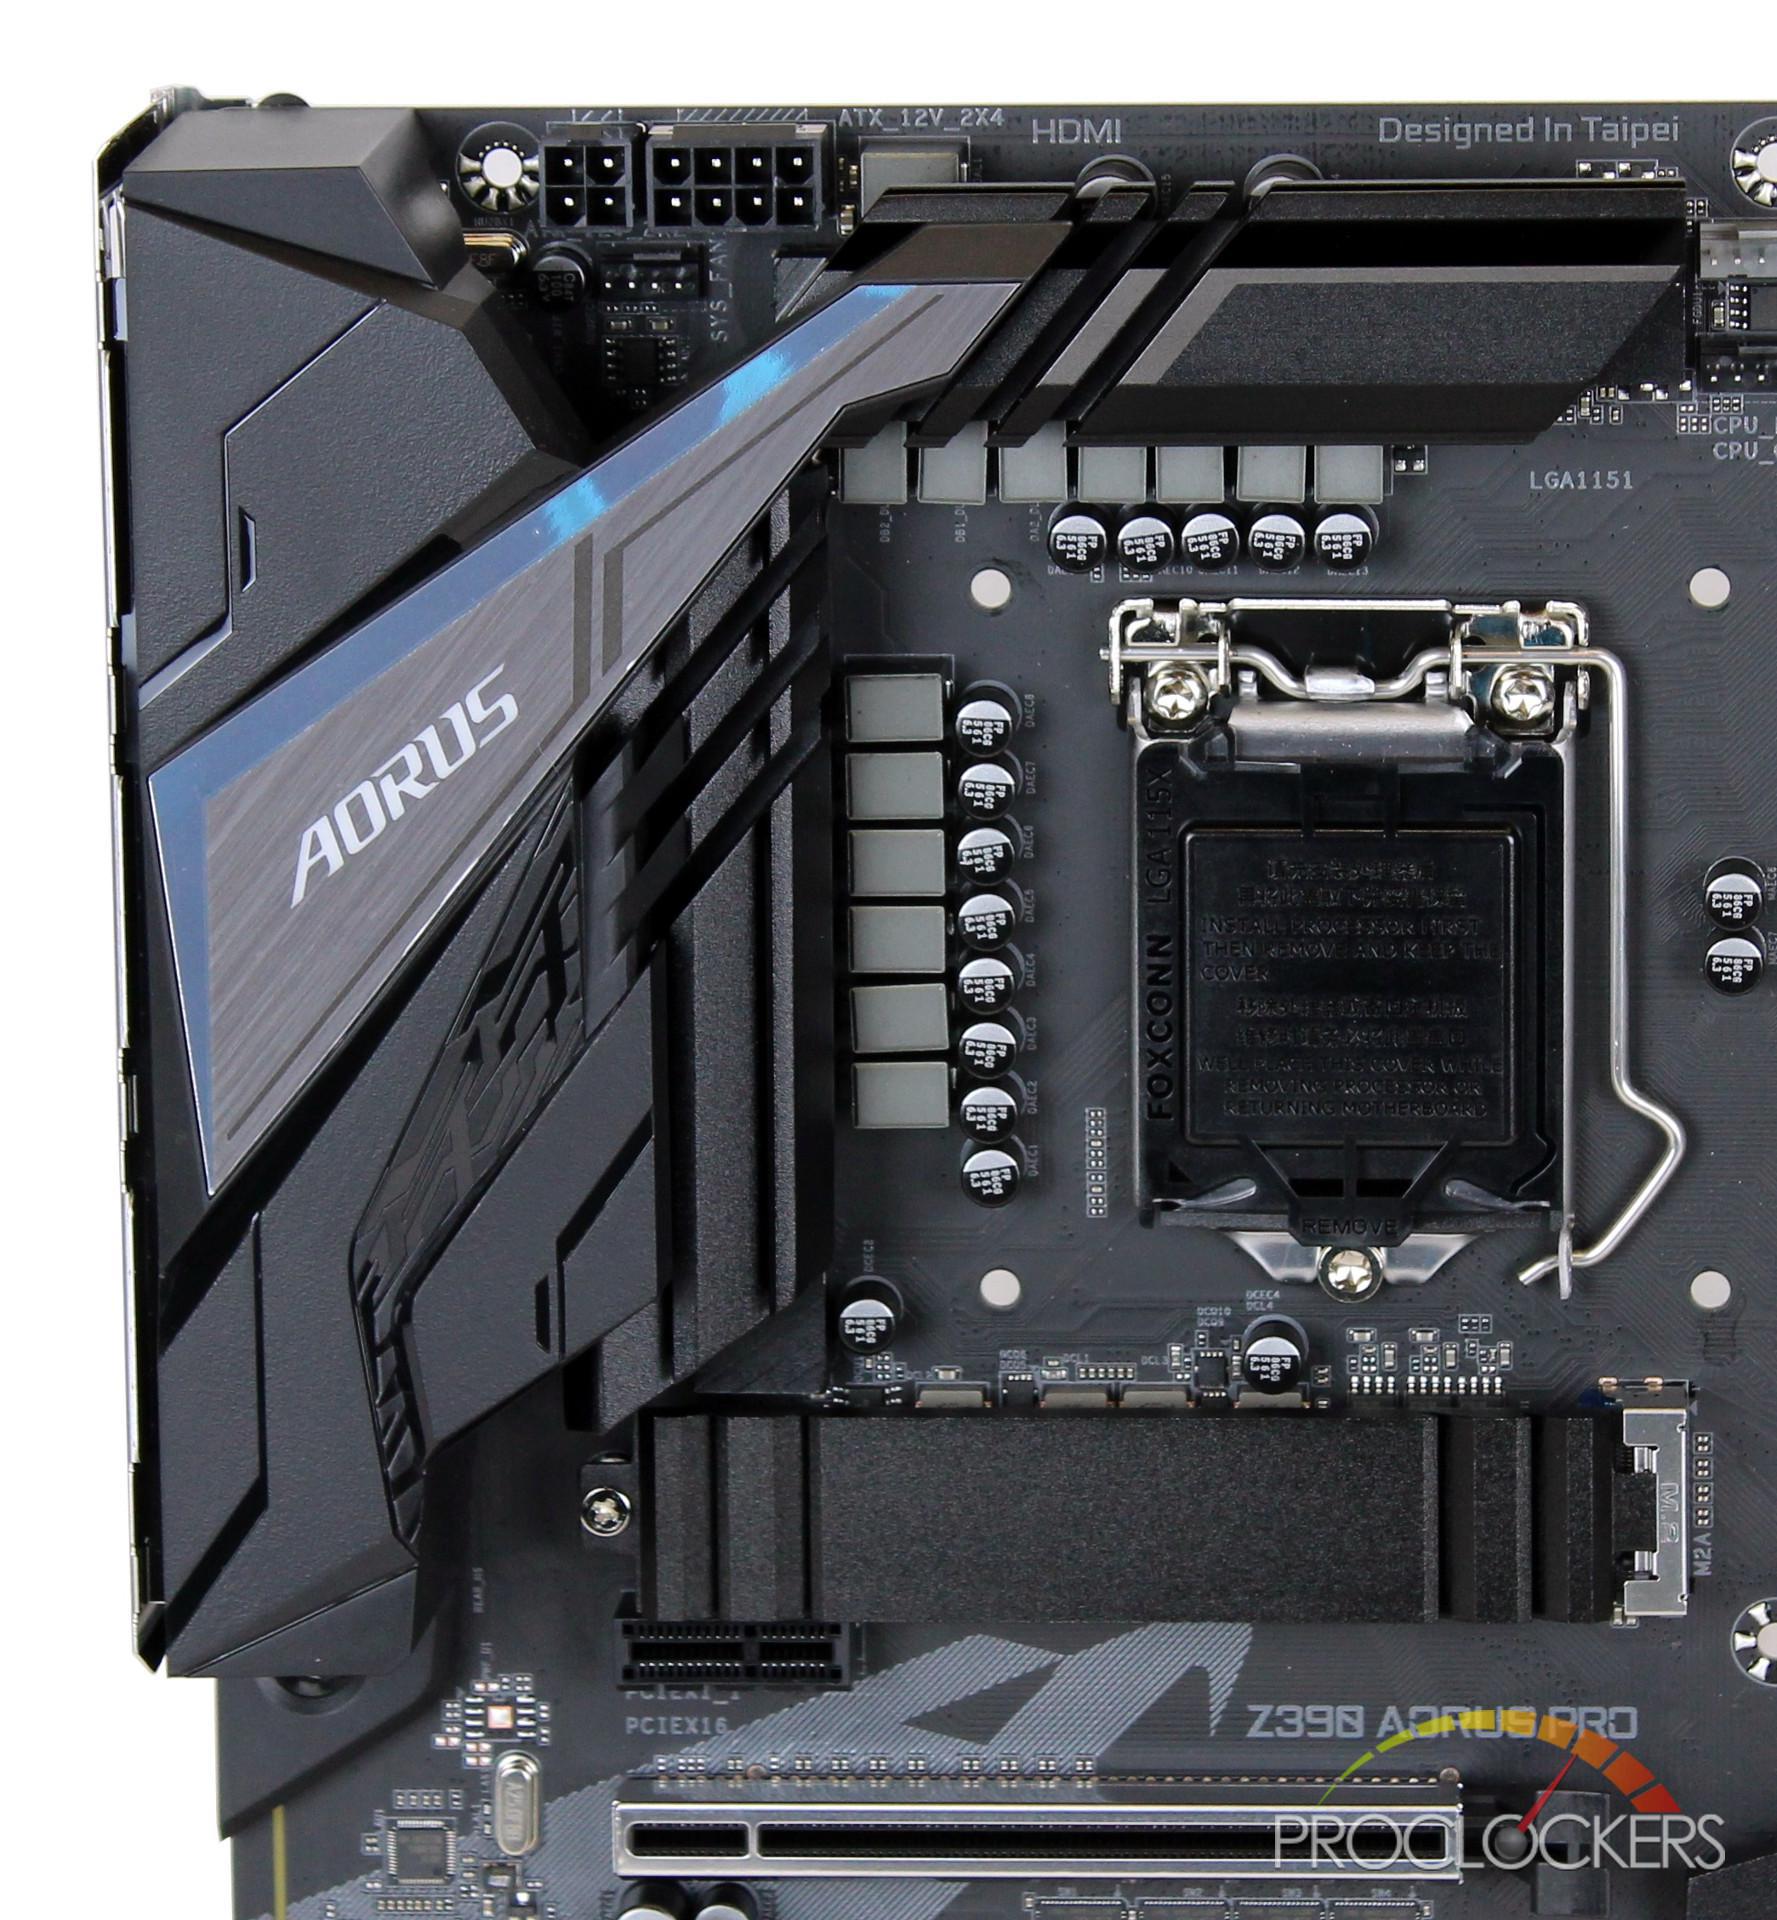
After peeling the film from the motherboard, we really enjoy the aesthetics of the black/silver color scheme and Aorus branding. The first few things that really caught our is the Aorus branded badge/MOSFET heatsink as well as the included M.2 armored heatsink covers. The M.2 covers are a very welcomed feature that not other helps to dissipate the heat, but also helps hides those green PCB M.2 drives. It evident that Gigabyte carefully planned out the board connections as they placed all of the fan connections near the edges of the board. This is quite nice and really helps maintain a clean build without having fan cables going across the motherboard.
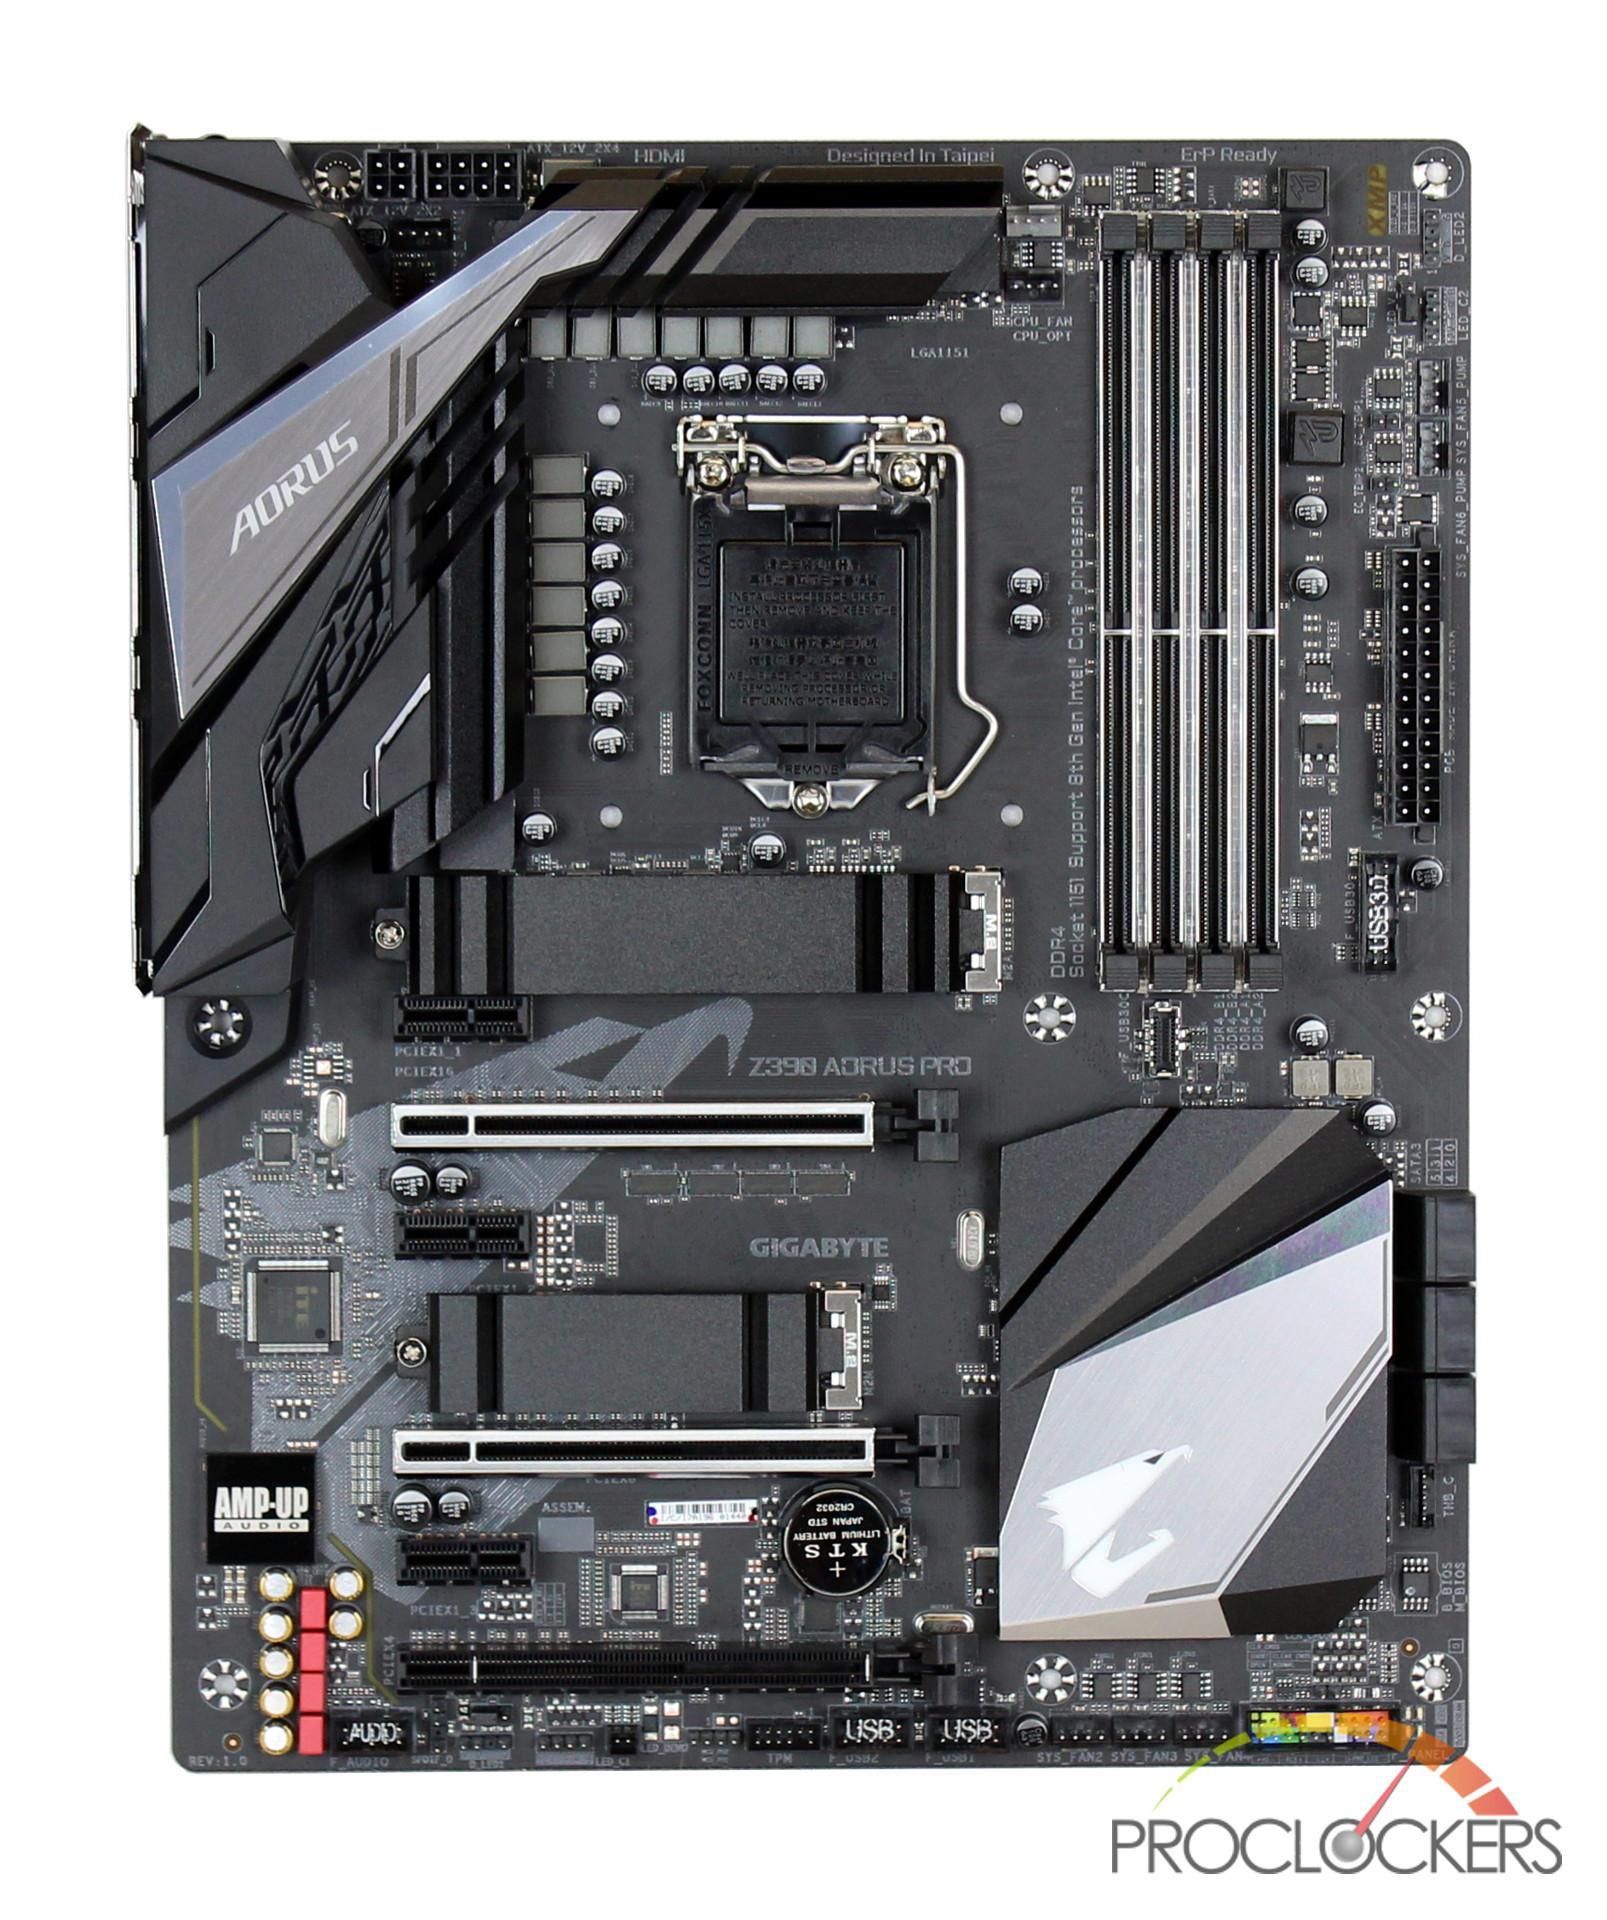
The Aorus branded MOSFET heatsink is mostly black with a center brushed aluminum mid-section that has an RGB lit “AORUS” written on it. You can also see that the power delivery does include 12 + 1 digital power phases.
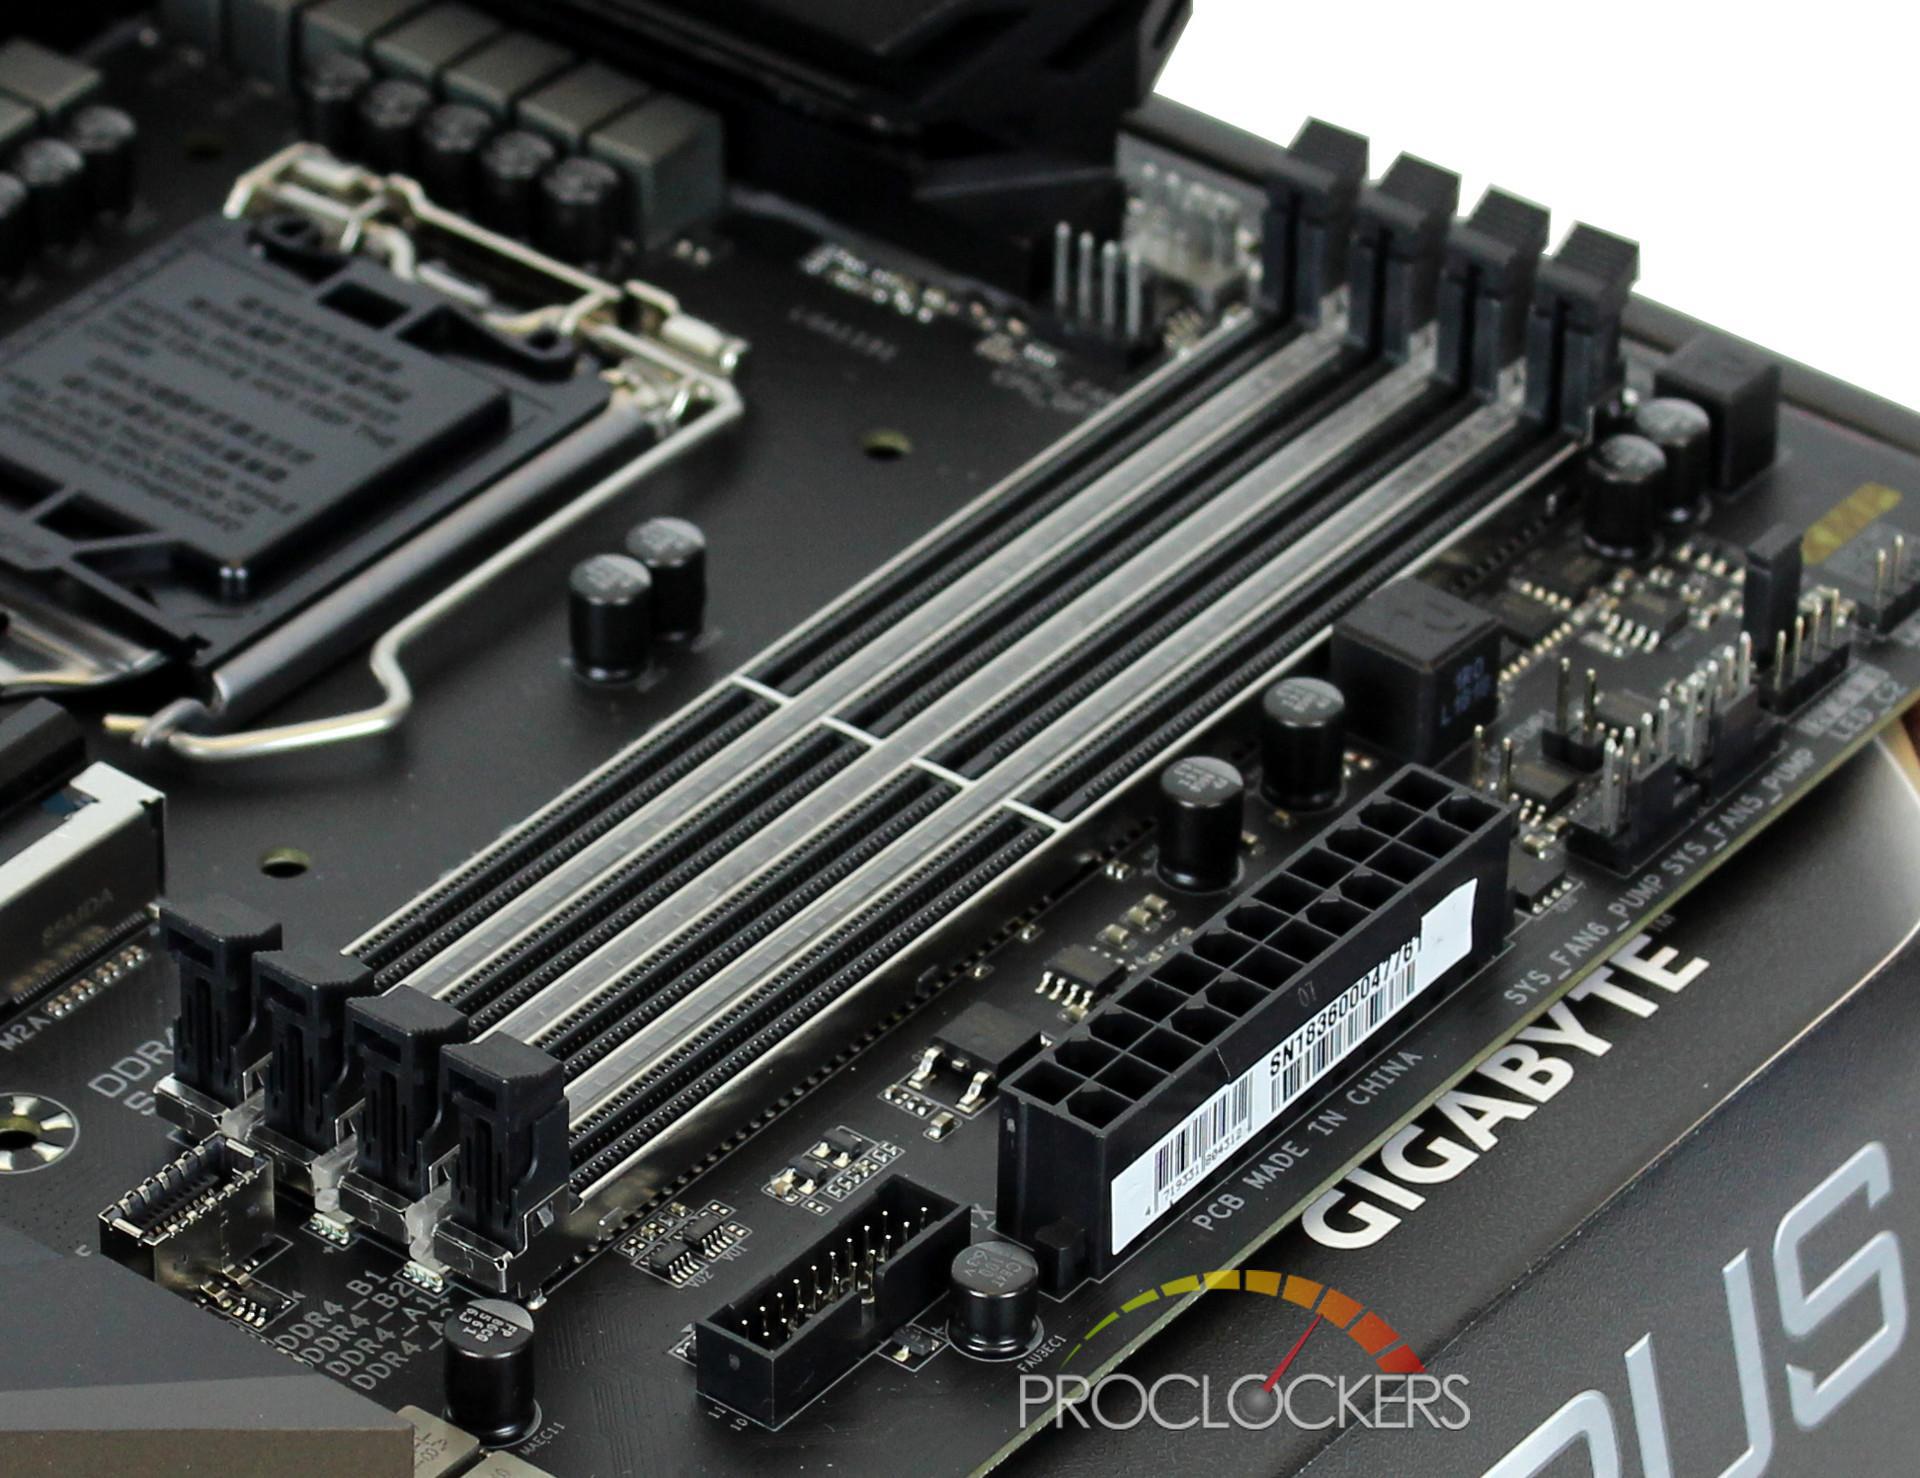
Moving toward the right of the board, you have the 4 x DDR4 ram slot that includes 3 RGB LED strips in-between them. On the edge of the board, you have both 3 and 4 pin RGB headers, 2 x fan/pump headers, 24 pin connector and a USB 3.0 header. Right below the ram slot, Gigabyte has also included a USB Type-C header with USB 3.1 Gen 1 support.
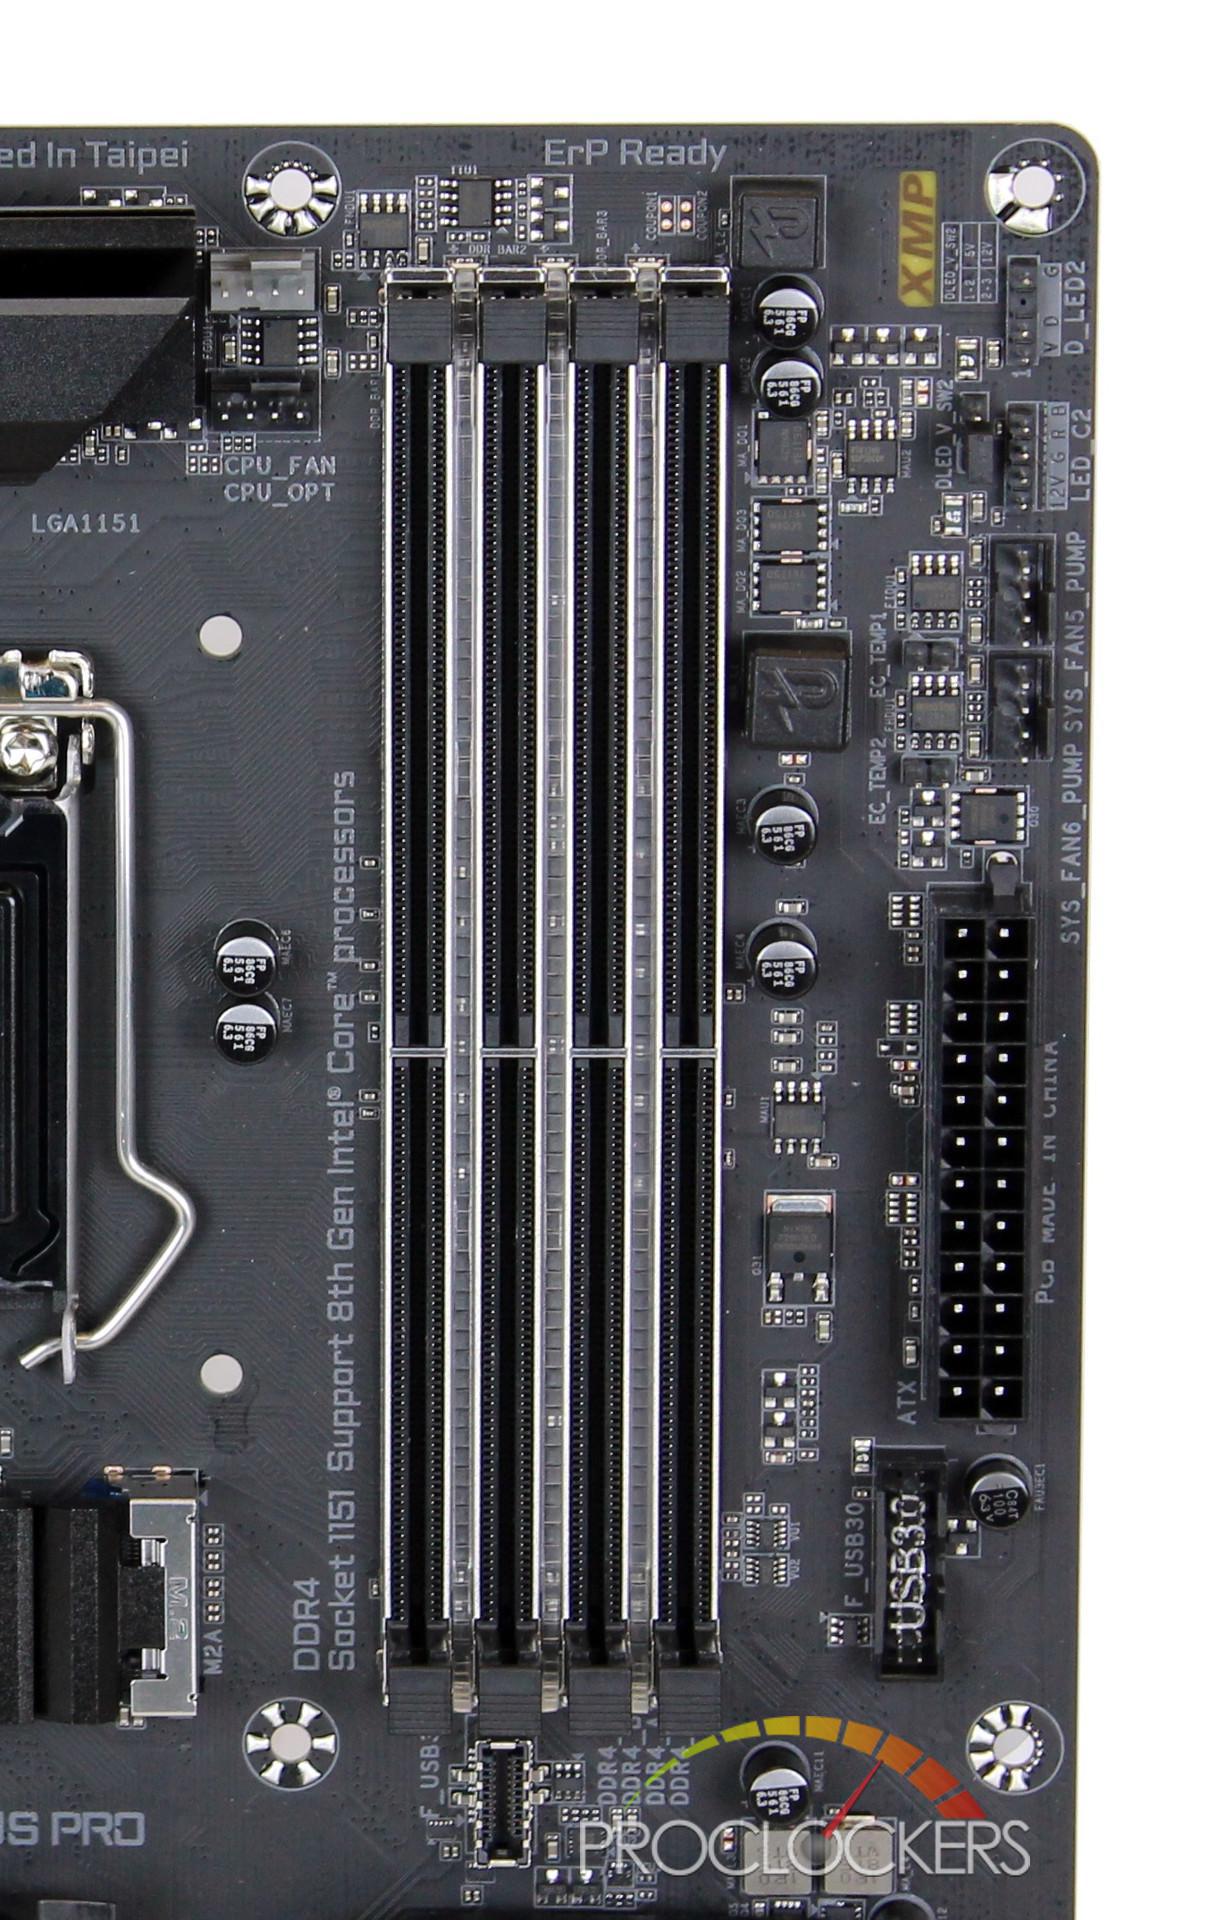
Looking at the ram slots, you will also see they have been reinforced with steel. This really ties in with all the silver accents of the board and provide that little extra support when installing the ram modules.
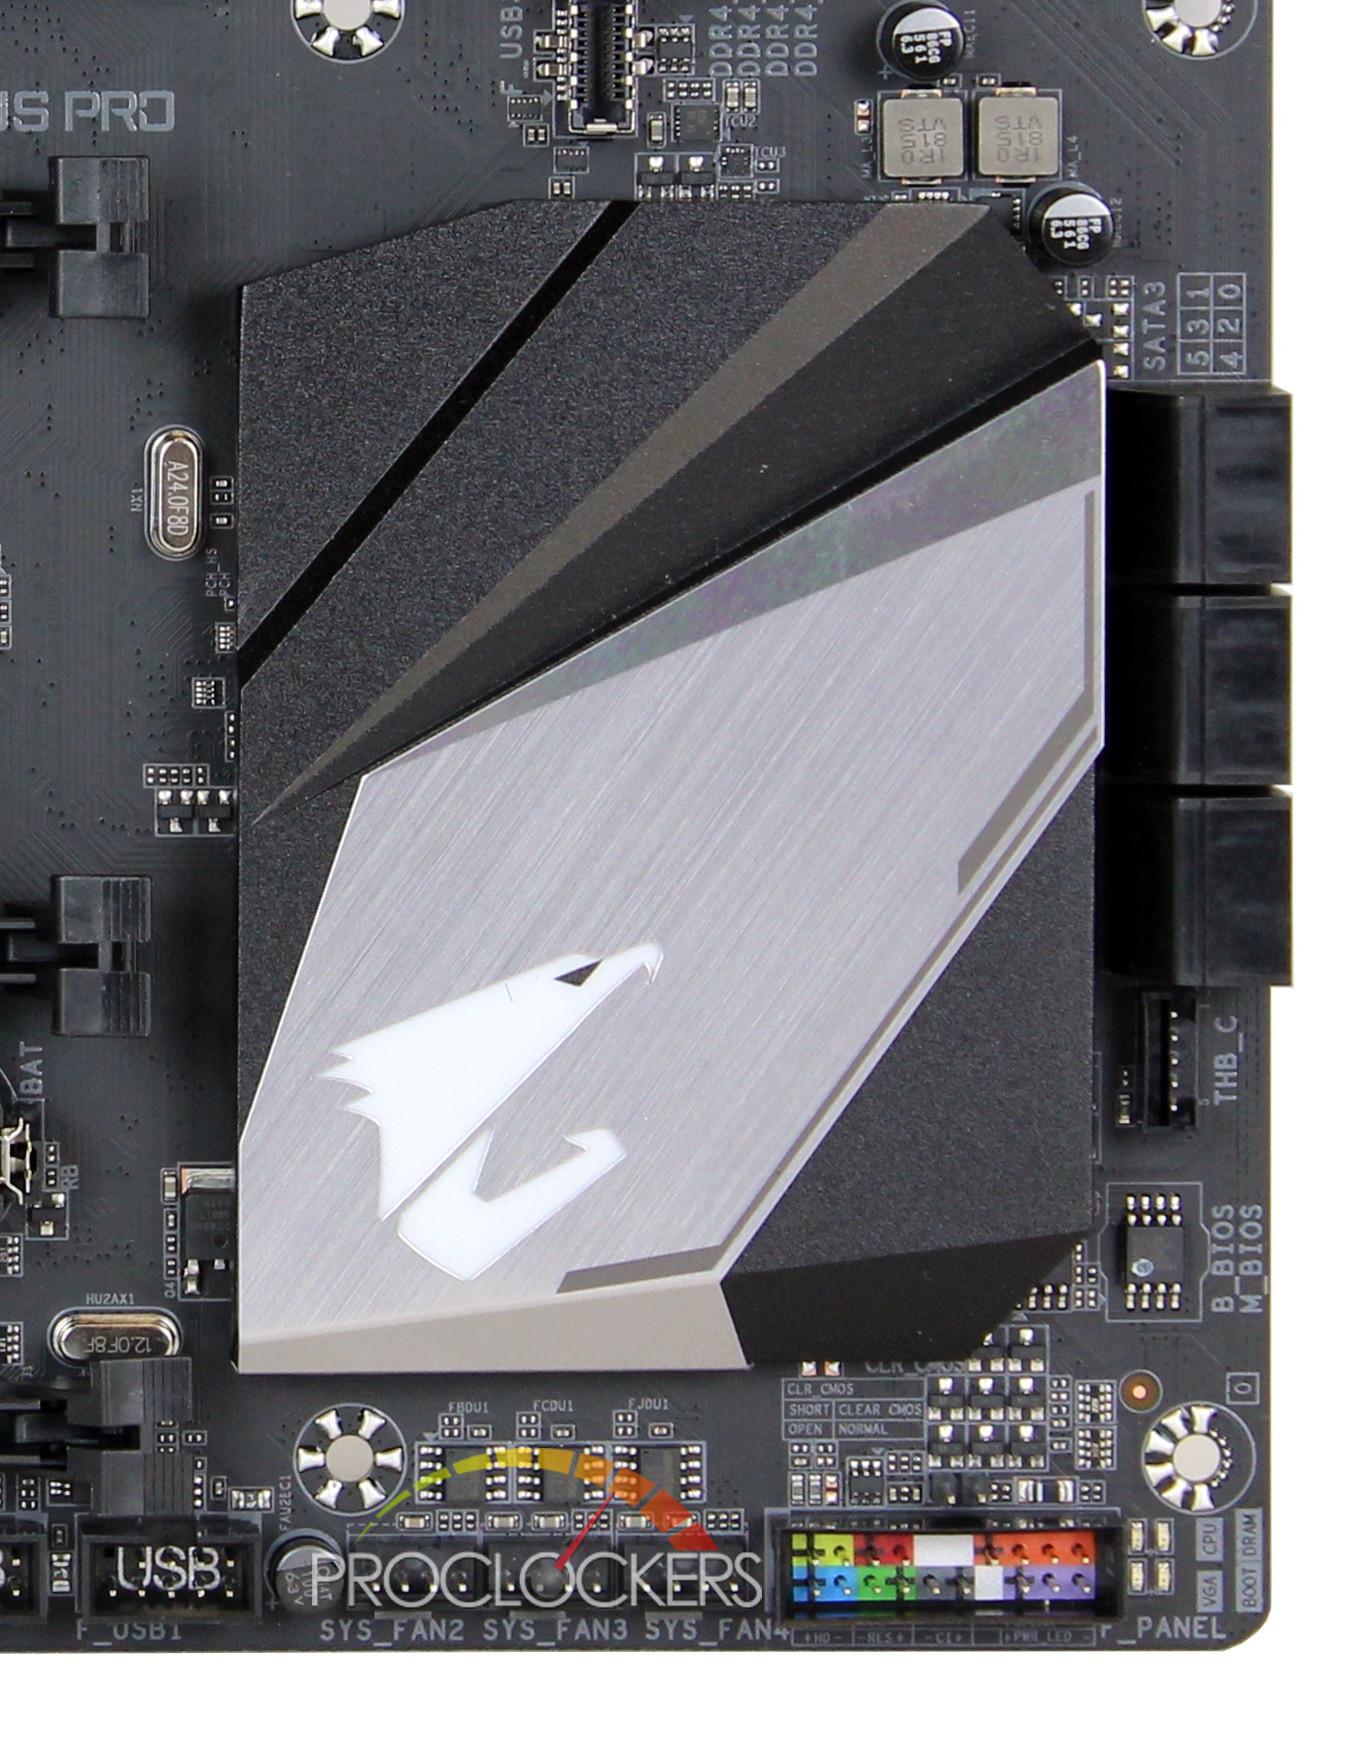
Like the MOSFET heatsink, the Aorus badge is black with a brushed aluminum center with an RGB lit Aorus logo in the left-hand corner. Like most motherboards, you have the system I/O on the bottom right of the boards. Something that Gigabyte has done differently is color-coded the inside of the connector. I could see this definitely being helpful when wiring the case to the motherboard.
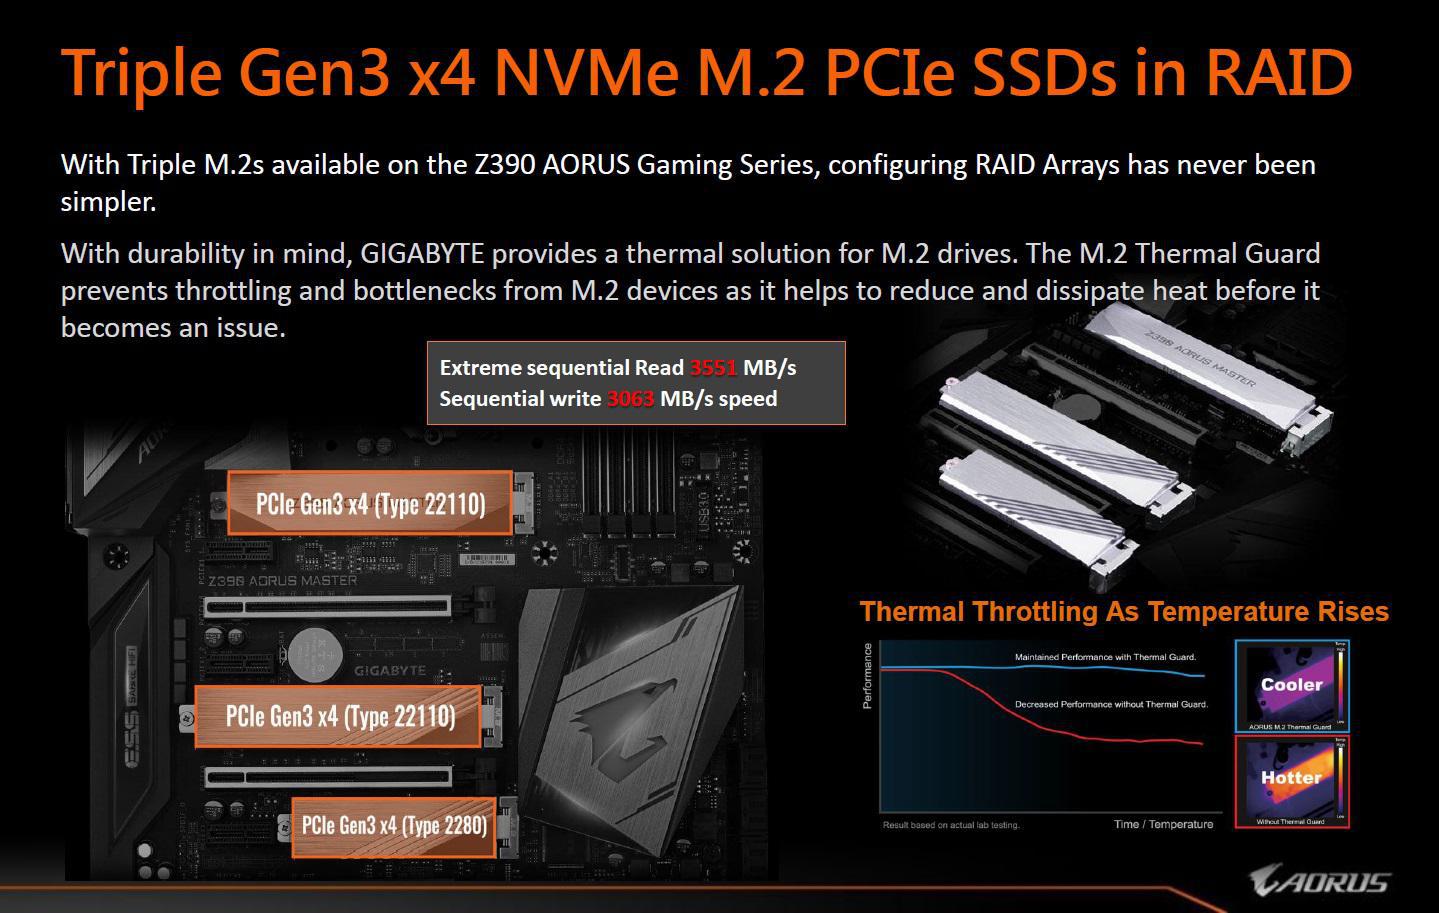
Included on the motherboard are two M.2 slots that are compatible with both M.2 SATA and M.2 PCIe SSD’s. The top slot support drives up to 110mm in length with the lower slot up to 80mm in length.
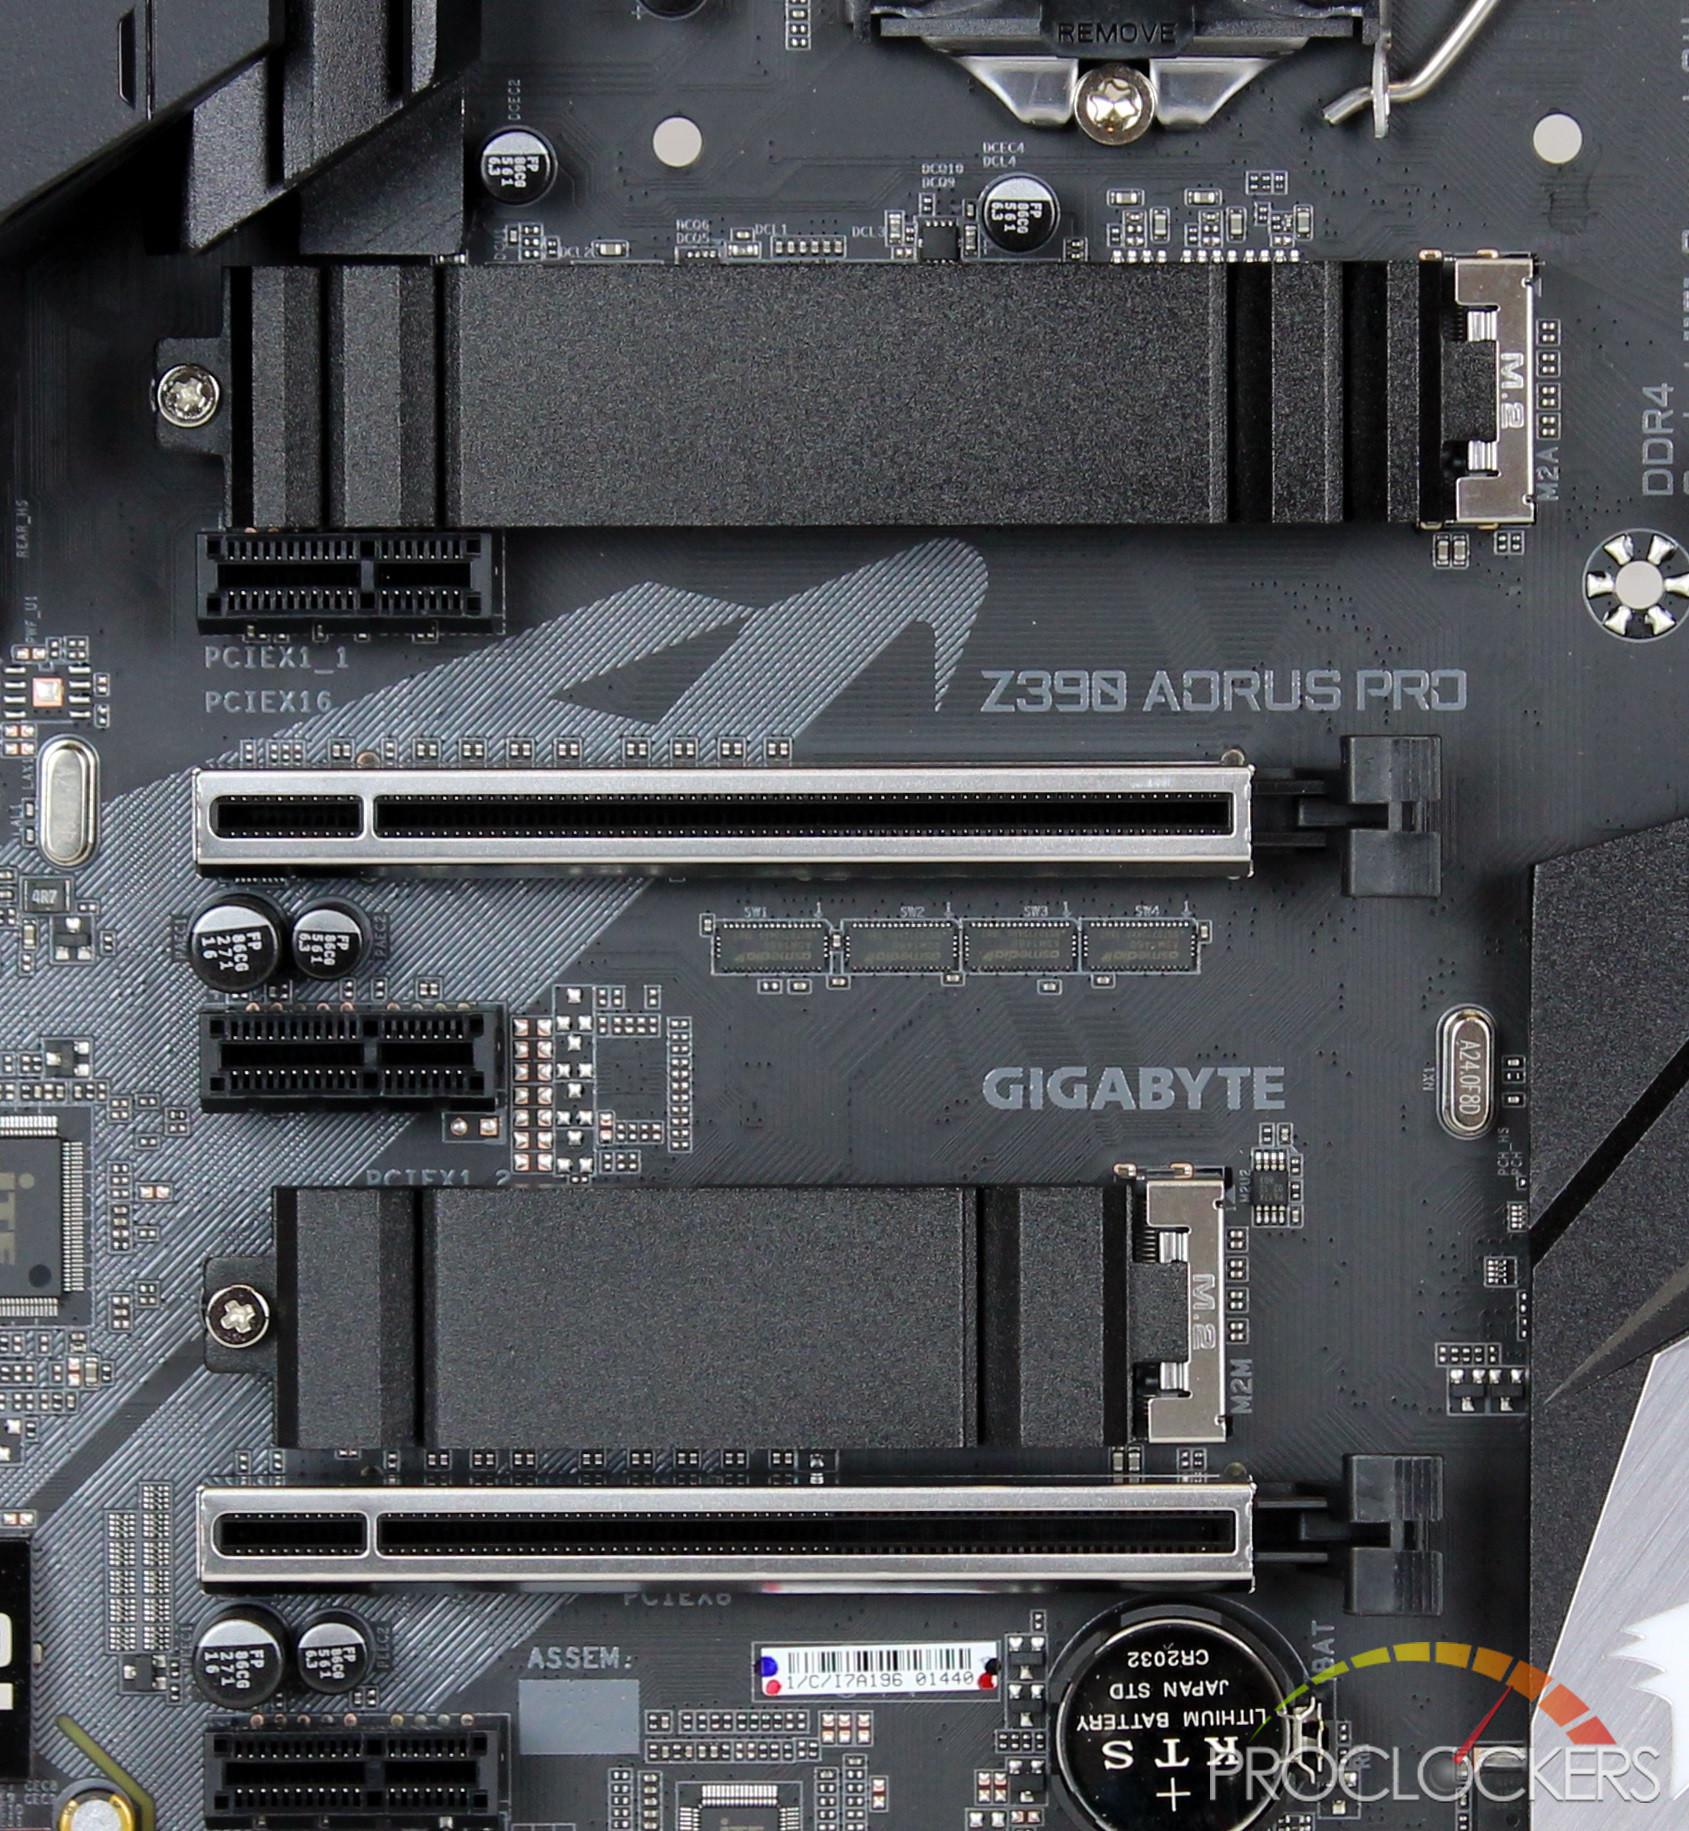
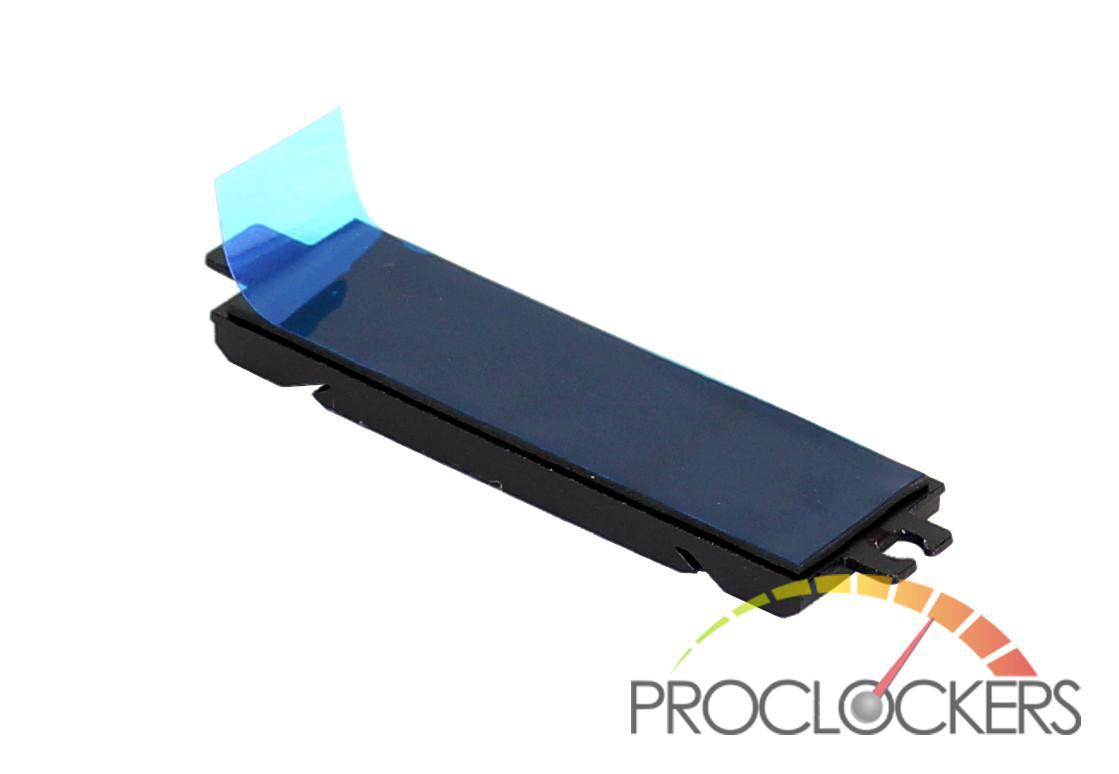
Taking one of the M.2 covers off reveals an installed thermal pad with a blue film still intact.
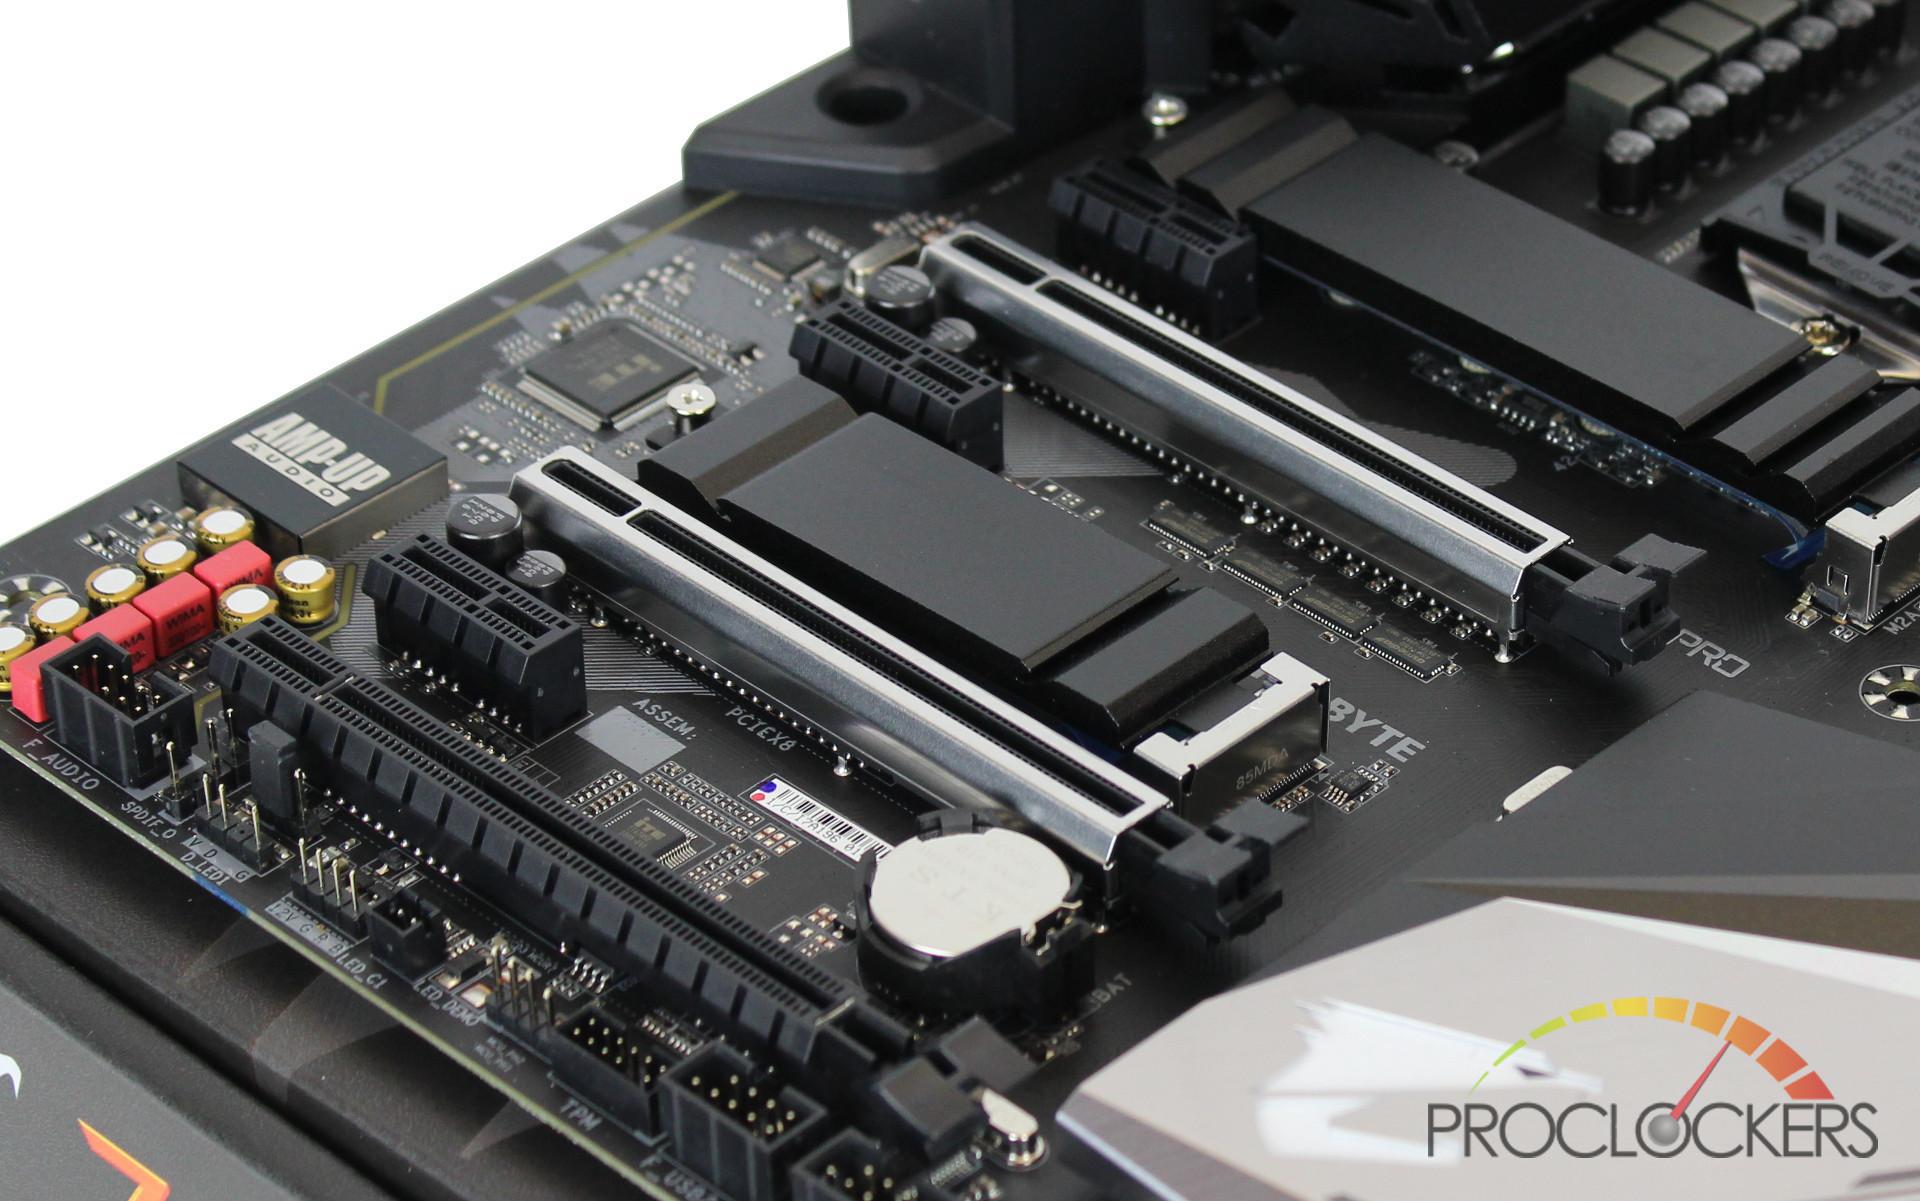
The Aorus Pro contains three PCIe 1x slots, one PCIe x4 slot, one PICe 8x slot, and one PCIe 16x slot. With the 16x and 8x slot primarily used for heavy GPU’s, Gigabyte has reinforced the slots with a steel cover that also ties in nicely with the silver accent of the board.
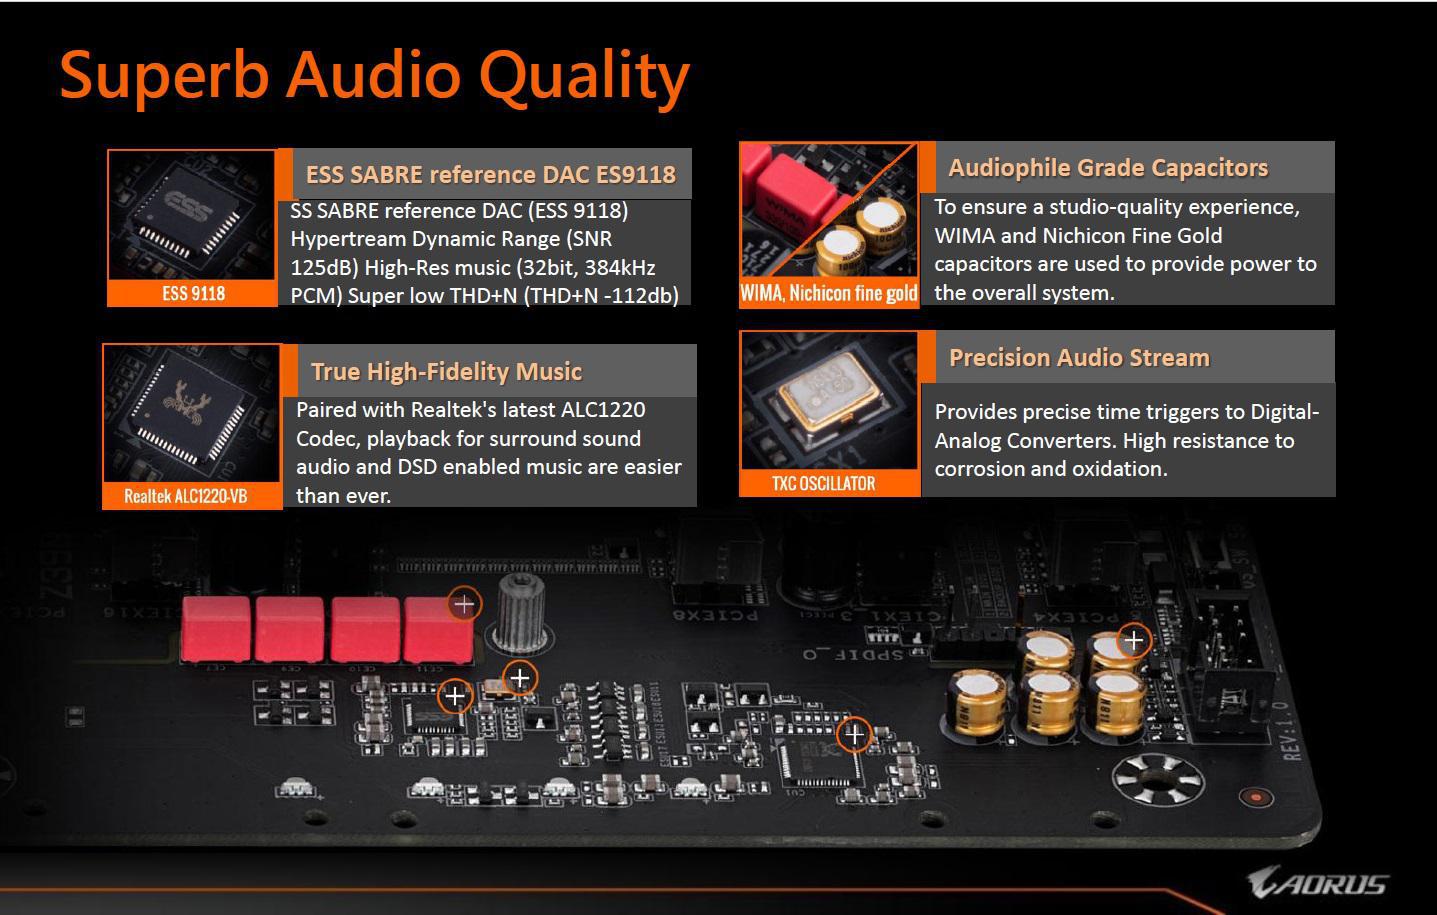
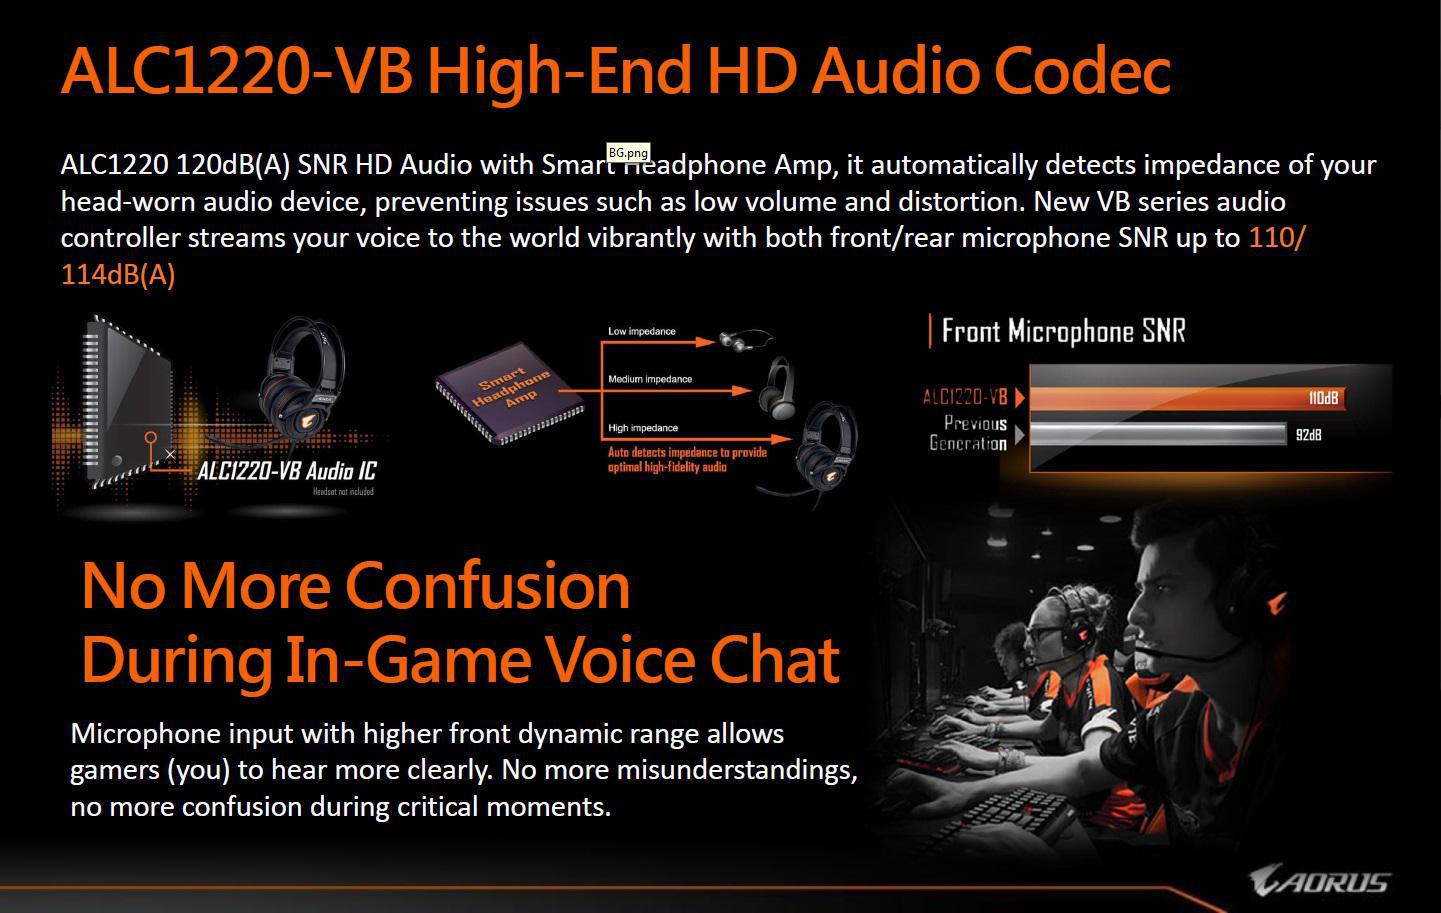
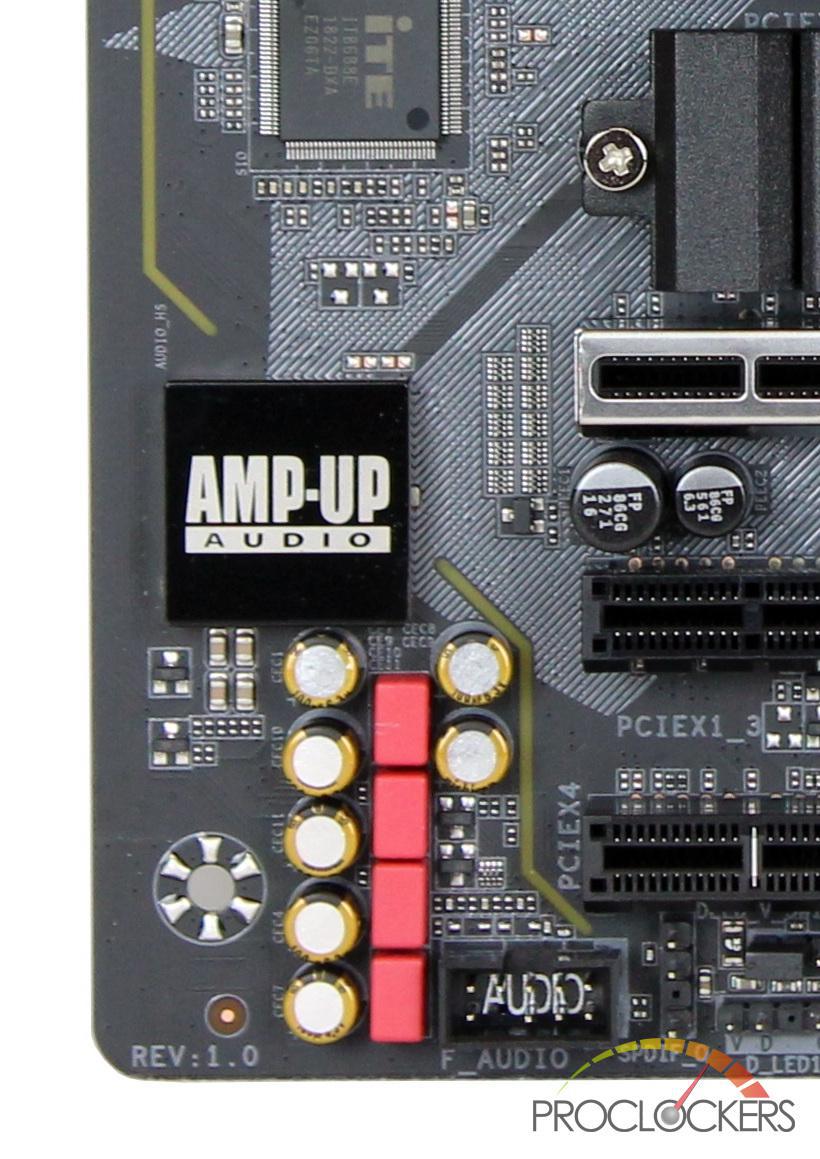
Looking at the onboard audio, Gigabyte went with a Realtek ALC1220-VB codec and uses Hi-Fi grade WIMA FKP2 and high-end audio capacitors. They have also added a little RGB flare with a faint line of LED’s going through the audio components.
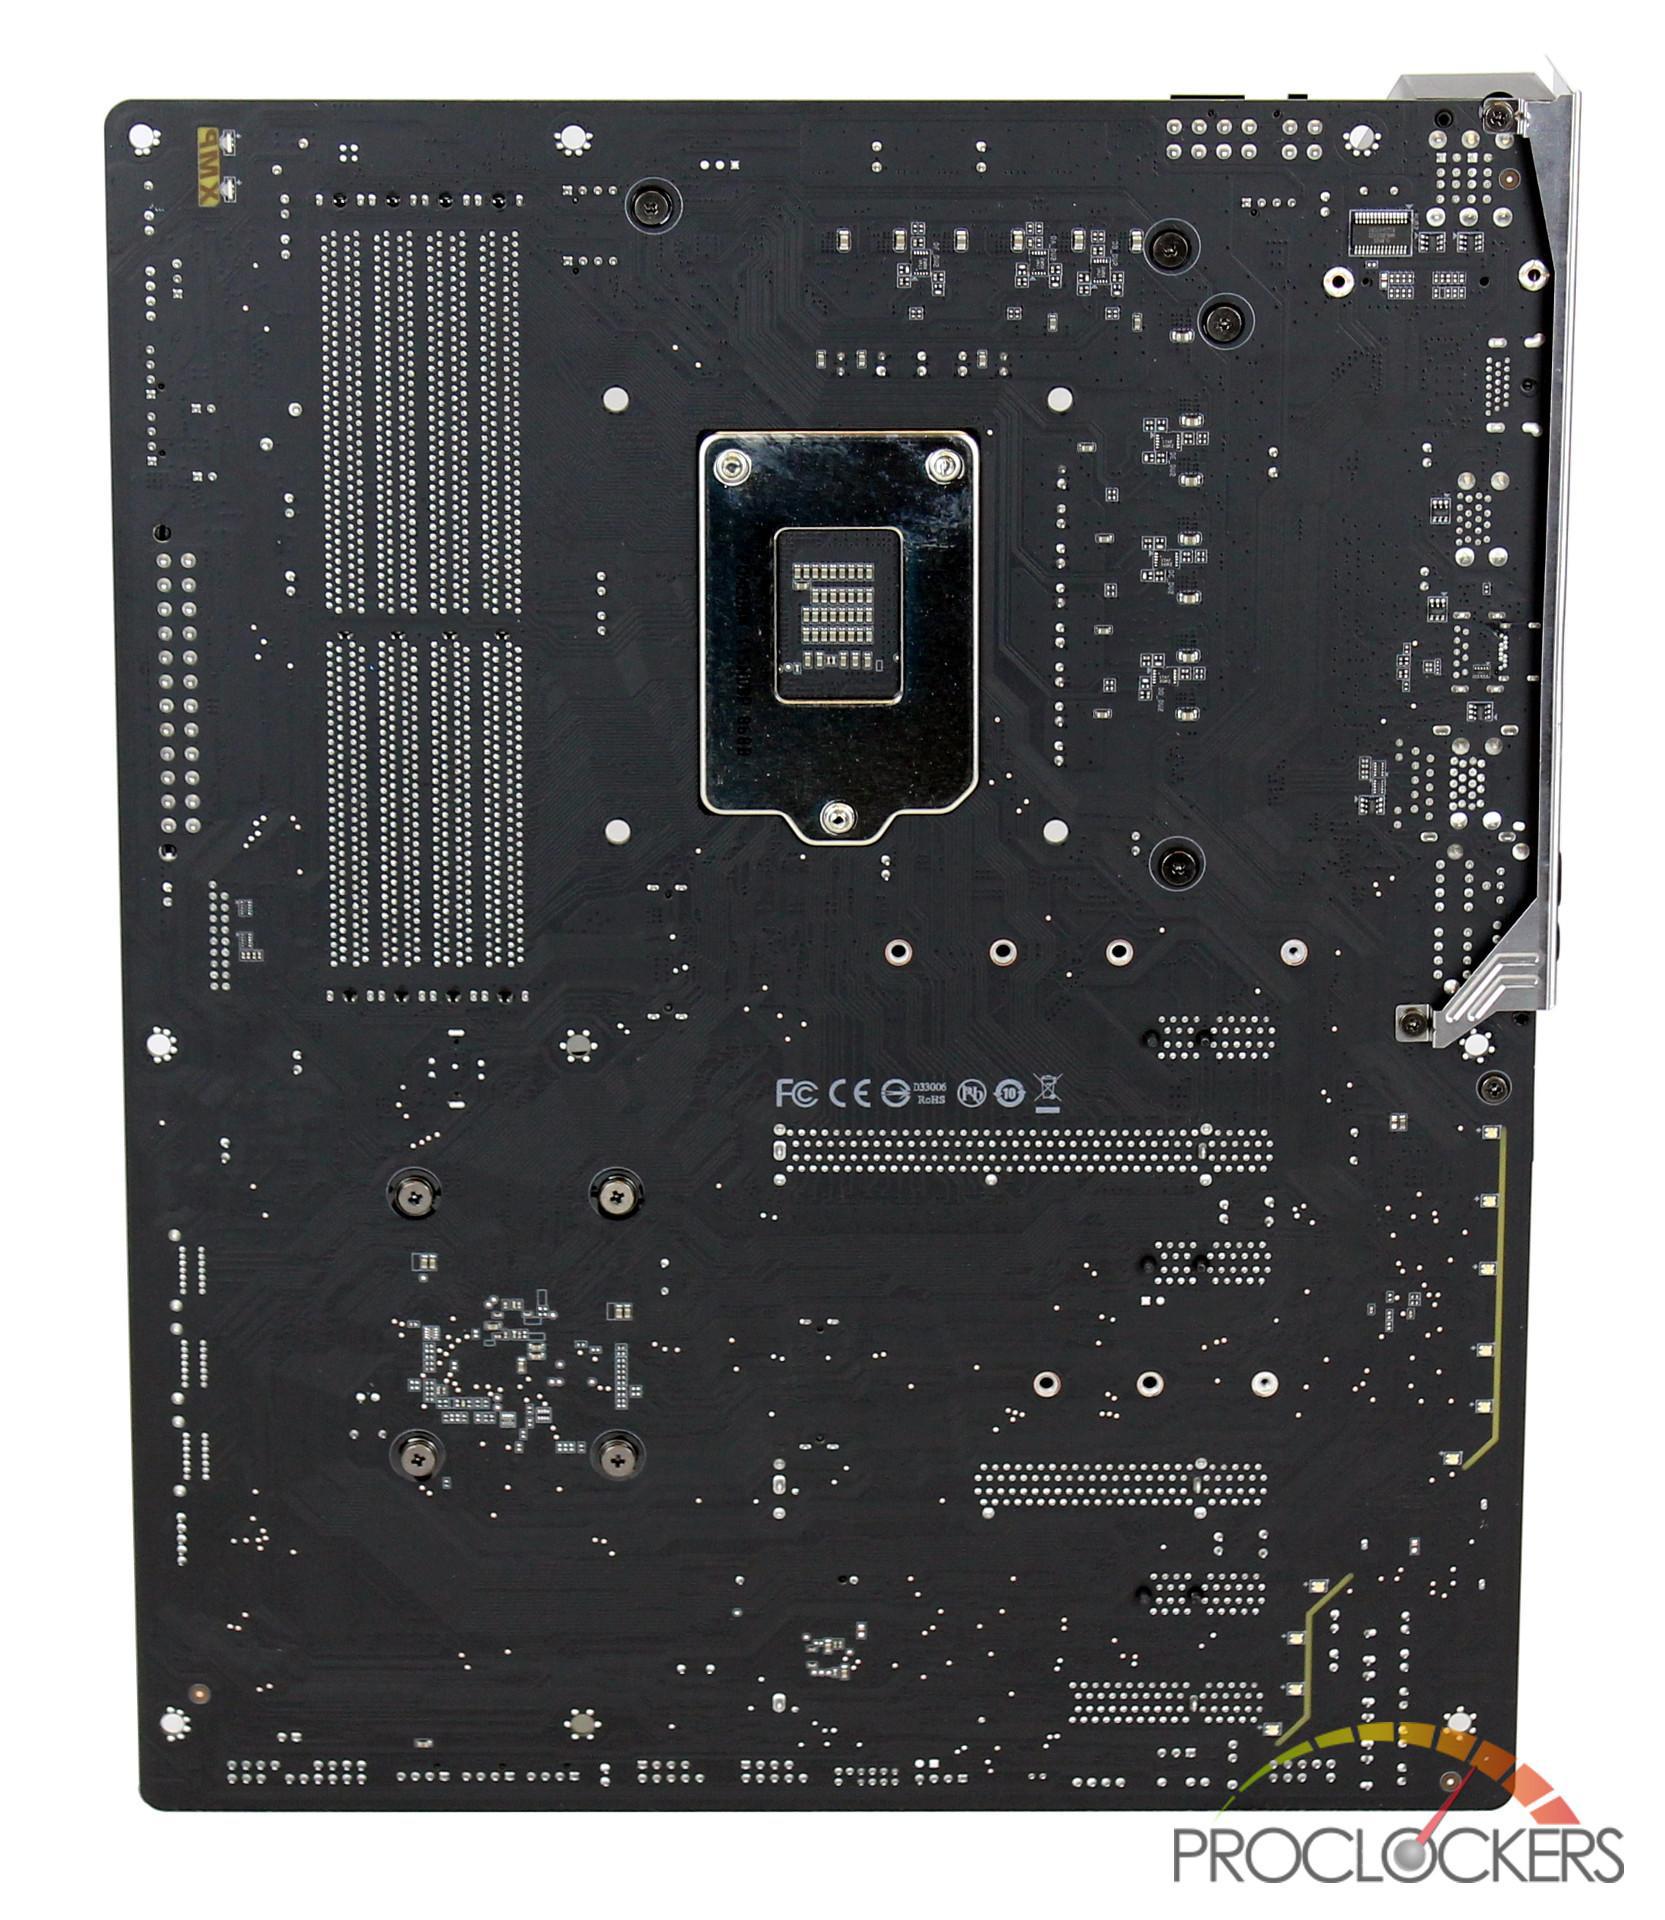
The back of the motherboard includes the CPU backplate and the audio LED in the lower right of the board.
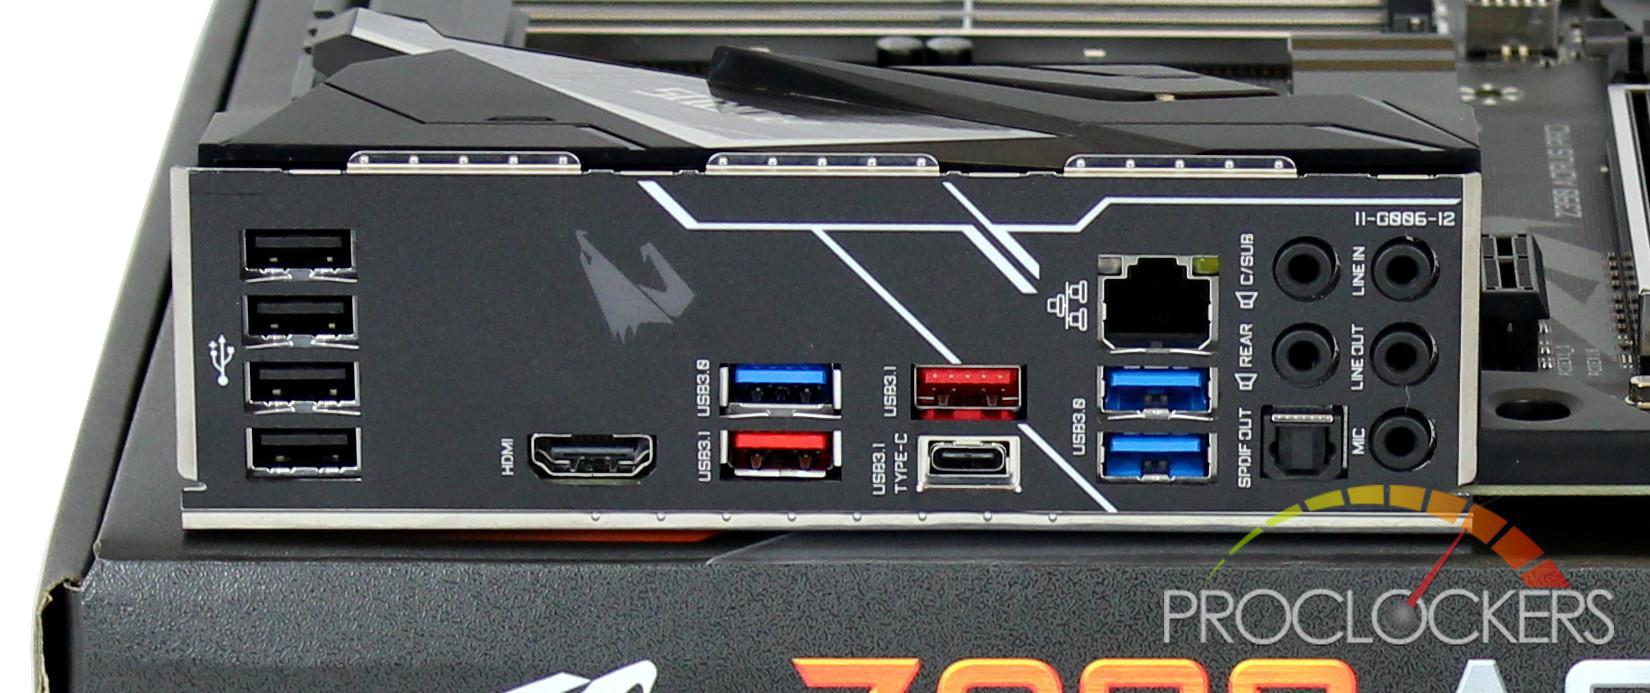
The back I/O from left to right includes: 4 x USB 2.0, HDMI port, 3 x USB 3.0 (Blue), 2 x USB 3.1 Gen 2 (Red), 1 x USB Type-C, Gigabyte RJ45, Audio I/O with an optical S/PDIF output. It’s nice to see that the I/O plate is attached to the motherboard which we are seeing more and more on mid-range boards. You will also see the Aorus logo on the I/O backplate which like the MOS heatsink is also RGB lit.
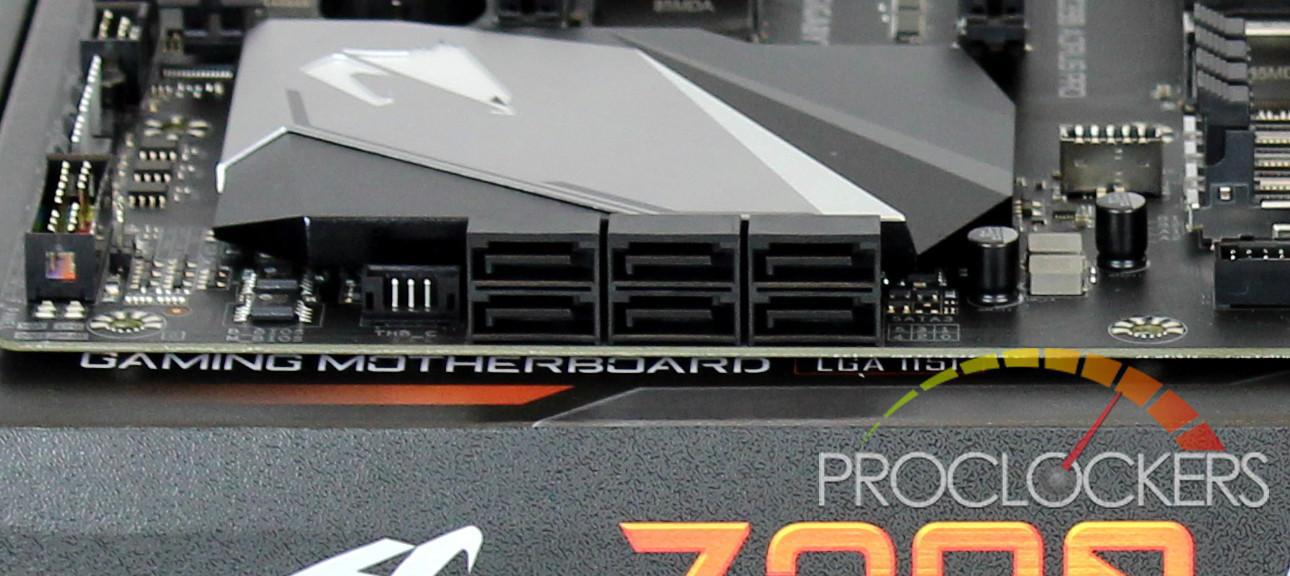
The Aorus Pro includes 6 x SATA 3 connectors that can be configured in RAID 0/1/5 or 10. Note that if you have an M.2 SATA drive installed in the top M.2 slot, SATA3 1 will be disabled. Also, if either a SATA or PCIe M.2 drive is installed in the lower M.2 slot SATA3 4 and SATA3 4 are disabled.
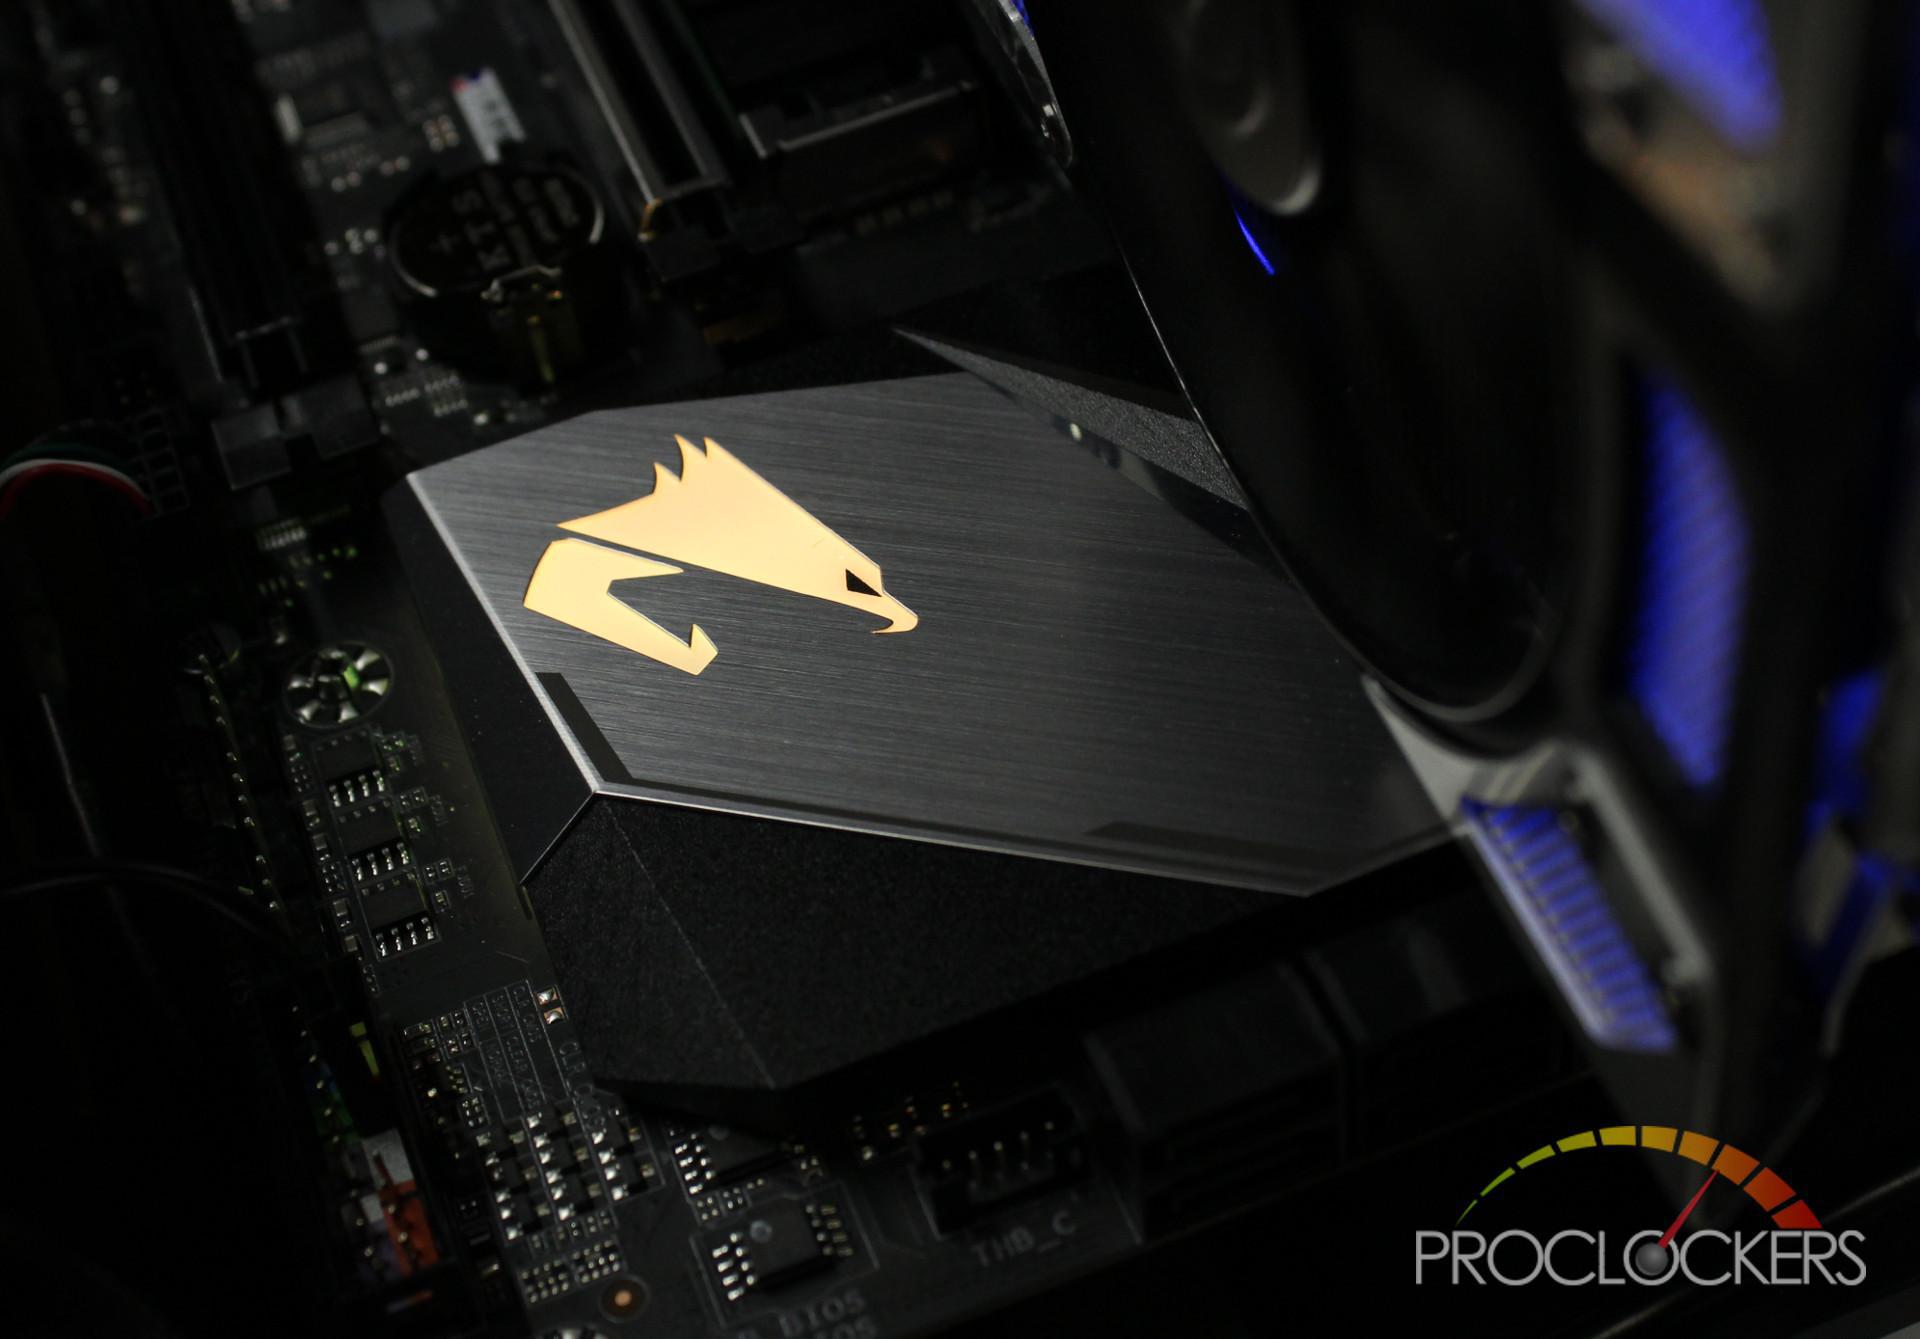
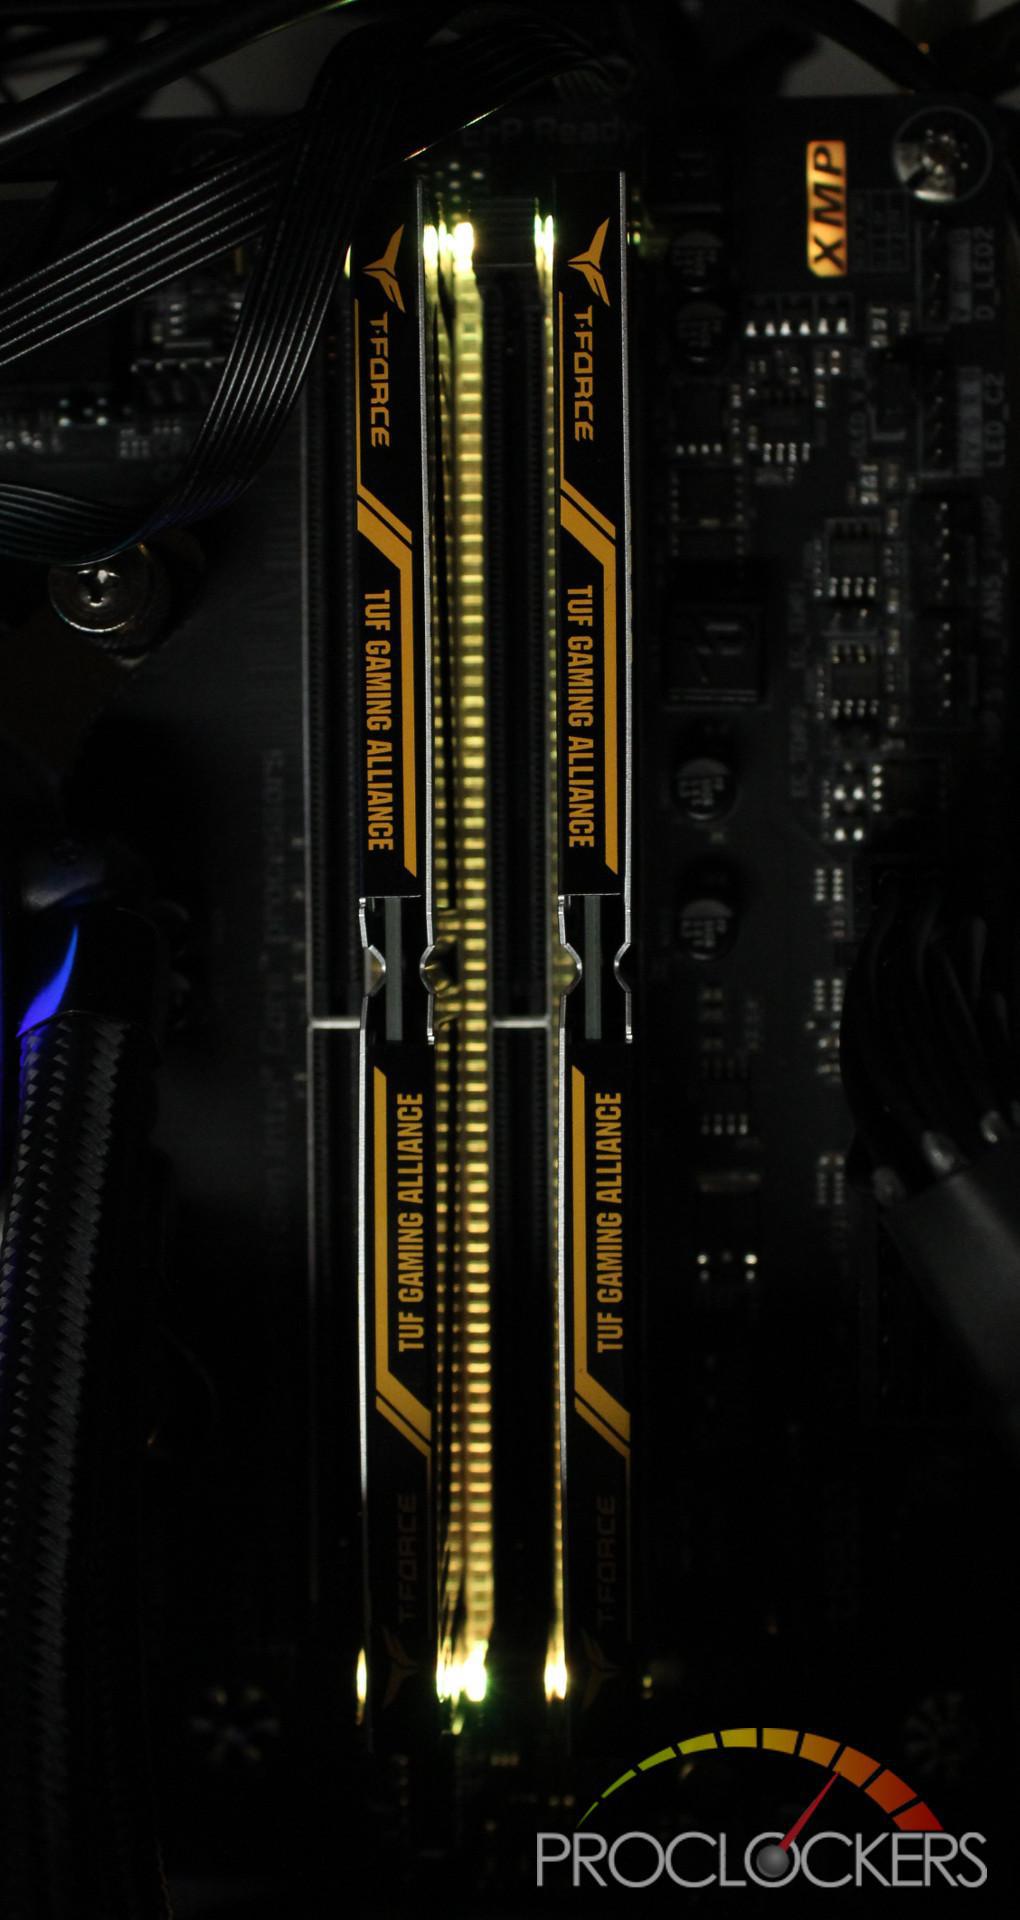
On first boot of the Aorus Pro, the onboard RGB LED’s are an orangish yellow matching the Aorus brand and look stunning on all the onboard RGB elements. Our favorite of the RGB’s has to be the Aorus badge with the brushed aluminum finish.
The upper heatsink sporting an RGB lit “AORUS” brand name.

The LED’s nicely matching the installed Team Group Vulcan TUF ram modules.
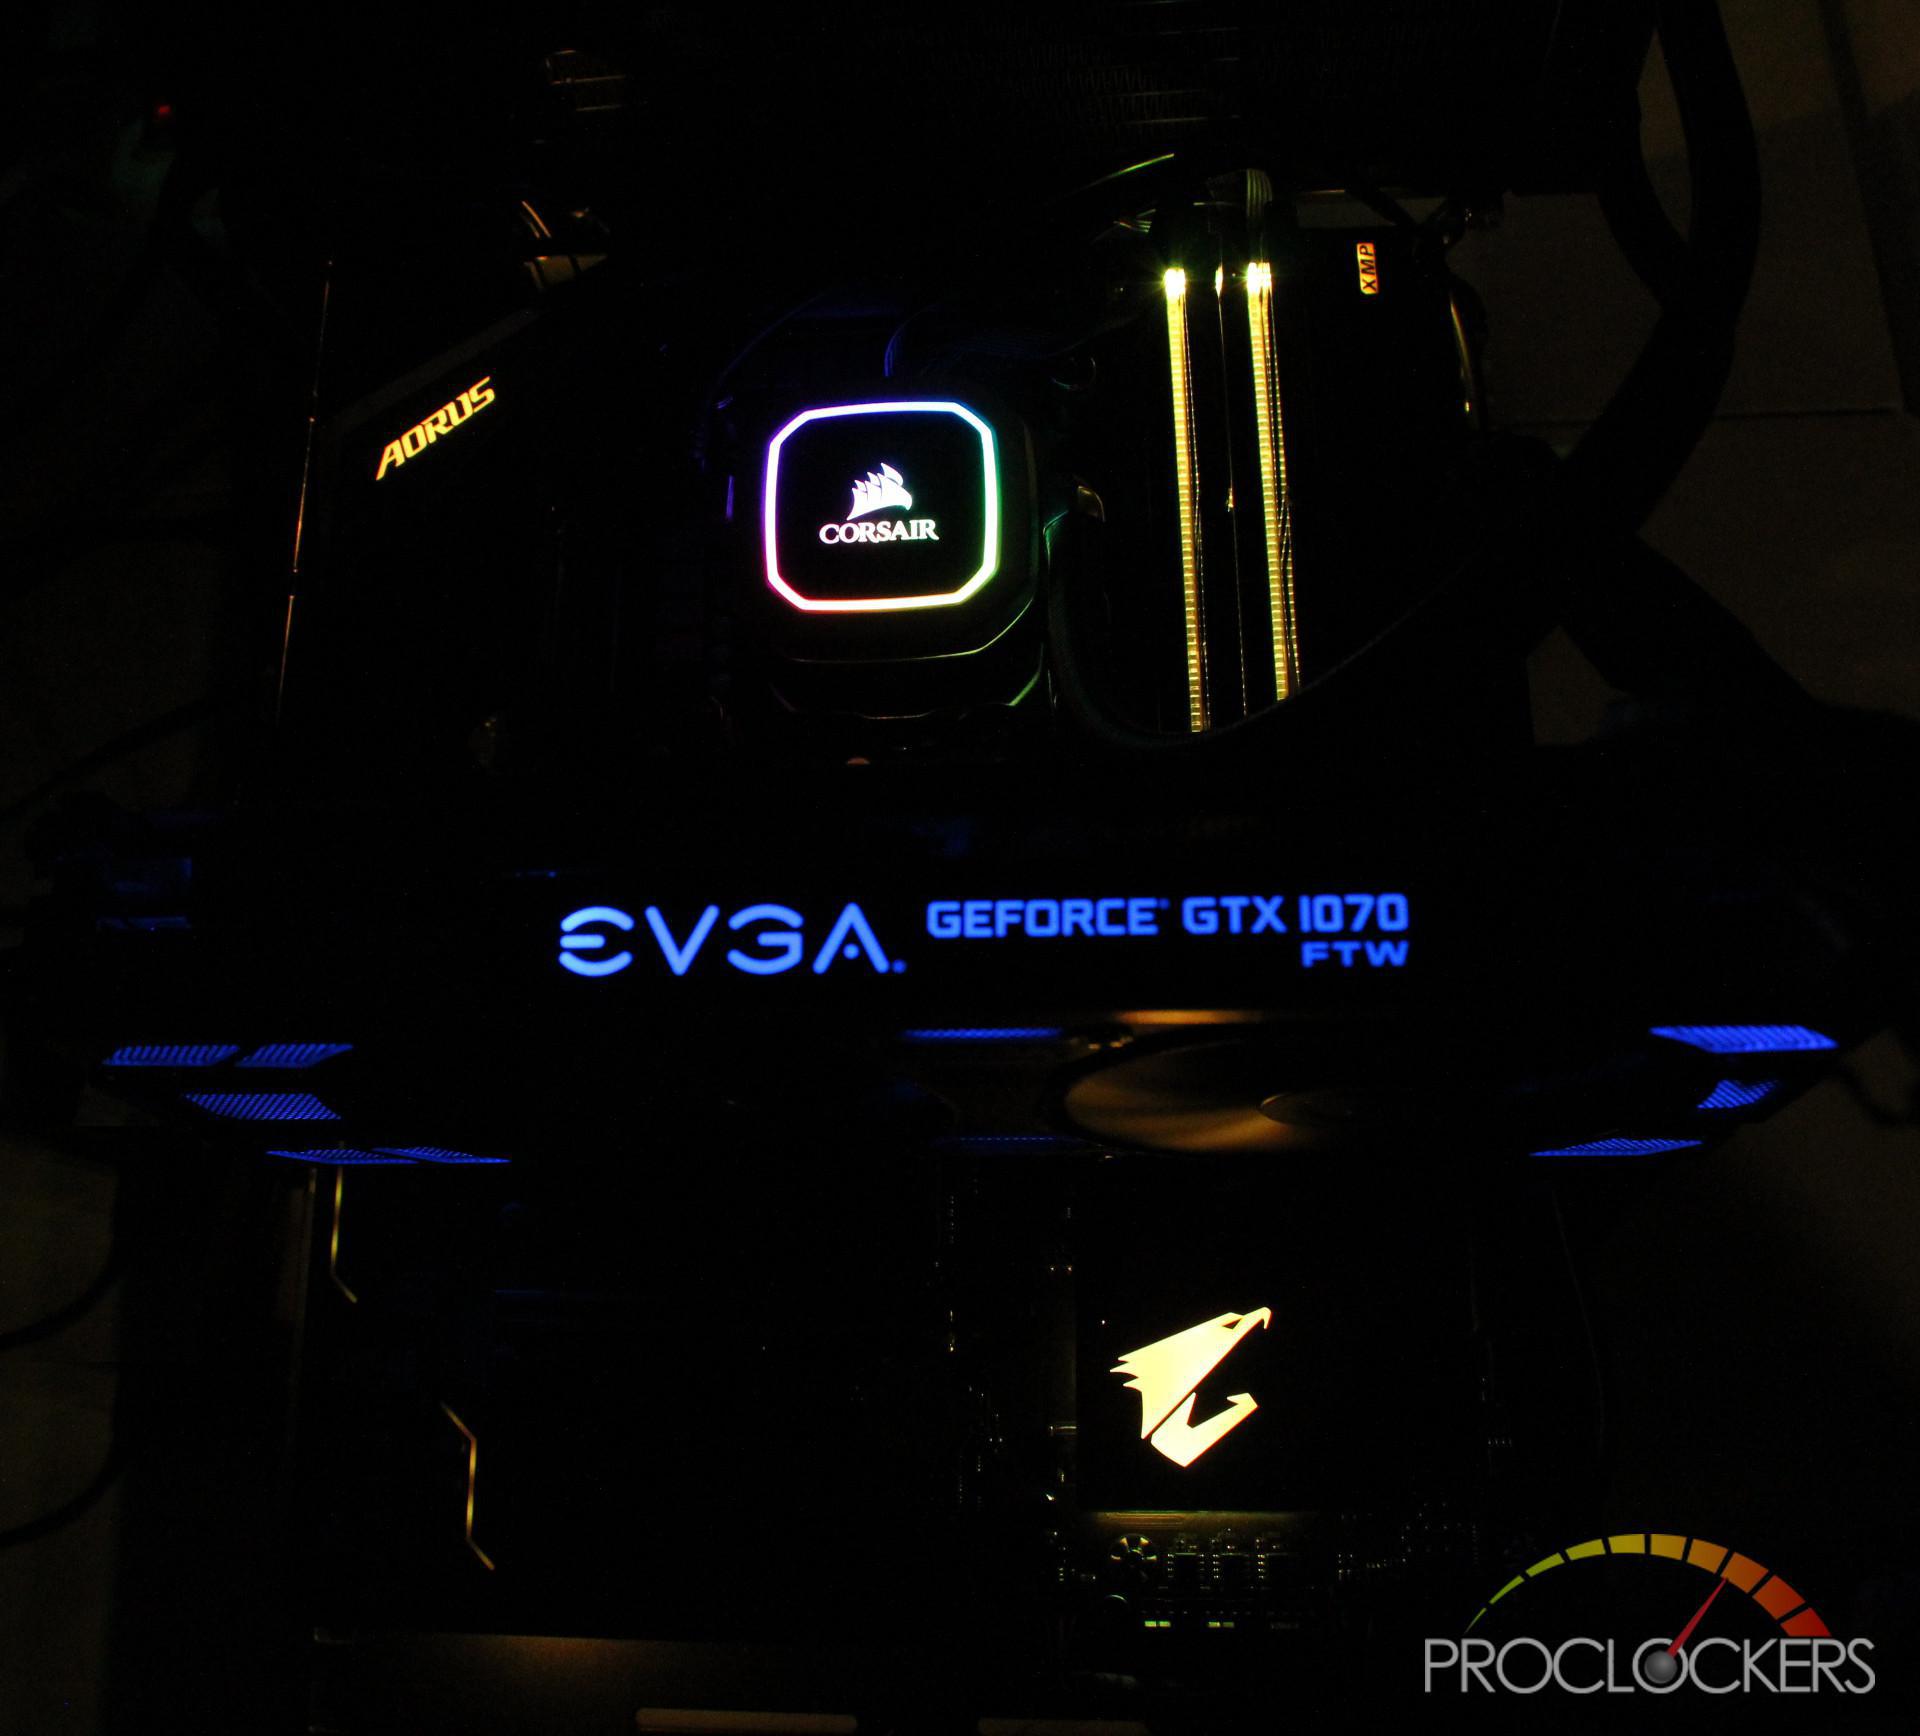
A complete look of a lit up Aorus Pro with a Corsair H115i cooler and EVGA 1070 FTW GPU.
System Configuration & BIOS
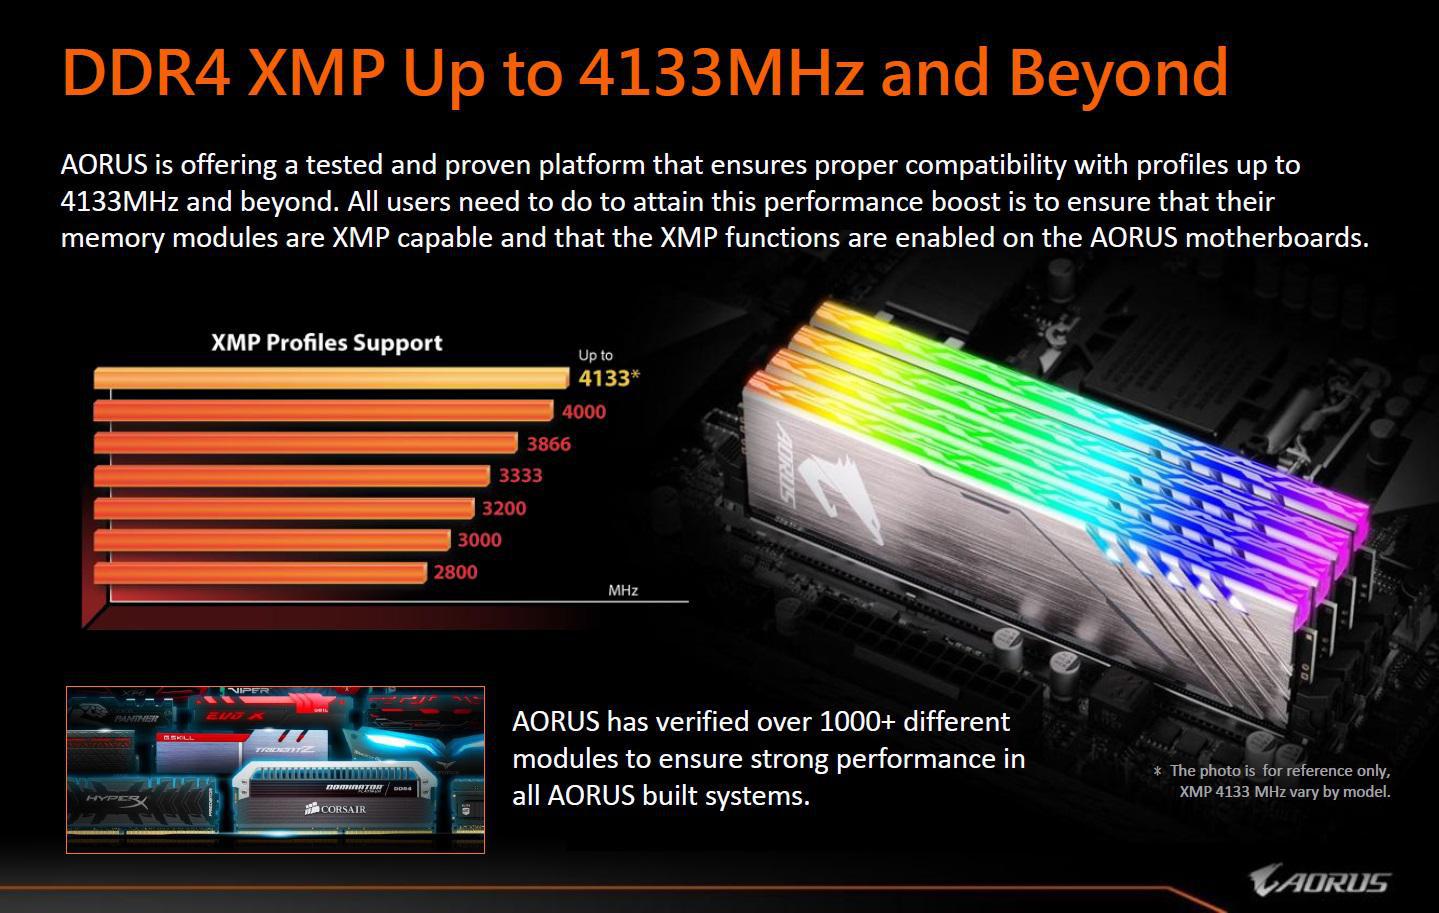
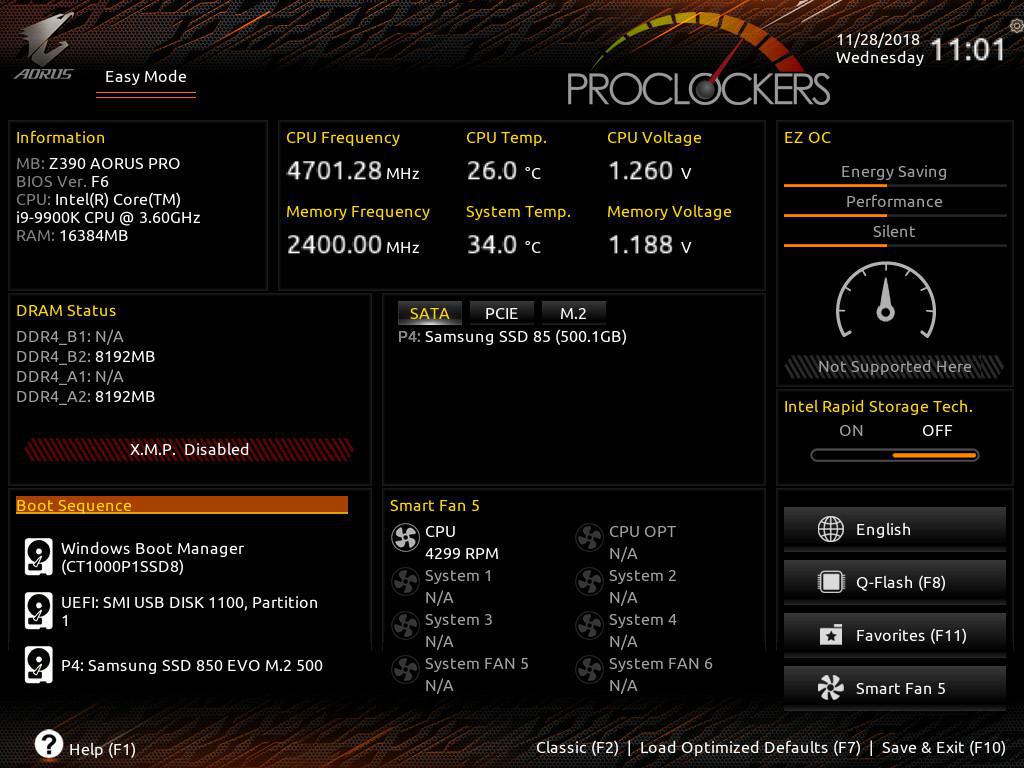
Upon booting into the BIOS, we noticed it was using the old F5 version that looks familiar from the previous Z370 generation boards. We went ahead and downloaded the new F6 version, which contains various UI enhancements. The version has done away with the generally red UI and replacing it with Aorus branded orange. By default, it loads the “Easy Mode” version of the UI which displays your system information, CPU frequency/temperature/voltage, Memory frequency/temperature, system temperature, DRAM configuration, fan speeds, storage configuration, and boot sequence. You can’t do too much from this screen other than enabling XMP, turning on/off intel rapid storage and change your boot sequence. There are a few shortcut buttons on the lower right of the screen to change the language, q-flash (to flash the BIOS), Favorites (more on the later), and Smart Fan 5 configuration.
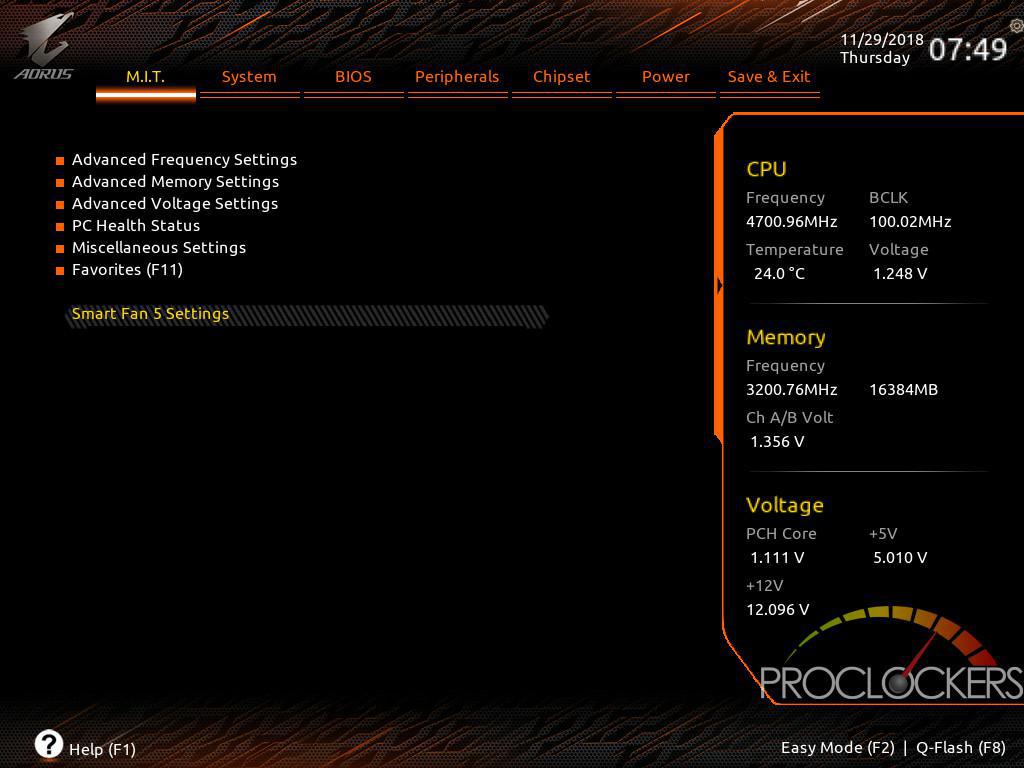
Pressing “F2” brings you into “Classic Mode” which gives you access to all your frequency, memory, voltage and miscellaneous settings.
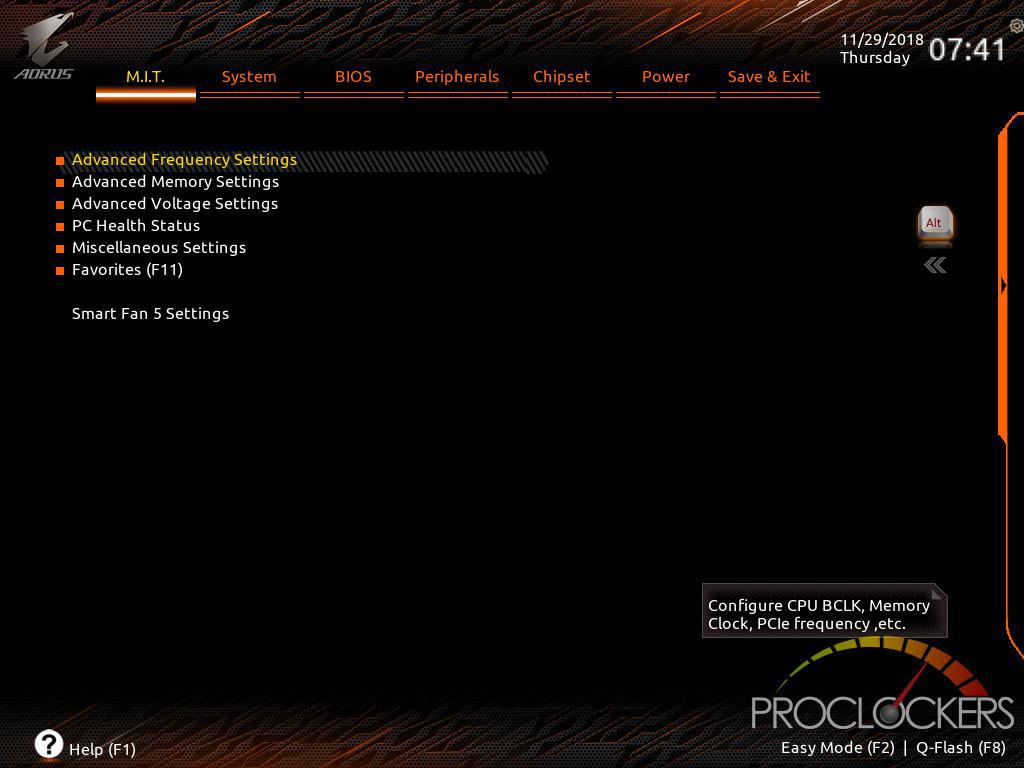
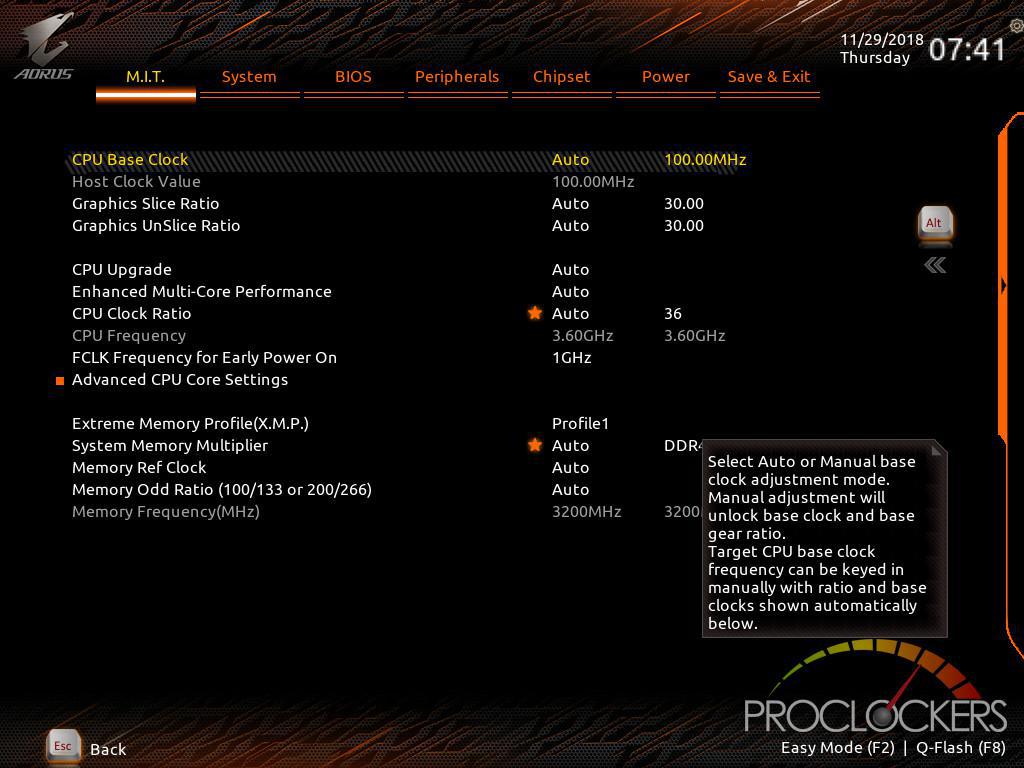
Looking at the “Advanced Frequency Settings”, you’re able to configure such settings as your “CPU Clock Ratio”, enable/disable XMP, and manually set your memory frequency.
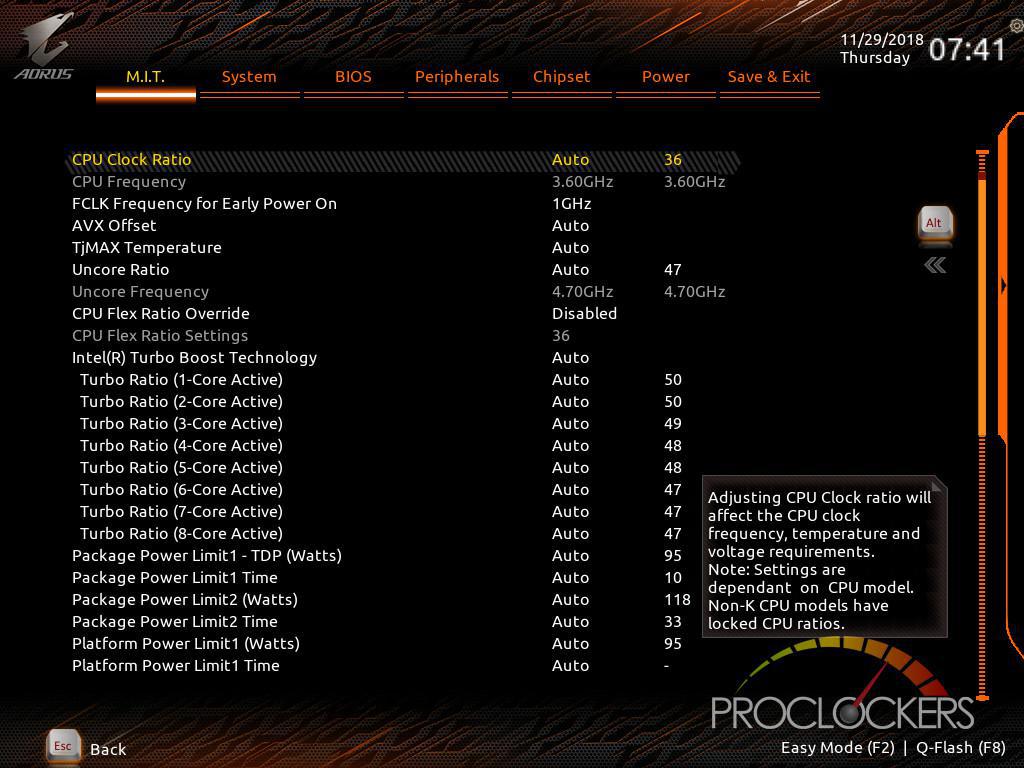
Looking at “Advanced CPU Core Settings” you can configure your CPU further by setting an AVX offset, adjust your TjMAX temperature, and change your CPU boost profile.
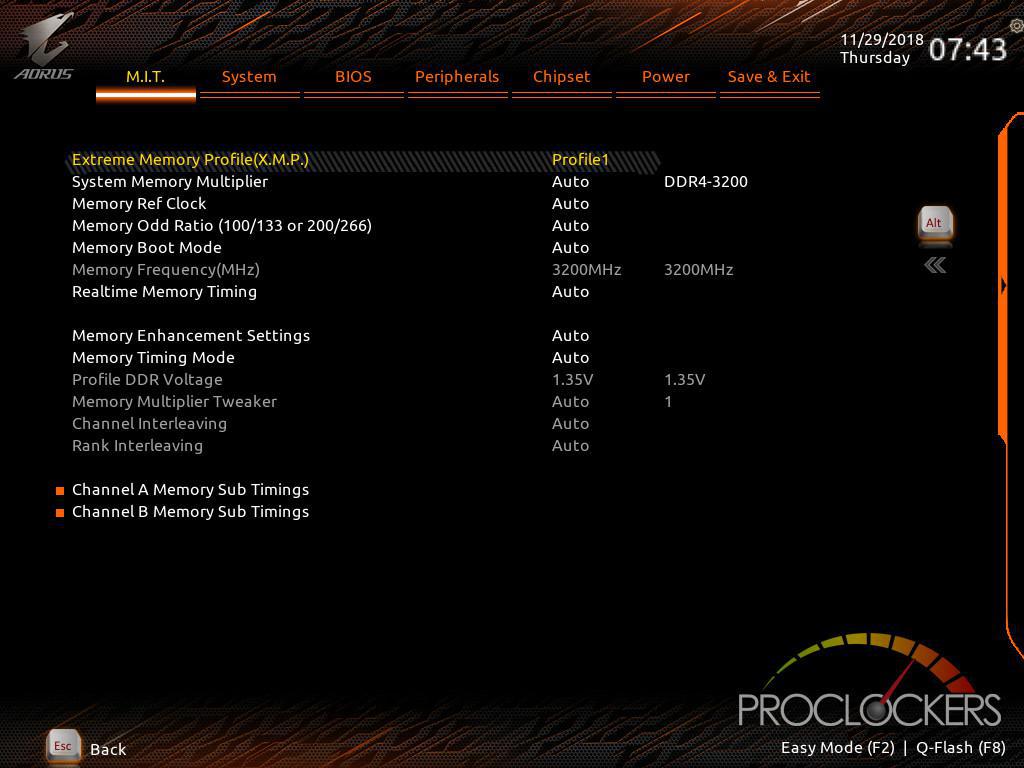
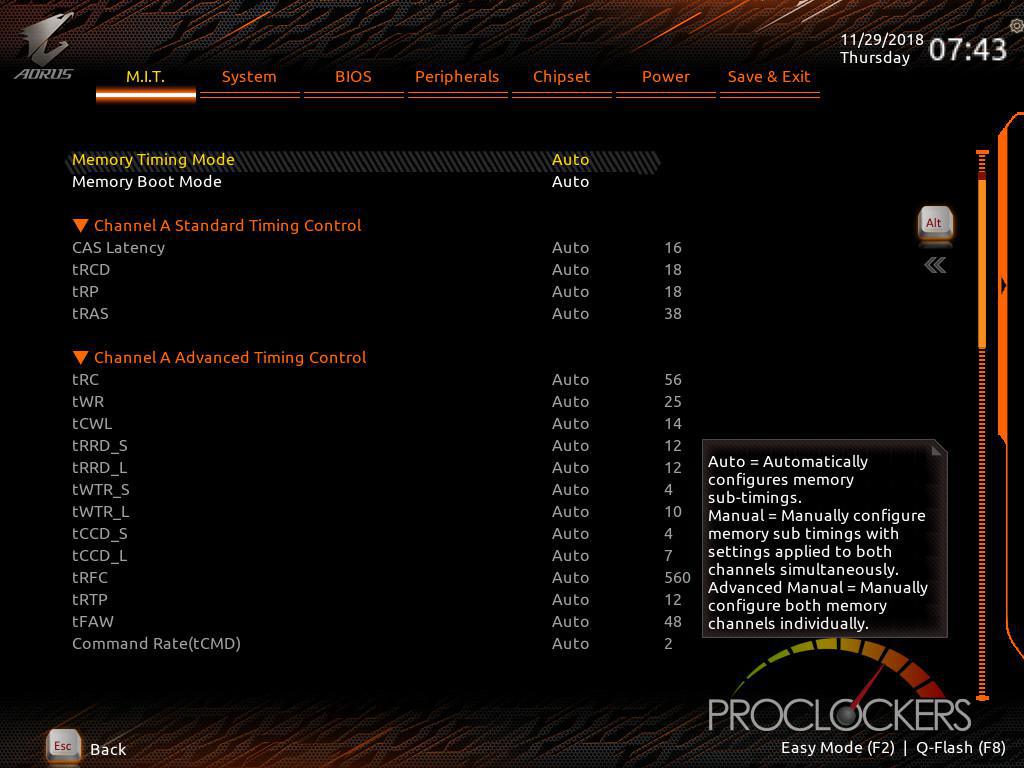
Looking at the “Advanced Memory Settings” you can enable XMP and manually adjust the memory frequency. You can also go a little further and adjust each channel’s Sub Timings.
Under the “Advanced Voltage Settings” section you can adjust the voltage for your CPU, Chipset and DRAM.
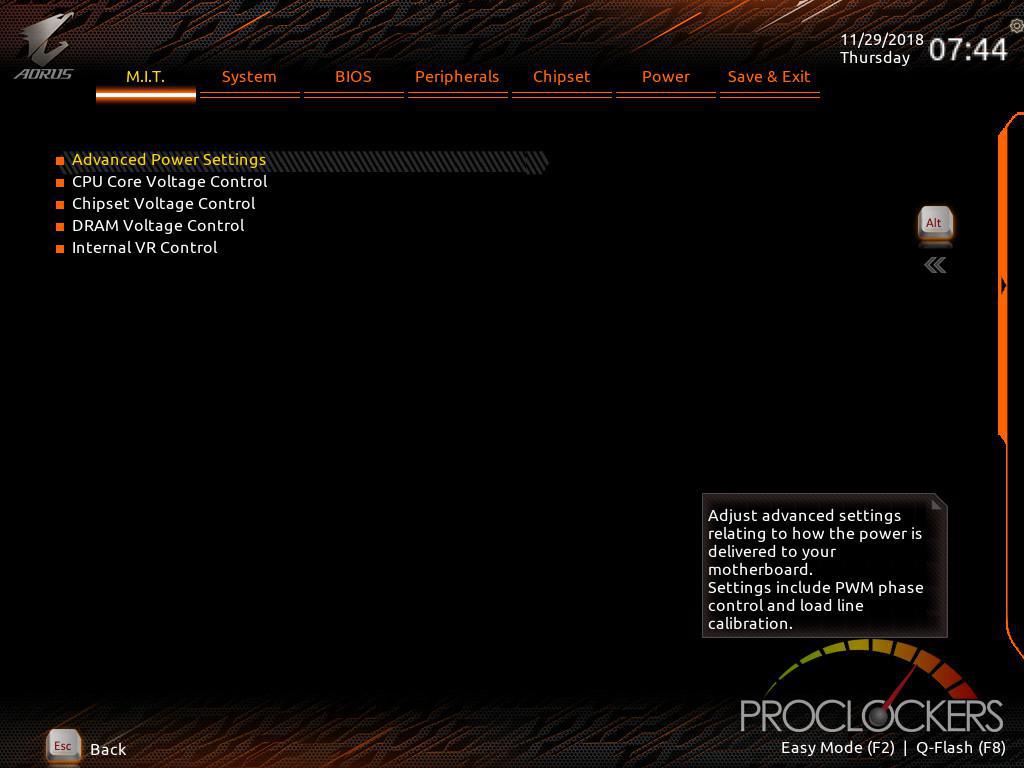
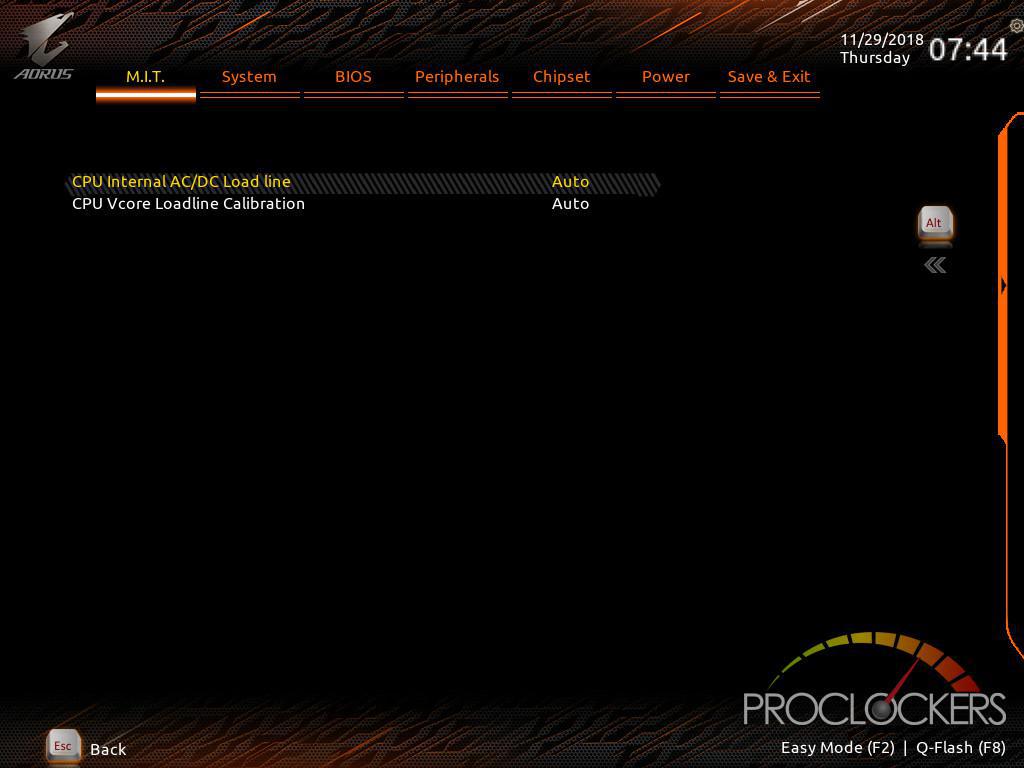
Under “Advanced Power Settings” you can manually set up your LLC to help prevent vCore droop.
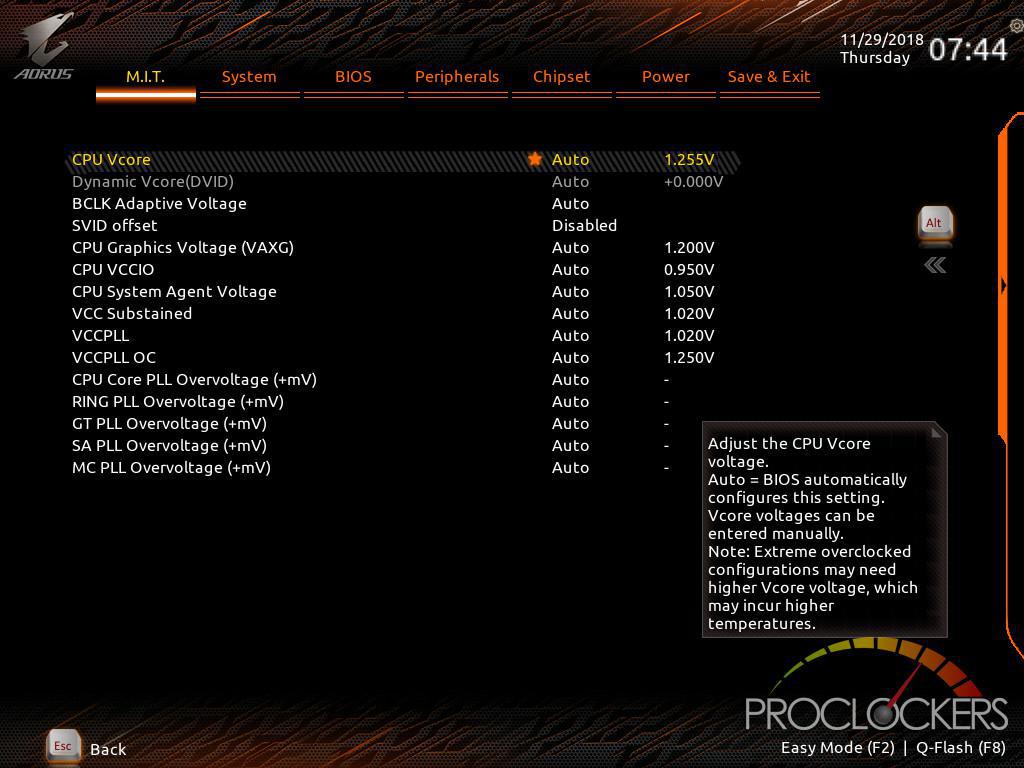
In the “CPU Core Voltage Control” section, you can change settings such as CPU vCore, BCLK Adaptive Voltage, and VPU VCCIO.
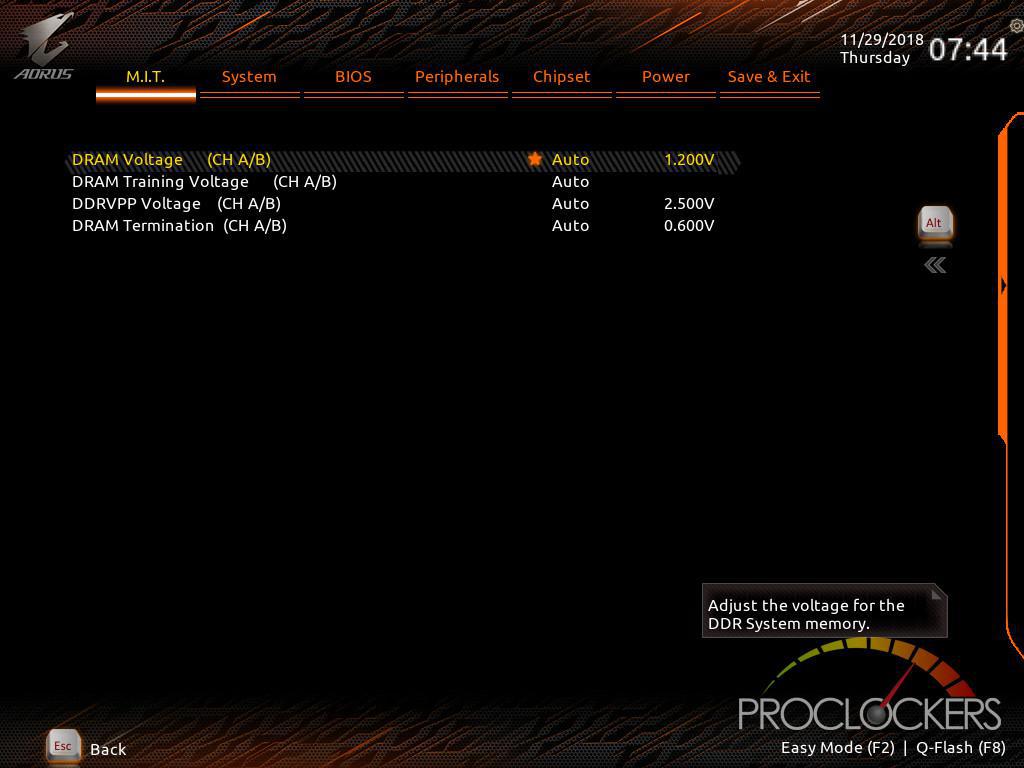
Under the “DRAM Voltage Control” section you can adjust various voltage setting for your ram modules.
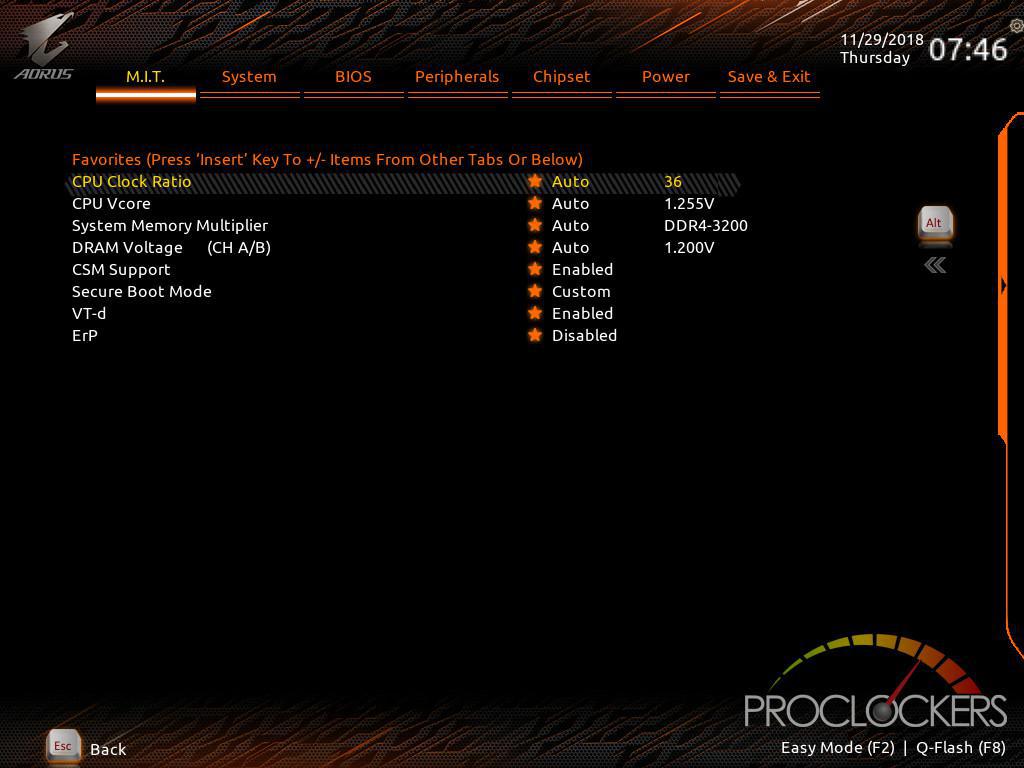
One of the best features of Aorus Pro’s BIOS is the “Favorites” screen. This screen will display any setting you have flagged with an orange star in any of the BIOS screens. You can add/remove these stars by selecting the setting and hitting the insert key. This is extremely helpful and saves you from having to go through all the screens adjusting setting while trying to find a stable overclock.
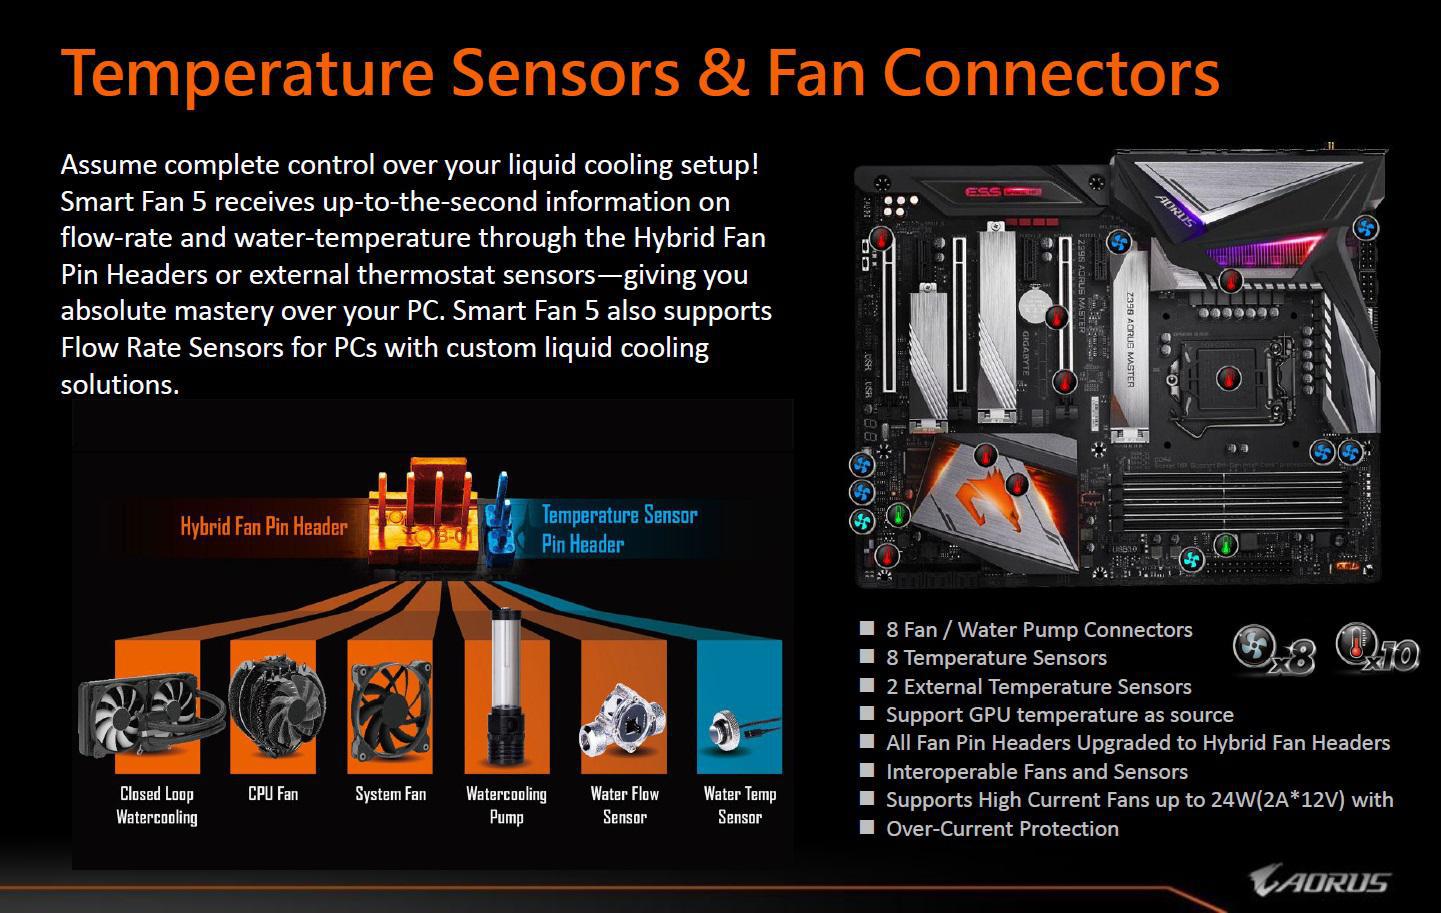
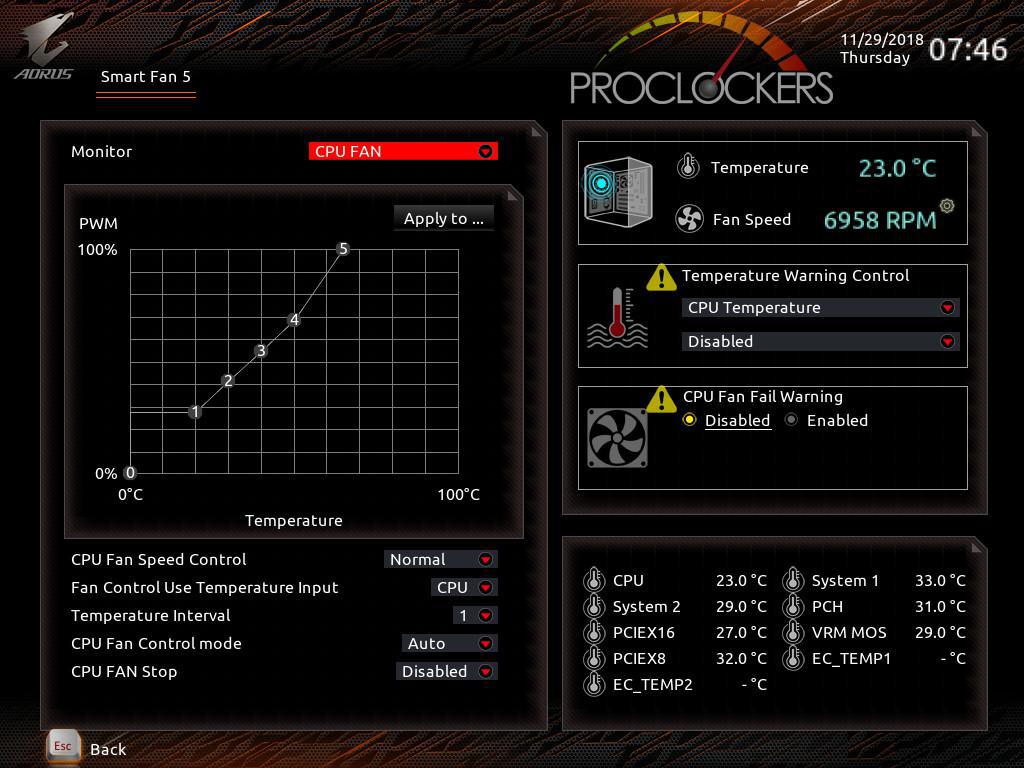
Looking at the “Smart Fan 5” screen you can adjust your fan curve, view current system temperatures and enable/disable temperature and fan warnings.
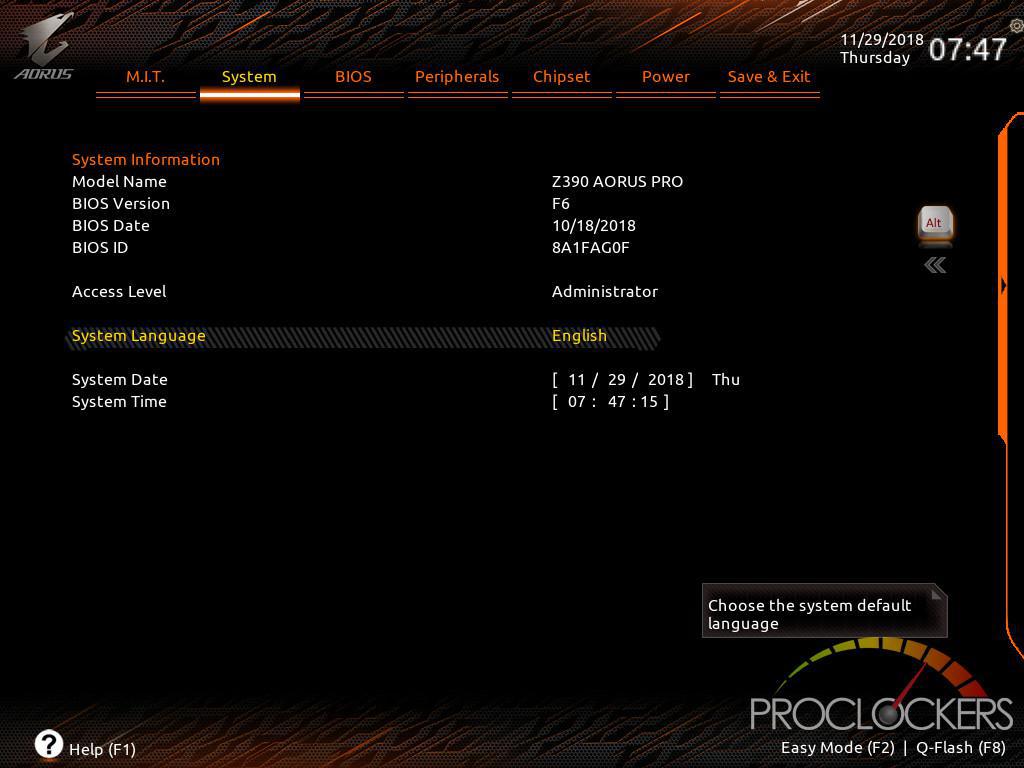
Moving over to the “System” tab it displays various system information and allows you to configure the systems language and date/time settings.
The “BIOS” tab allows you to configure your boot settings and other various BIOS related settings.

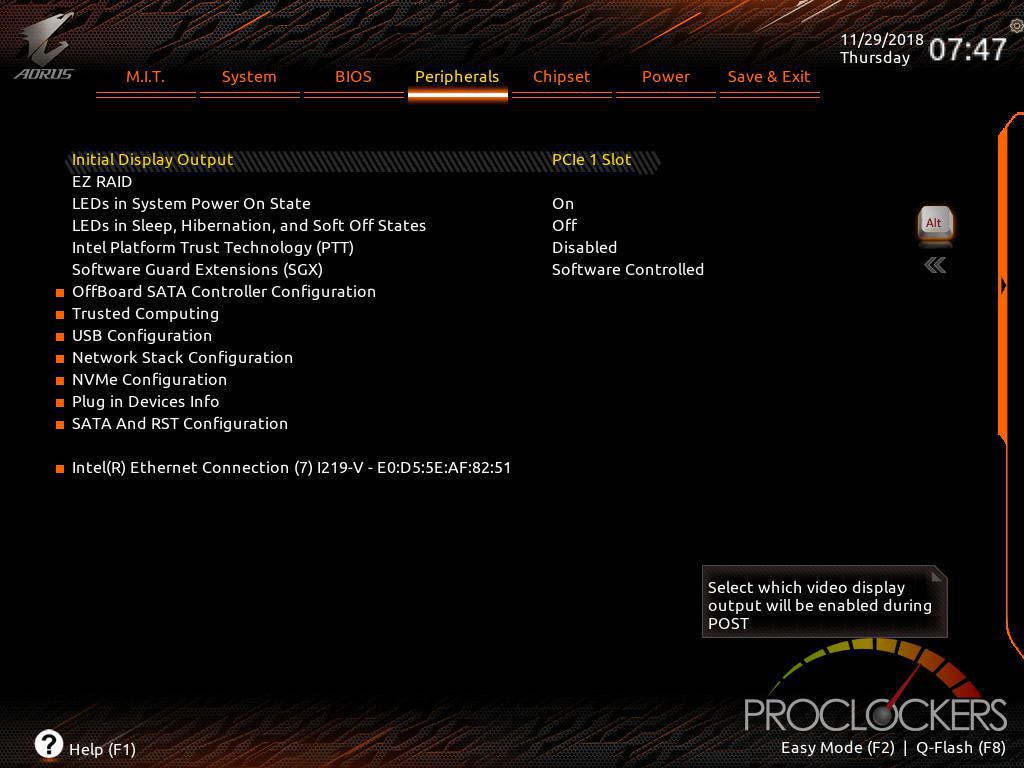
The “Peripherals” tab is where you can configure items such as SATA, USB, NVMe and Network settings.
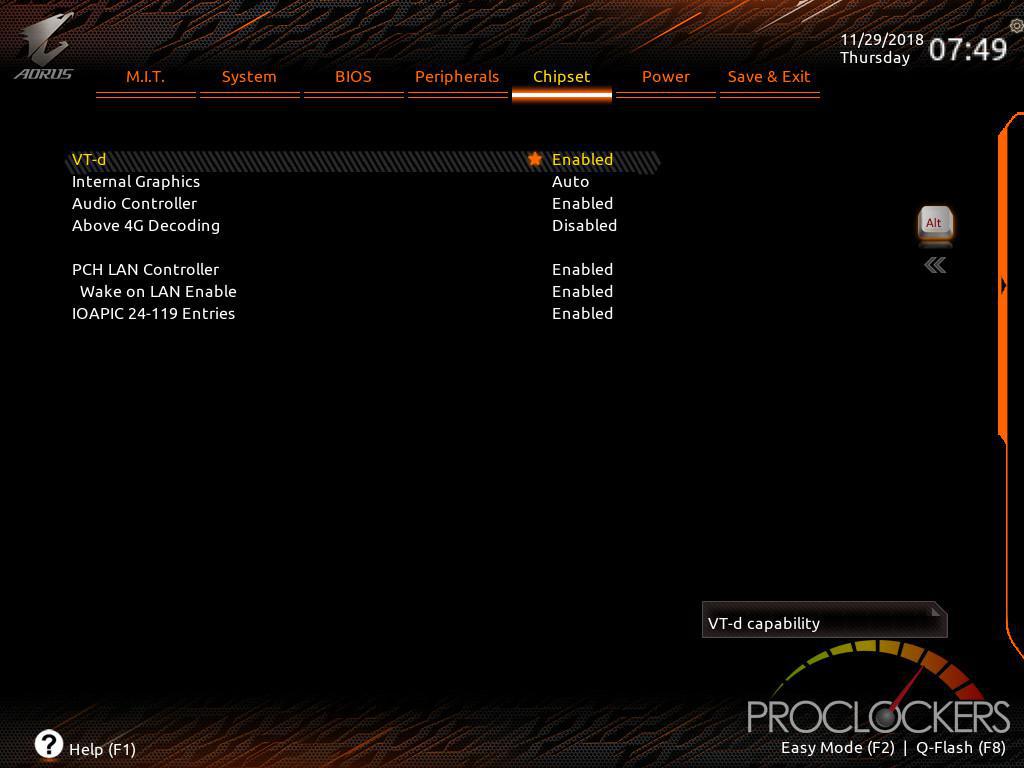
To enable/display features like VT-d, Internal Graphics and the Audio Controller you can use the “Chipset” tab.
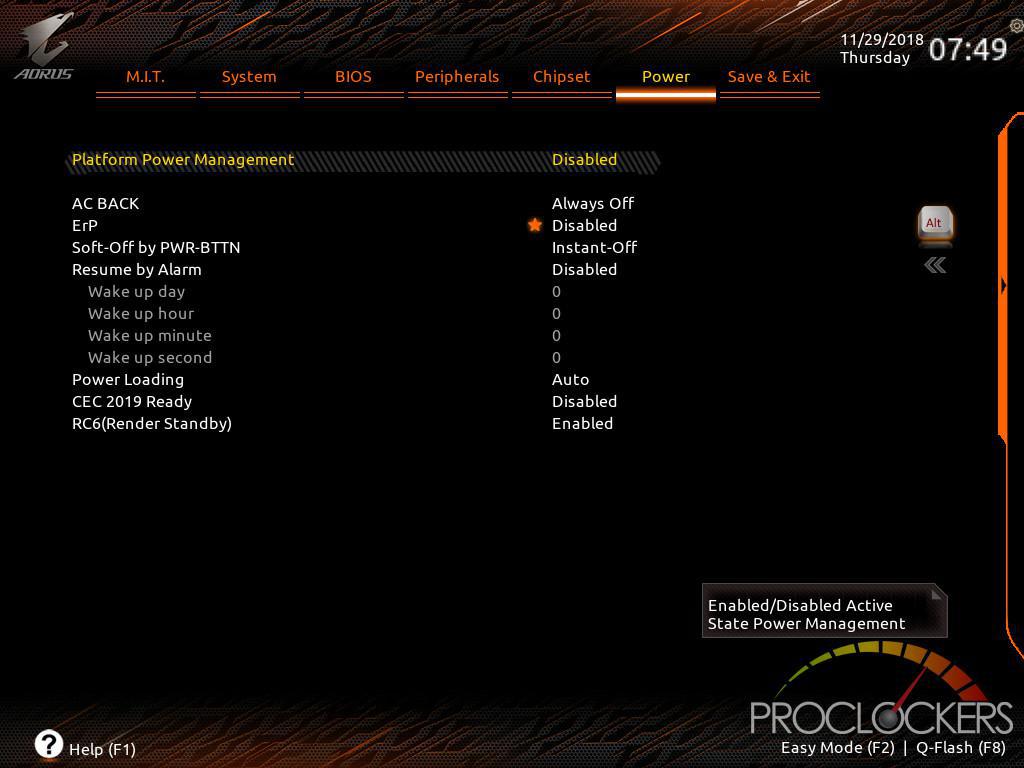
The “Power” tab allows you to enable/disable platform power management and configure other power-related settings.
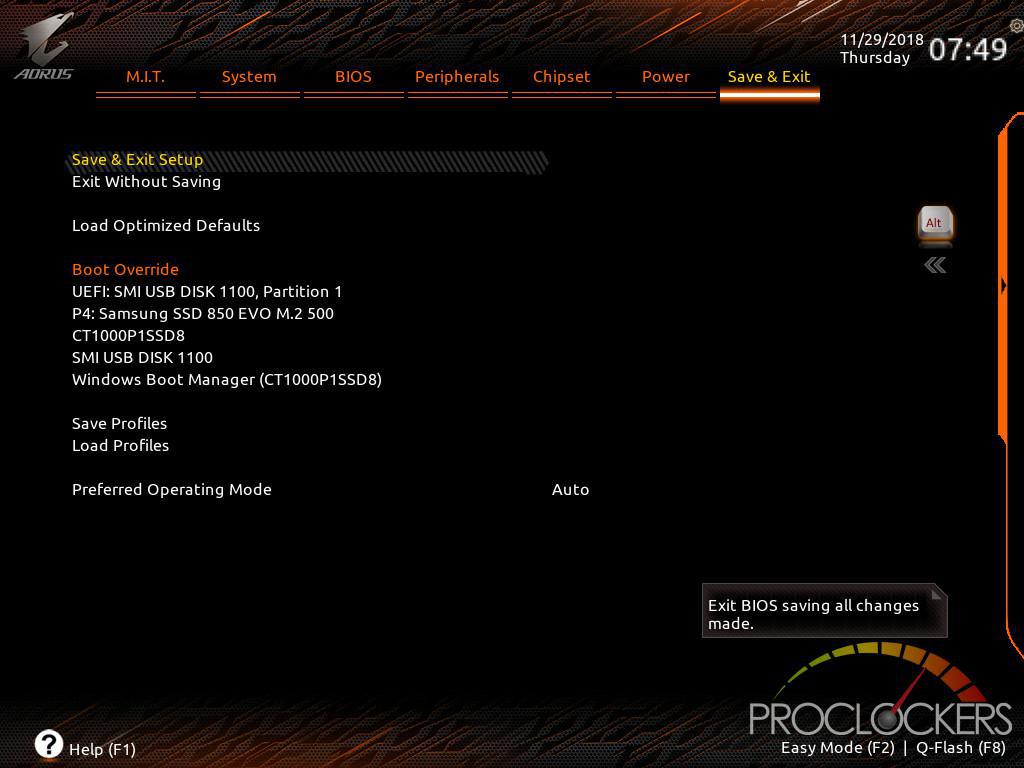
The last tab “Save & Exit” allows you to save your changes, exit without saving, set up your boot sequence and load/save profiles.
On any of the BIOS screens, you can get a quick overview of your system by clicking the arrow on the right hand of the screen.
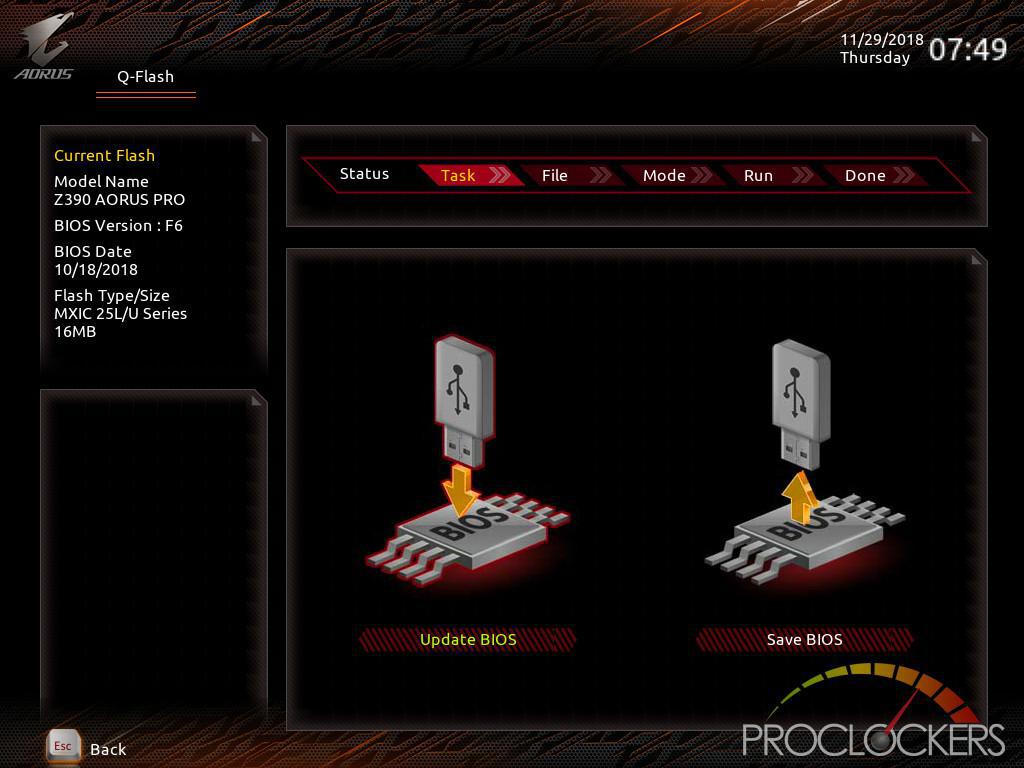
You can access the “Q-Flash” screen at any time by pressing “F8”. From this screen, you can save or load a BIOS from an attached USB drive.
Software
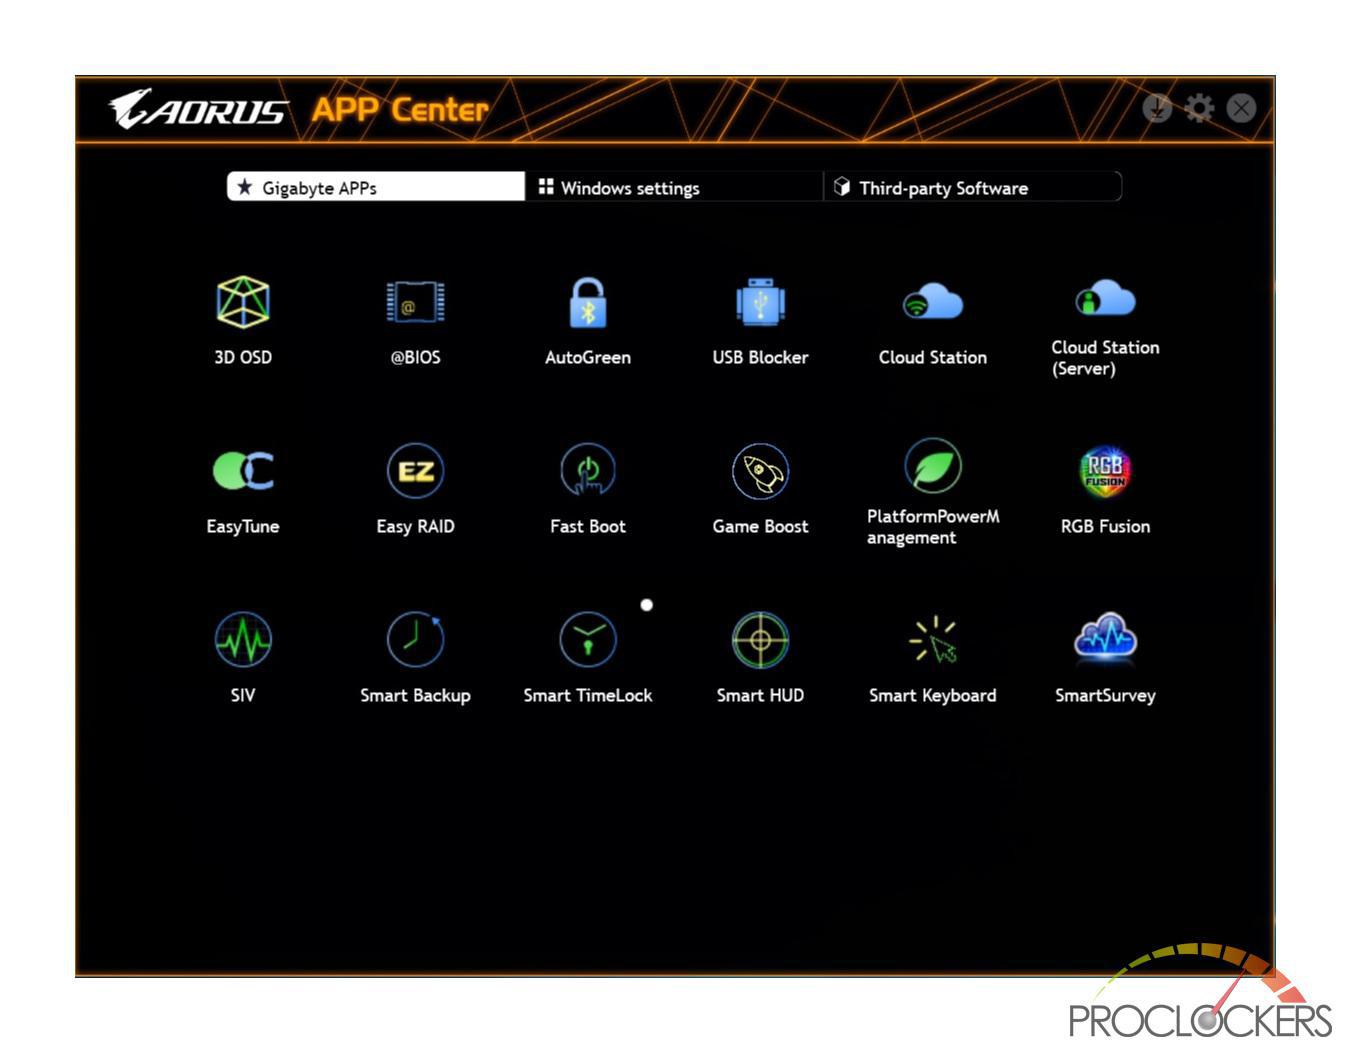
Aorus Pro makes use of the Gigabyte’s APP Center ecosystem, which allows you to access all the installed system application in one place. We went ahead and installed all the ones for the Aorus Pro, which totaled 18 separate applications.
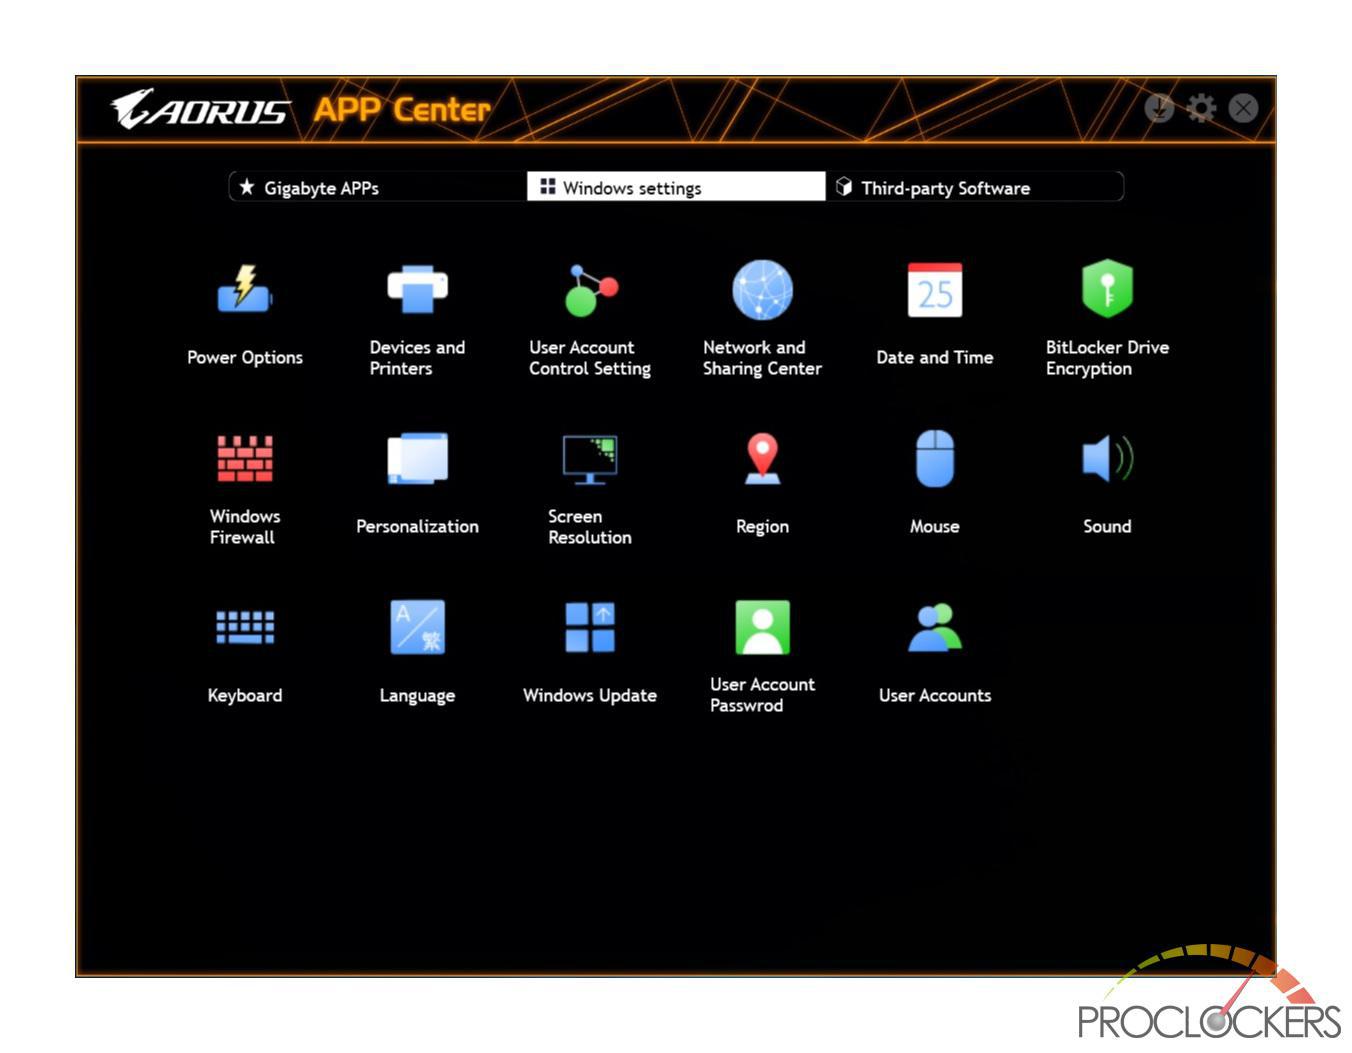
The APP Center also provides you with shortcuts to a variety of windows settings.
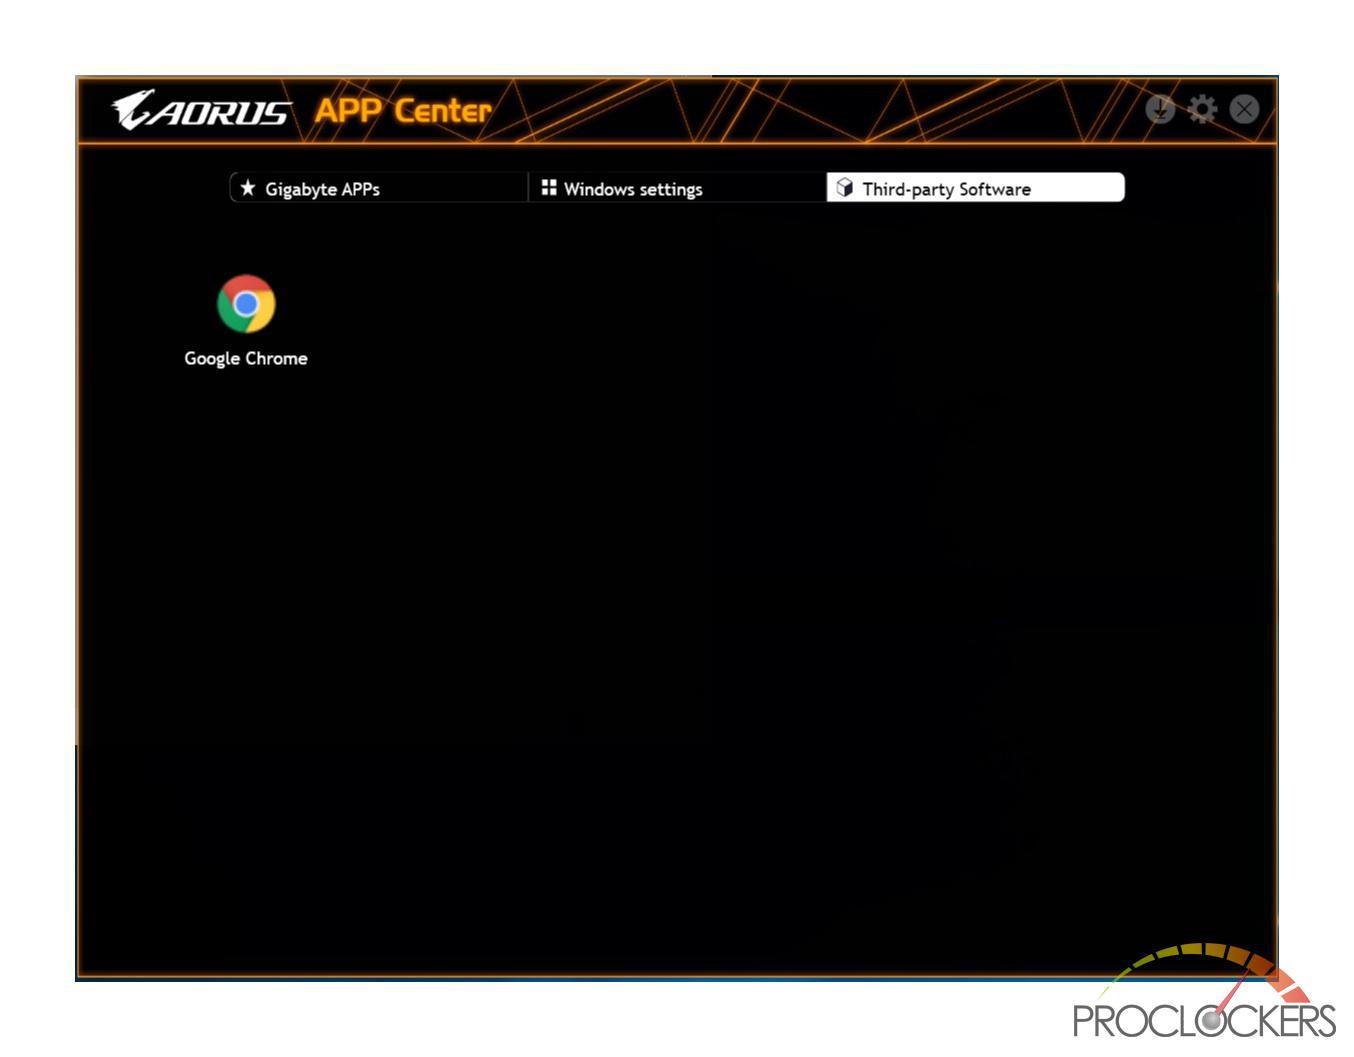
It also has quick launch links to your installed third-party applications such as our “Google Chrome”
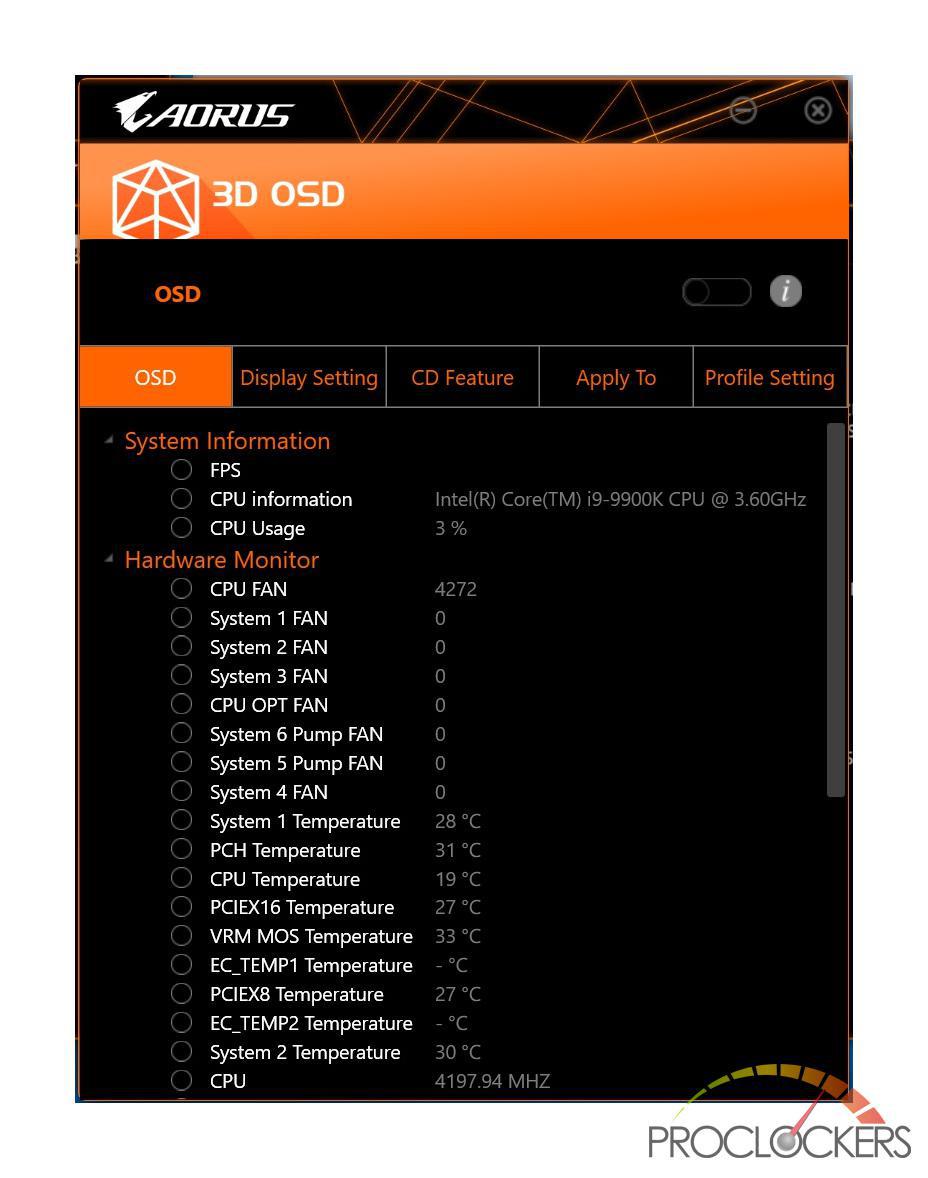
3D OSD
Allowed you to configure an on-screen display of various settings including FPS, System temperature and CPU usage.
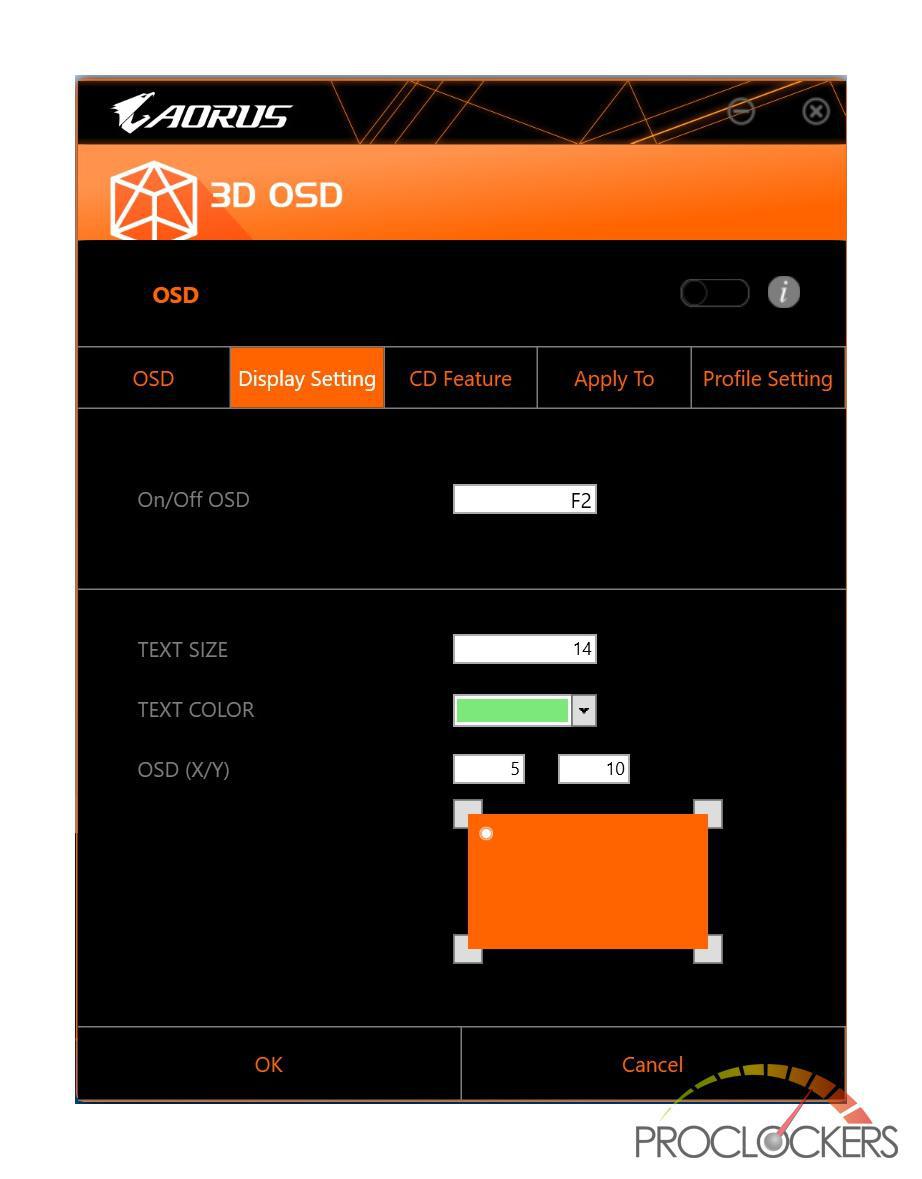
You can configure the text color/size and the location of the OSD. You can also set up a hotkey to enable/disable the display.
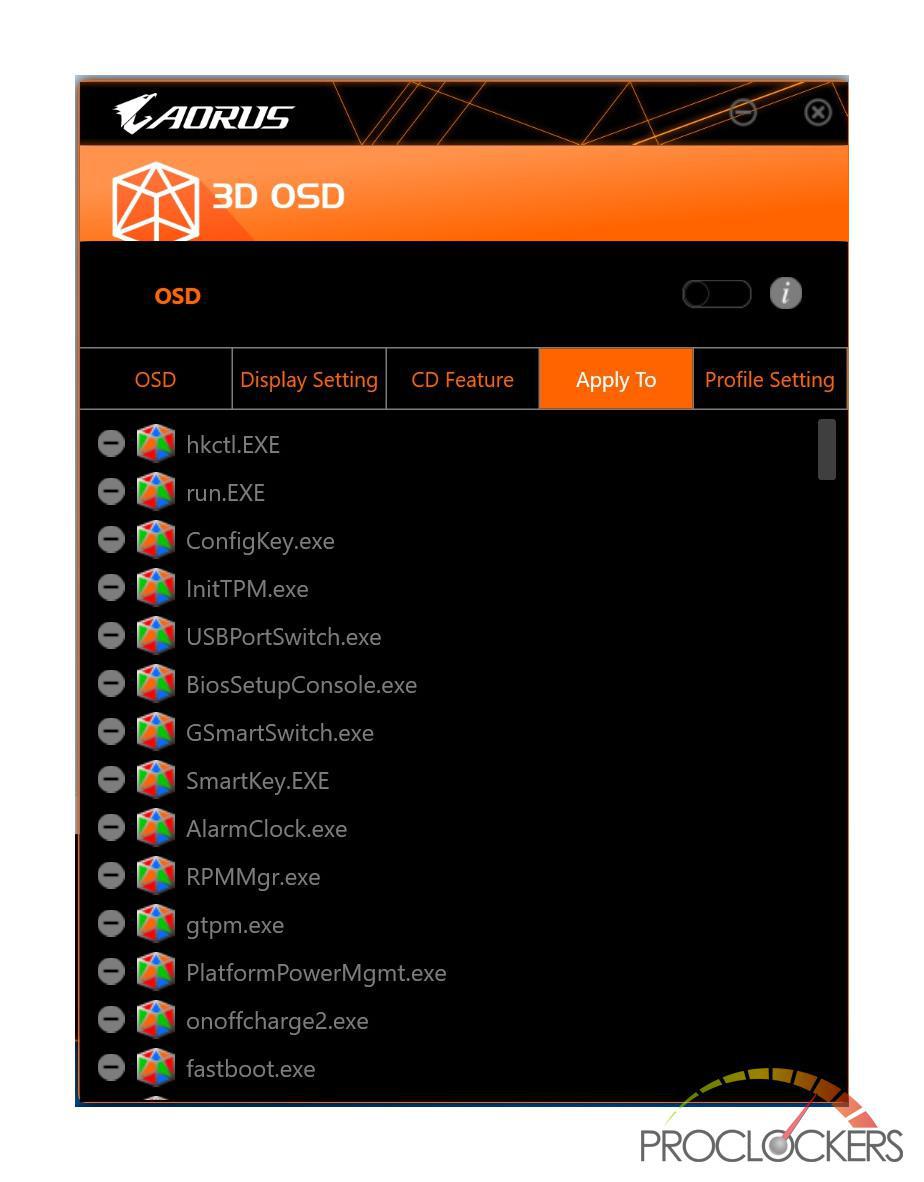
You can set up the apply the OSD to any of your installed applications and games.
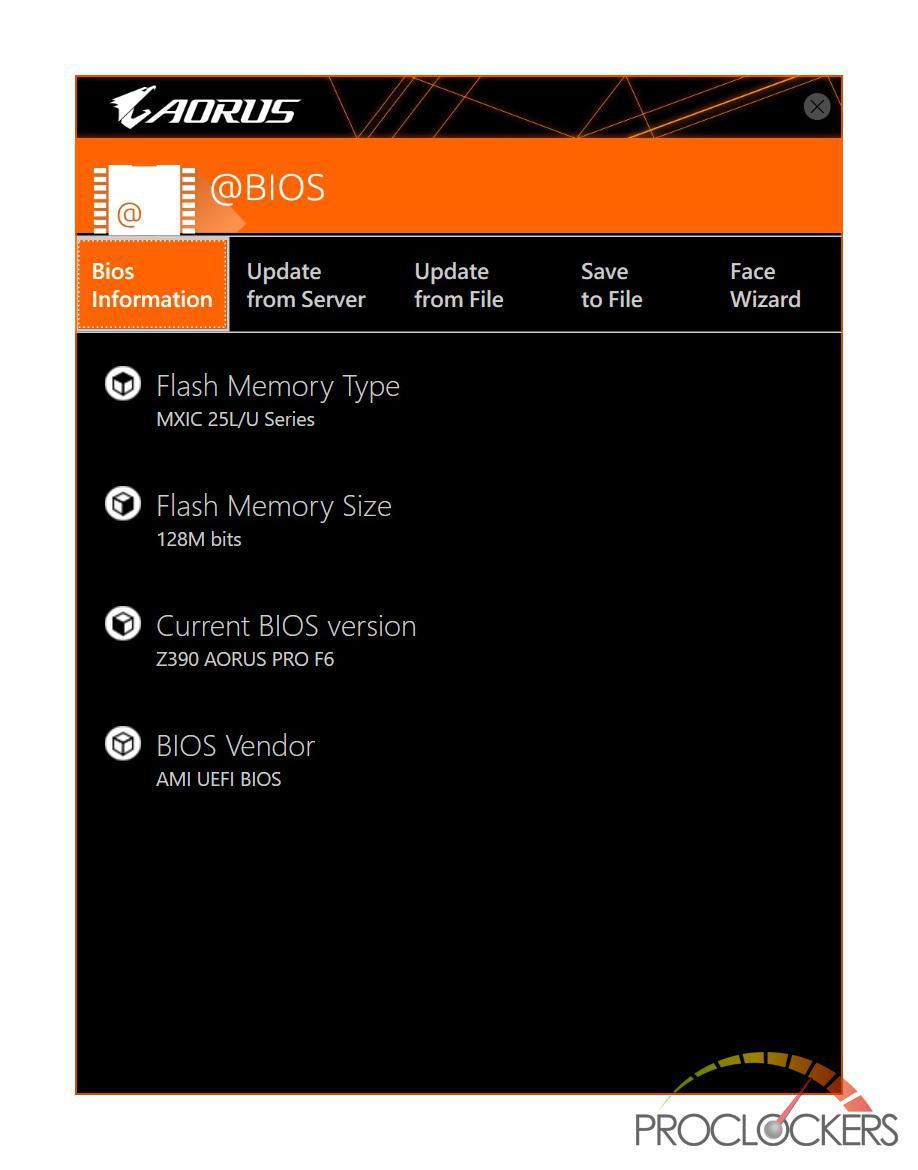
@BIOS
Using the @BIOS application you can view and update the motherboard BIOS within windows.
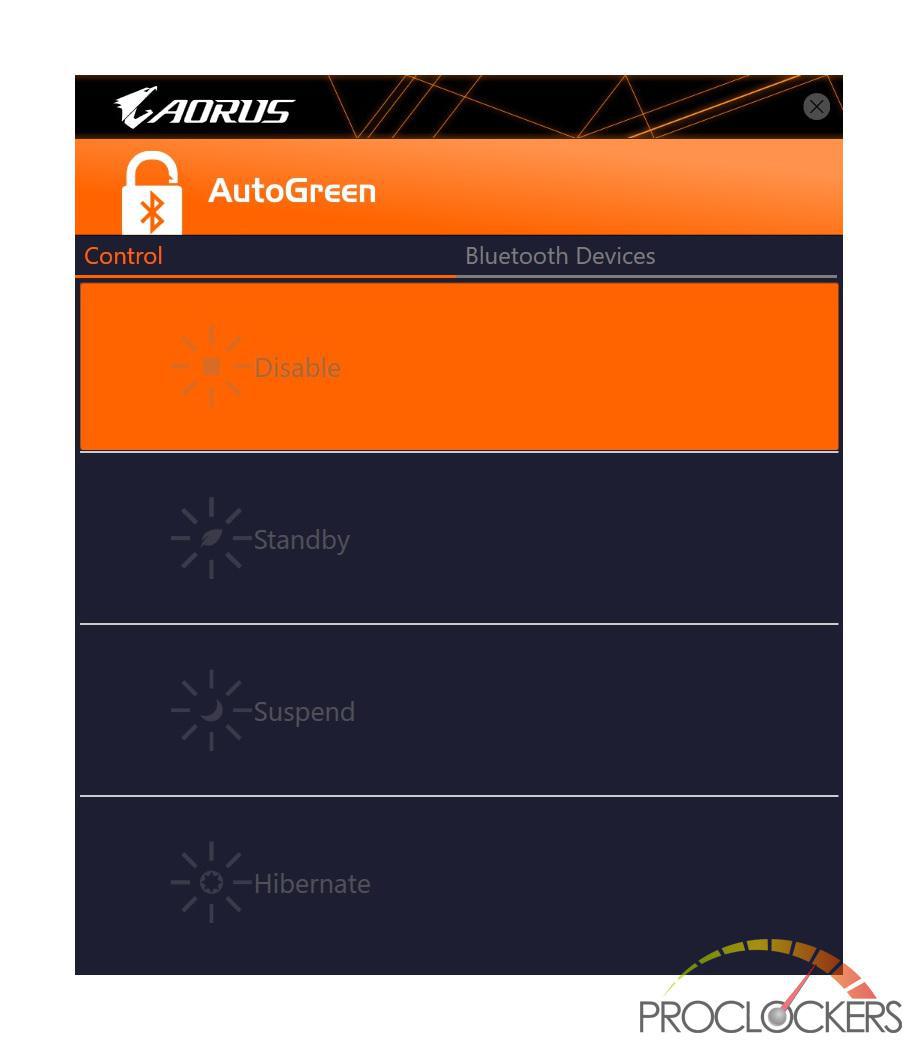
AutoGreen
AutoGreen is an easy-to-use tool that provides users with simple options to enable system power savings via a Bluetooth-enabled smartphone/tablet device. When the device is out of the range of the computer’s Bluetooth receiver, the system will enter the specified power saving mode. Before using this app, you need to turn on Bluetooth on both your computer and smartphone/tablet device.
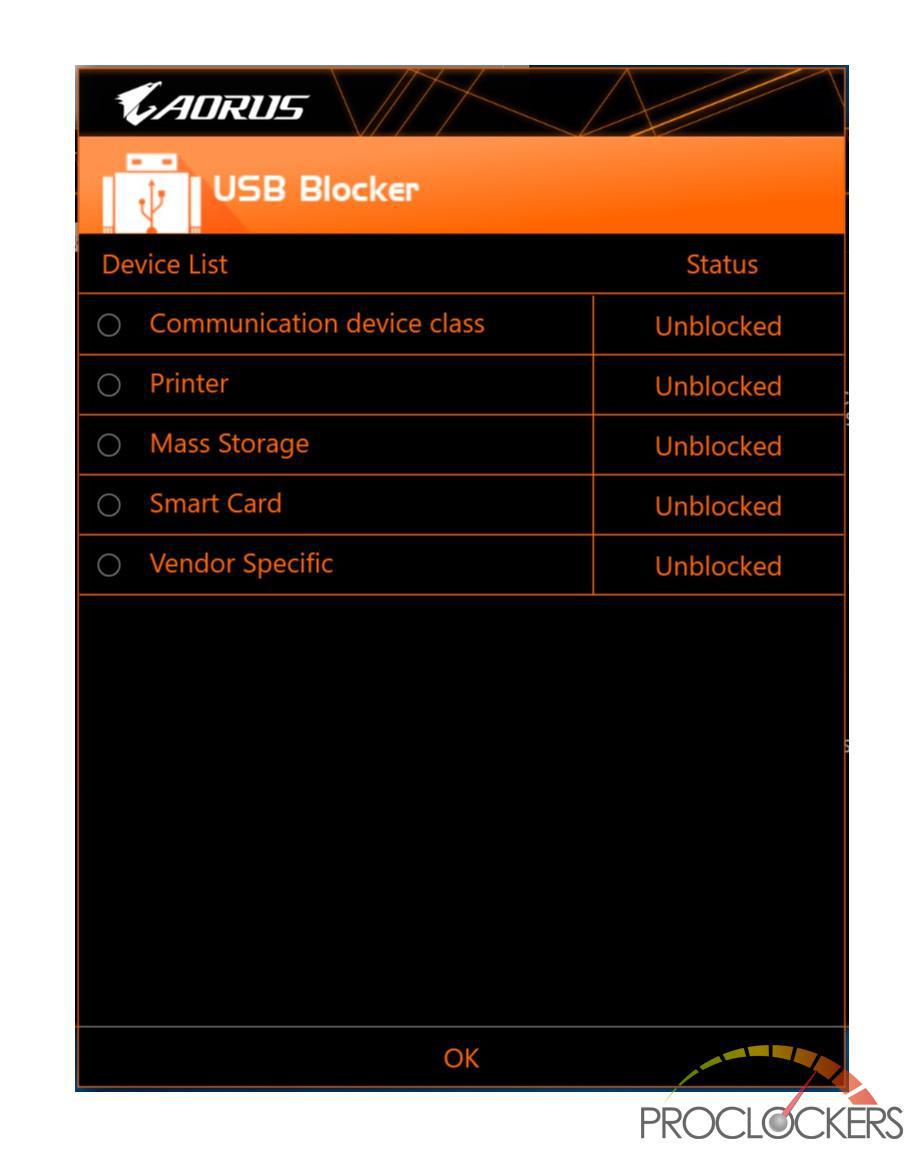
USB Blocker
Allows you to block certain types of USB devices which will be ignored by the operating system.
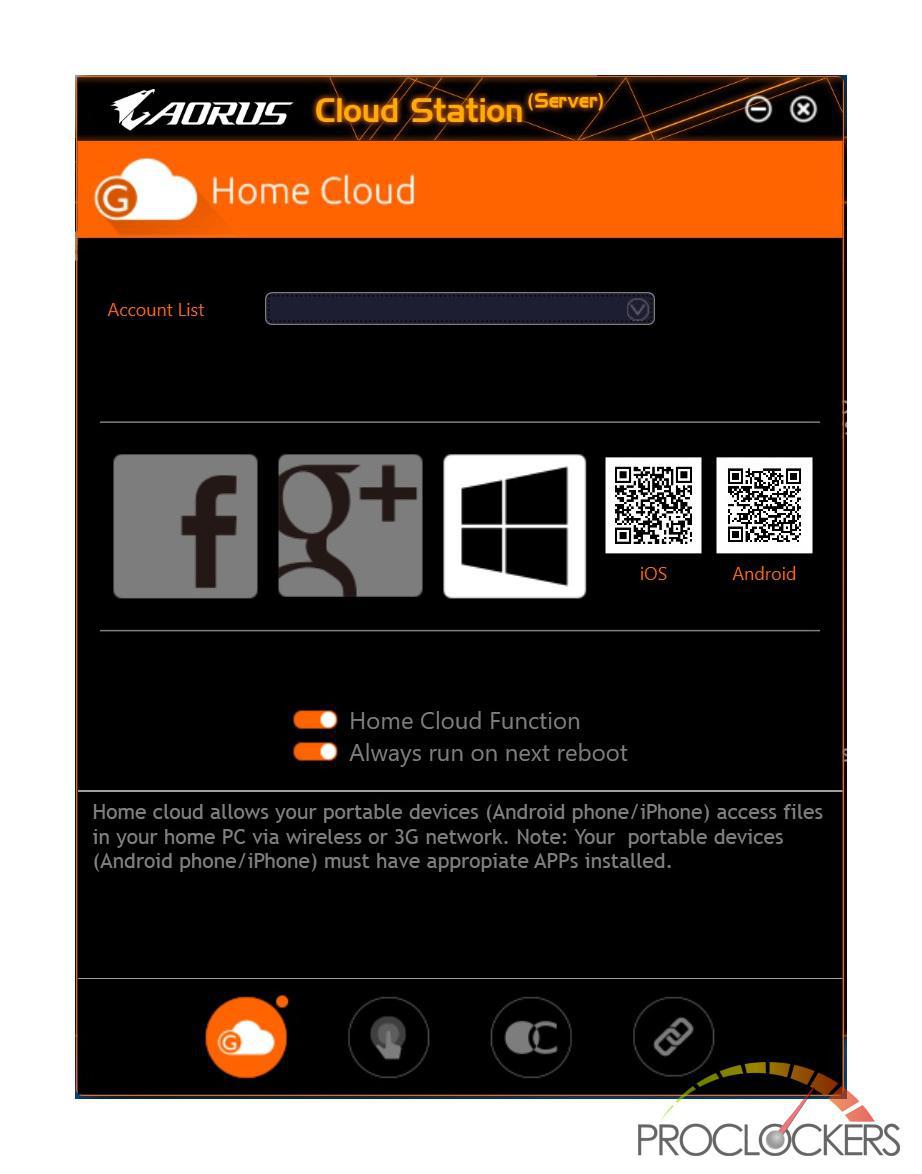
Cloud Station
Cloud Station Server is composed of HomeCloud, Gigabyte Remote, Remote OC, and HotSpot, which allow your smartphone, tablet device, and remote computer to communicate, share resources, and control the host computer via wireless connection. Cloud Station allows your computer to share files with another computer that has Cloud Station (Server) installed.
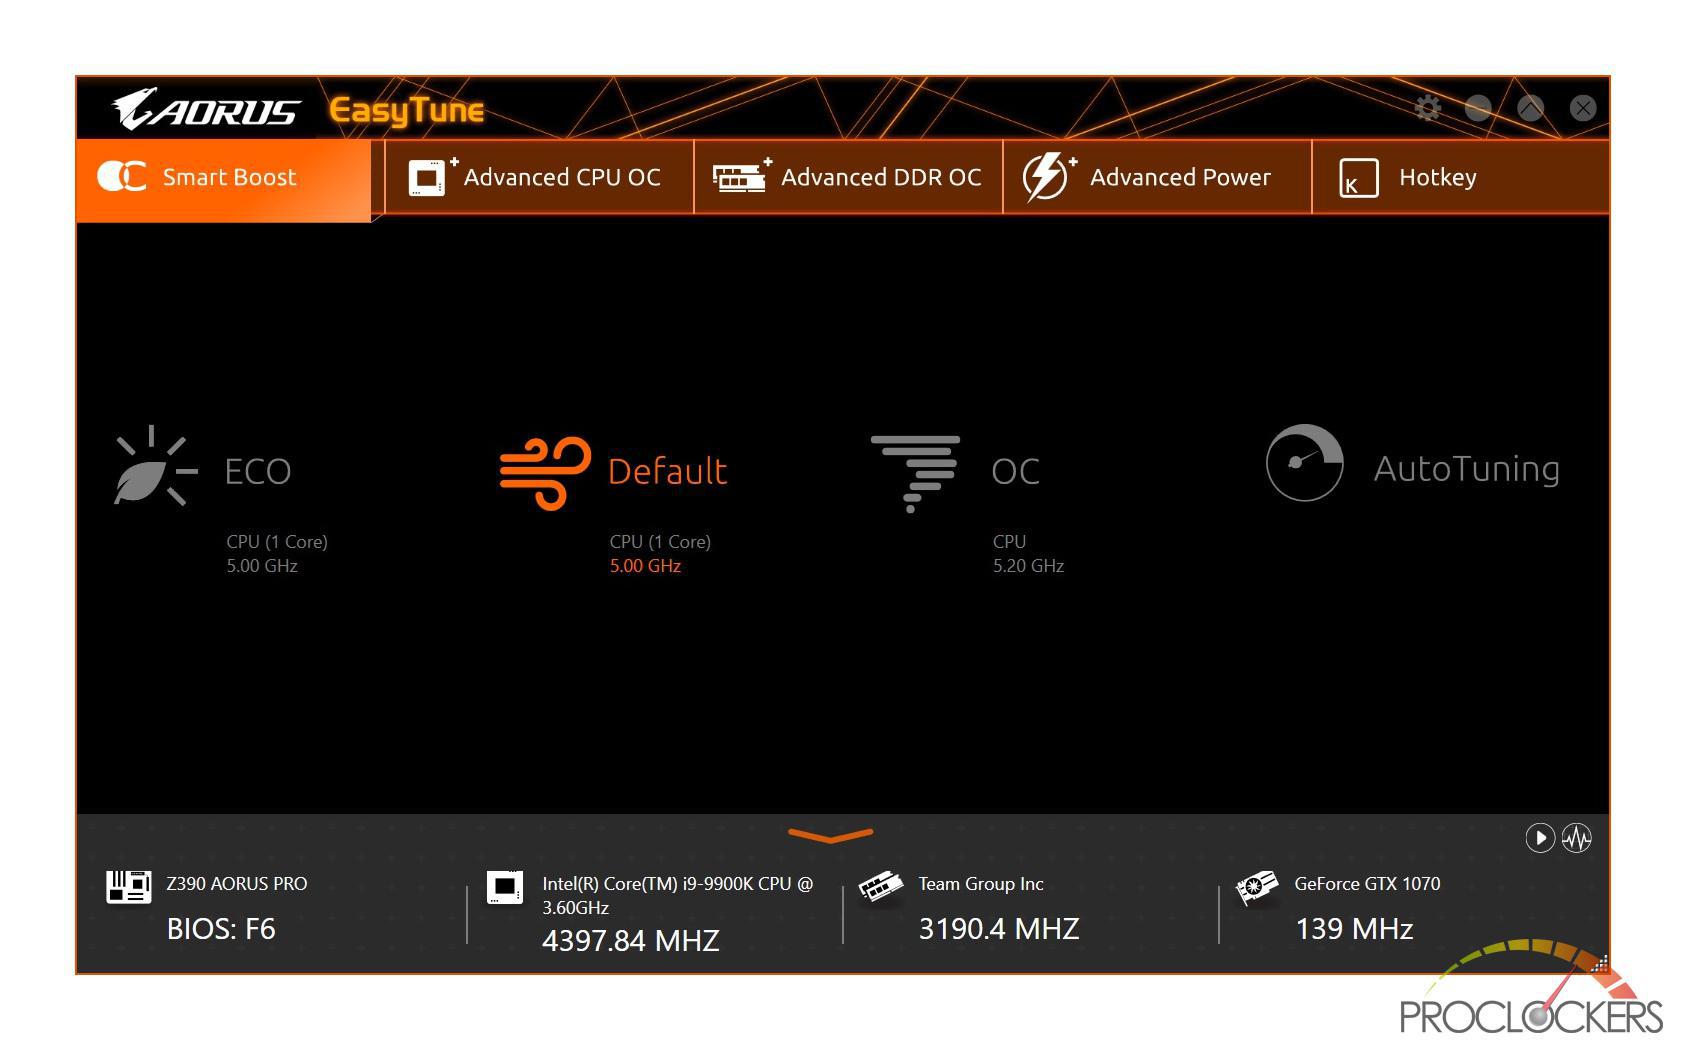
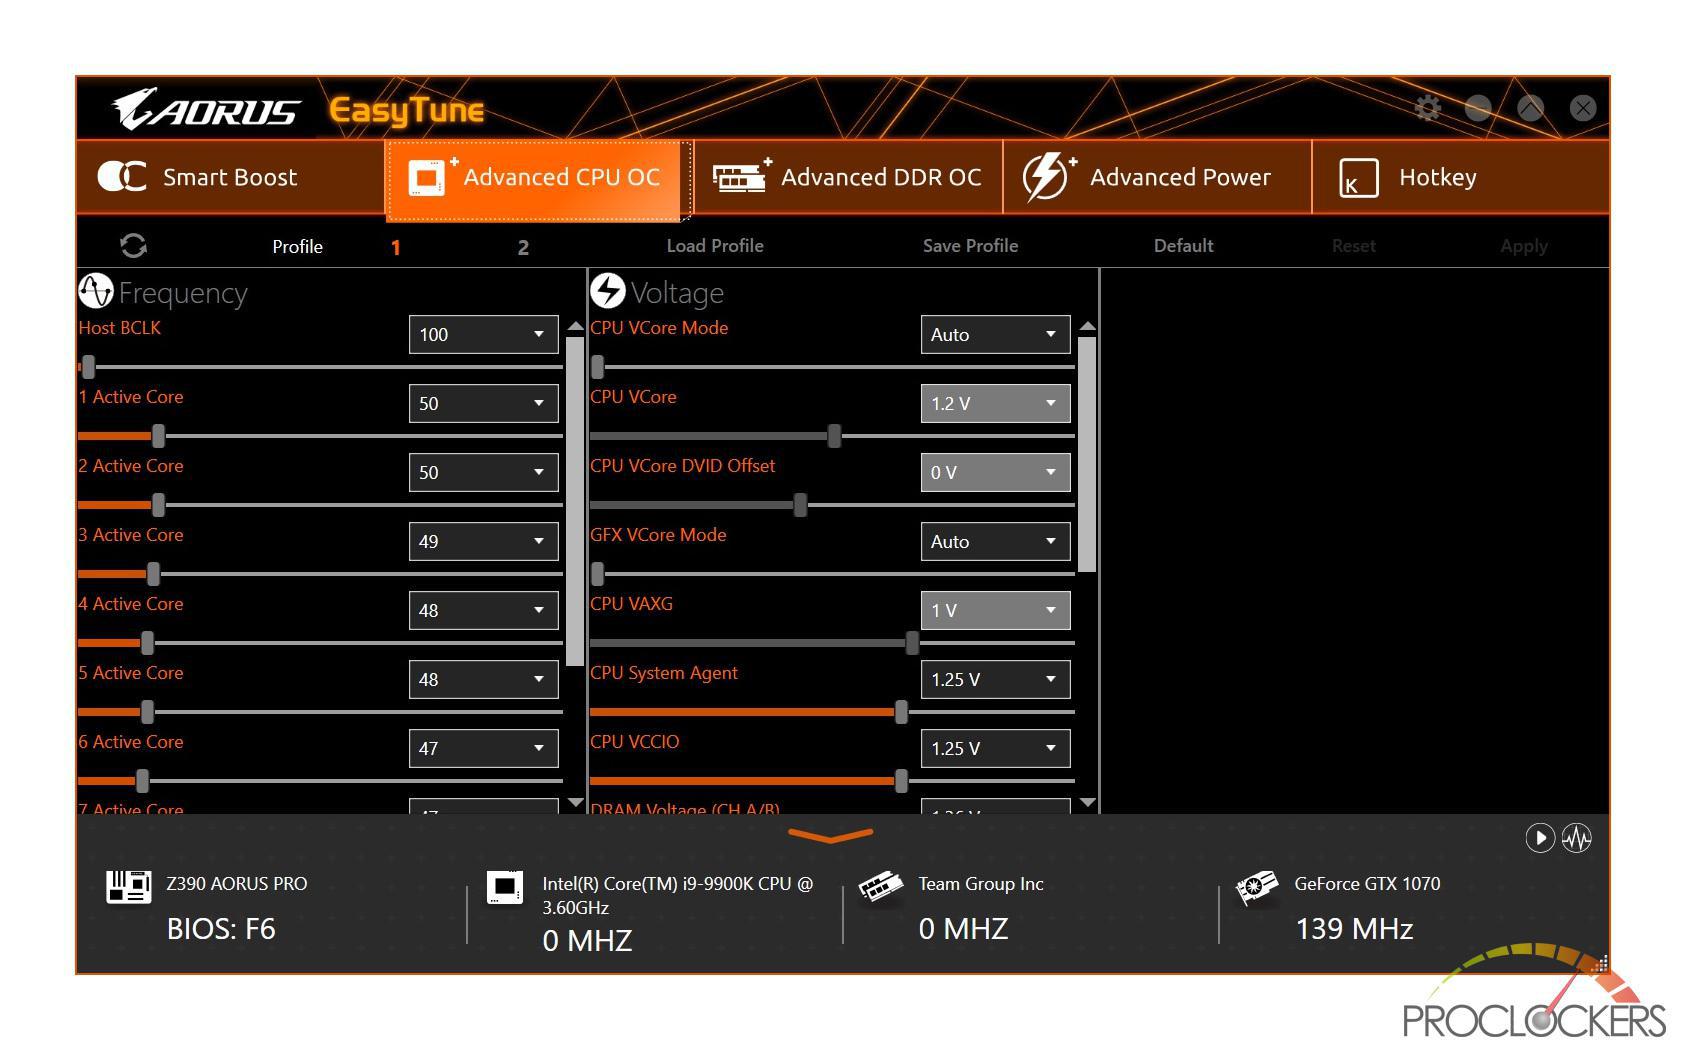
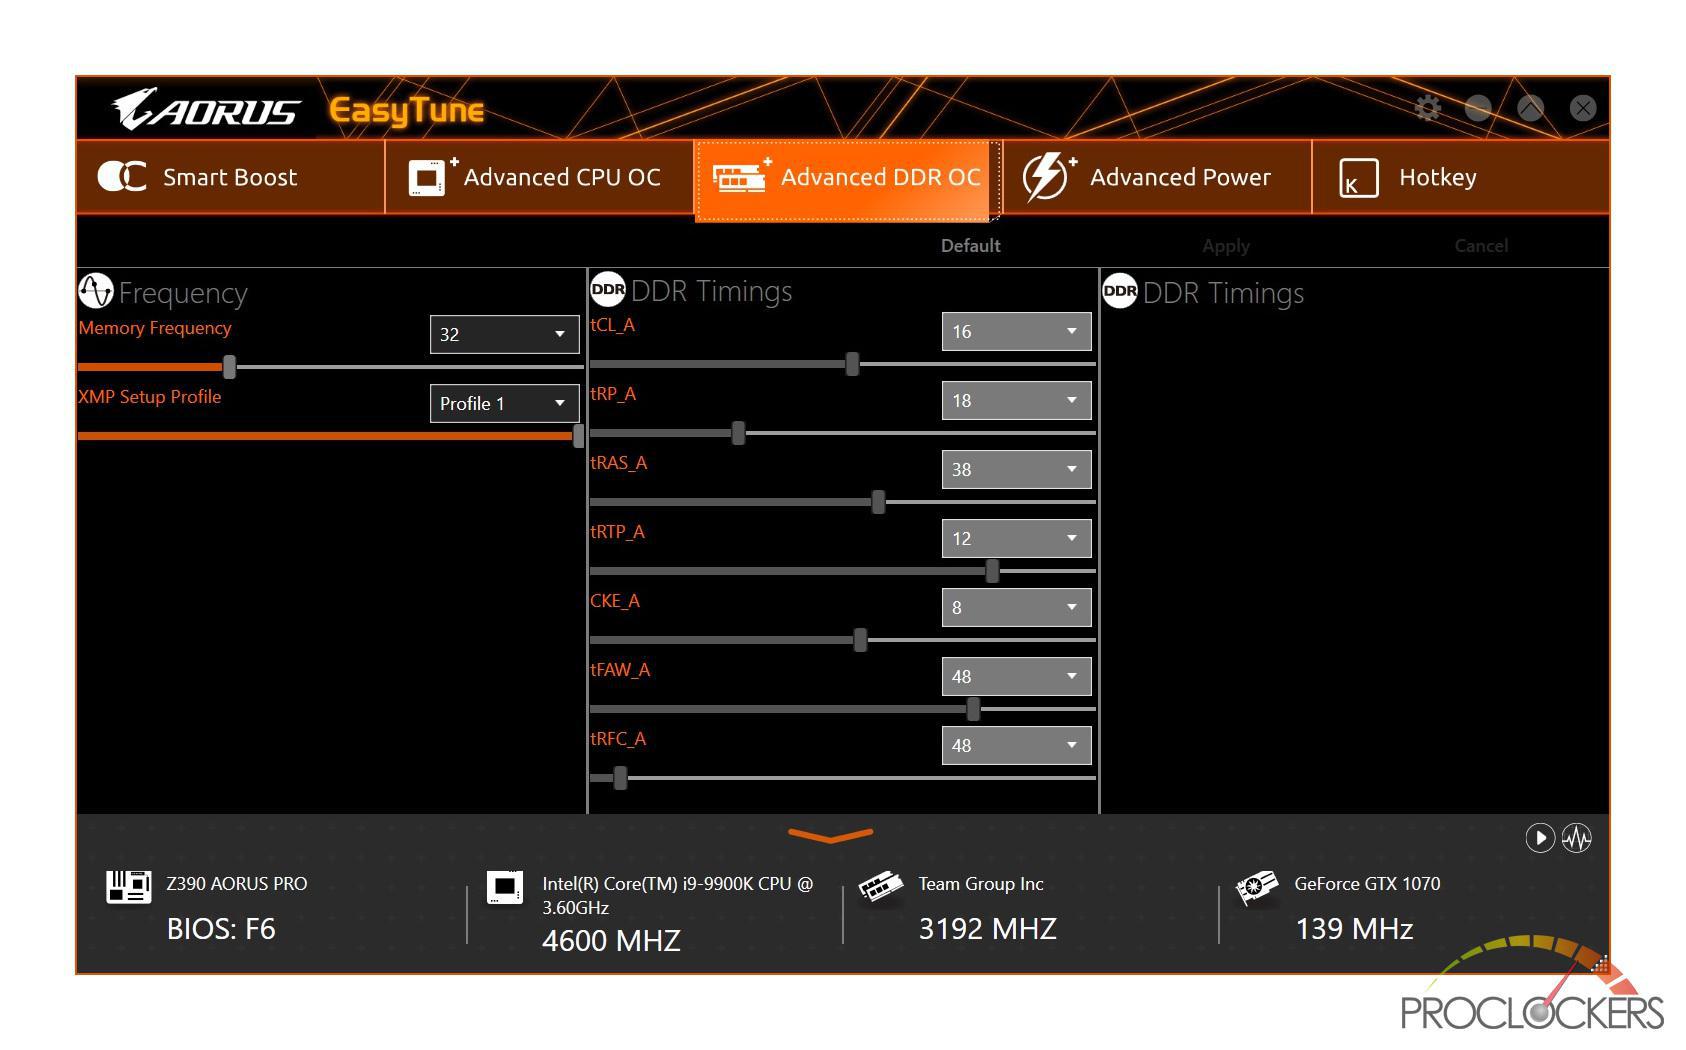
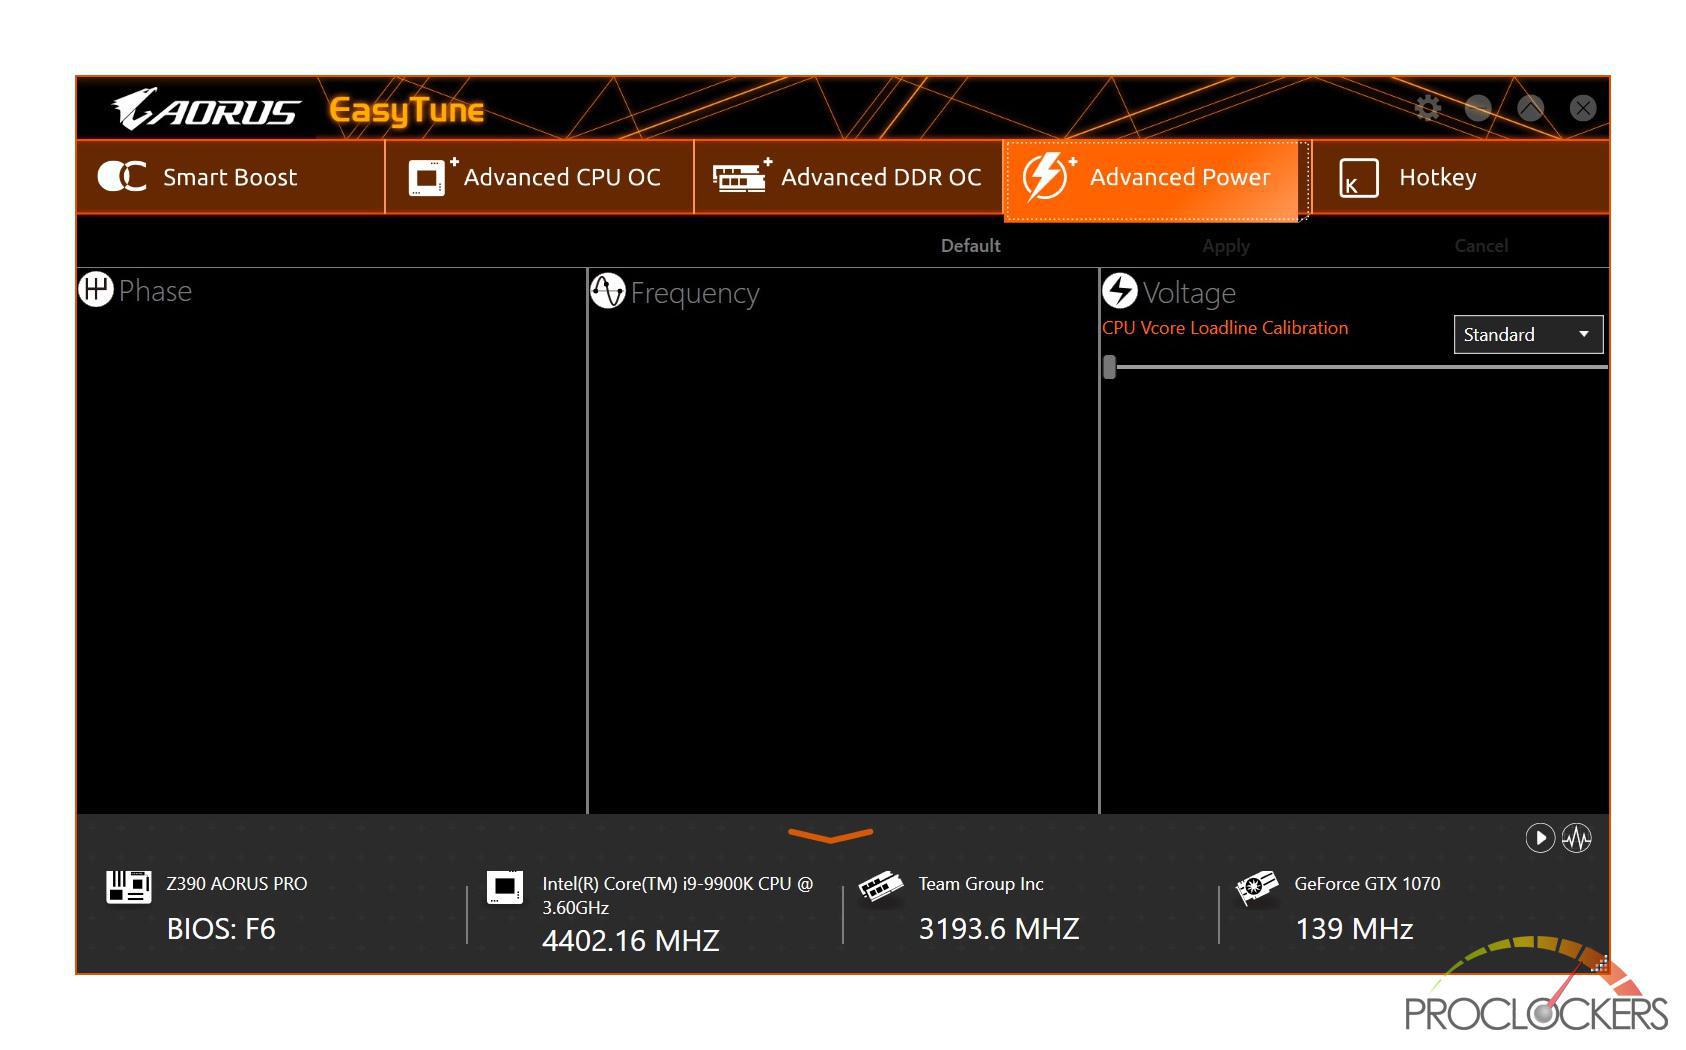
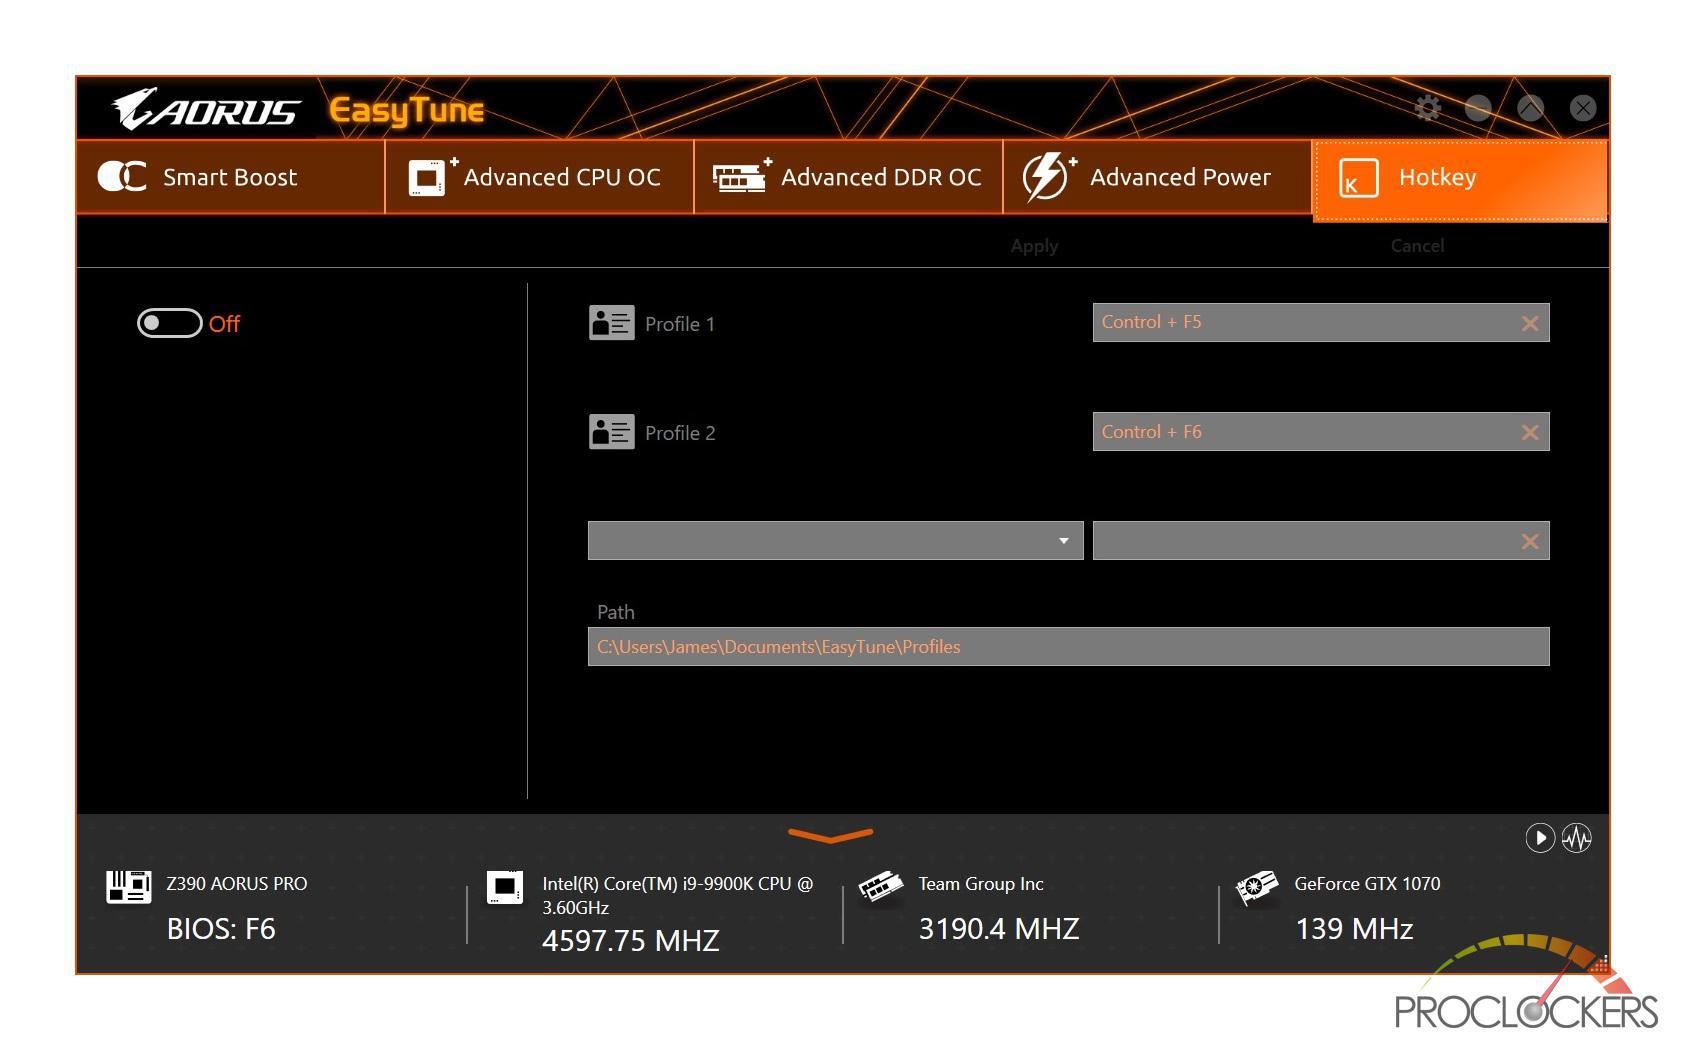
EasyTune
EasyTune allows you to overclock your system within Windows and not require to go into the BIOS each time when changing your settings. This application would be good to help you find what overclock you can achieve. I recommend once you have found your optimal setting you then apply those settings to your BIOS.
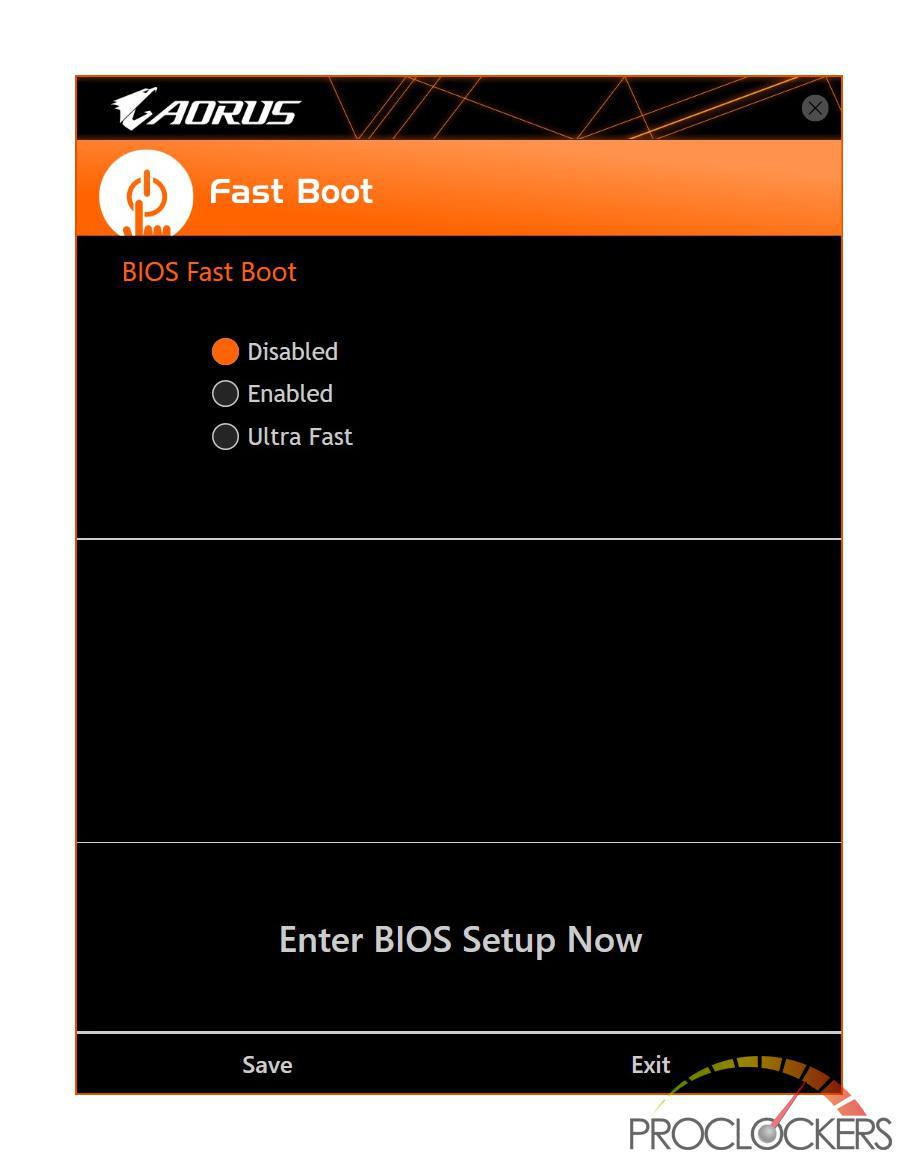
Fast Boot
Allows you to enable or change your Fast boot settings within windows.
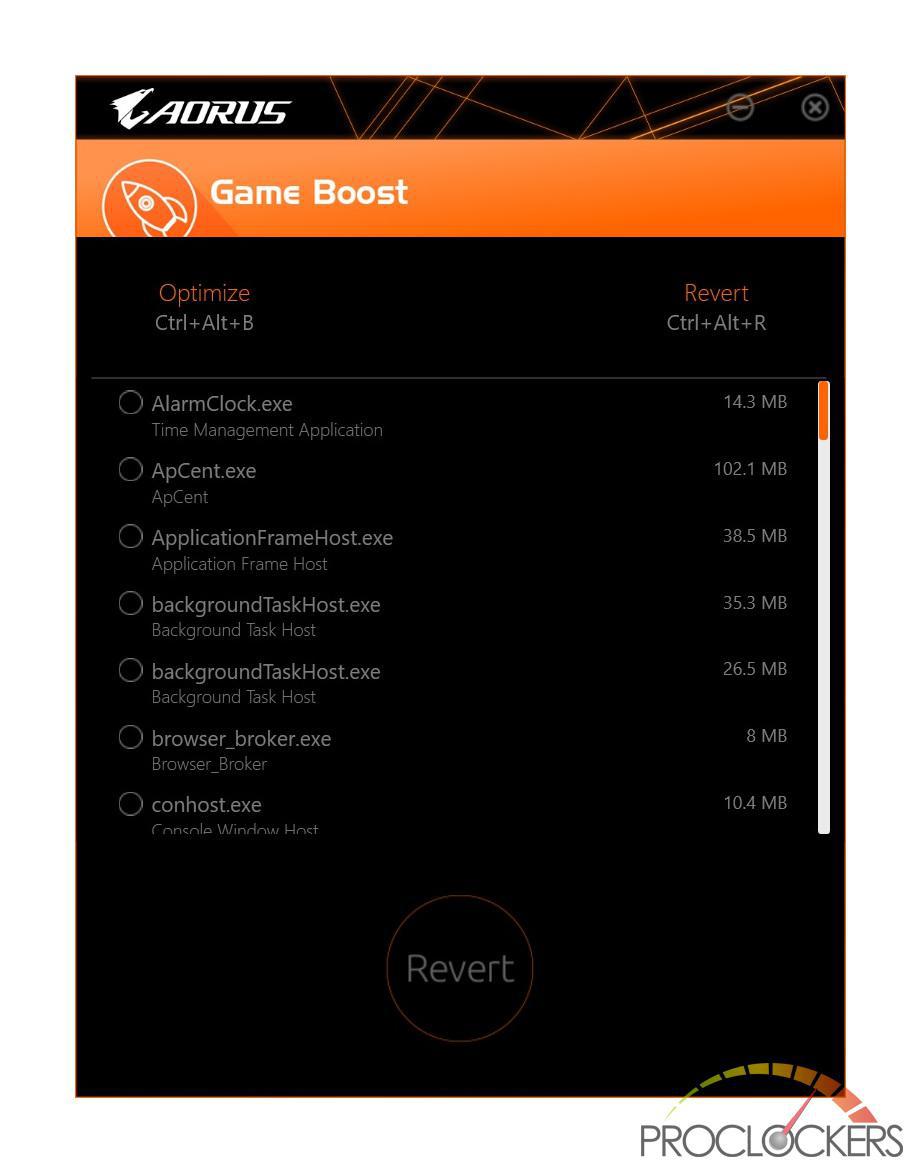
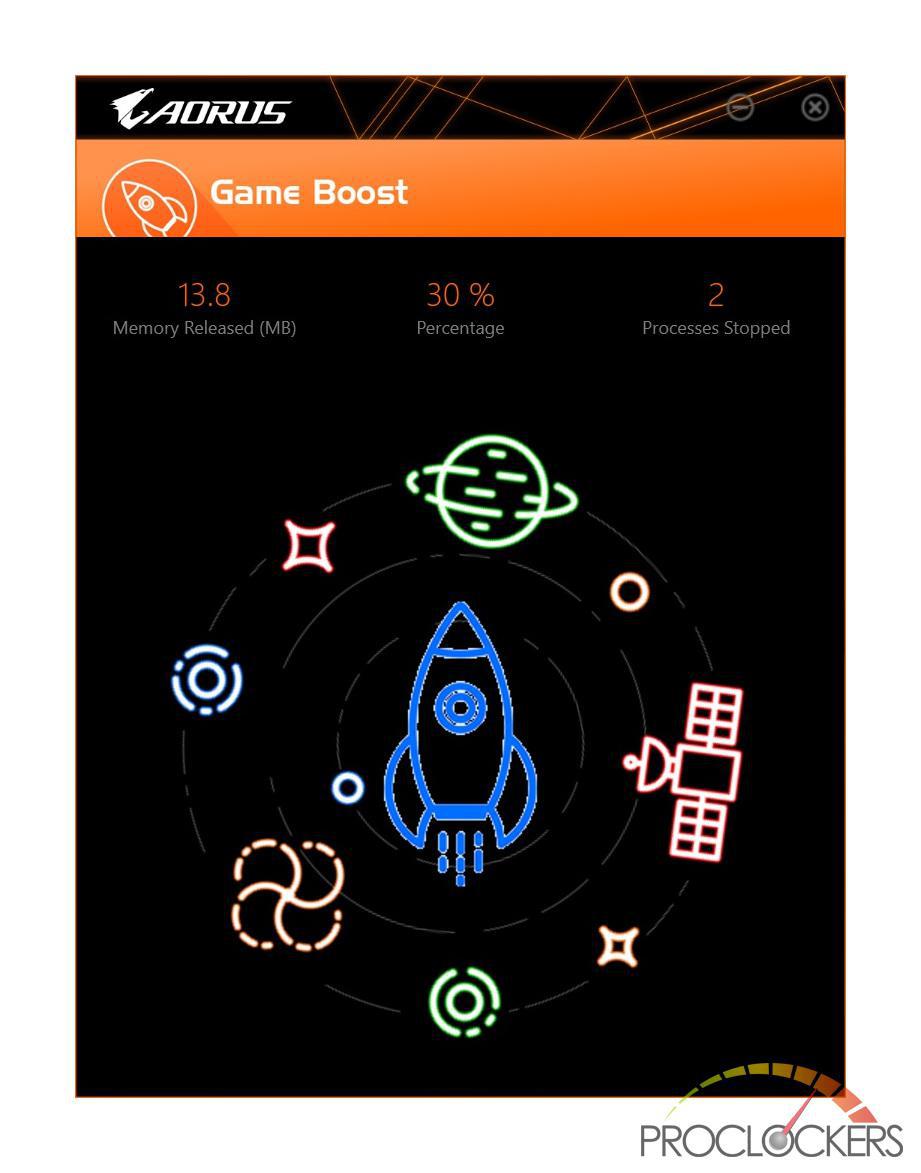
Game Boost
Game Boost will close unneeded application to prevent them from interfering with your game/system. Once you have applied Game Boost you get the option to revert which then will relaunch the closed applications.
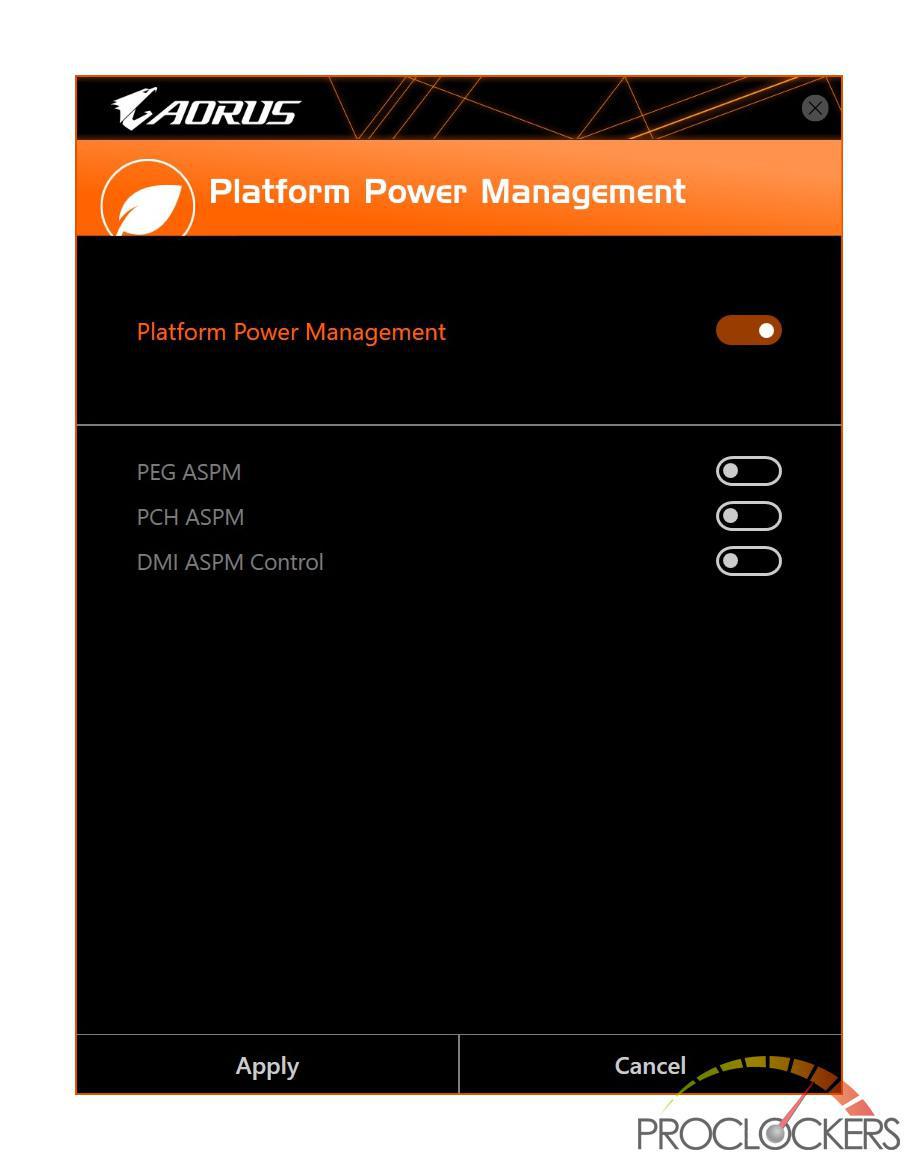
Platform Power Management
Enable/Disable various power management options.
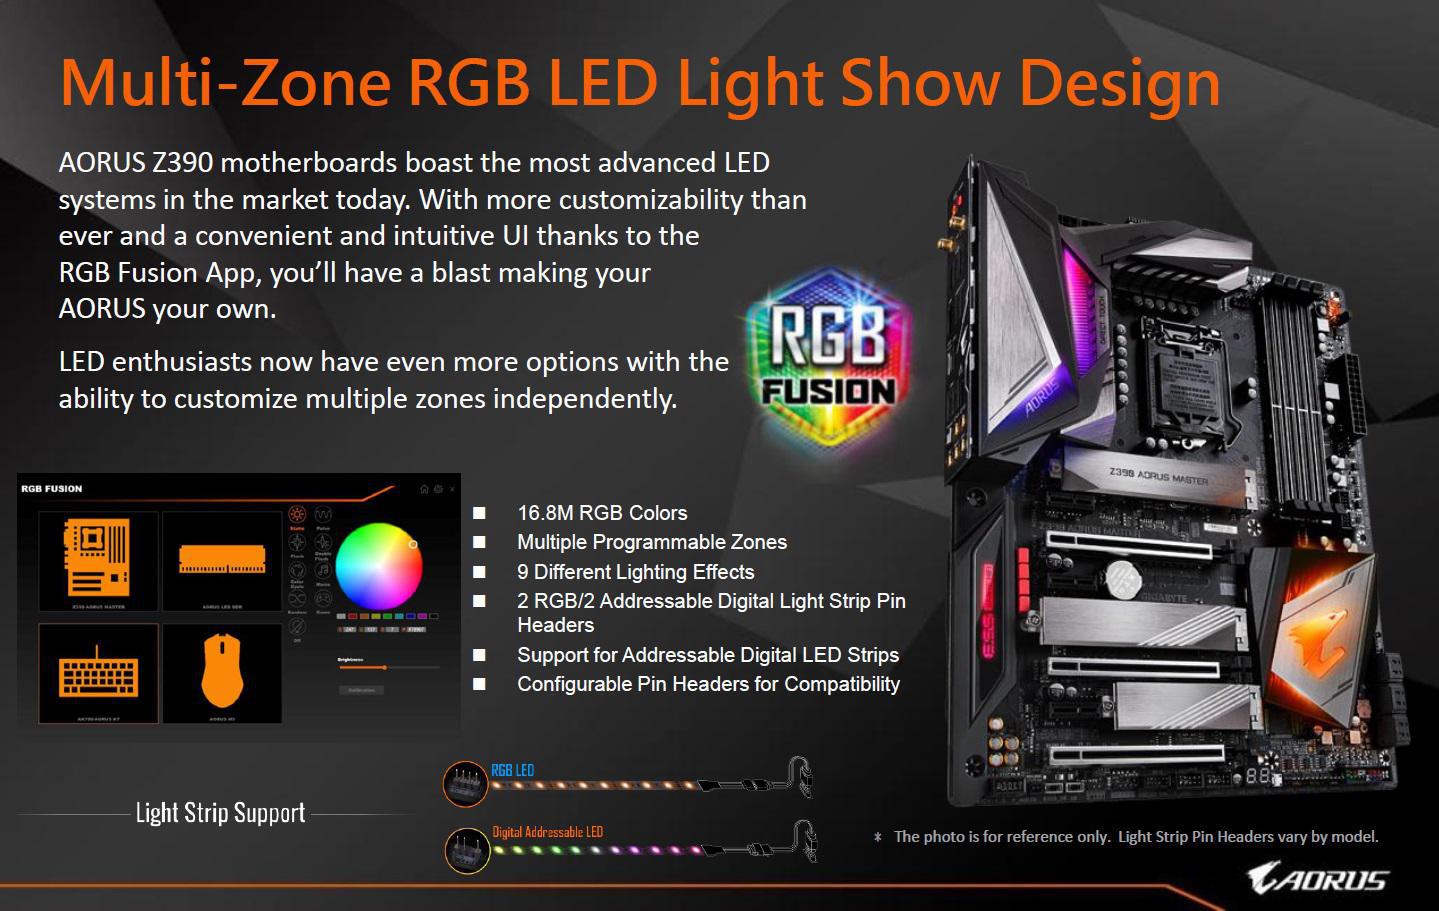
RGB Fusion
RGB Fusion allows you to enable or change the display mode for the ambient motherboard LEDs, rear panel I/O shield LEDs, and case LEDs while in the Windows.

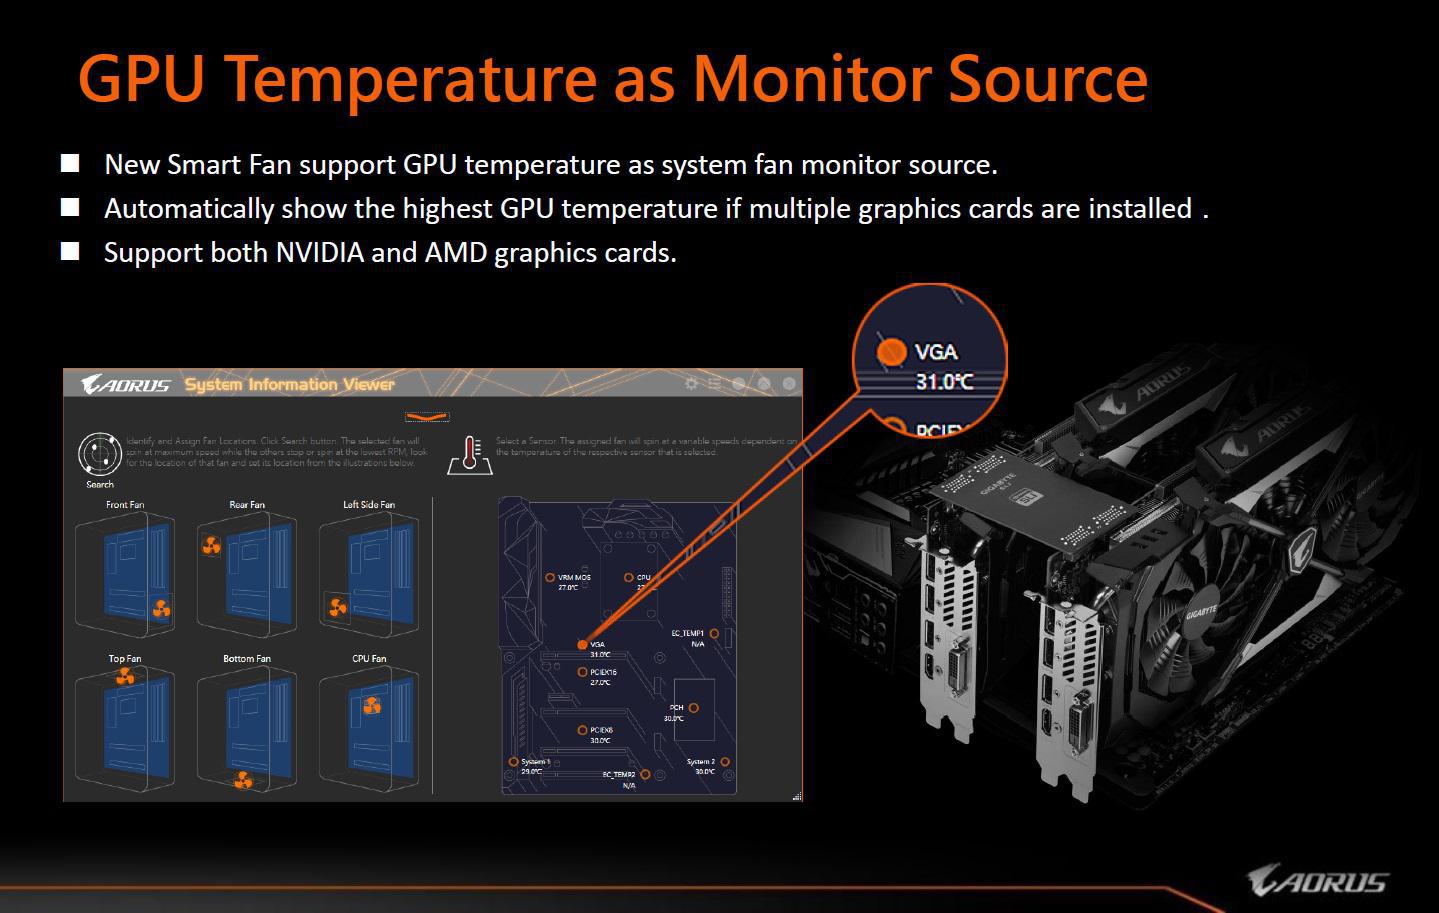
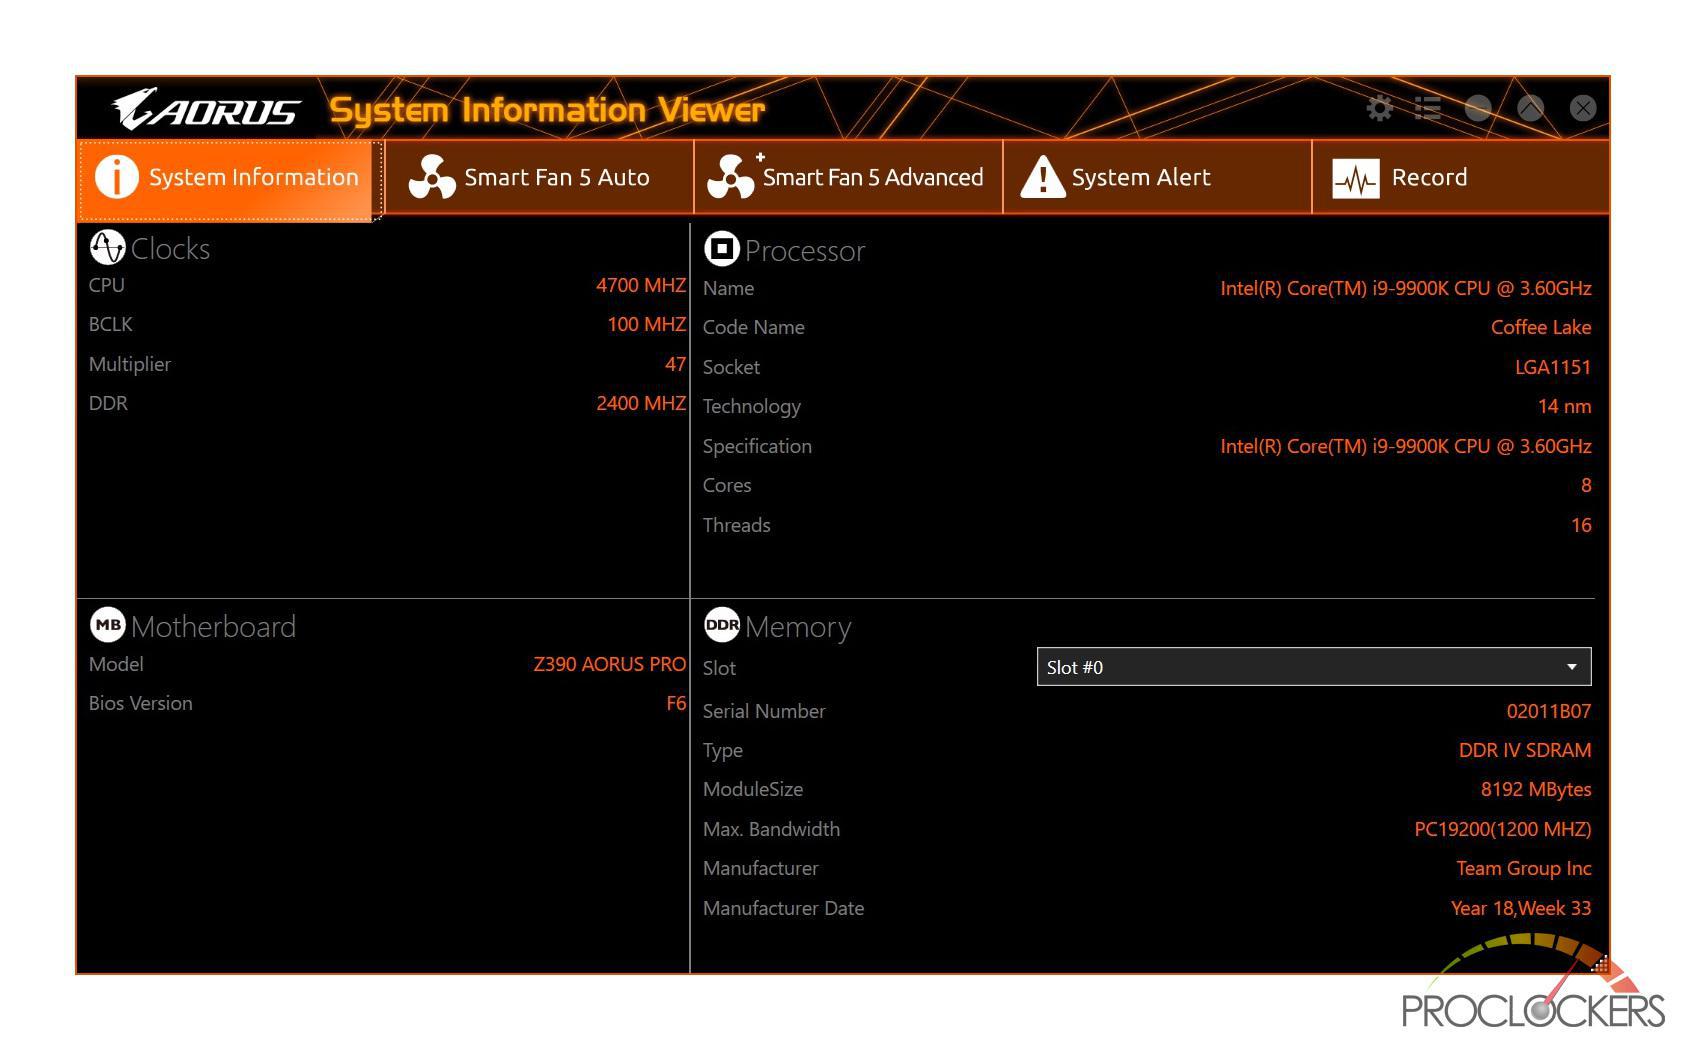
System Information Viewer
This application displays your system’s configuration and allows you to adjust various fan settings. On the system information tab, it displays your CPU/Memory configuration as well as your motherboard model and BIOS version.
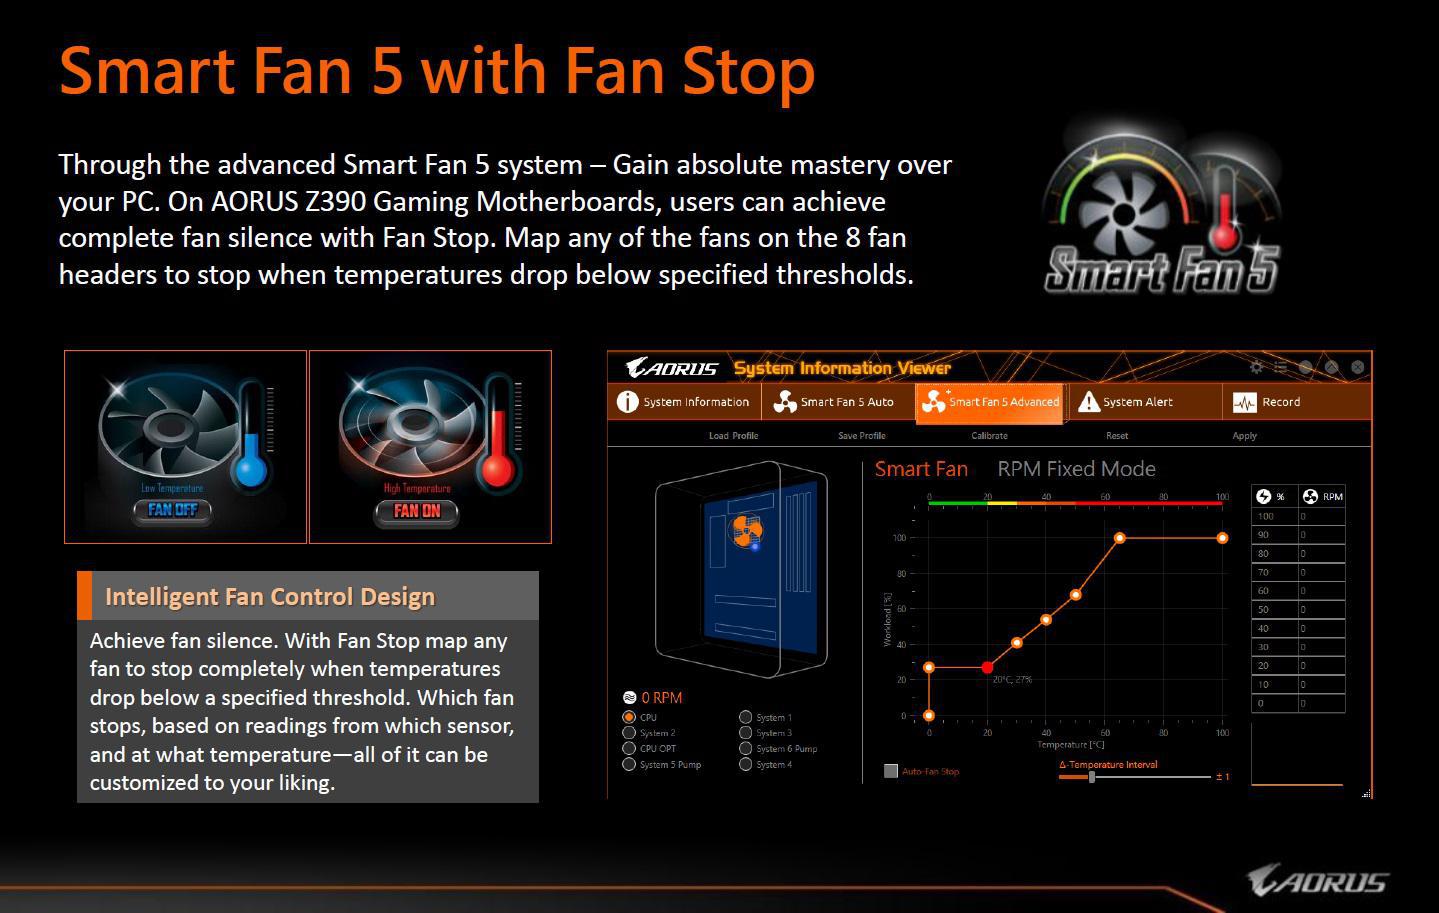
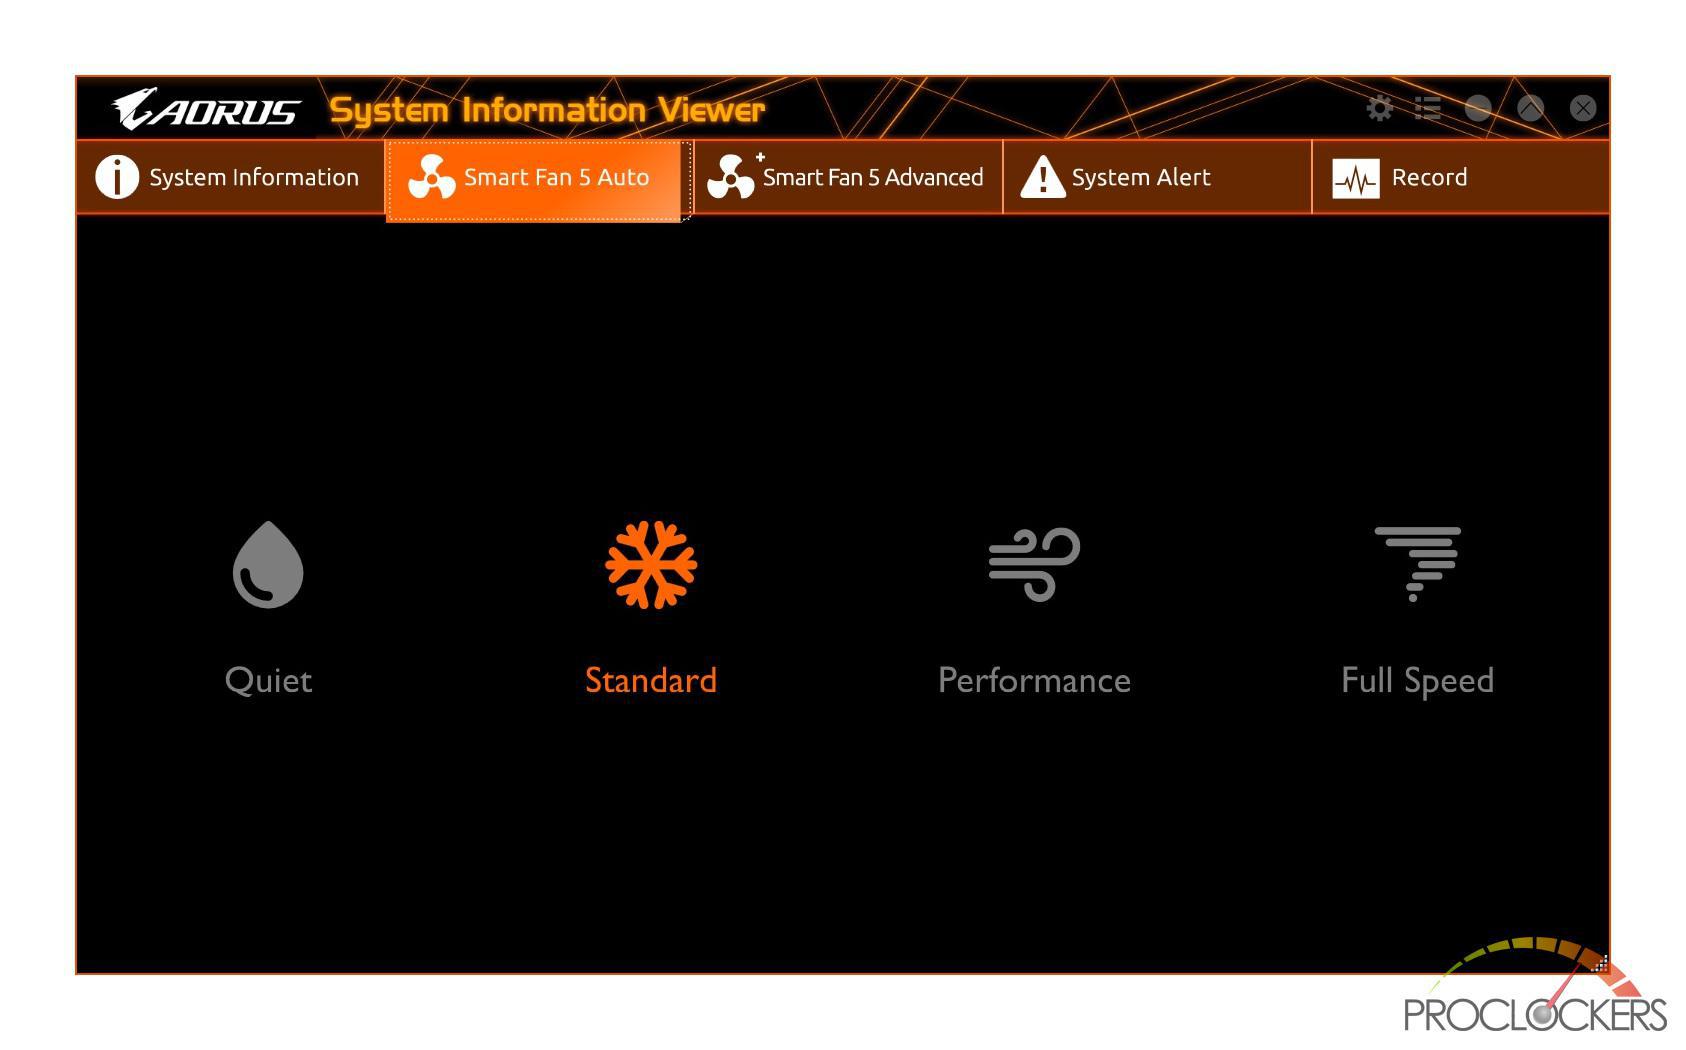
The “Smart Fan 5 Auto” tab allows you to quickly configure your fans based on the profiles: Quiet, Standard, Performance, and Full Speed.
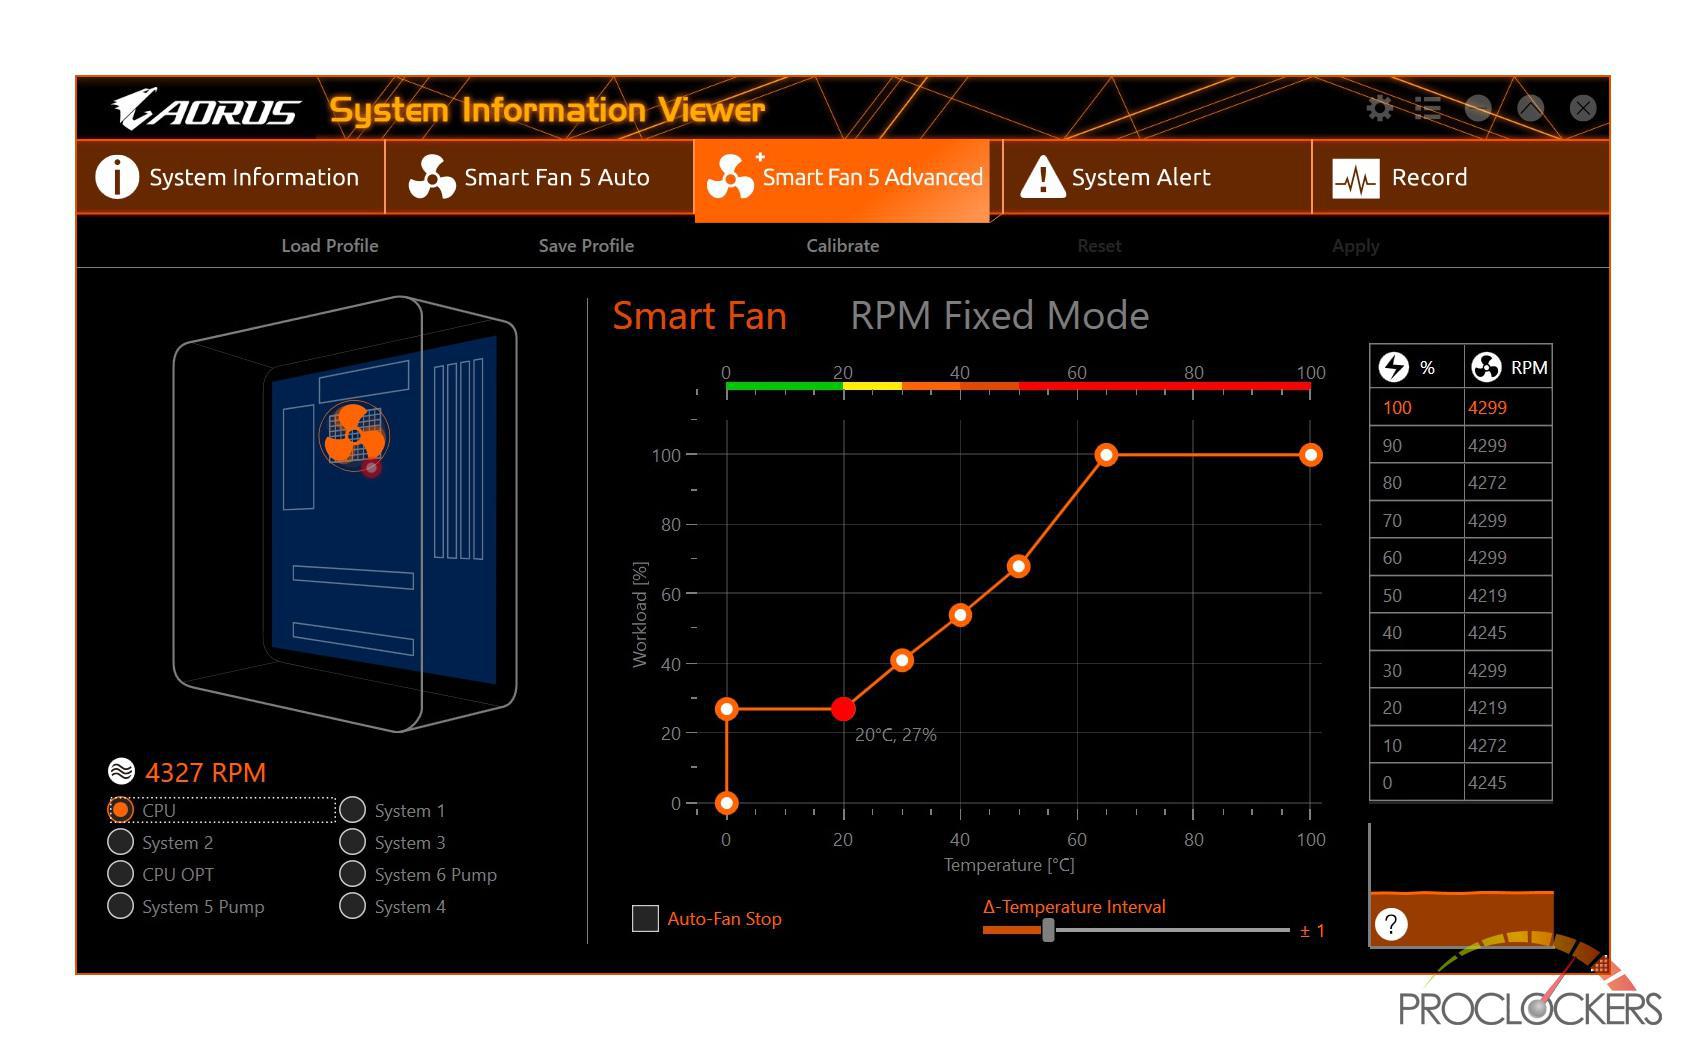
The “Smart Fan 5 Advanced” tab gives you the ability to apply your own fan profile.
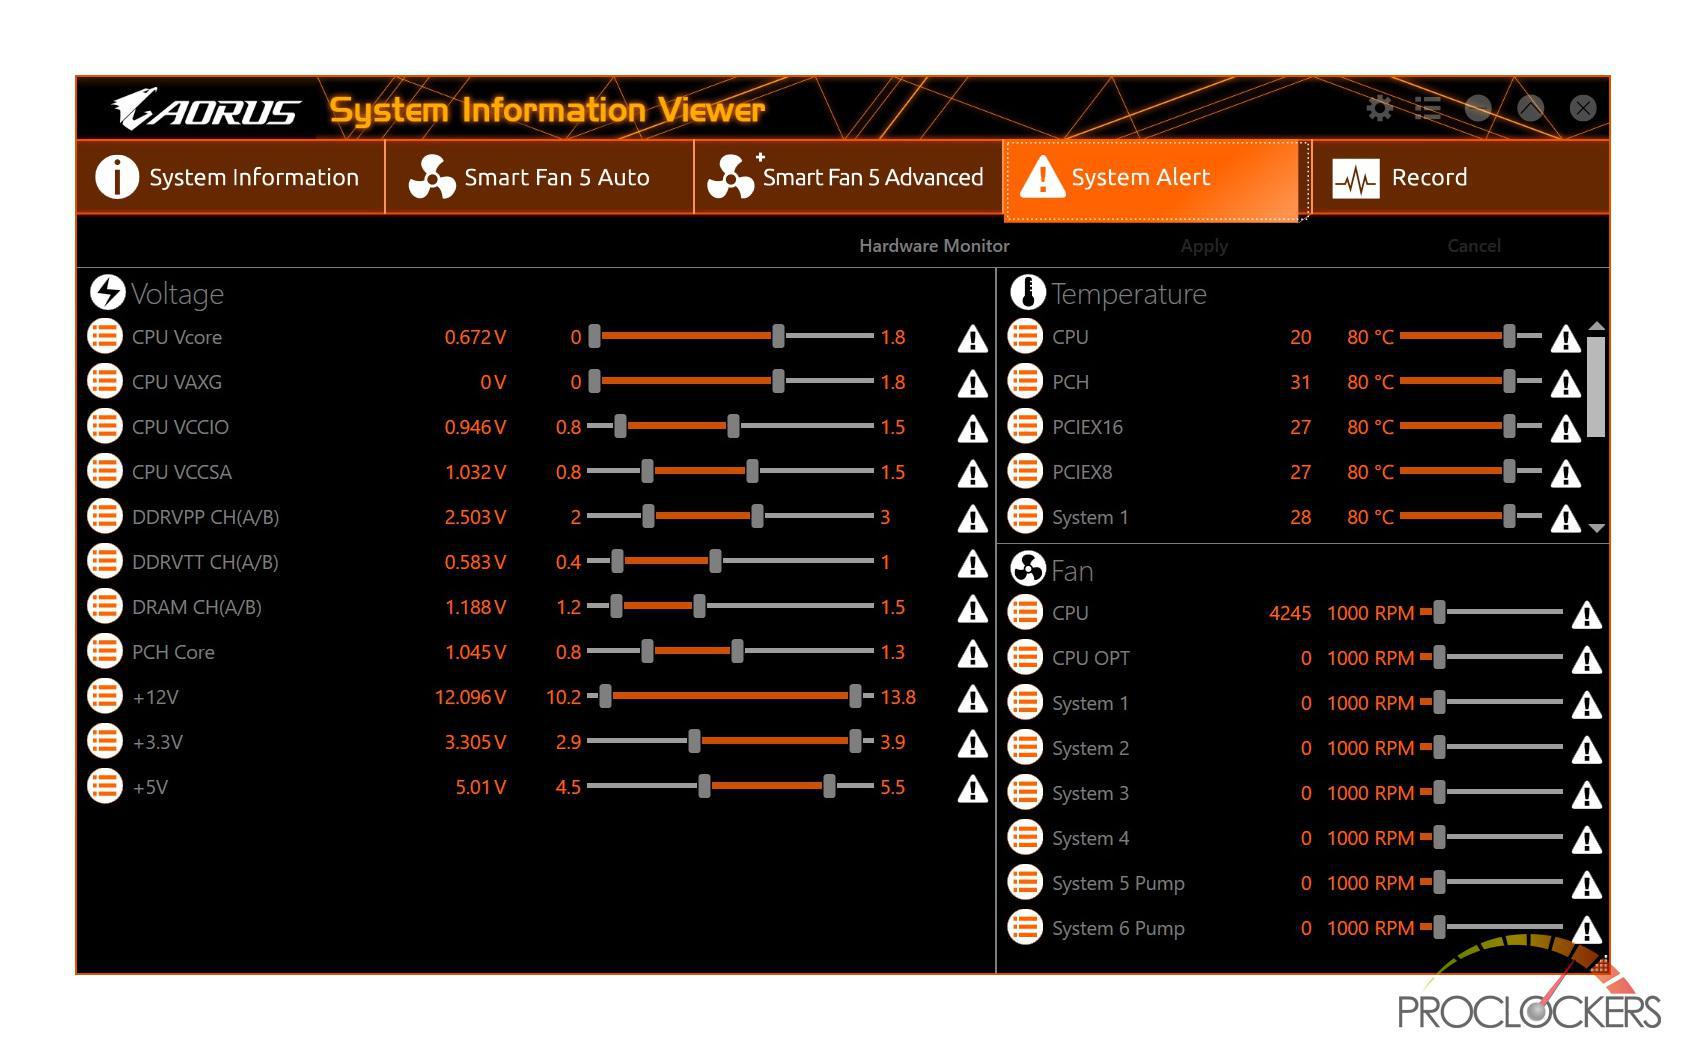
Using the “System Alert” you can set up alerts for various voltage, temperature and fan thresholds.
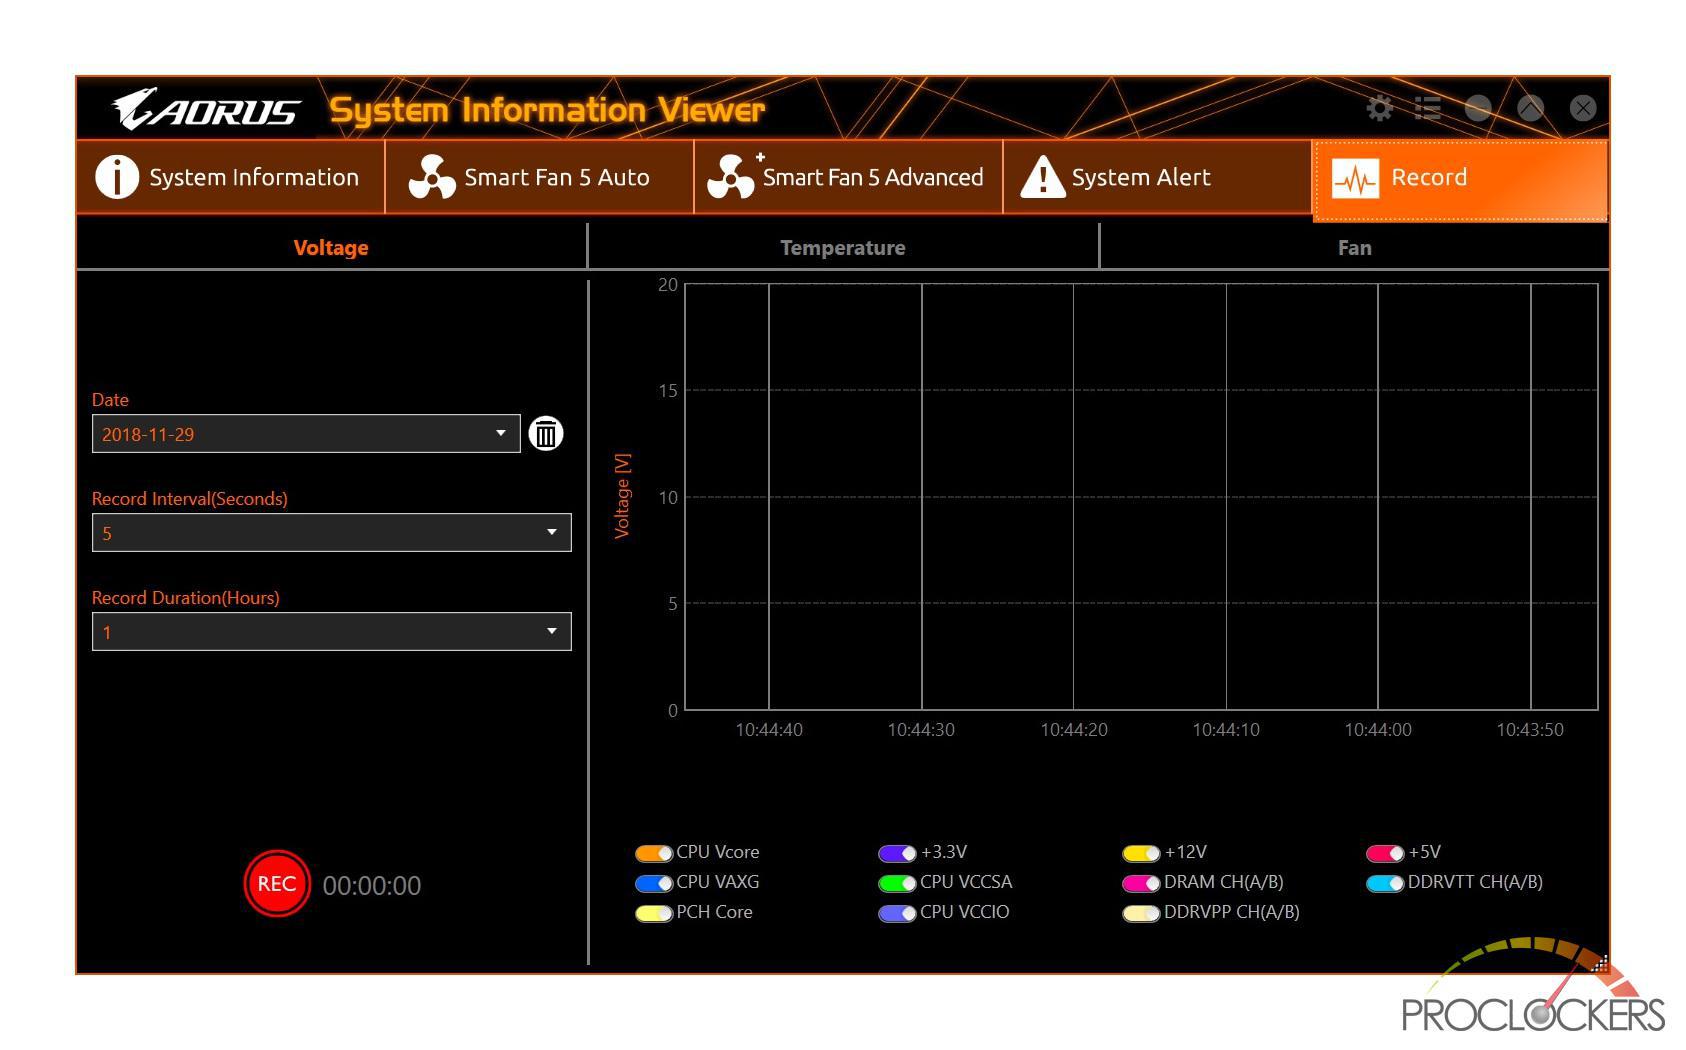
If you are monitoring certain aspects of your system you can use the “Record” tab to monitor and graph various system attributes.
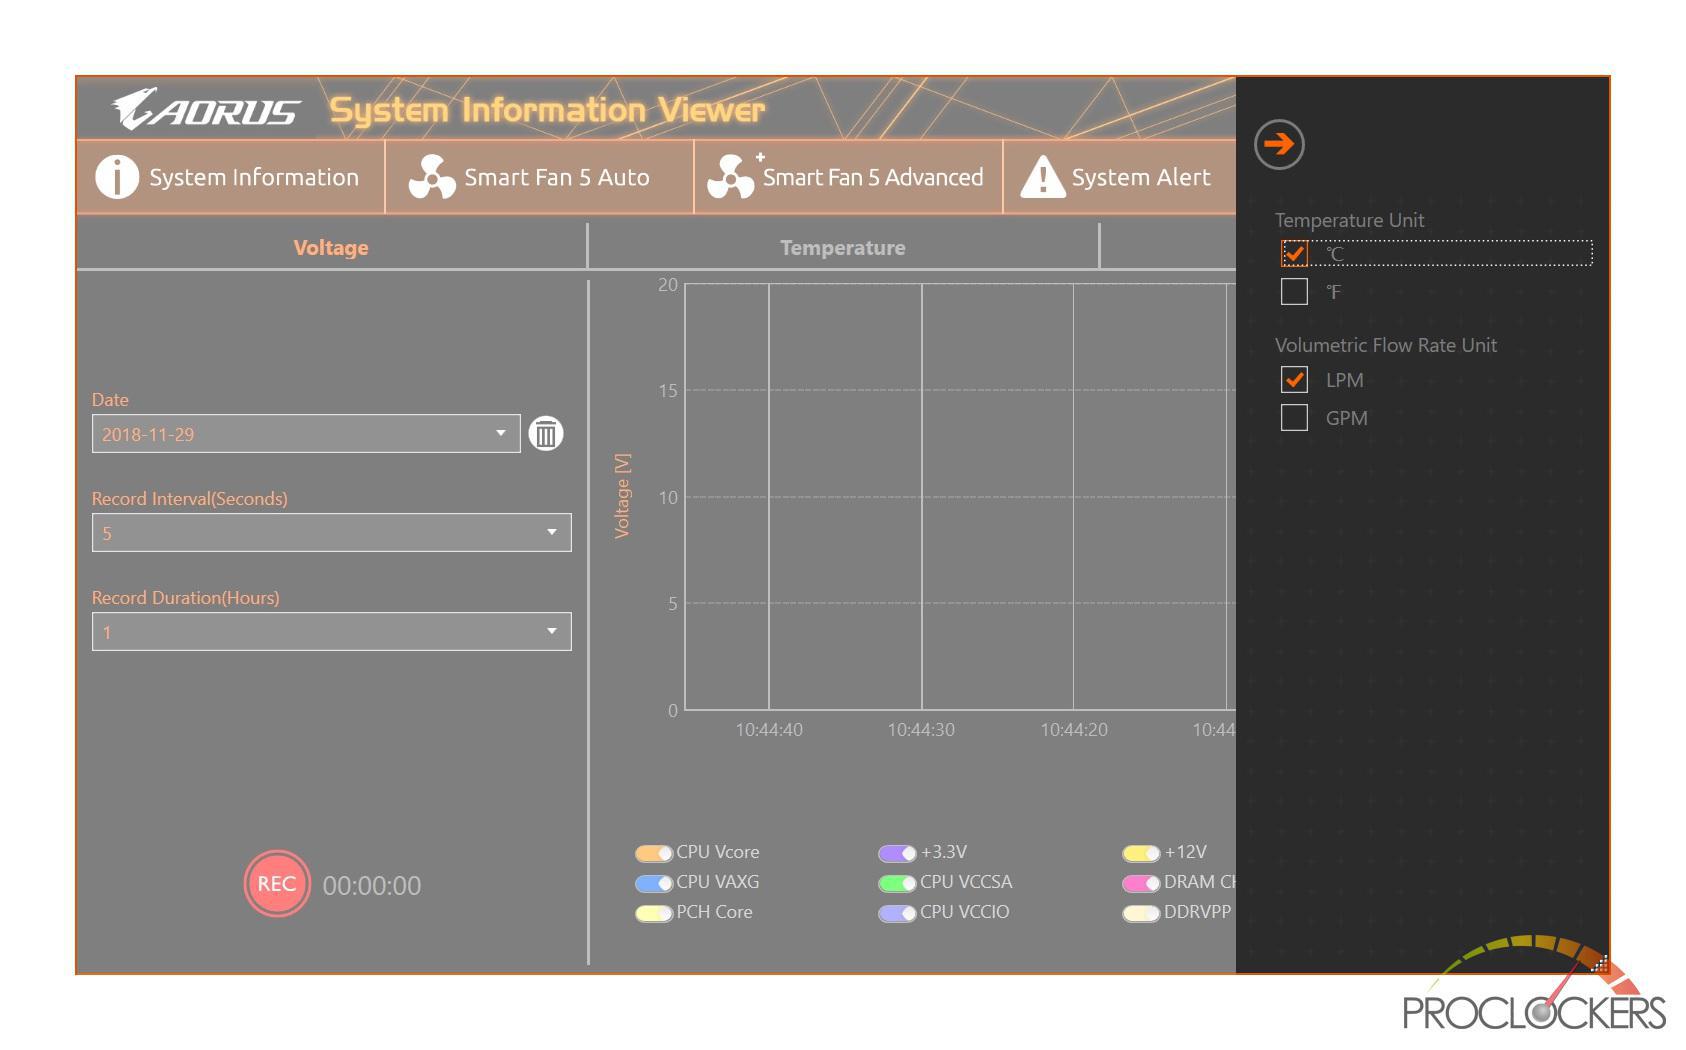
You can configure the application to use C or F and LPM or GPM.
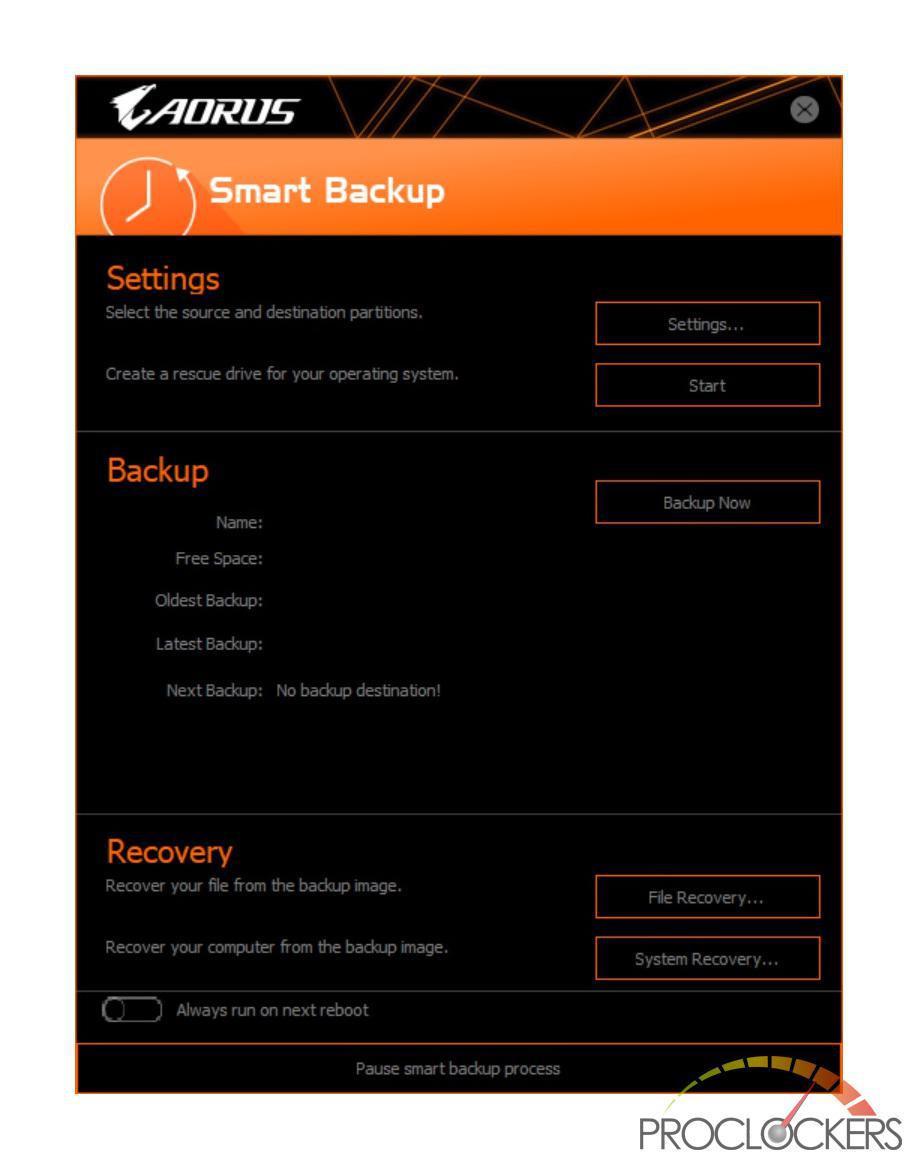
Smart Backup
Smart Backup allows you to back up a partition as an image file every hour. You can use these images to restore your system or files when needed.
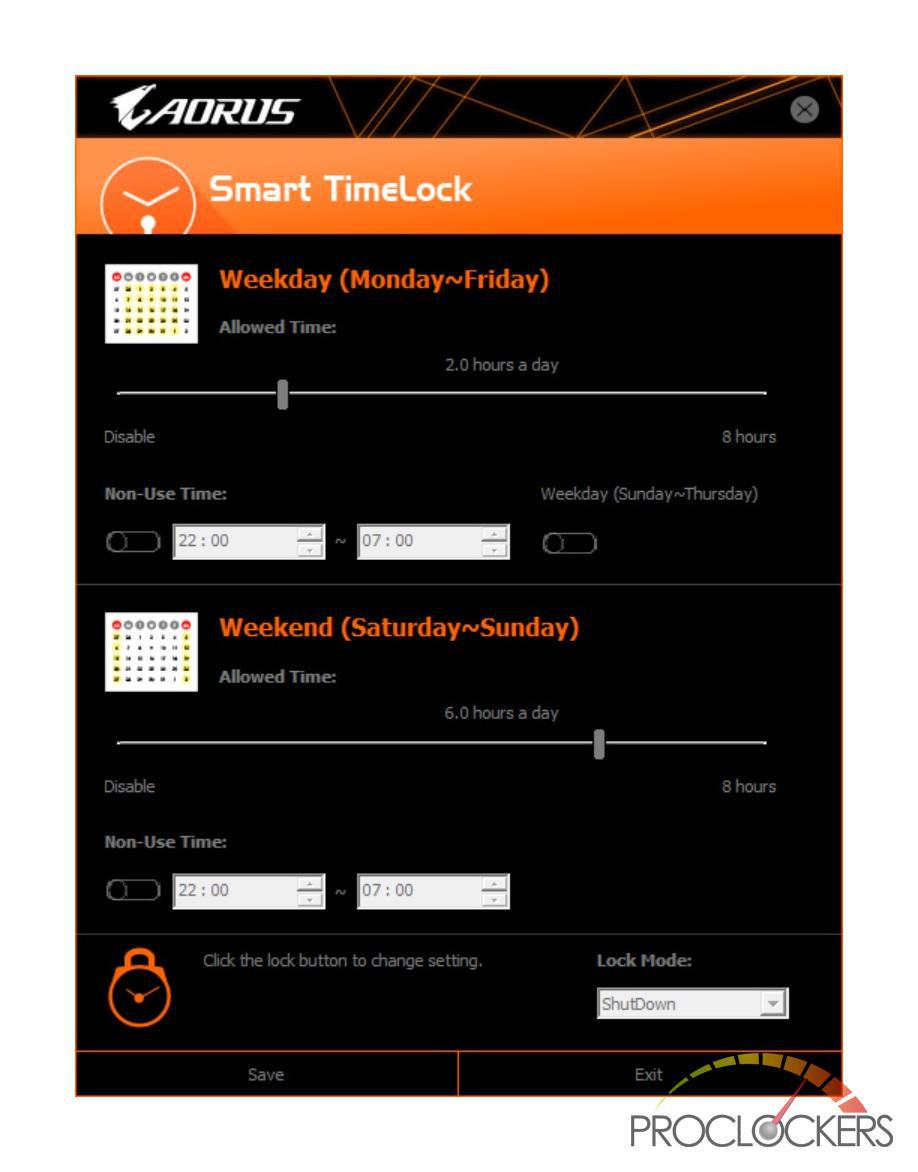
Smart Time Lock
Smart Time Lock allows you to effectively manage computer or Internet usage time with simple rules and options.
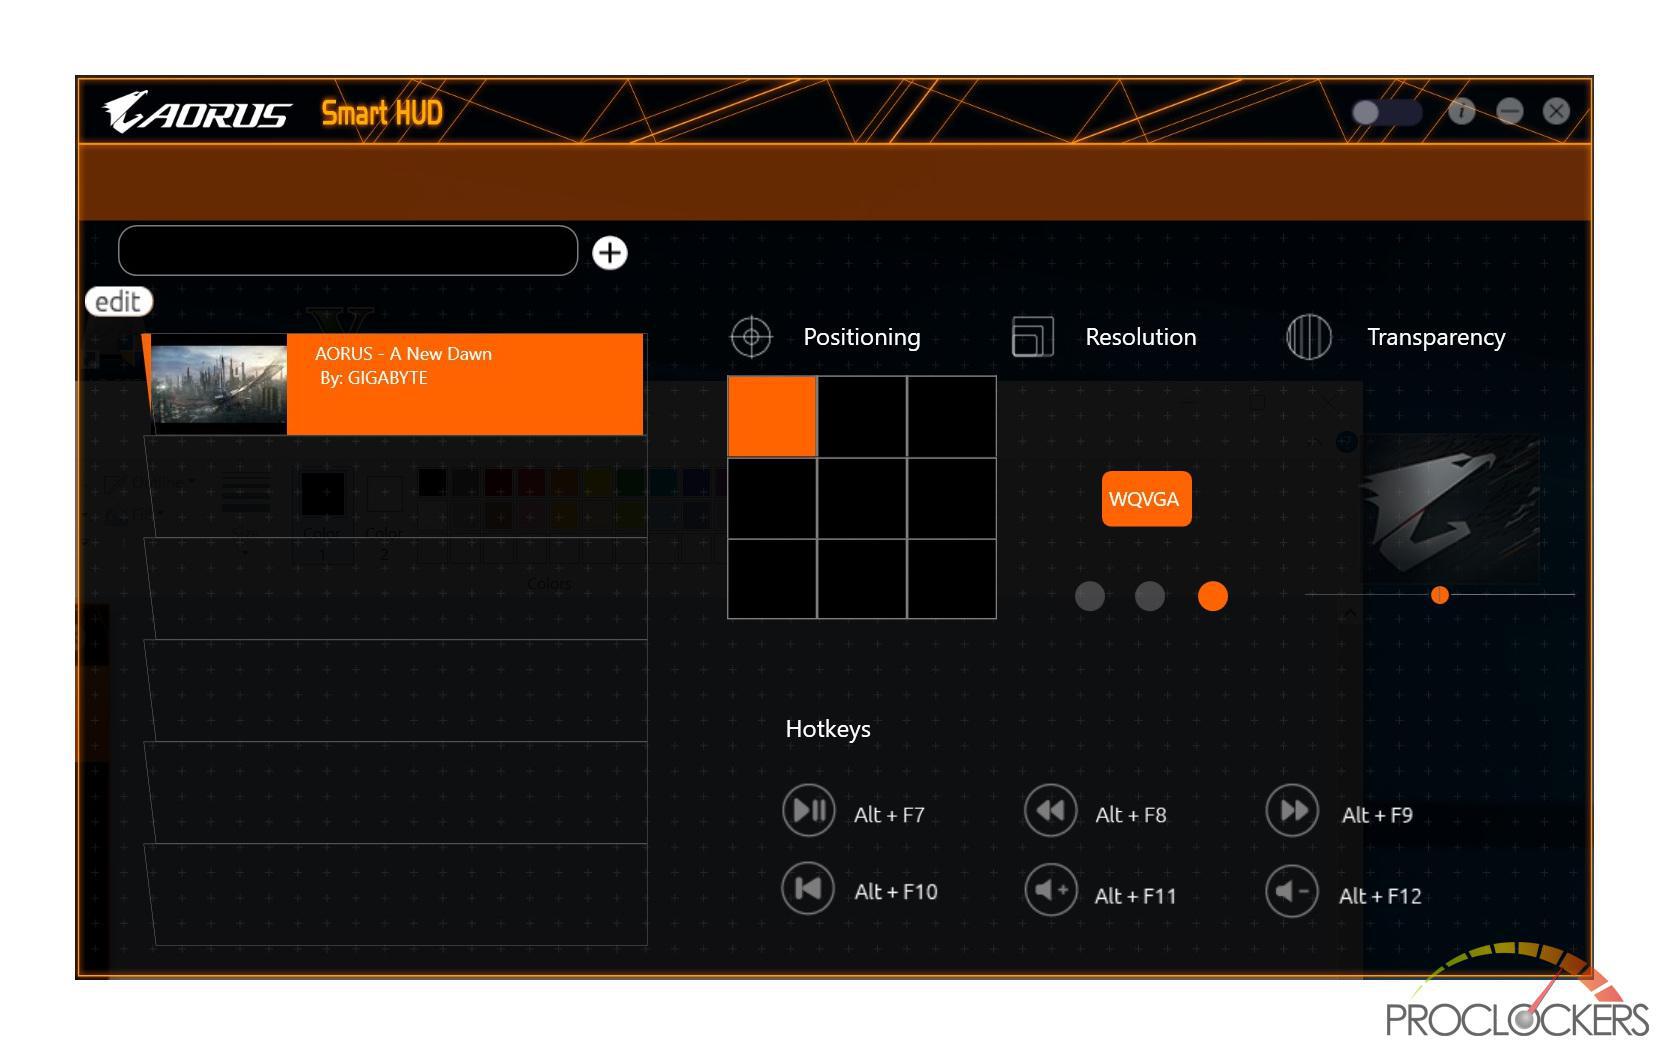
Smart Hud
Offers many options for displaying real-time system information in-game.
Smart Keyboard
Designed to easily create keyboard macros.

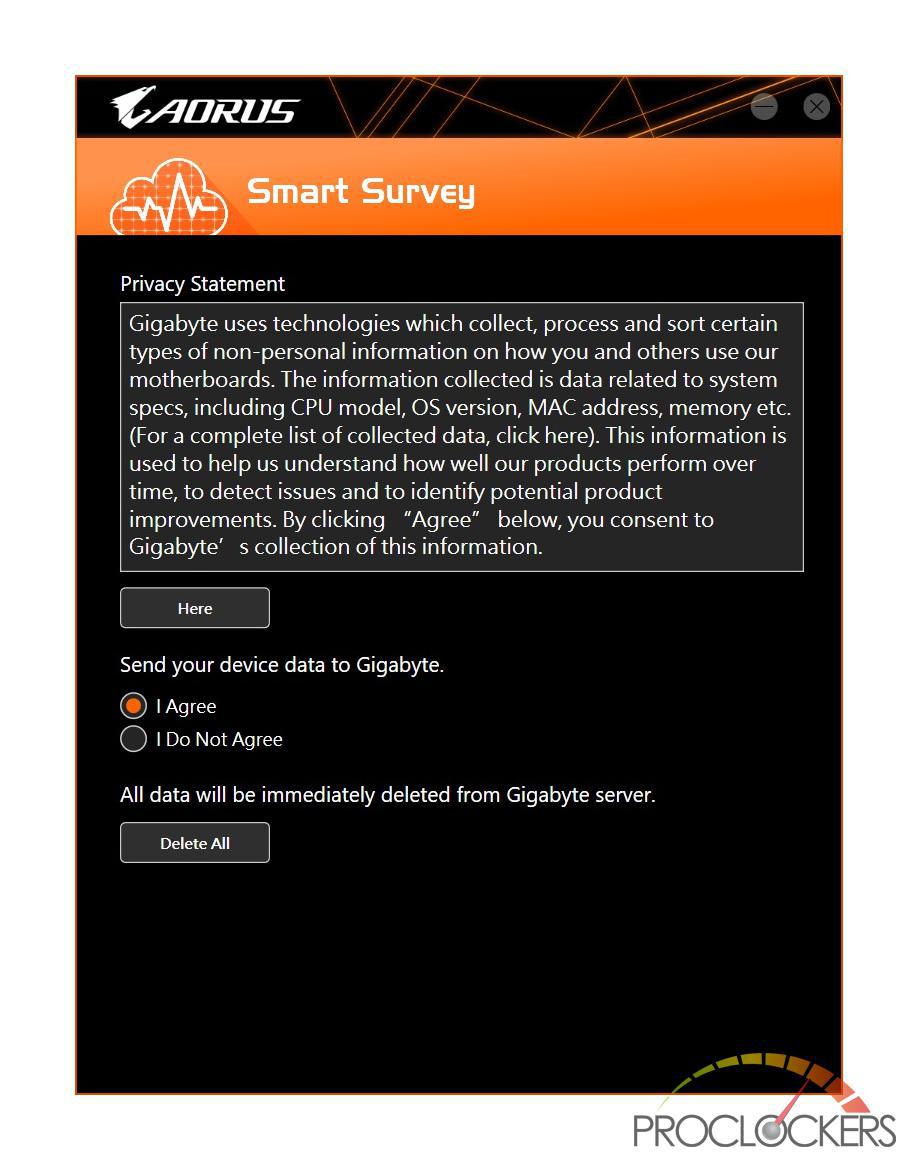
Smart Survey
An application to send non-personal system information to Gigabyte. Also, give you an option to delete any data sent from Gigabyte’s servers.
Testing & Performance
To test the Z390 Aorus Pro we will be running it through various benchmarks that will test all aspects of the board. These tests will include CPU, Memory and gaming benchmarks which will give us the overall performance of the board.
The system we will is mounted on an Open Test Bench and will include the following components:
- Intel 9900K
- Corsair H115i Platinum
- 2 x 8 GB Team Group Vulcan TUF Gaming Alliance DDR4
- EVGA 1070 FTW GPU
- Crucial P1 1000GB M.2 NVMe SSD
- Corsair HX750W PSU
General Performance Testing
PCMark 10
PCMark 10 is the complete benchmark for the modern office. It is the ideal test for organizations that are evaluating PCs for a workforce with a range of performance needs. The tests in this benchmark cover a wide range of activities from everyday productivity tasks to demanding work with digital media content.
PCMark 10 uses a modular approach to build relevant benchmark tests around common end-user scenarios. A Test Group is a collection of workloads that share a common theme or purpose. There are four test groups in PCMark 10, we use three of them.
Essentials: covers the common, everyday ways that people use a PC. The workloads include Web Browsing, Video Conferencing, and App Start-up time.
Productivity: measures system performance with everyday office applications. This test group includes the Spreadsheets and Writing workloads.
Digital Content Creation: This test group’s workload reflects the demands of working with digital content and media. The tests include Photo Editing, Video Editing, and Rendering and Visualization.
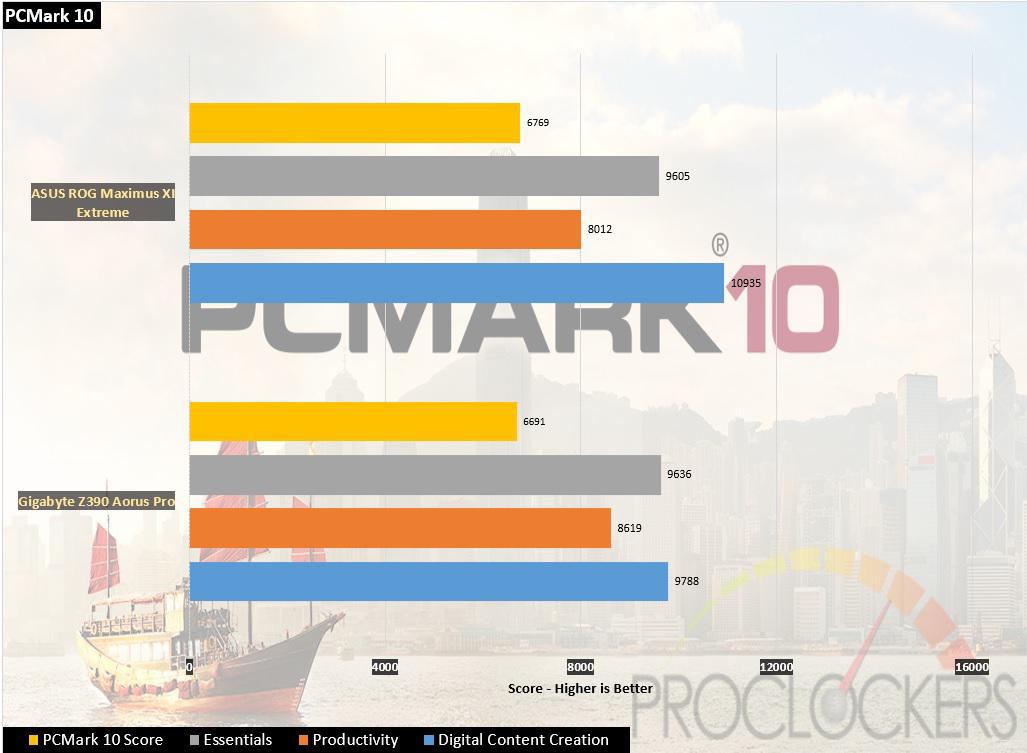
The Aorus Pro performs very well coming in only 78 points behind the Maximus XI Extreme.
WebXPRT 2015
WebXPRT 2013 uses scenarios created to mirror the tasks you do every day to compare the performance of almost any Web-enabled device. It contains four HTML5- and JavaScript-based workloads: Photo Effects, Face Detect, Stocks Dashboard, and Offline Notes. WebXPRT is run with the latest stable release version of Google Chrome browser, in this case, Version 70.
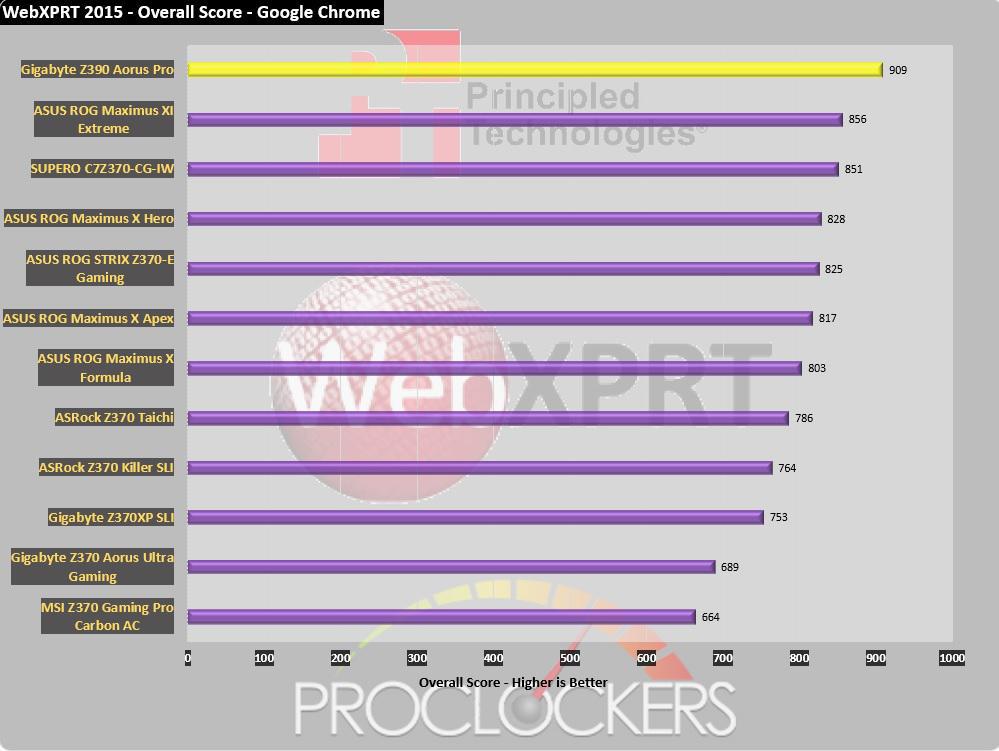
The Aorus Pro put up an impressive score of 909 +/- 17, which takes the top spot with a 53-point lead of 2nd place.
CPU Performance Tests
Super PI
“In August 1995, the calculation of pi up to 4,294,960,000 decimal digits was succeeded by using a supercomputer at the University of Tokyo. The program was written by D.Takahashi in collaboration with Dr.Y.Kanada at the computer center. This record should be the current world record. (Details are shown in the windows help.) This record-breaking program was ported to personal computer environments such as Windows NT and Windows 95. In order to calculate 33.55 million digits, it takes within 3 days with a Pentium 90 MHz, 40 MB main memory and 340 MB available storage.”
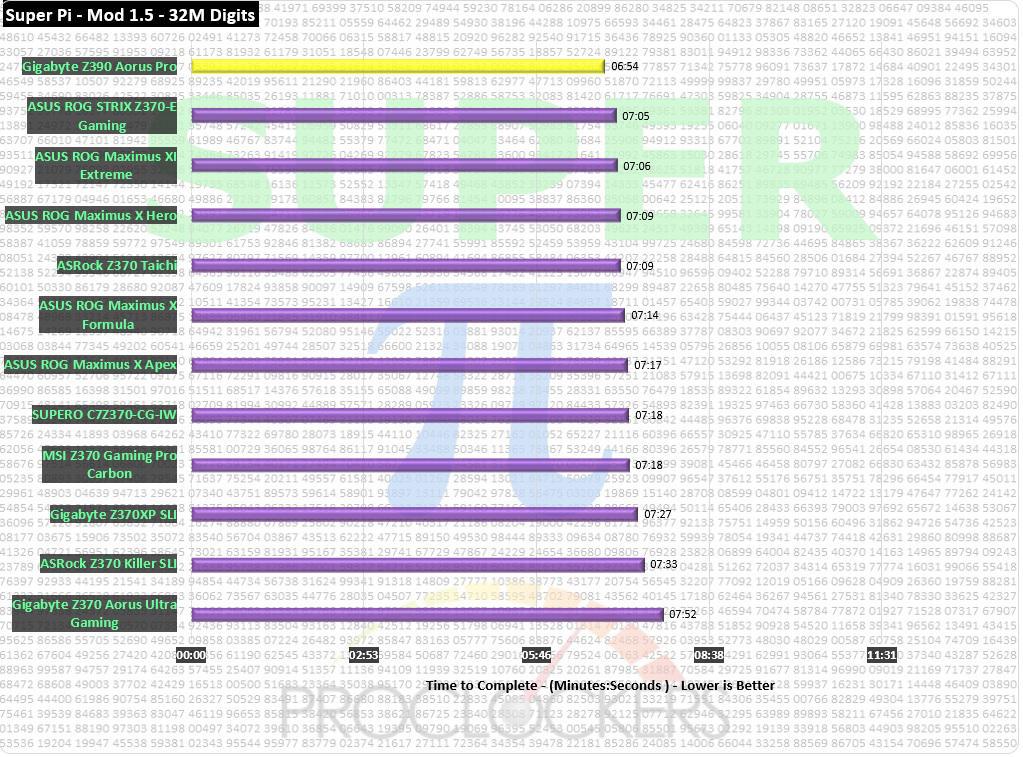
We put up a top score of 6 minutes and 54 seconds being the first motherboard to have a sub-7-minute result.
Cinebench R15
“CINEBENCH is a real-world cross platform test suite that evaluates your computer’s performance capabilities. CINEBENCH is based on MAXON’s award-winning animation software CINEMA 4D, which is used extensively by studios and production houses worldwide for 3D content creation. MAXON software has been used in blockbuster movies such as Iron Man 3, Oblivion, Life of Pi or Prometheus and much more.
CINEBENCH is the perfect tool to compare CPU and graphics performance across various systems and platforms (Windows and OS X). And best of all: It’s completely free.”
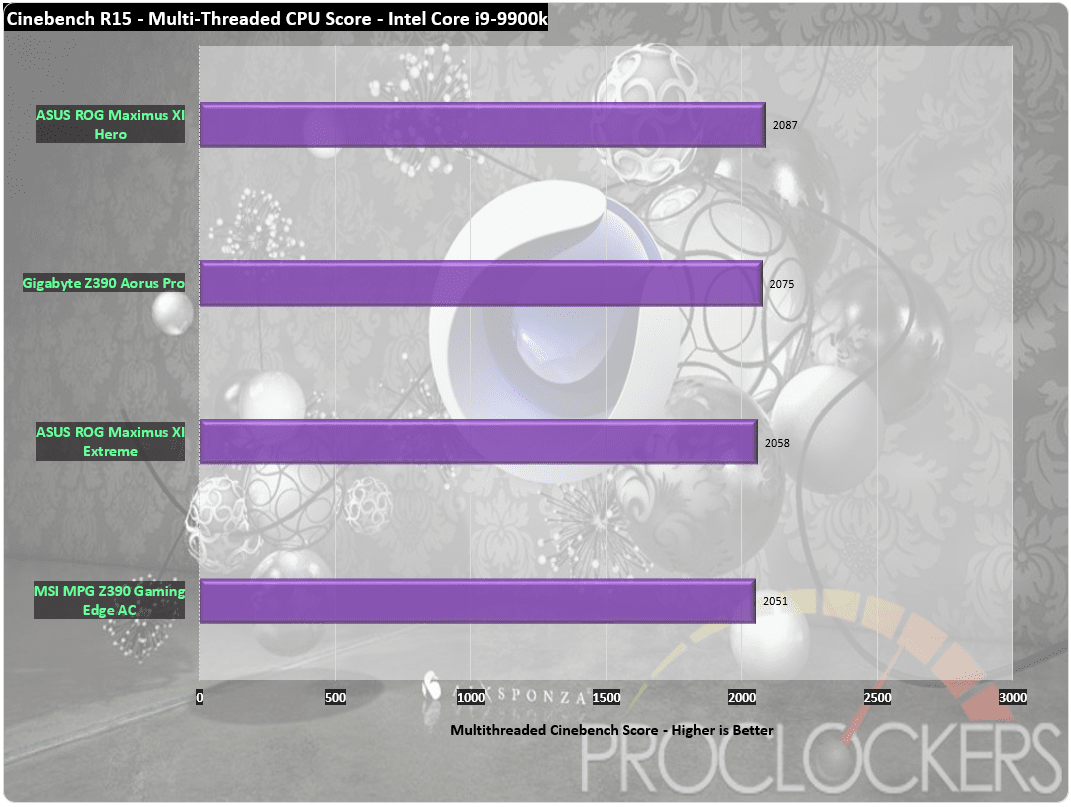
With a stock 9900K, we achieve a score of 2075, which is right where we would expect it to be.
7 Zip
The benchmark shows a rating in MIPS (million instructions per second). The rating value is calculated from the measured speed, and it is normalized with results of Intel Core 2 CPU with multi-threading option switched off. So, if you have modern CPU from Intel or AMD, rating values in single-thread mode must be close to real CPU frequency. There are two tests, compression with LZMA method and decompression with LZMA method. Once the total passes reach 100, the score is taken
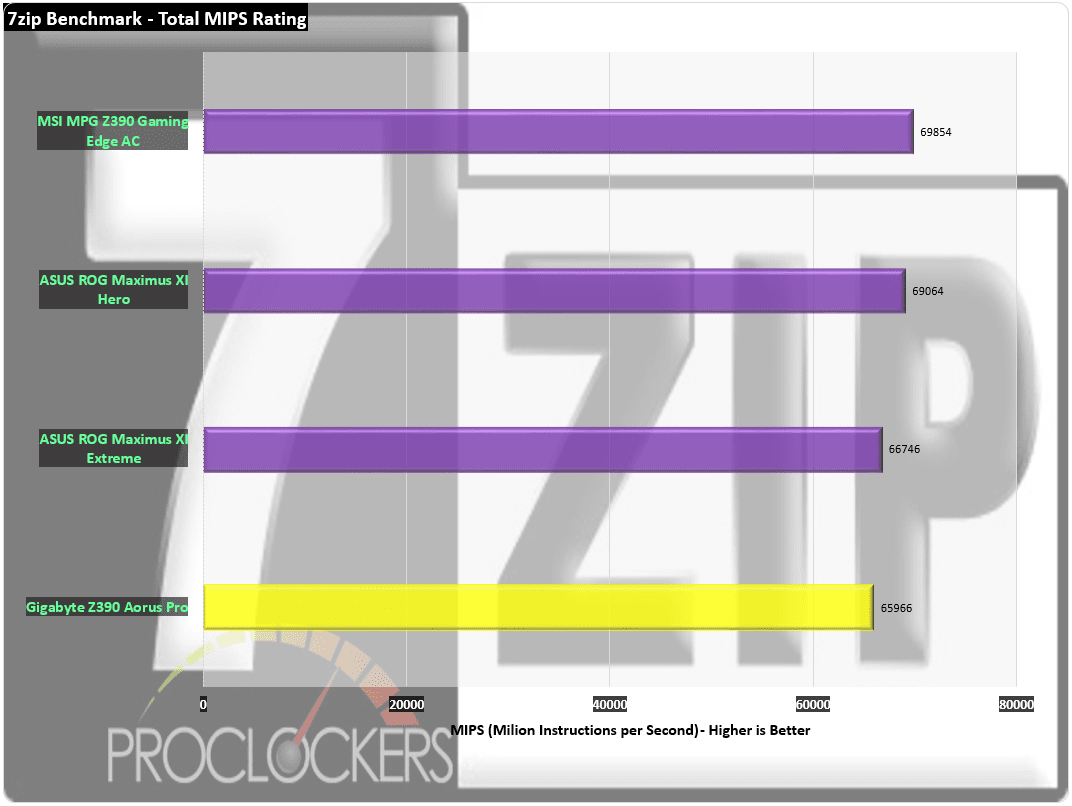
7Zip testing comes in at an impressive 65966 MIPS, which is about 20000 MIPS over the previous z370 platform and 8700K.
Memory Performance Testing
AIDA64 Engineer Edition
“FinalWire Ltd. today announced the immediate availability of AIDA64 Extreme Edition 1.50 software, a streamlined diagnostic and benchmarking tool for home users; and the immediate availability of AIDA64 Business Edition 1.50 software, an essential network management solution for small and medium scale enterprises. The new AIDA64 update implements AVX-optimized benchmarks for the upcoming Intel Sandy Bridge processors, adds a brand-new video encoding benchmark, and supports the latest AMD and NVIDIA graphics processors.”
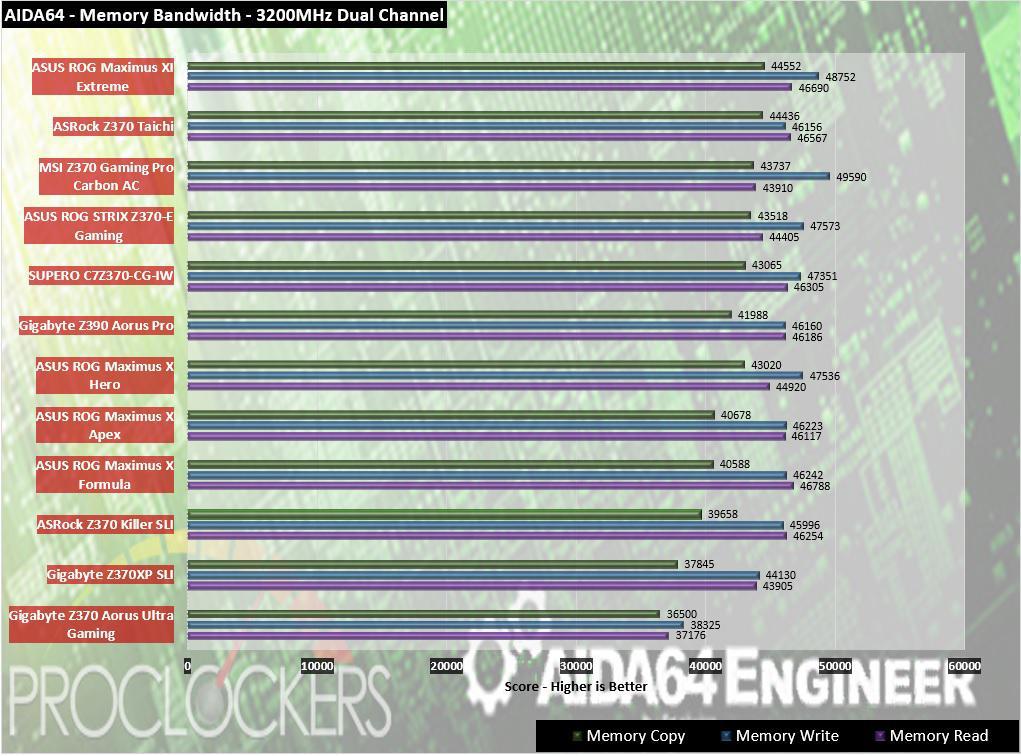
We do very well with the AIDA64 memory bandwidth benchmark placing it about in the middle of the pack.
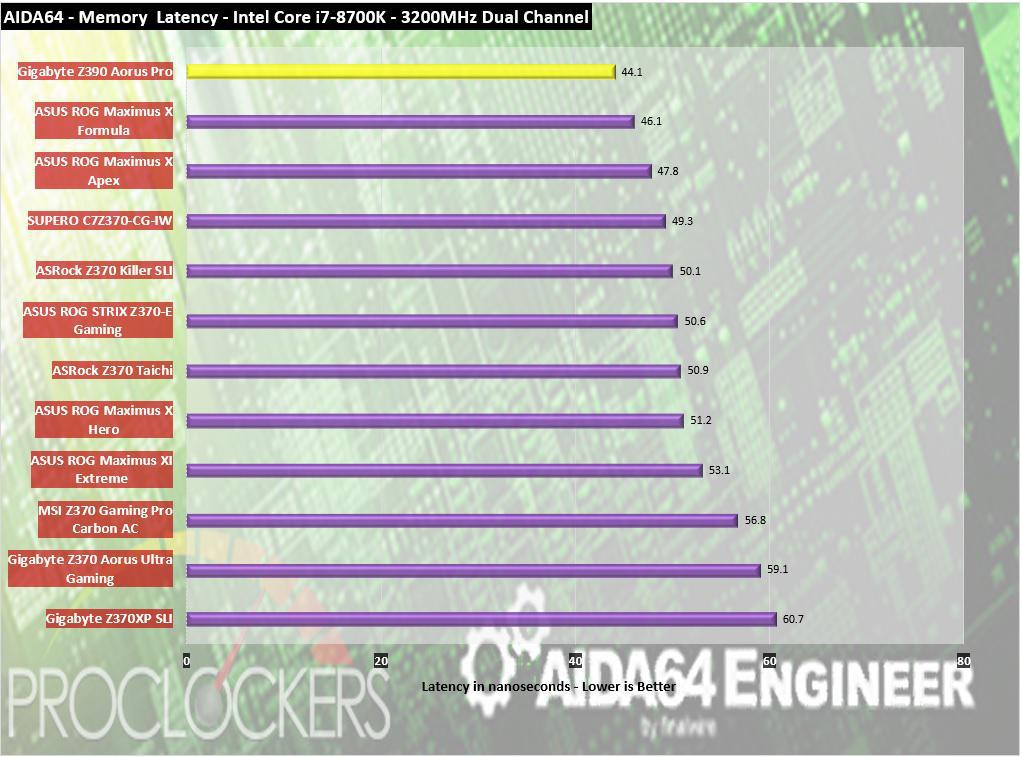
We come out on top for in the latency benchmark with a snappy 44.1ns
Passmark Performance Test – Memory Mark – Threaded
“Fast, easy to use, PC speed testing and benchmarking. PassMark PerformanceTest ™ allows you to objectively benchmark a PC using a variety of different speed tests and compare the results to other computers.”
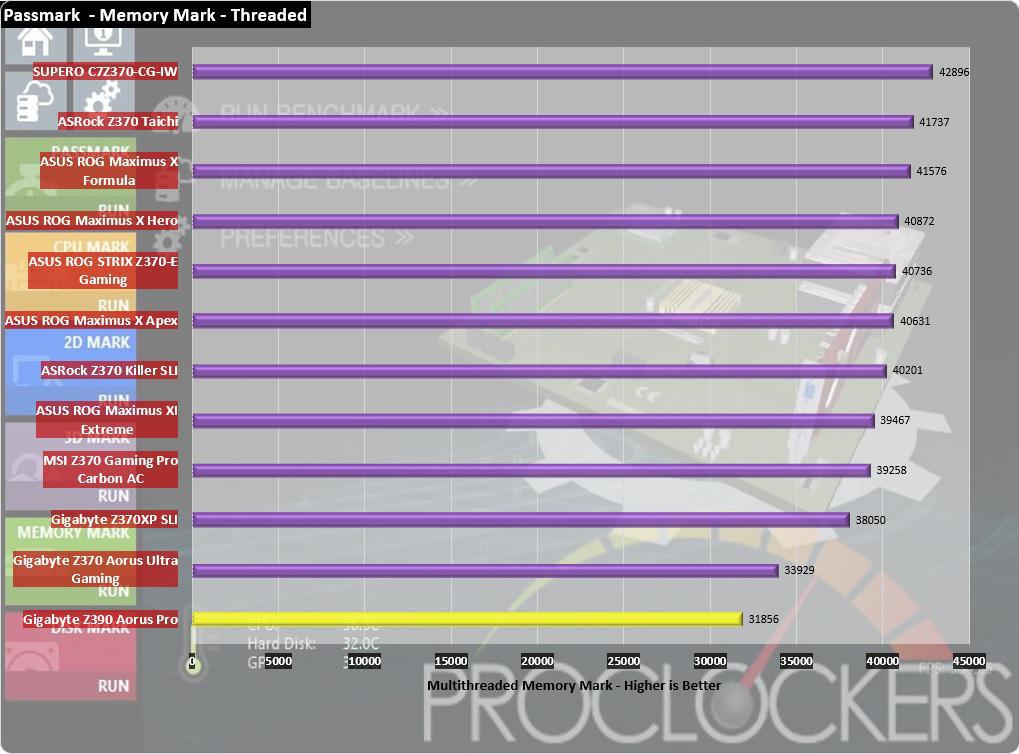
Like the Z370 Aorus Ultra Gaming, we are seeing an unusually low score in the Memory Mark Threaded test.
SiSoft Sandra – Memory Bandwidth
“SiSoftware Sandra provides a robust package of diagnostic tools for testing your system and teasing out its problems–or potential headaches.”
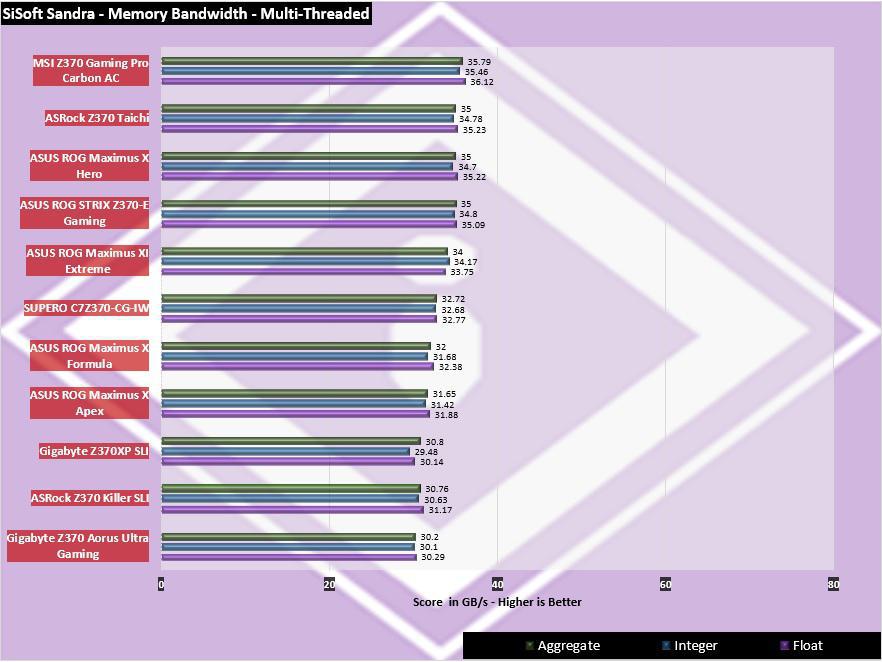
Like Memory Mark, we are also seeing an unusually low score in SiSoft’s Memory Bandwidth test as well.
Storage Performance Testing
ATTO Disk Benchmark
“As the industry’s leading provider of high-performance storage & network connectivity products, ATTO has created a widely-accepted Disk Benchmark freeware utility to help measure storage system performance. As one of the top tools utilized in the industry, Disk Benchmark identifies performance in hard drives, solid state drives, RAID arrays as well as connections to storage. Top drive manufacturers, like Hitachi, build and test every drive using the ATTO Disk Benchmark”
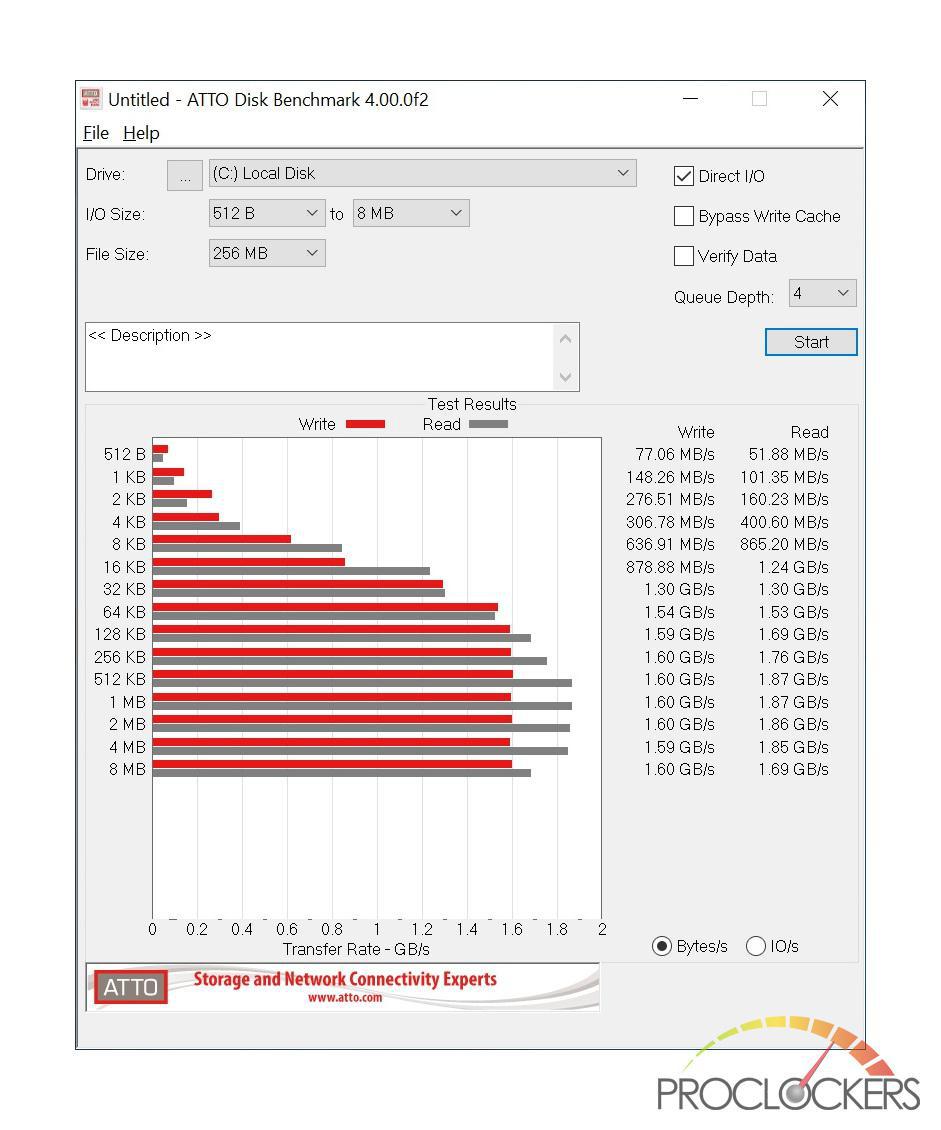
We see our Crucial P1 drive relatively close to its rated 2000 MB/s read and 1700MB/s write speeds.
CrystalDiskMark
“CrystalDiskMark is designed to quickly test the performance of your hard drives. Currently, the program allows measuring sequential and random read/write speeds.”
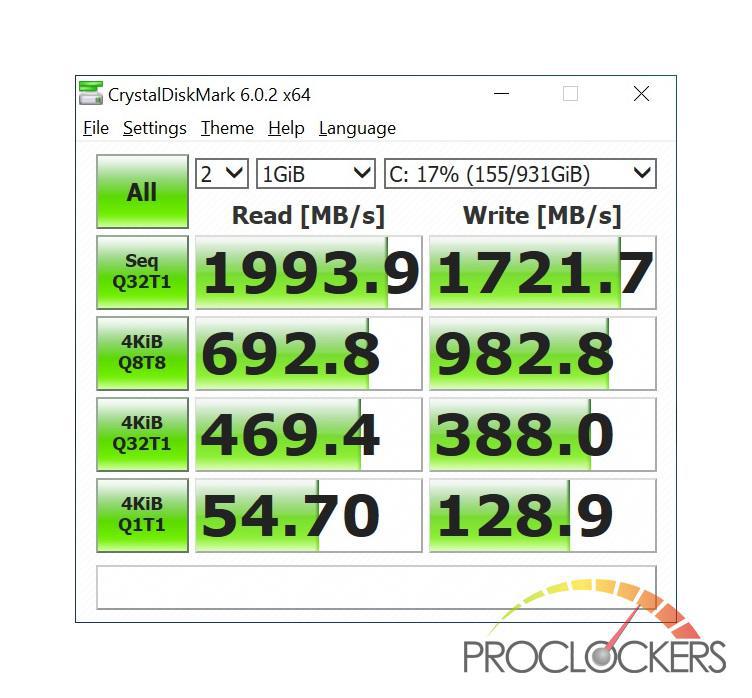
We score pretty much exactly the rated speeds of the Crucial P1 1000GB.
AS SSD
The AS SSD benchmark determines the performance of Solid State Drives (SSD). The tool contains six synthetic and three copy tests.
The synthetic tests determine the sequential and random read and write performance of the SSD. These tests are performed without using the operating system cache. In the Seq test, the program measures how long it takes to read and write a 1 GB file. In the 4K test, read and write performance is determined for randomly selected 4K blocks. The 4K-64 Third test is equivalent to the 4K procedure, except that the read and write operations are distributed to 64 threads. This test should show differences between the IDE operating mode where NCQ is not supported and the AHCI mode for SSDs with Native Command Queuing (NCQ). The additional compression test can measure the performance of the SSD as a function of the compressibility of the data. This is especially important for the controllers that are used to increase the performance and life of the cell compression.
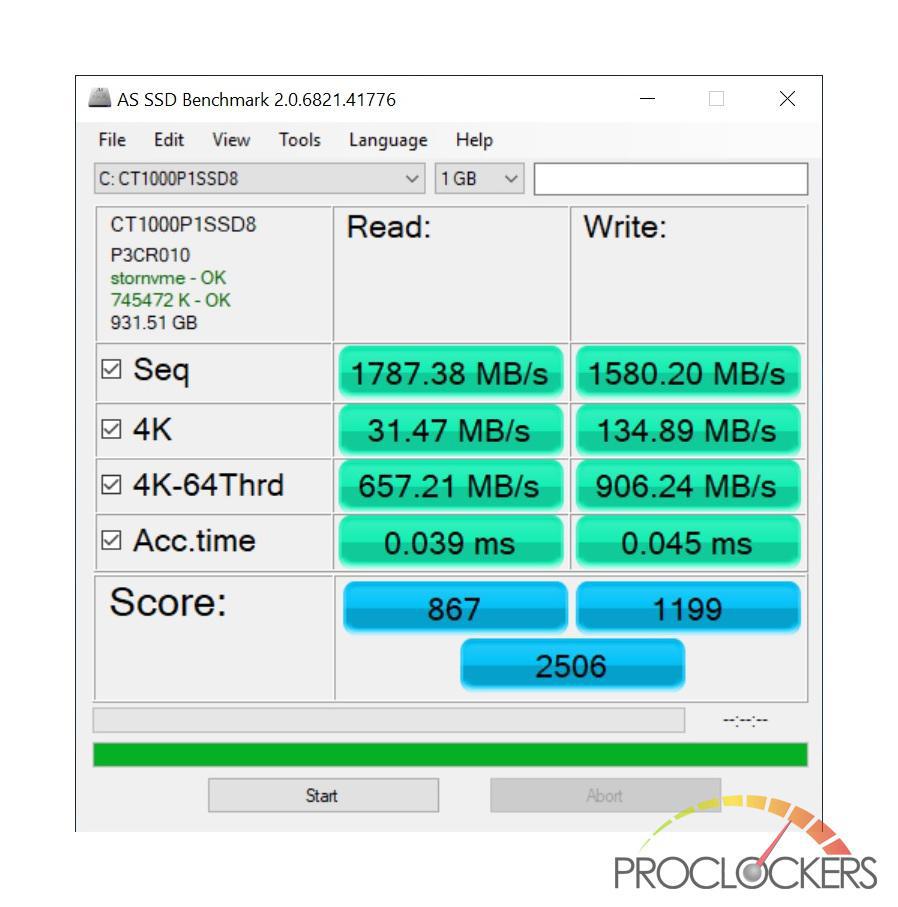
AS SSD is known to score lower than most other benchmarks and the Aorus Pro benchmarks pretty much right where I would expect it to be.
Game Testing
3DMark – Fire Strike
“Fire Strike is a showcase DirectX 11 benchmark designed for today’s high-performance gaming PCs. It is our most ambitious and technical benchmark ever, featuring real-time graphics rendered with detail and complexity far beyond what is found in other benchmarks and games today”
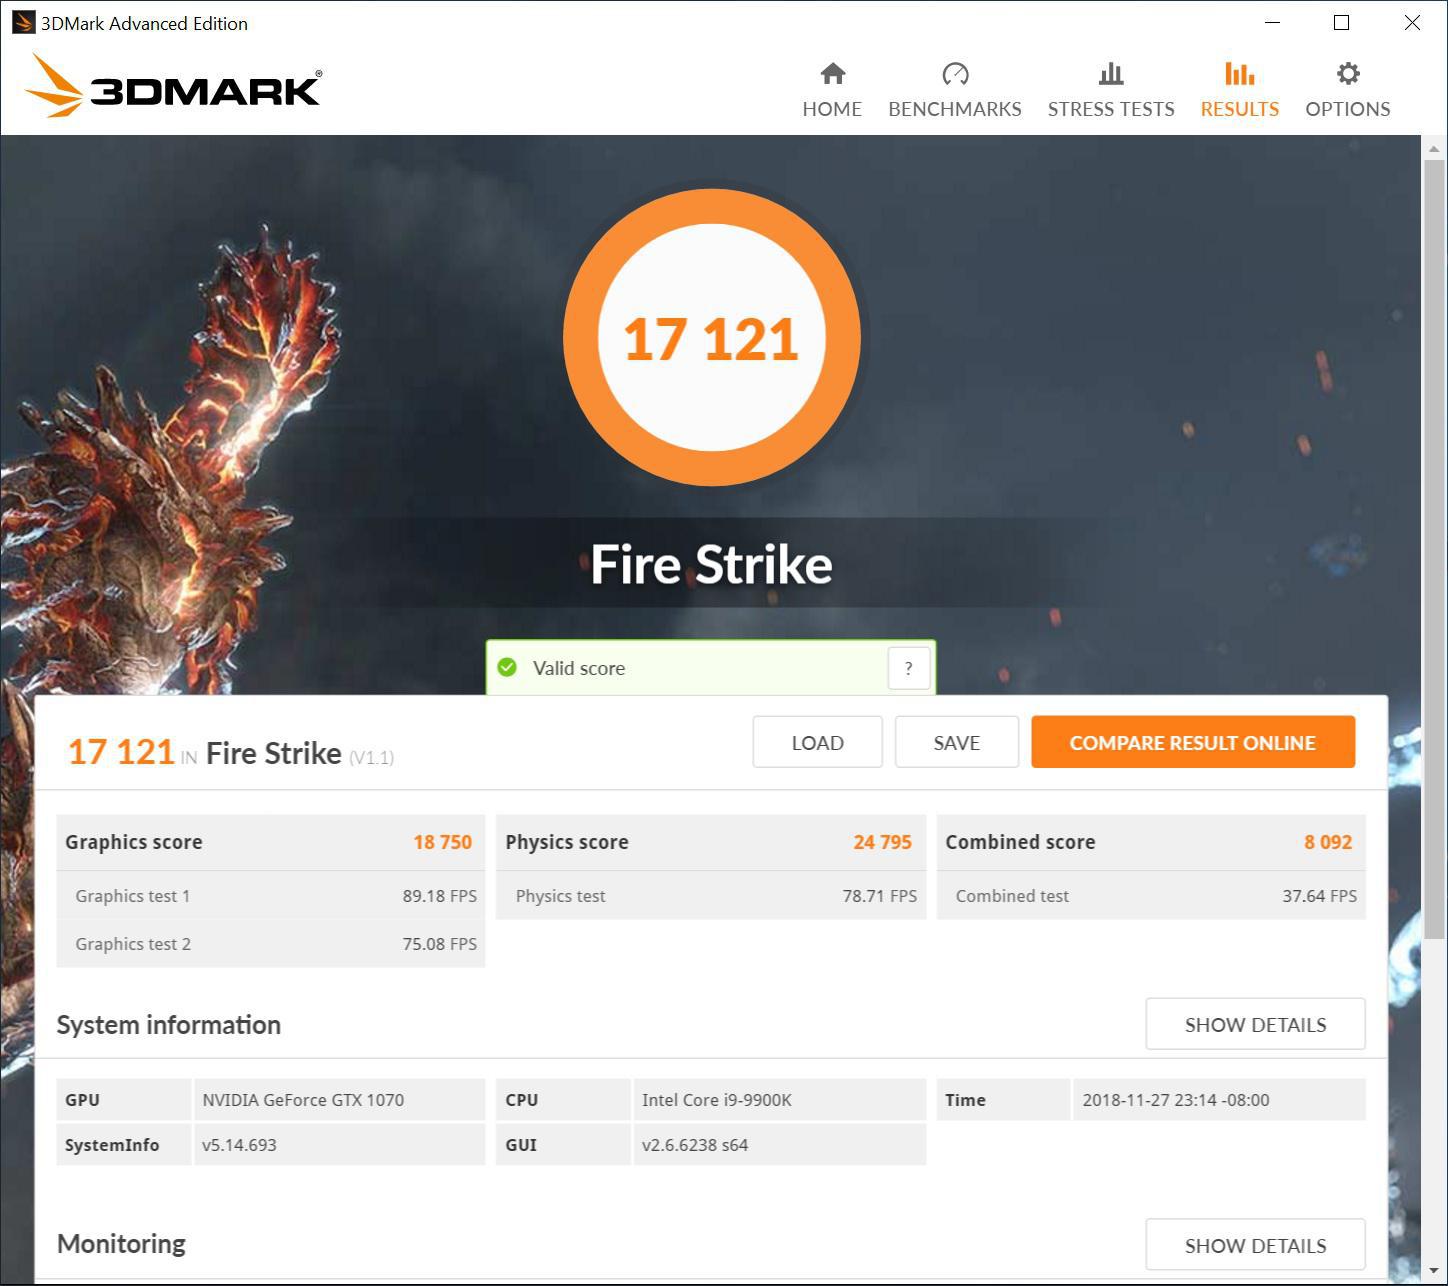
Our setup posts an impressive score of 17121 and would have no problem playing modern day games.
3DMark – Time Spy
“3Dmark Time Spy is a new DirectX 12 benchmark test for Windows 10 gaming PCs. Time Spay is one of the first DirectX 12 apps to be built “the right way” from the ground up to fully realize the performance gains that the new API offers. With DirectX 12 engine, which supports new API features like asynchronous compute, explicit multi-adapter, and multi-threading, Time Spy is the ideal test for benchmarking the latest graphics cards.”
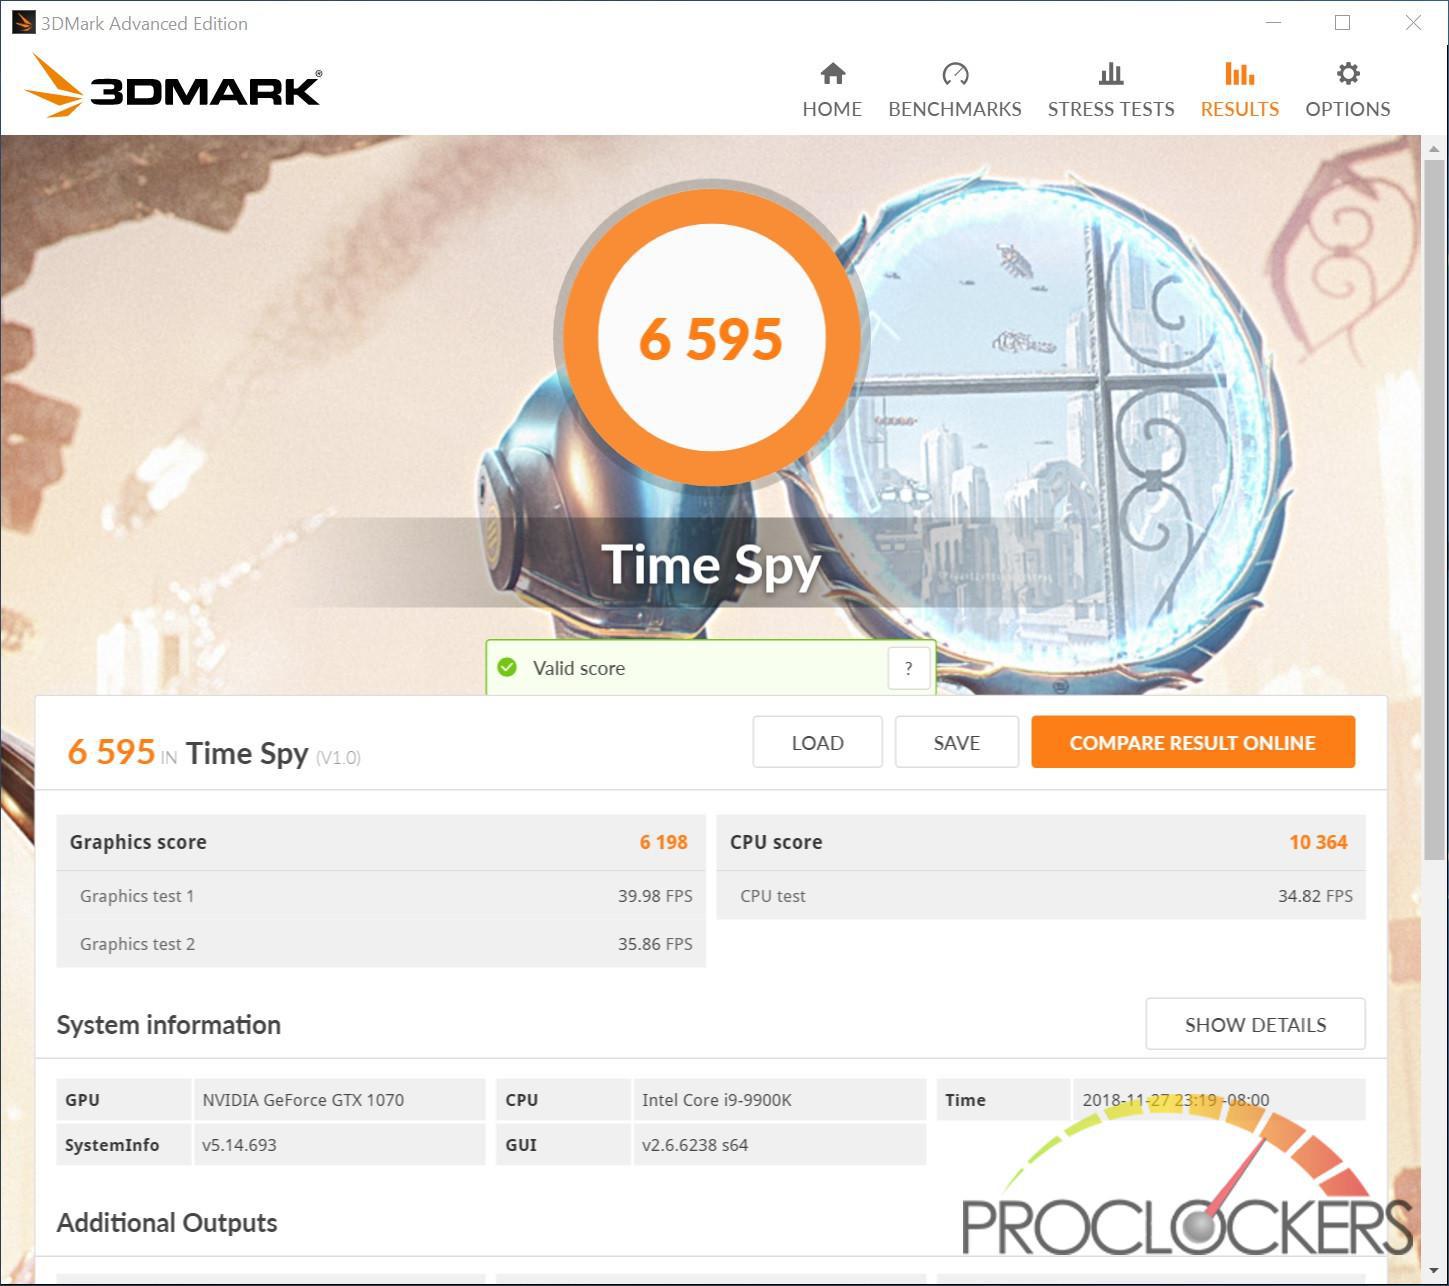
Timespy scores an impressive 6595, which is pretty much where it should be.
Grand Theft Auto: V
“When a young street hustler, a retired bank robber, and a terrifying psychopath find themselves entangled with some of the most frightening and deranged elements of the criminal underworld, the U.S. government and the entertainment industry, they must pull off a series of dangerous heists to survive in a ruthless city in which they can trust nobody, least of all each other.”
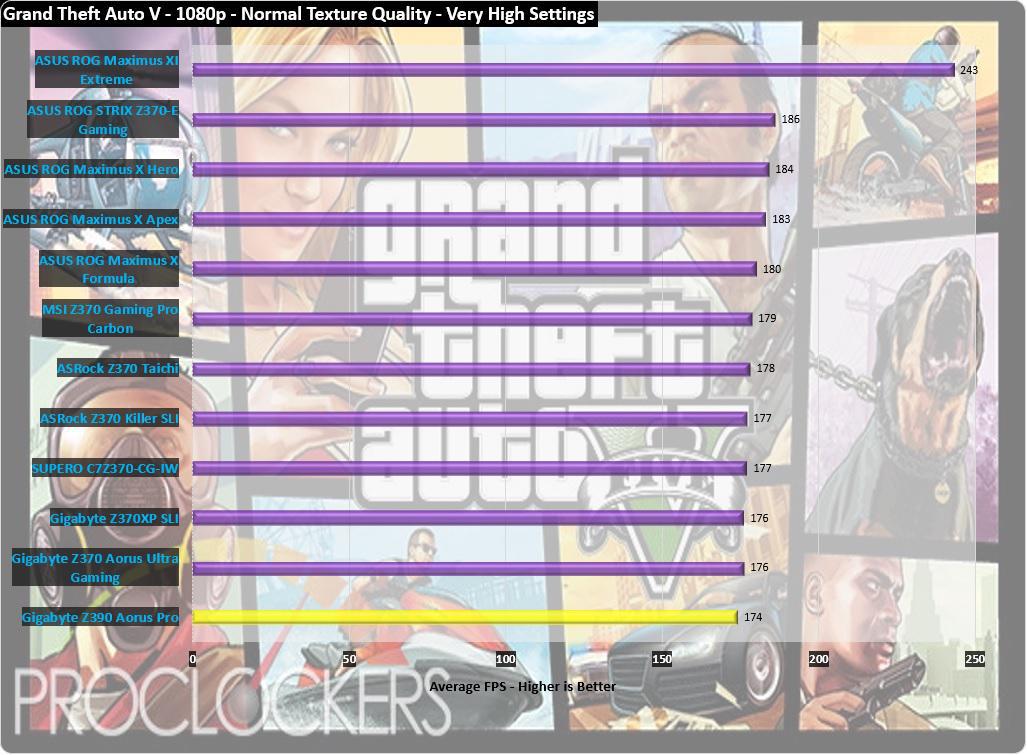
We do come up last in the GTA V benchmark but still have an impress average framerate of 174.
Tomb Raider
“Tomb Raider explores the intense and gritty origin story of Lara Croft and her ascent from a young woman to a hardened survivor. Armed only with raw instincts and the ability to push beyond the limits of human endurance, Lara must fight to unravel the dark history of a forgotten island to escape its relentless hold.”
Tomb Raider was developed by Crystal Dynamics and published by SQUARE ENIX, Eidos Interactive. It features a modified version of the Crystal game engine and was the first game to integrate AMD’s TressFX 2.0, which adds hair, fur and grass physics.
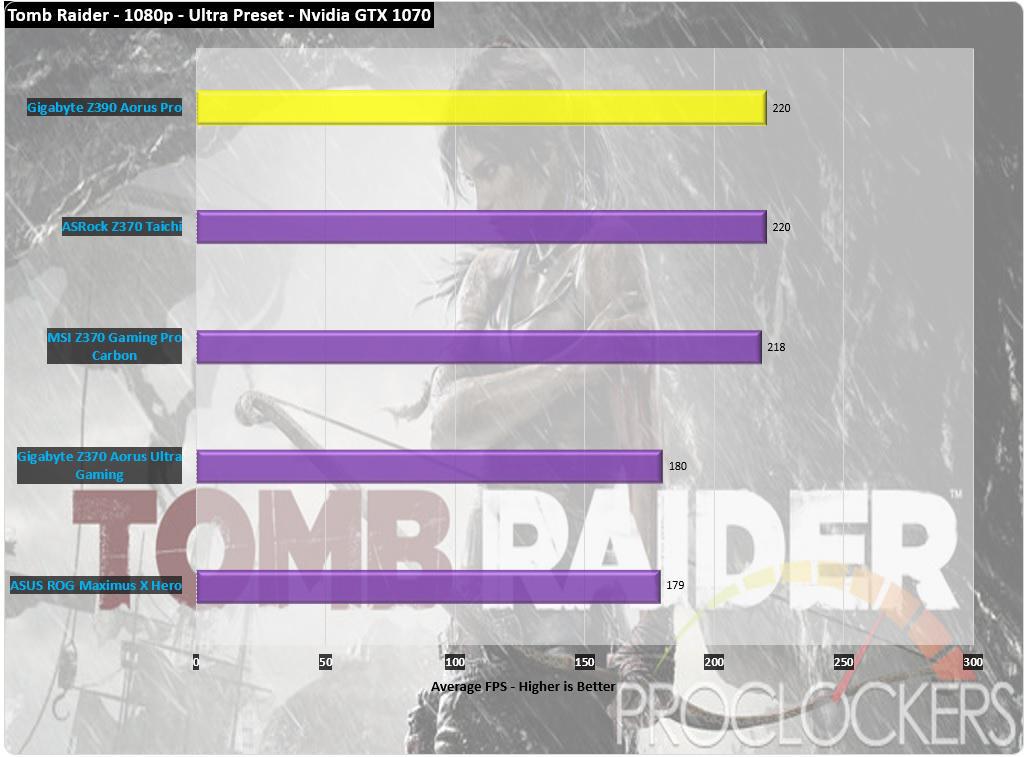
In Tomb Raider, we tie for first place with an average framerate of 220.
Overclocking
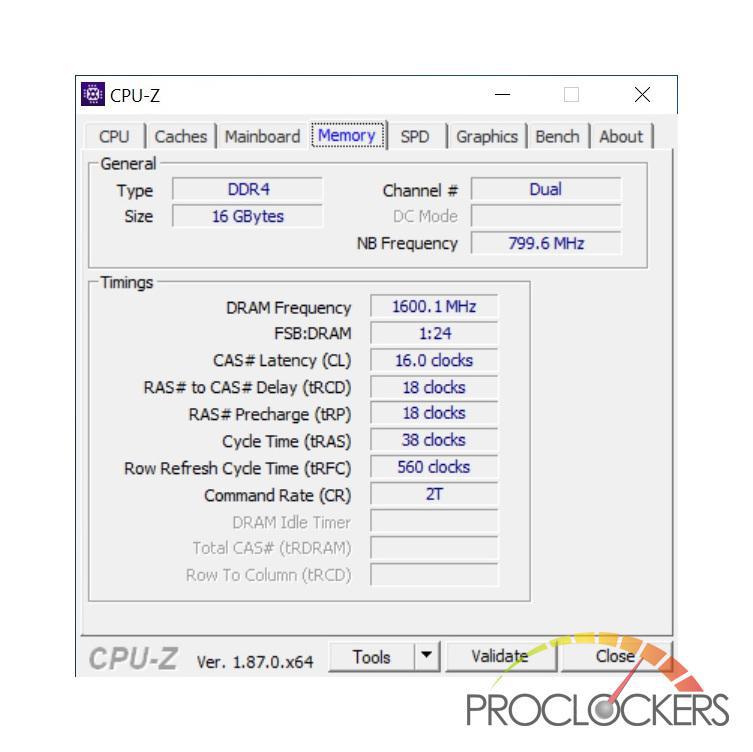
Now that we have completed all our stock testing lets see if you can get 5.0GHz on all the cores as advertised. Below are the stock settings for my 9900K and Team Group Vulcan memory.

I personally haven’t overclocked this 9900K chip yet, so it will be some trial and error to see what voltages are required at what clock. The first thing I tried was the included EasyTune software which has AutoTune that will automatically overclock your system. Once I ran AutoTune, it did some diagnostics, rebooted my machine, once I got into Windows, I immediately hit a BSOD. It looks like my 9900K didn’t like AutoTune to much so I’ll go ahead and manually set my own clocks and voltages.
I did manage to hit a stable clock of 5.0GHz on all cores with a vCore of 1.355v and overclocked my memory from 3200MHz to 3600MHz. I did try and go for 5.1GHz but could not get it stable with keeping acceptable temperatures below 90c.

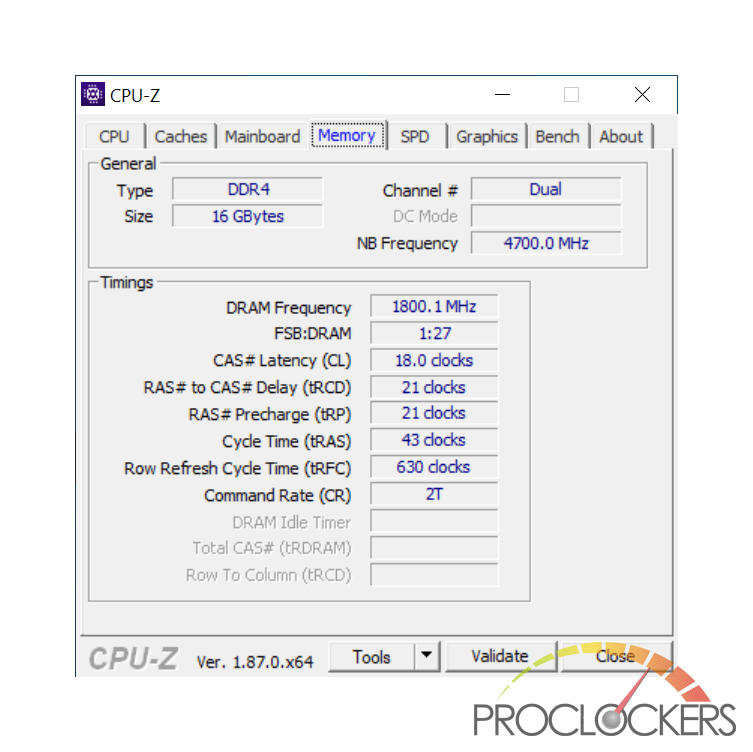
Now that we have a stable system let’s run some more benchmarks and see how much more performance, we were able to achieve.
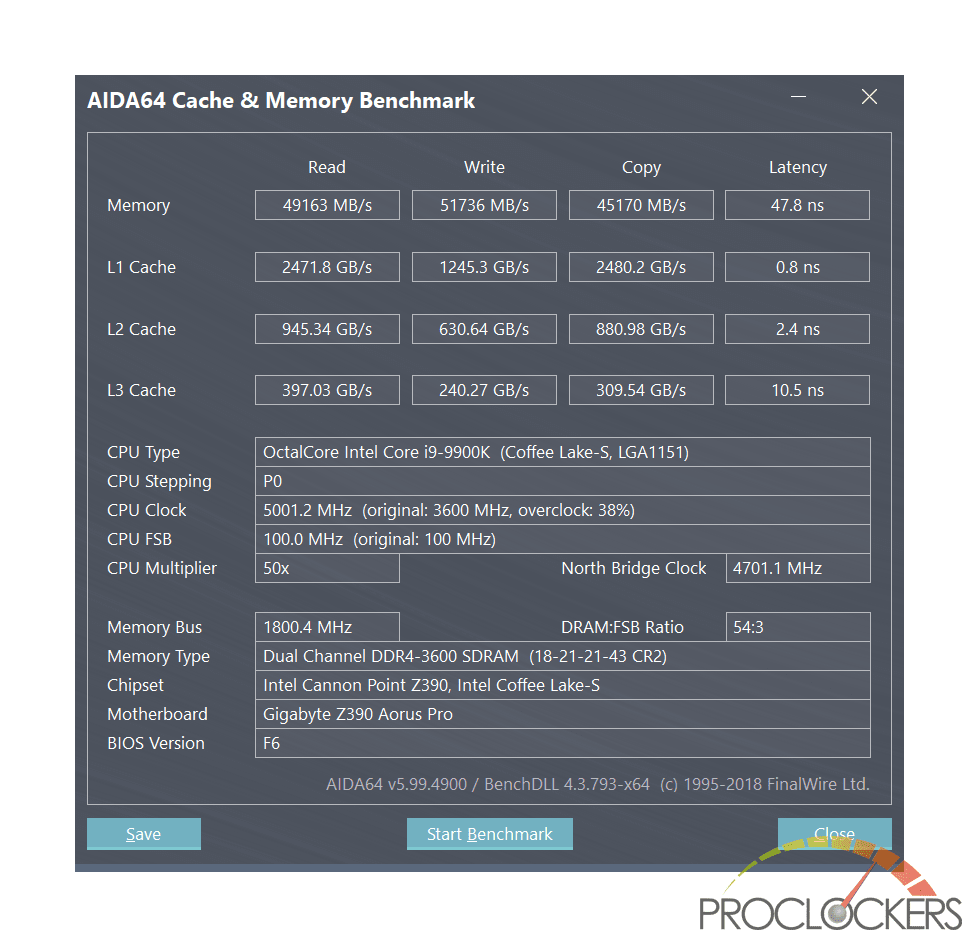
In AIDA64 we see an increase between 6-12% in write/read/copy performance with a slightly higher latency of 47.8ns.
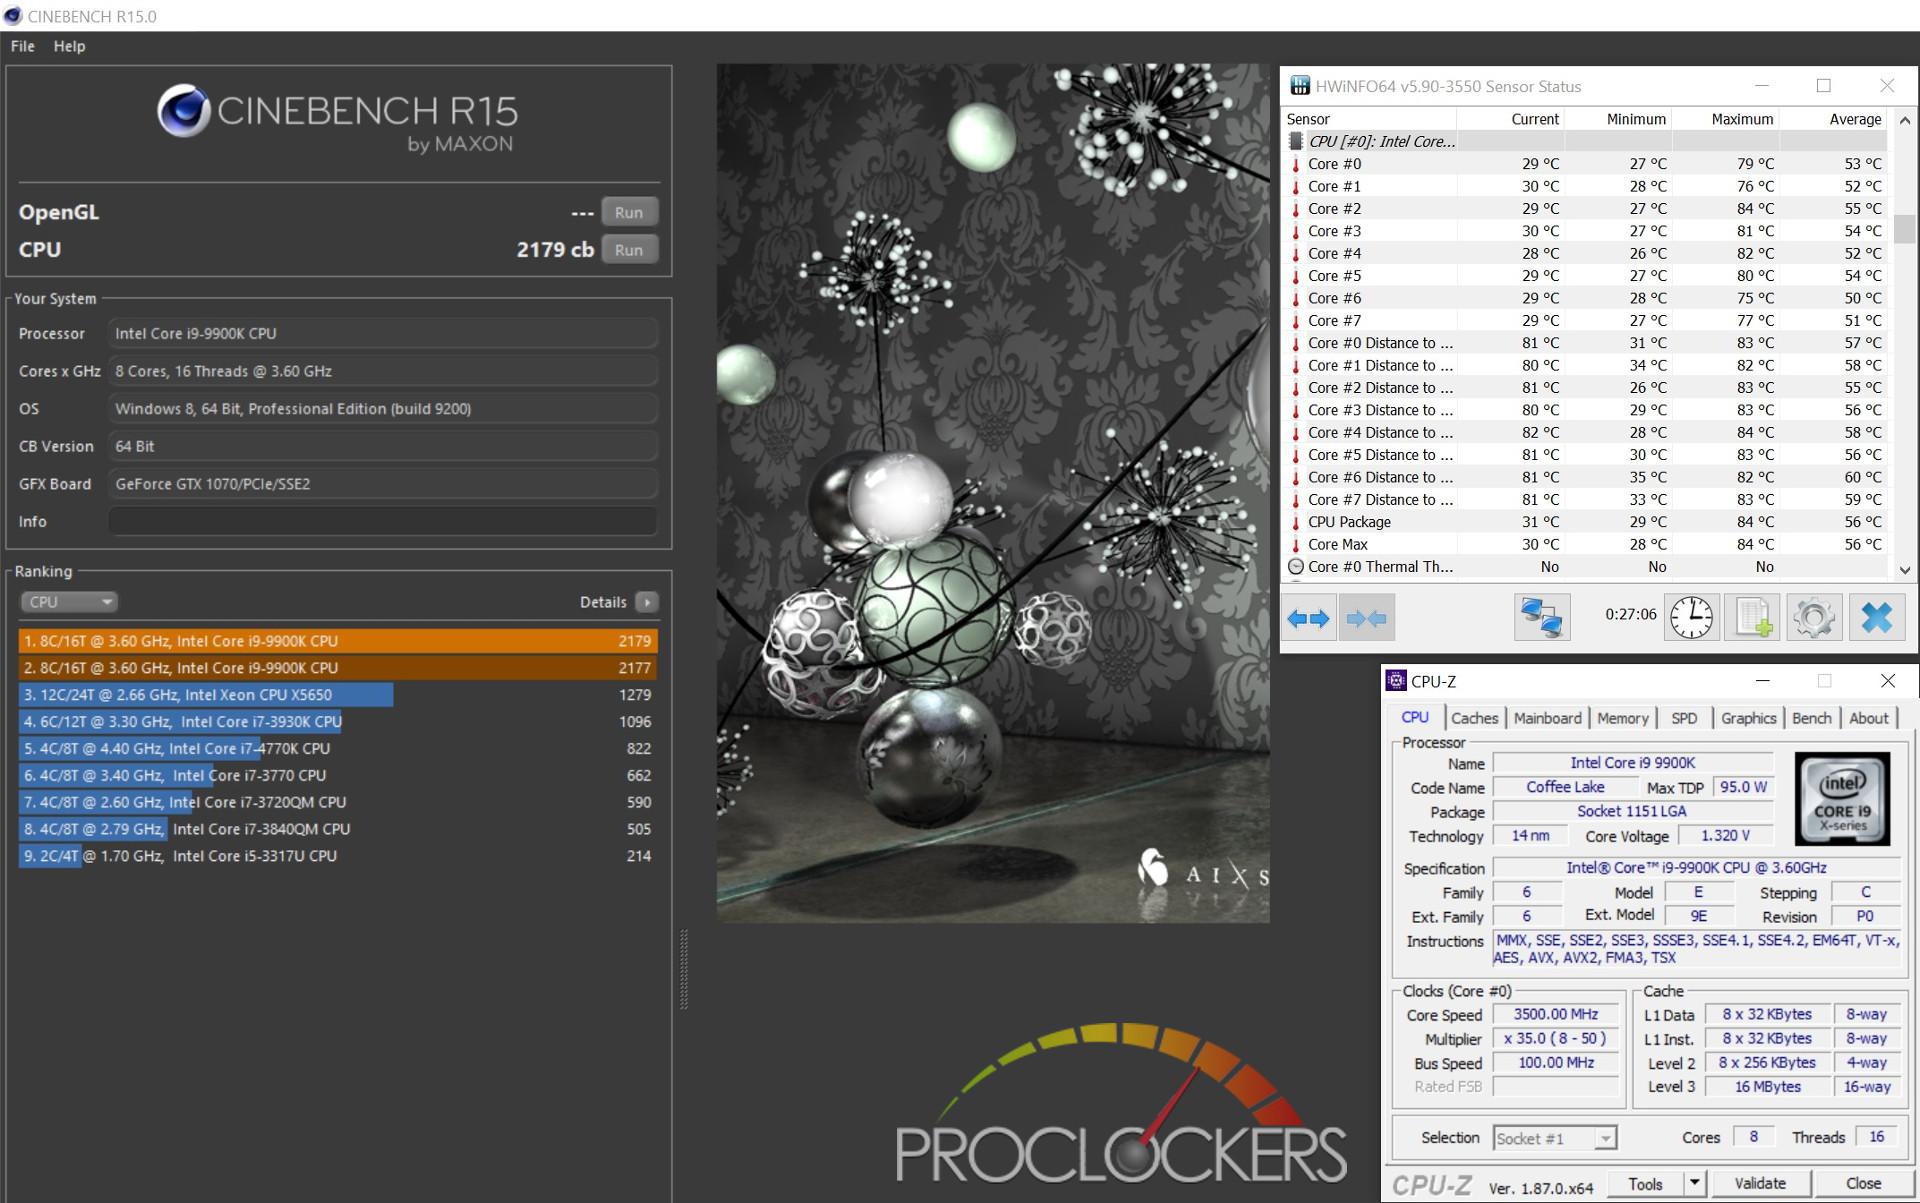
In Cinebench, we score an impressive 2179 which is 104 points above our stock score.
In Time Spy, our score was only slightly higher but we did achieve a 397-point increase in CPU score.

In Super PI we were able to beat our previous score by 5 seconds.

Final Thoughts & Conclusion
Gigabyte has brought their Aorus brand over to the new Z390 chipset and upgraded its power delivery system, which helps you get the most of Intel’s 9th generation of chips. Some of the features I really love about the Aorus Pro is the included thermal guards on both M.2 ports, the newly styled PCIe slot armor, and its upgraded 13 phase power delivery system.
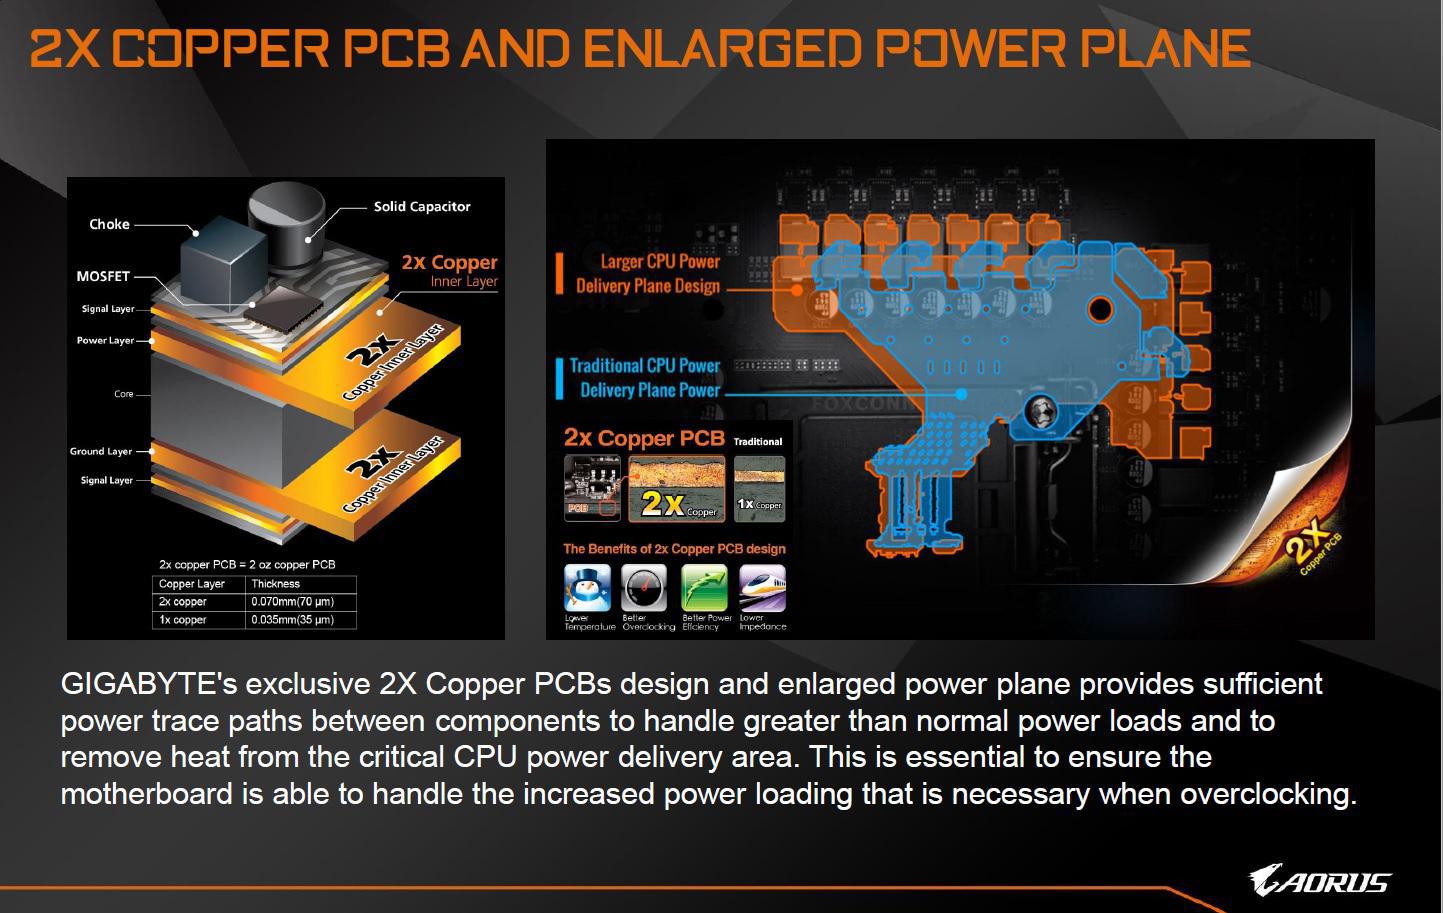
With the new Intel 8 core processors requiring exceptional power delivery, the Aorus Pro has you covered with it’s upgraded 12 + 1 digital CPU power design and optimized CPU power delivery plane with 2x copper PCB. Gigabyte has advertised the Z390 boards as able to get 5GHz across all cores and this held true with my 9900k. For some reason, AutoTune didn’t like our 9900K but It was fairly easy to manually tune my processer and achieve a stable 5GHz across all cores and maintaining an acceptable temperature during stress testing. Not only did the Aorus Pro do a great job at overclocking it also performed extremely well in our benchmark tests and even earned some top scores against other high-end motherboards. Its only hiccup was in some of our memory tests which posted lower than normal scores. Even with this anomaly, it seemed to have little to no impact in our gaming benchmarks.
Overall the Z390 Aorus Pro is a solid board and has enabled me to get the most out of my 9900K. Not only did it perform well, but it also looked great on my test bench. This board is an exceptional mid-range board with the performance that you would expect from Aorus branded boards.
Great job Gigabyte!
If you enjoyed this Gigabyte Motherboard review, check out some of our other Aorus Motherboard reviews:
- GIGABYTE AORUS AX370 GAMING AMD ATX Motherboard Review
- Gigabyte X299 AORUS MASTER Motherboard Review
- Gigabyte B450 Aorus Pro WiFi AM4 Motherboard Review
- Gigabyte X570 AORUS Pro WIFI Motherboard Review
What did you think of this review? Leave a comment below.


The 25 Best Anime Cats, Ranked
What are the best anime cats? Cats are something you either love with every fiber of your being or vehemently...


The 25 Best Anime Teachers, Ranked
Who are the best anime teachers? With high school being such a prevalent setting in anime, it makes sense that...


The 25 Best Orange Hair Anime Girls, Ranked
Who are the best orange hair anime girls? Orange hair is interesting in anime because it can either be a...