
Hardware
Li-Heat GPU Vertical Mounting Bracket Review
Introduction
Video card manufacturers have been dressing up their offerings for a long time, but showing off that aesthetical hard work has only recently caught the eye of mainstream builders. A big part of that has been the more recent availability of quality, flexible PCIe risers, of which Li-Heat is also a market leader. While many recent cases have started coming with a place to vertical mount a GPU, there are a few common problems with them. One of the biggest deal-breakers is being too close to the side panel or glass cover. It doesn’t matter how great your card looks if it’s always screaming at you for some fresh air. The next issue is a lack of adjustability or accommodation for oversized cards. Most of the recent cards are landing somewhere between two and three slots. Li-Heat fixes all of that in one clean sweep with the new high-intensity GPU Vertical Mounting bracket, and we’re going to see just how it stacks up to the rest!
Pro Clockers would like to thank Li-Heat Industry Co. Ltd. For sending this new kit over for us to check out!
Features
- Compatible with most ATX and larger cases that have at least 7 PCI slots.
- Strong 3-point mounting for sag-free support of large cards.
- Adjustable positioning with support for single, double or triple-slot GPU’s.
- Included flexible PCIe 3.0 x16 riser. (PCIe 4.0 certified riser coming soon!)
- PCIe specified 35W electrical capacity of riser for full performance with no worry.
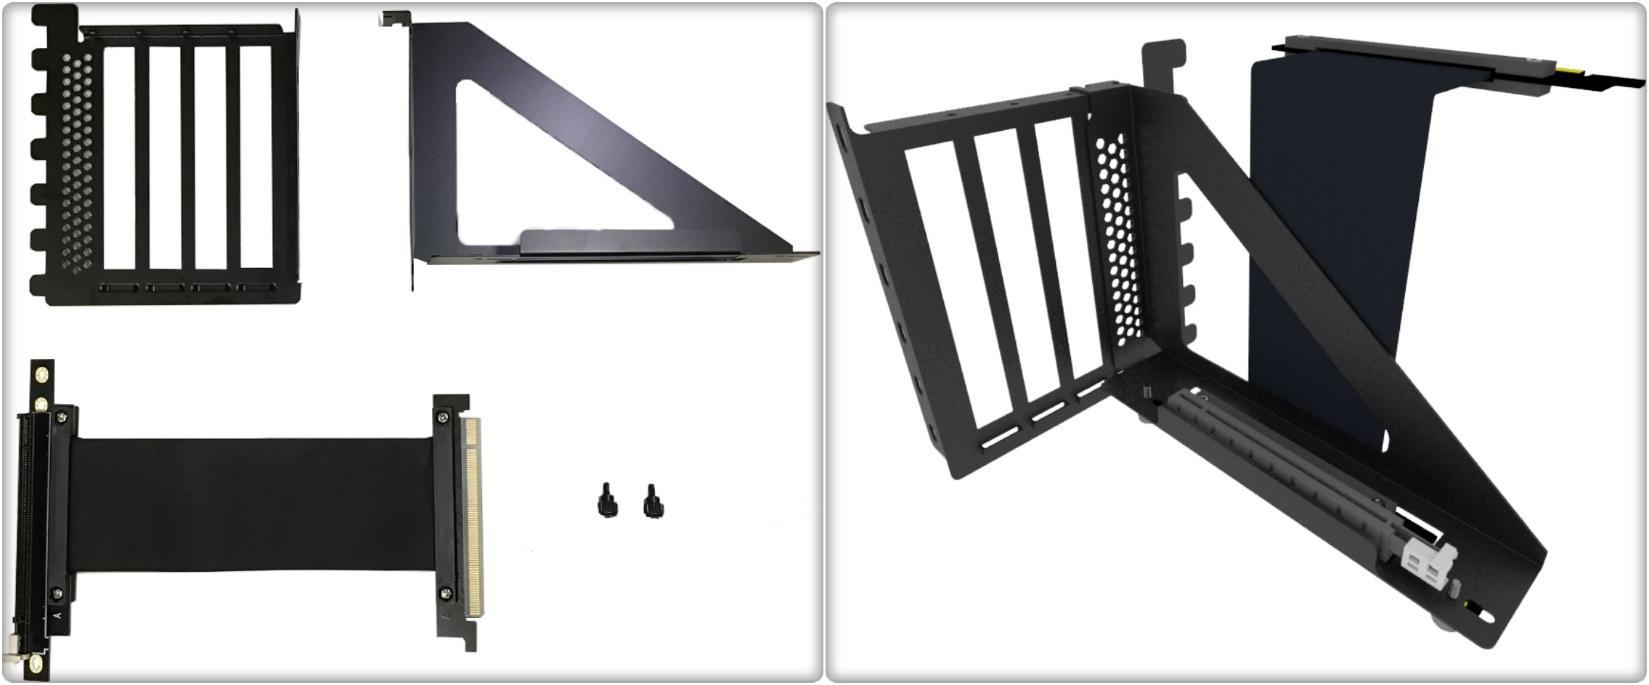
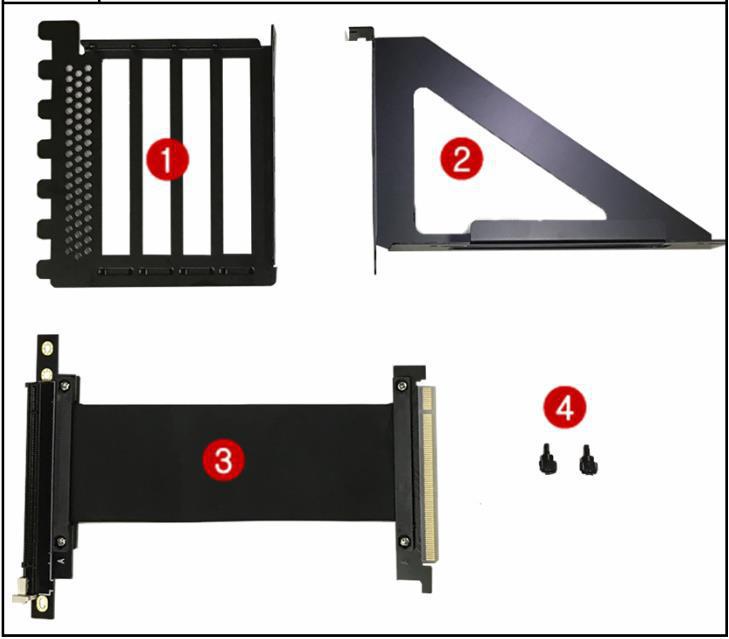
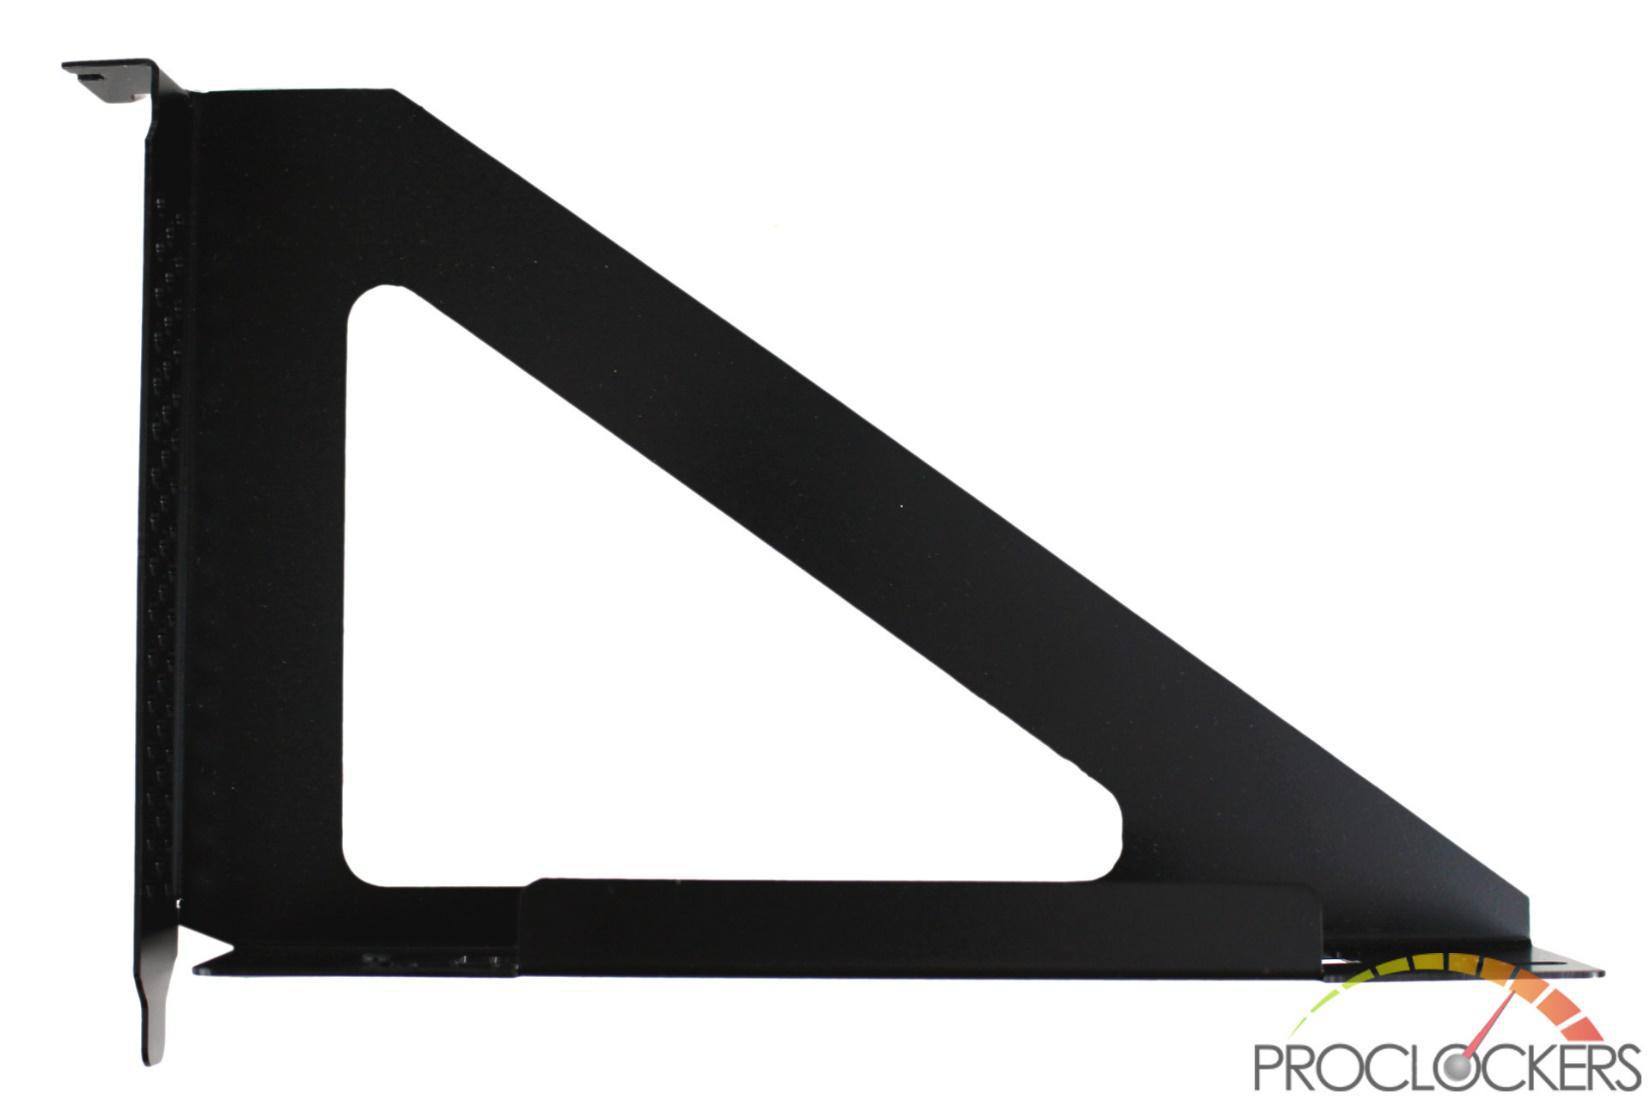
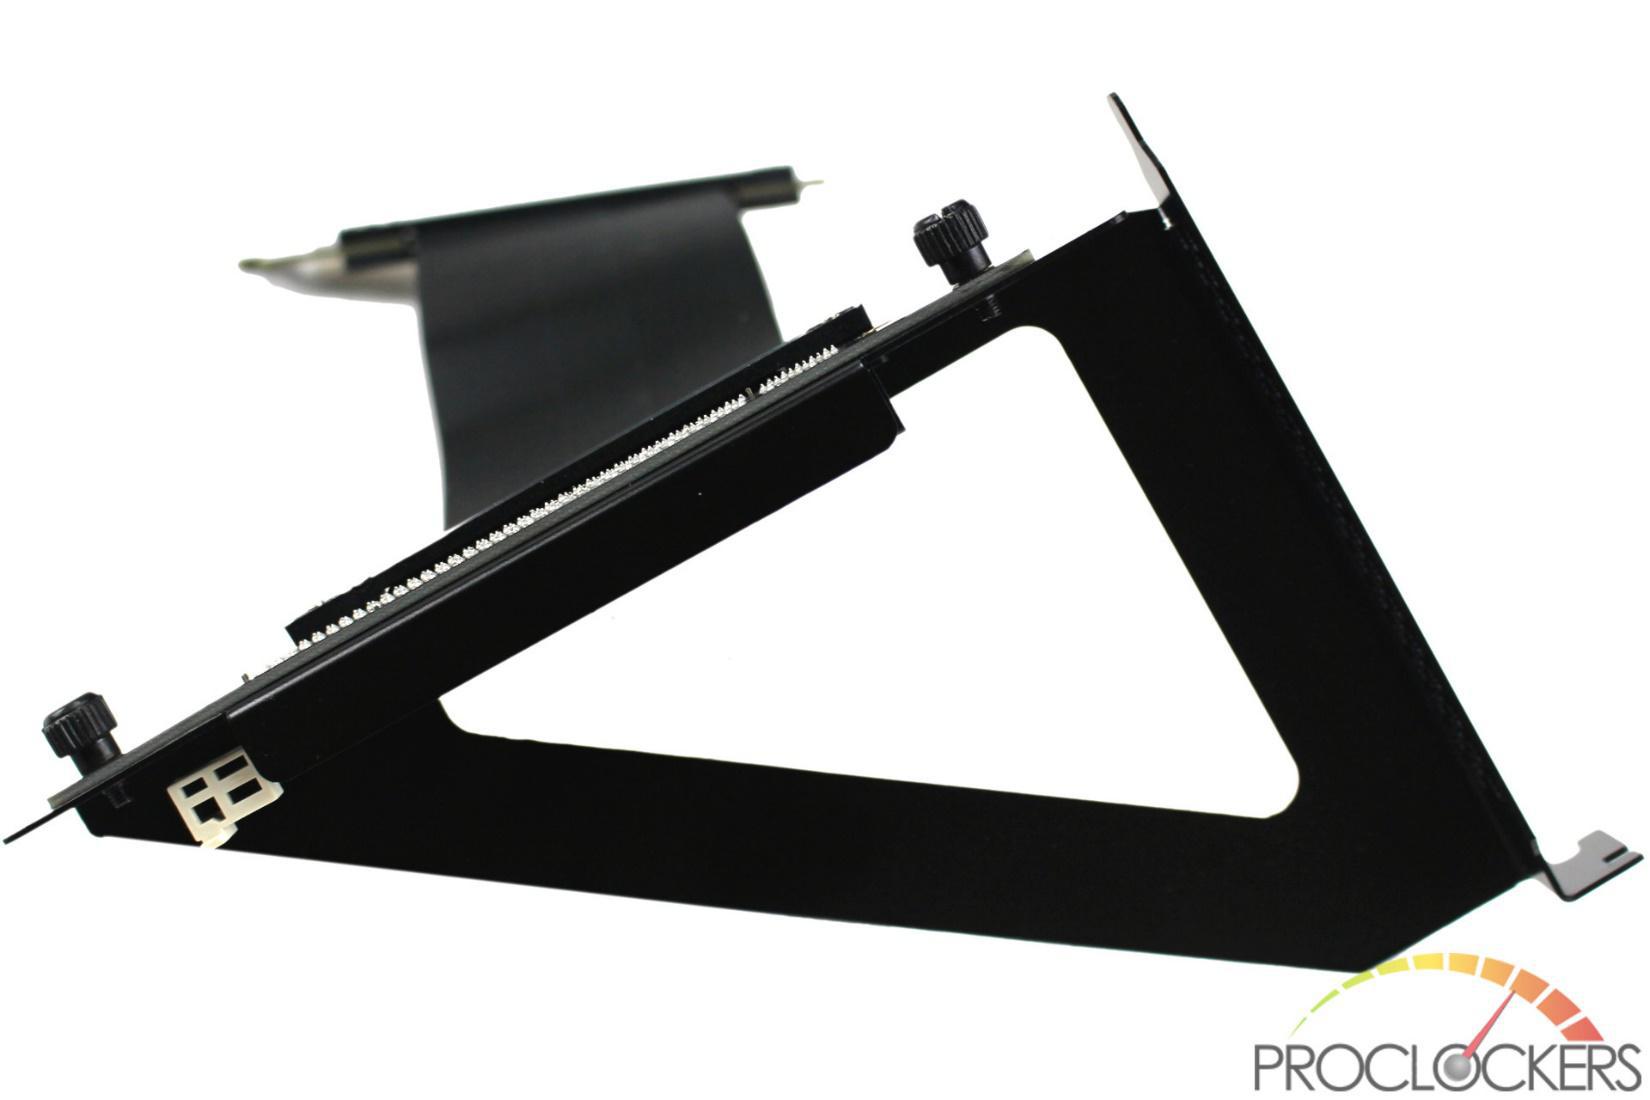
1 – Rear mounting bracket.
2 – GPU support bracket
3 – PCIe 3.0 X16 flexible riser
4 – Riser mounting thumbscrews
Packaging & A Closer Look
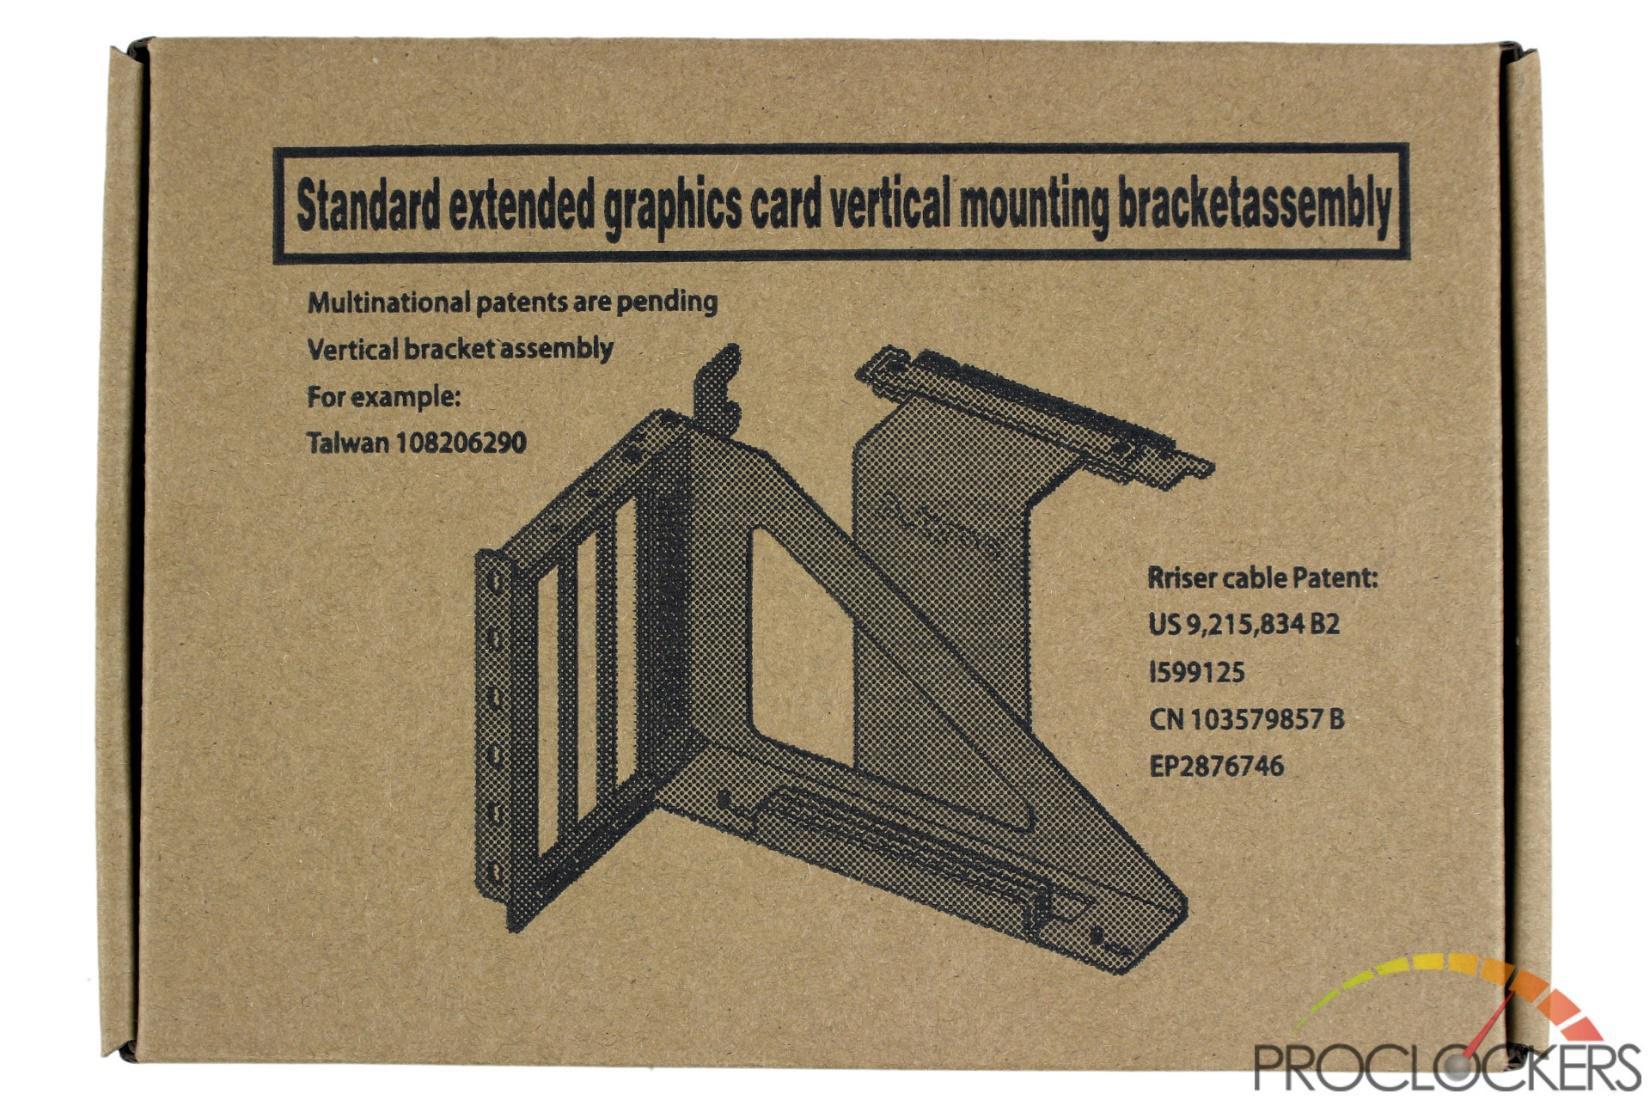
Li-Heat’s vertical mounting kit comes in a rather small cardboard box with a picture of the unit inside.
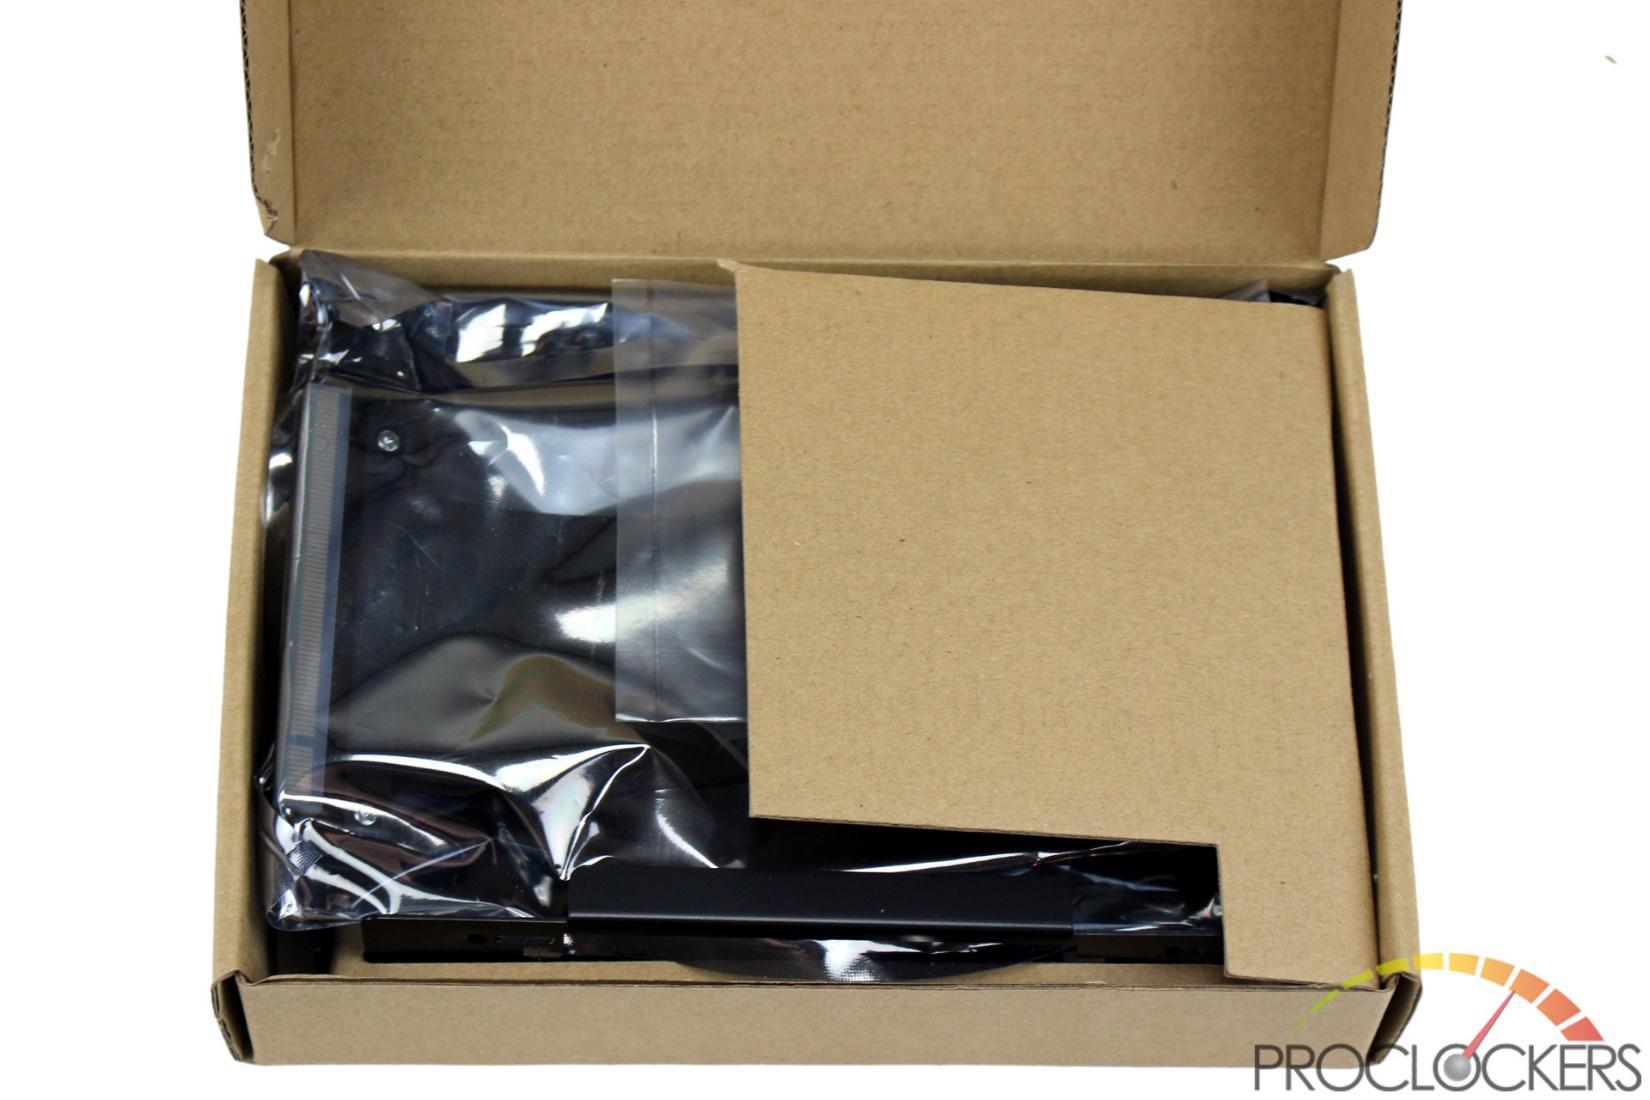
The first thing you are greeted with when opening the box is the PCIe riser in an ESD safe bag.
The bracket pieces are disassembled and cradled in cardboard in the bottom of the box.
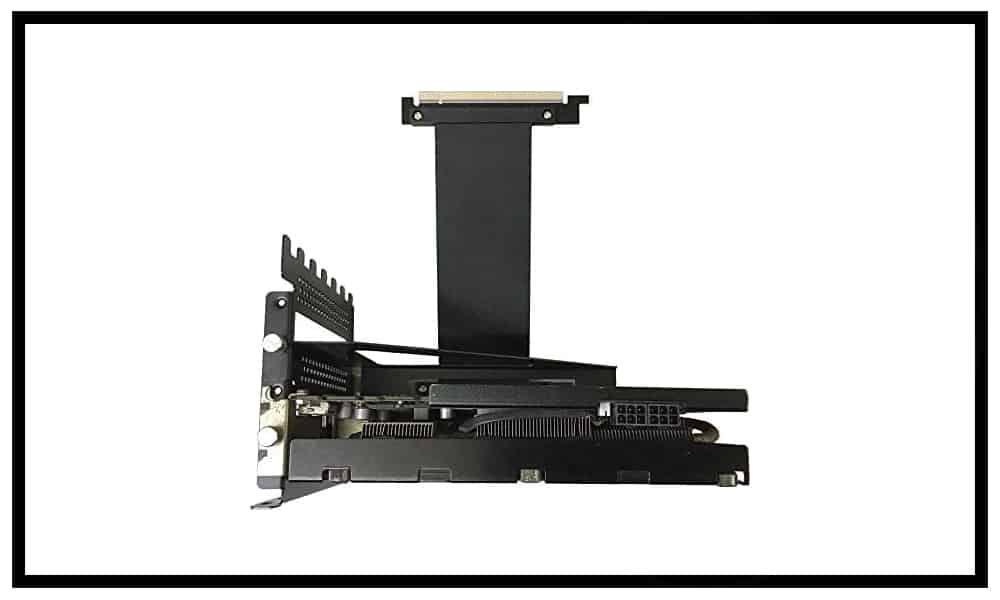
The kit consists of two brackets plus the riser.
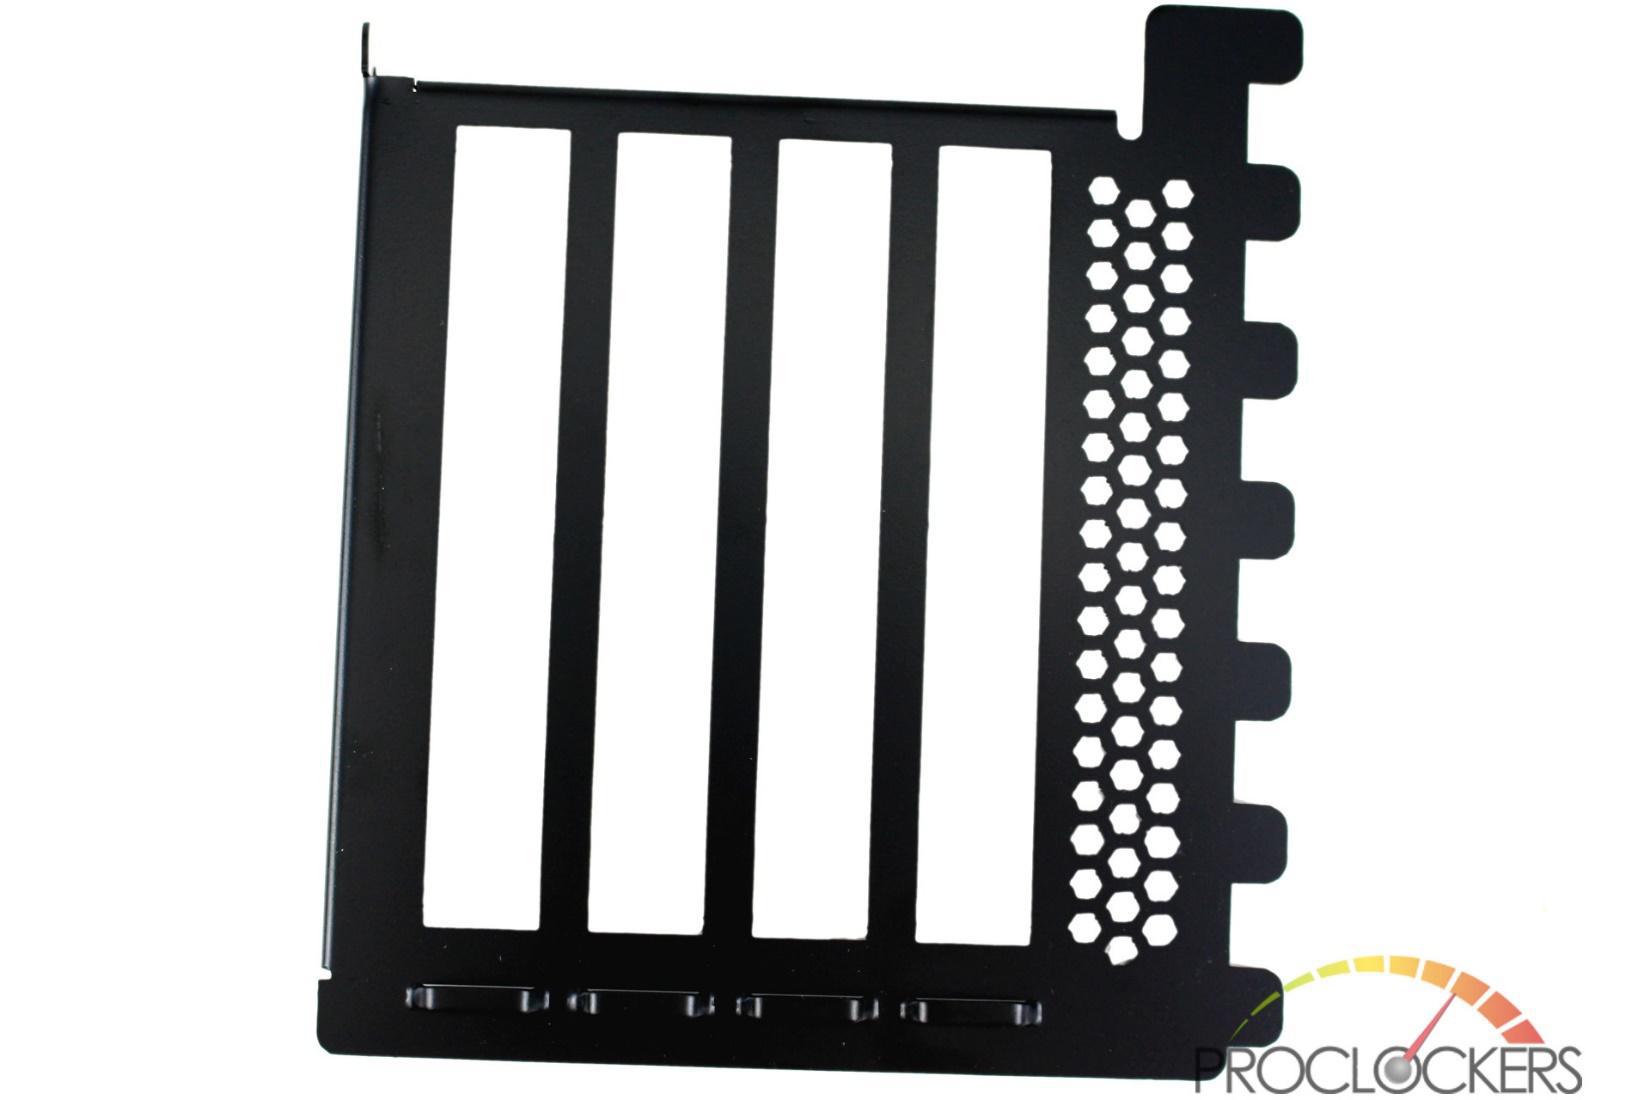
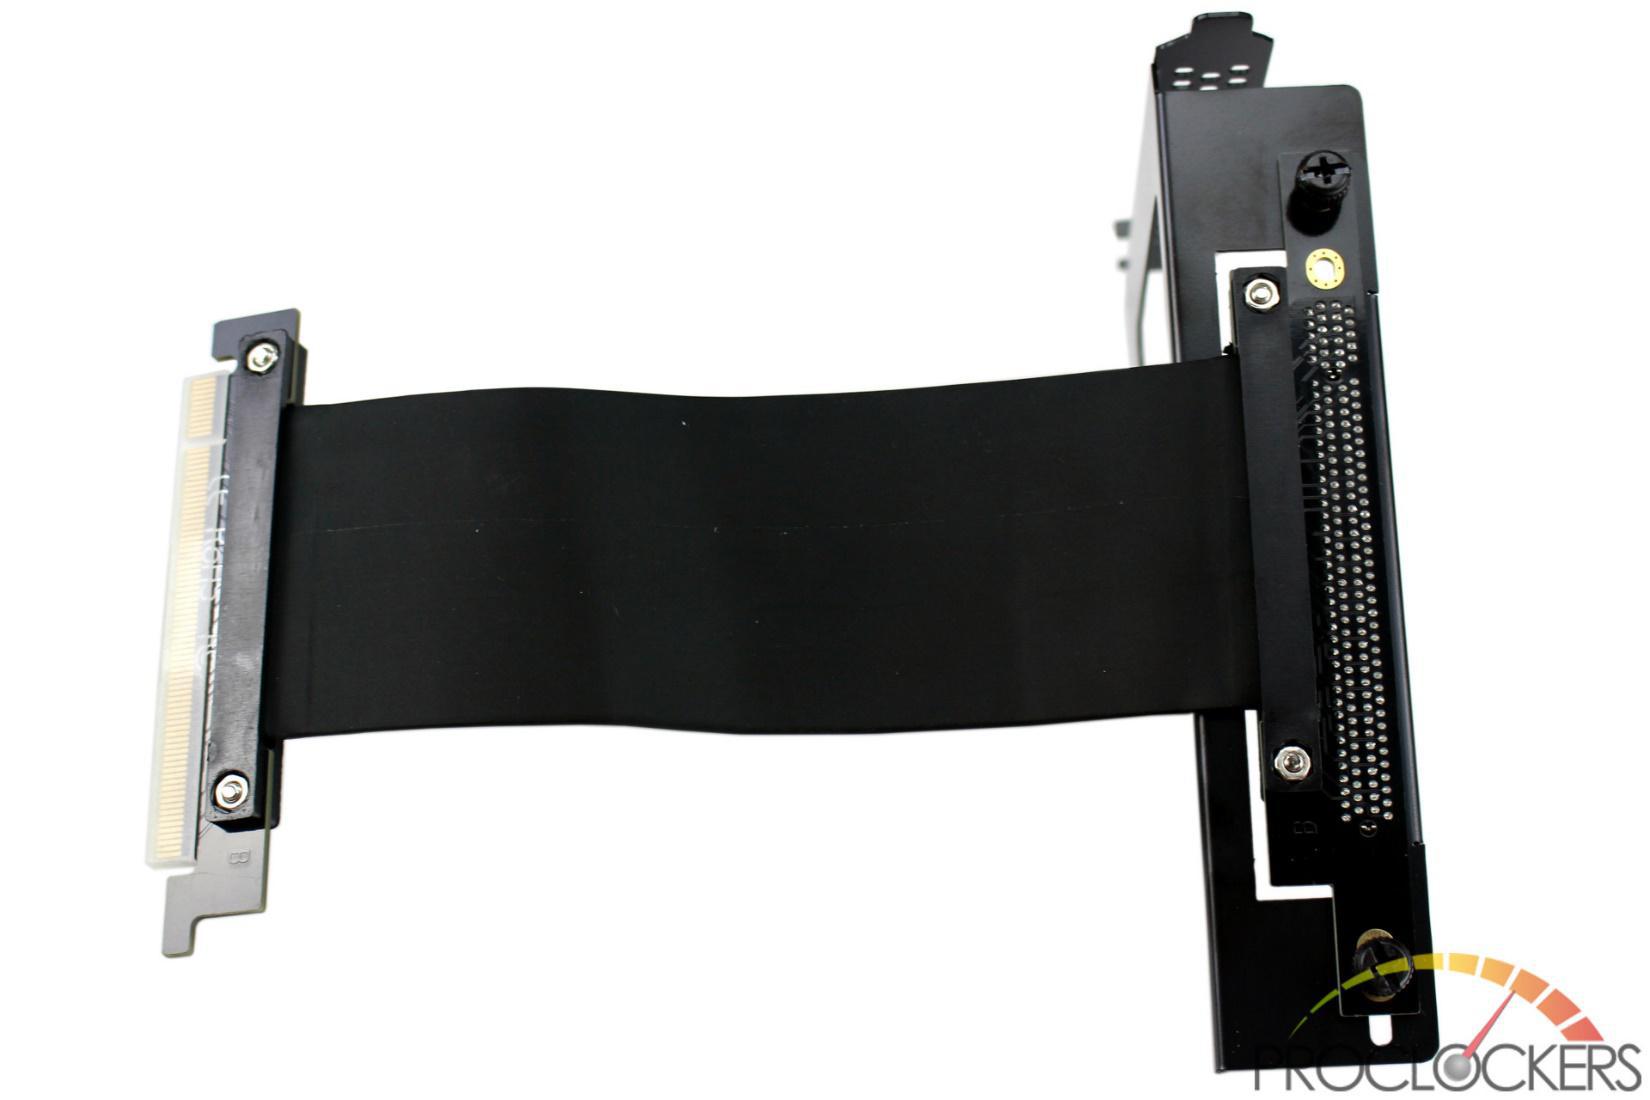
The first piece is what attaches to your case. The ‘fingers’ on the right support it from the motherboard tray side. It offers four normal ‘slots’ to mount everything vertically.
The second piece takes up one of those slots and holds the PCIe riser as well as most of the weight of the card.
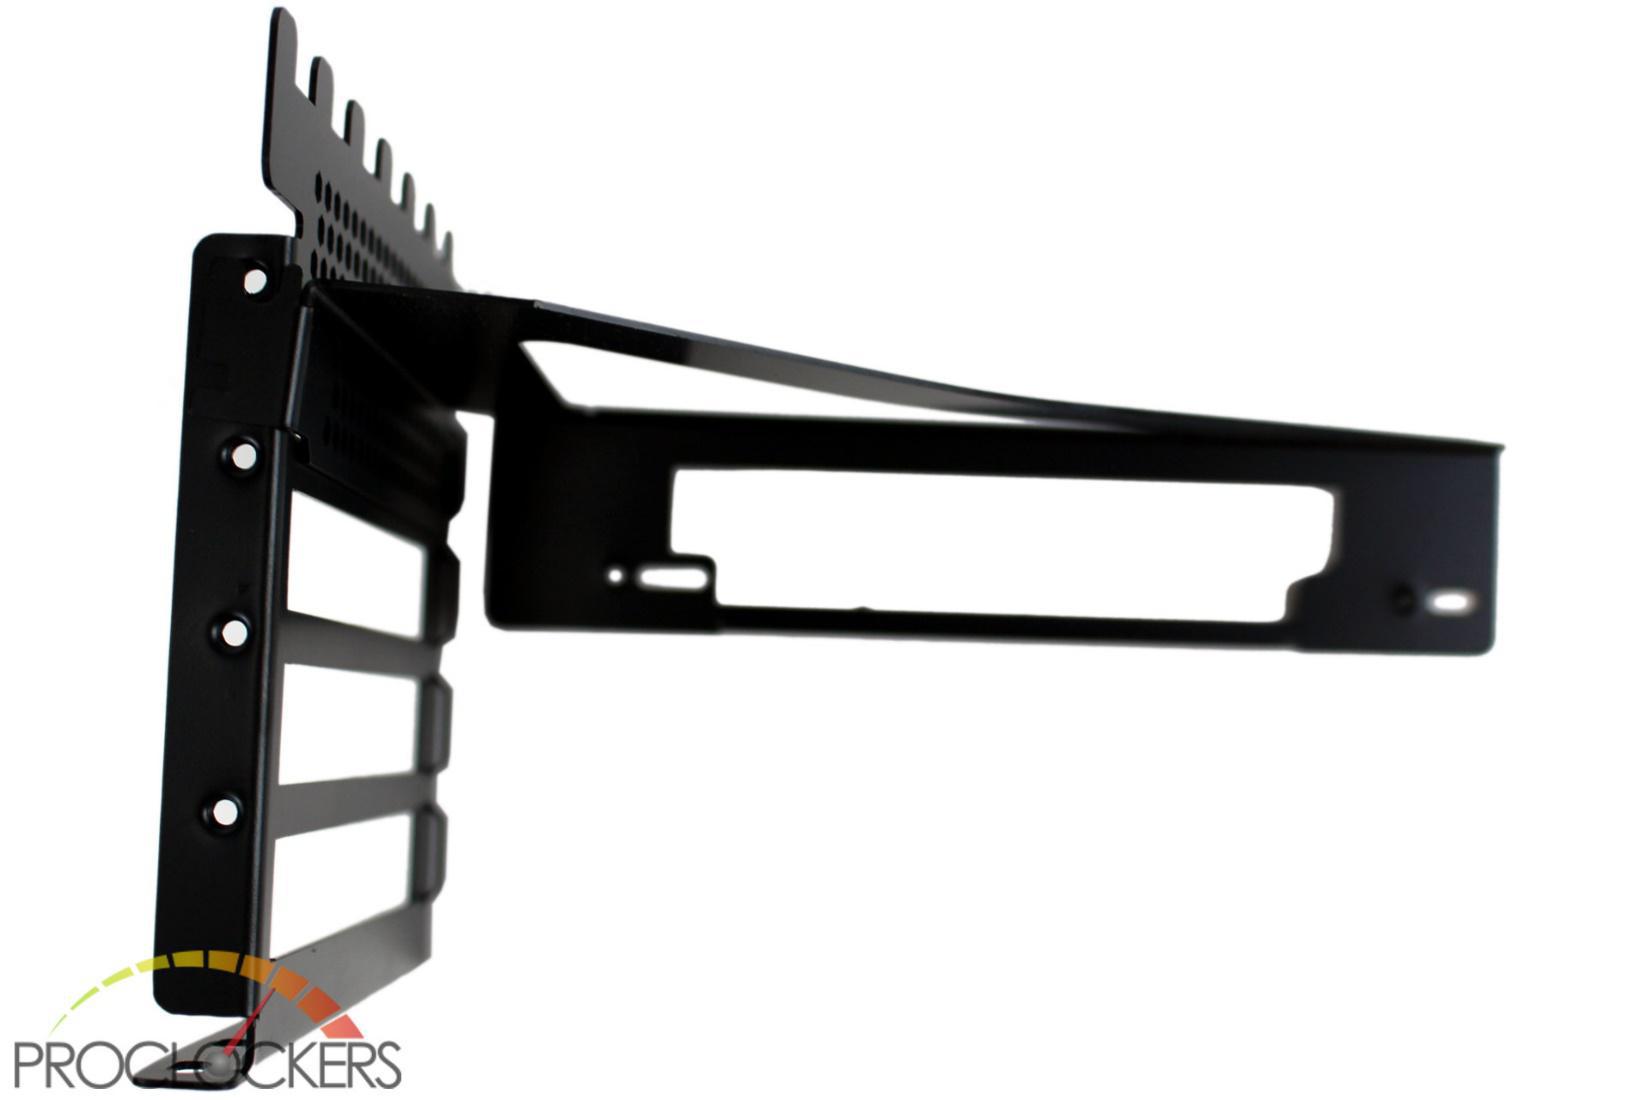
When joined together, you have up to three slots available for your GPU.
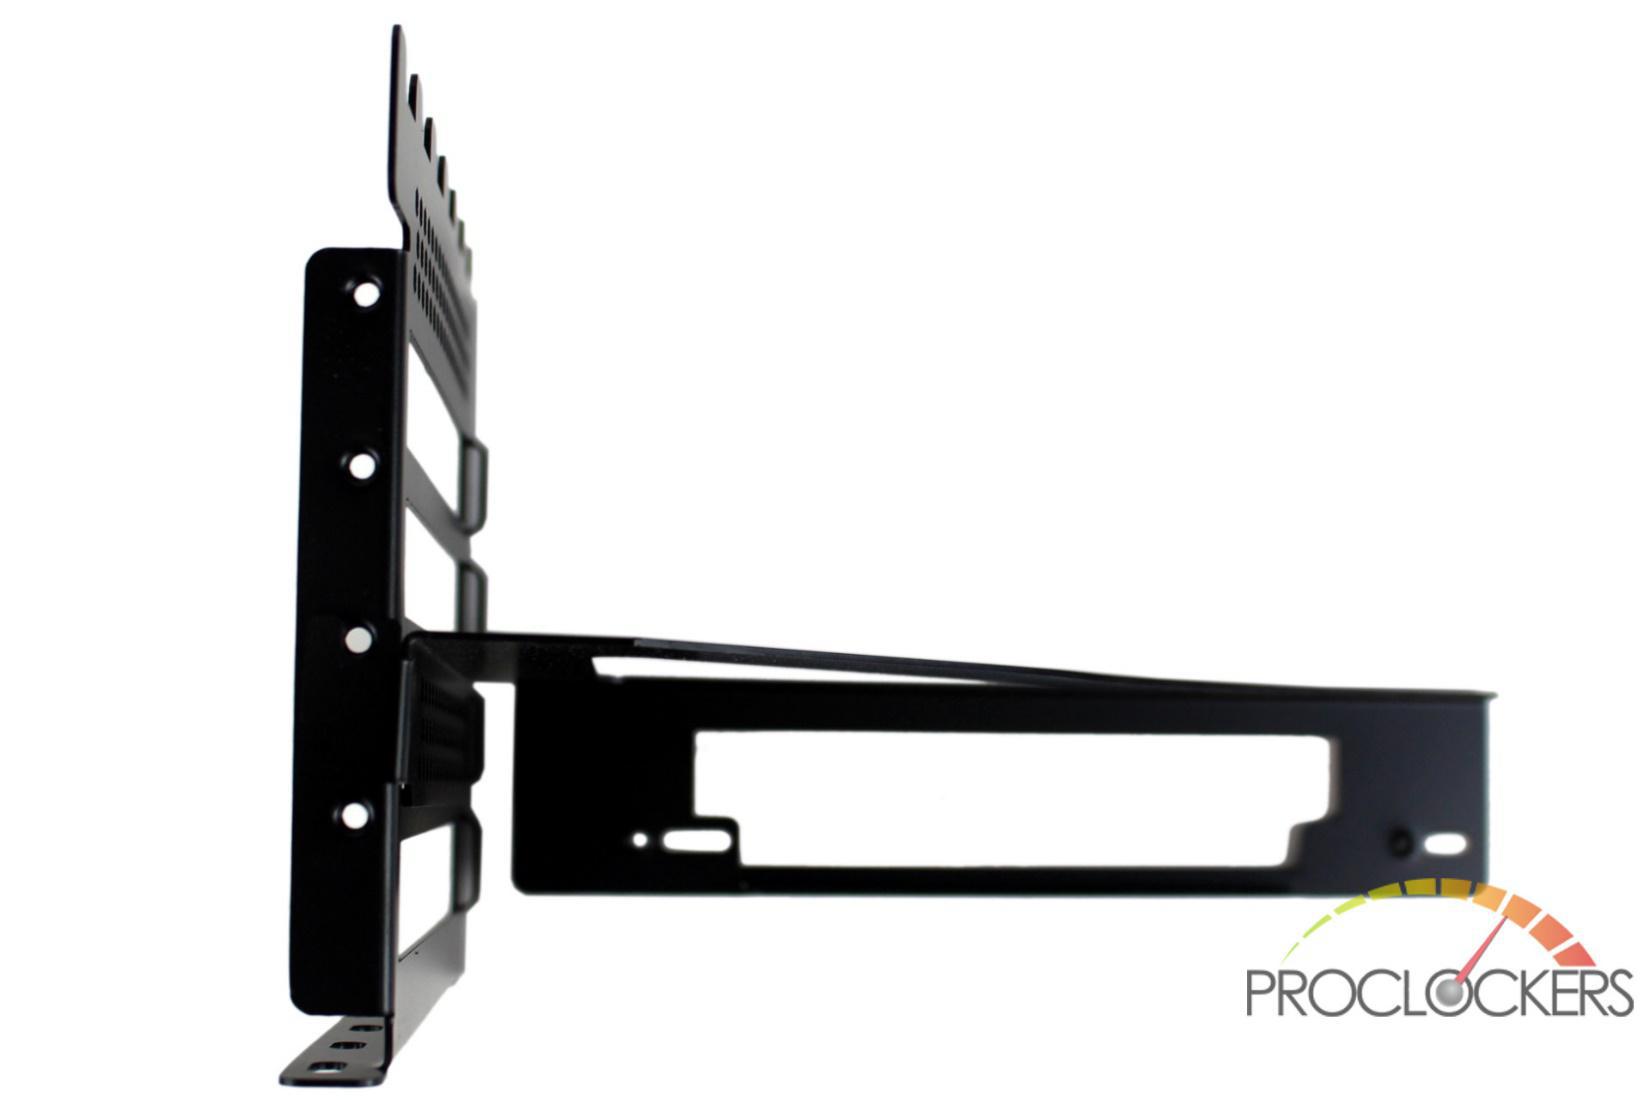
If you have a smaller card or just want to bring it a little closer to the window in your case, you can slide the support bracket forward a few slots.
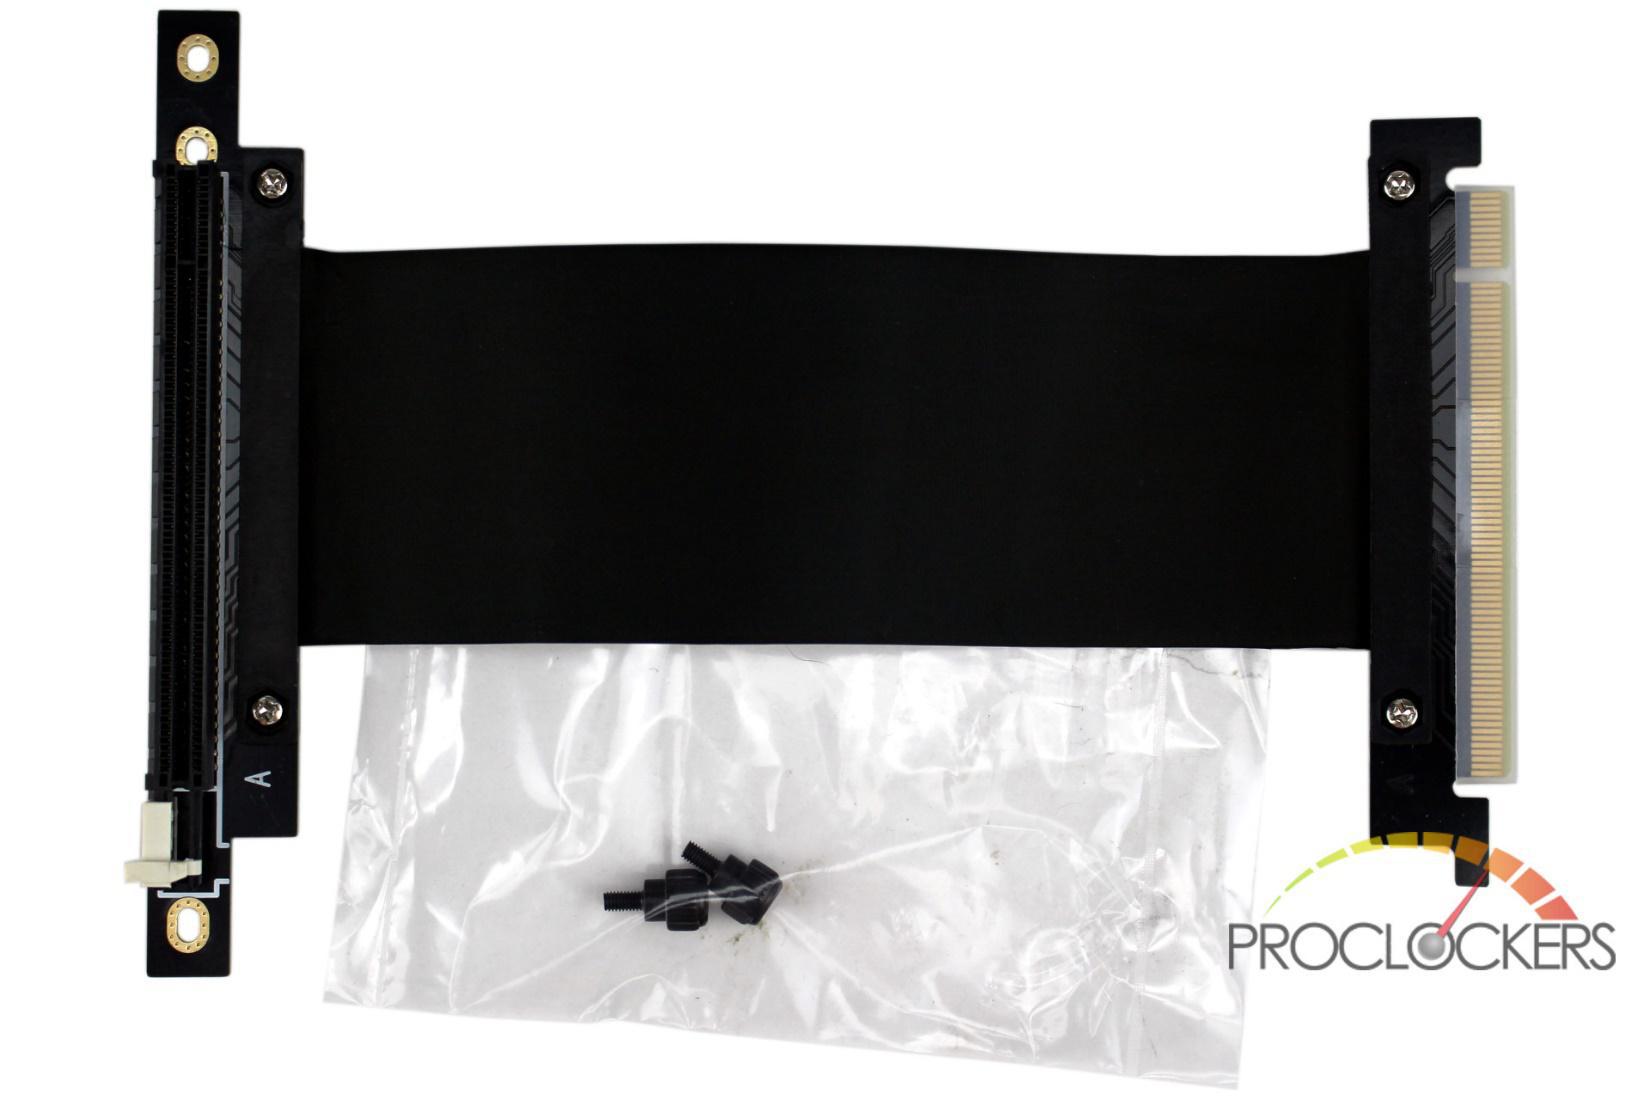
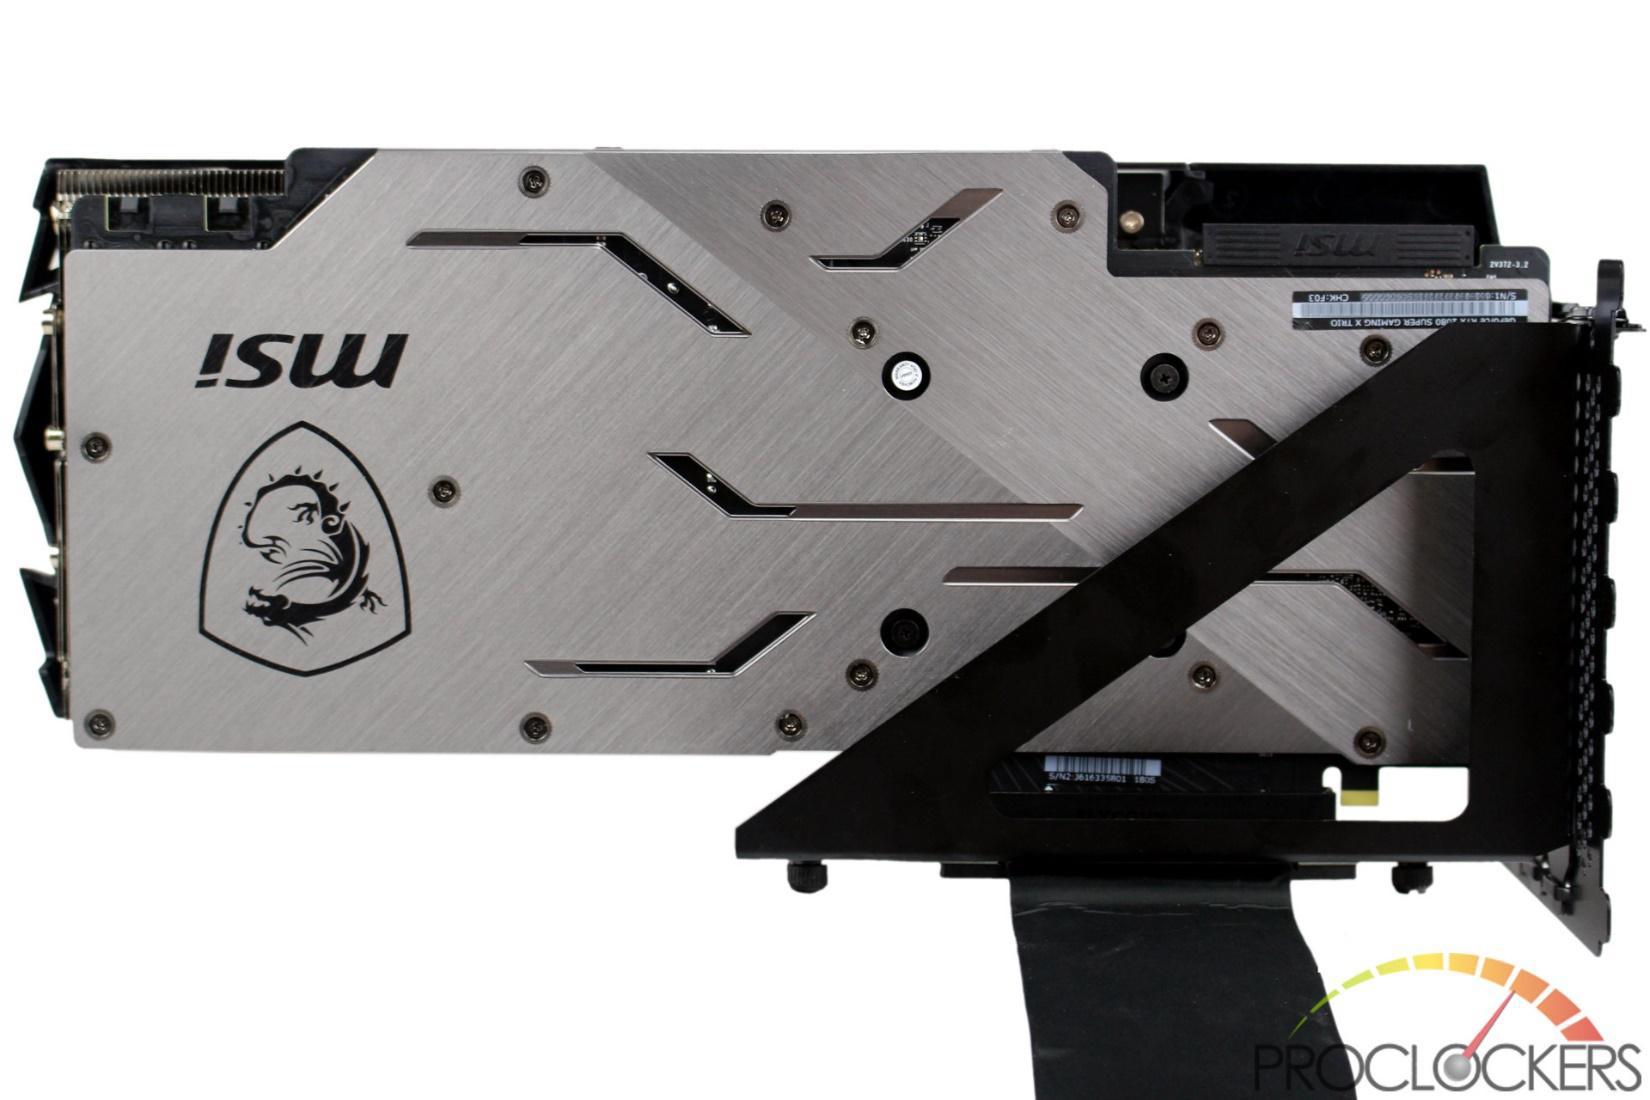
The PCIe riser itself is very nice. The flexible cable is very narrow and very thin, but robust and well shielded. The connections to the PCB components on each side are shrouded in a plastic cover.
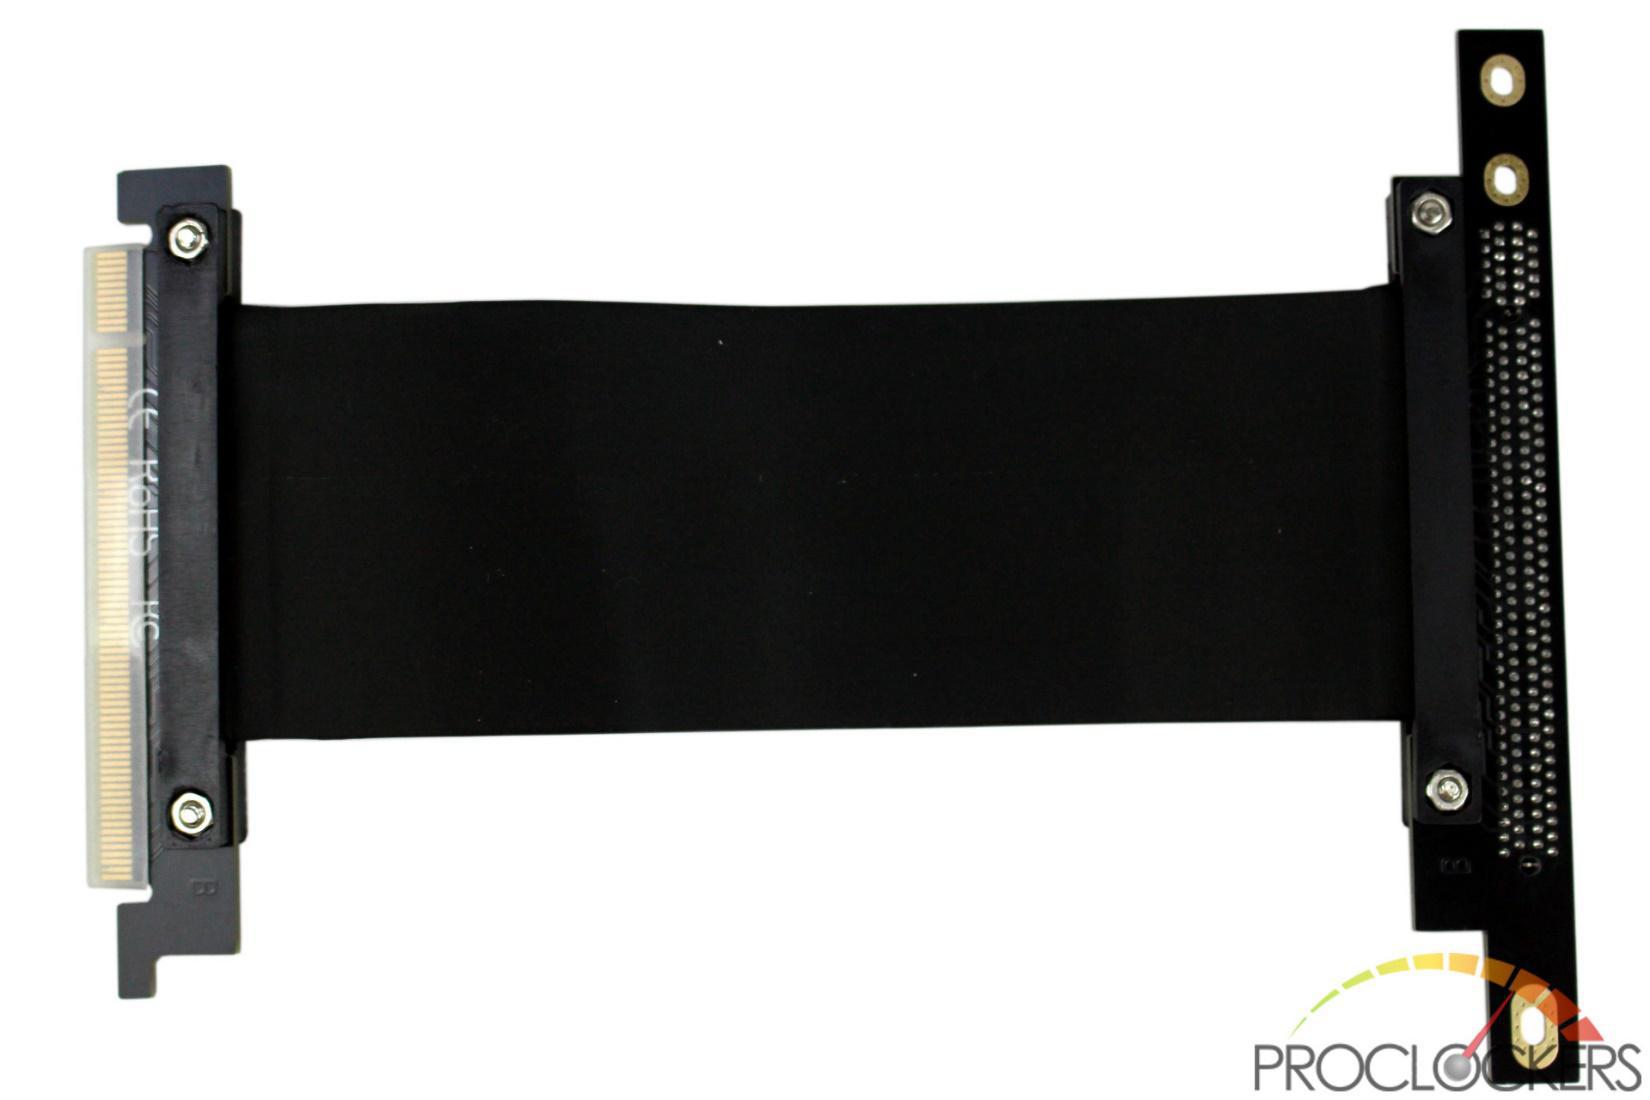
The backside looks very similar with the exception of the through-hole solder connection of the female PCIe x16 socket.
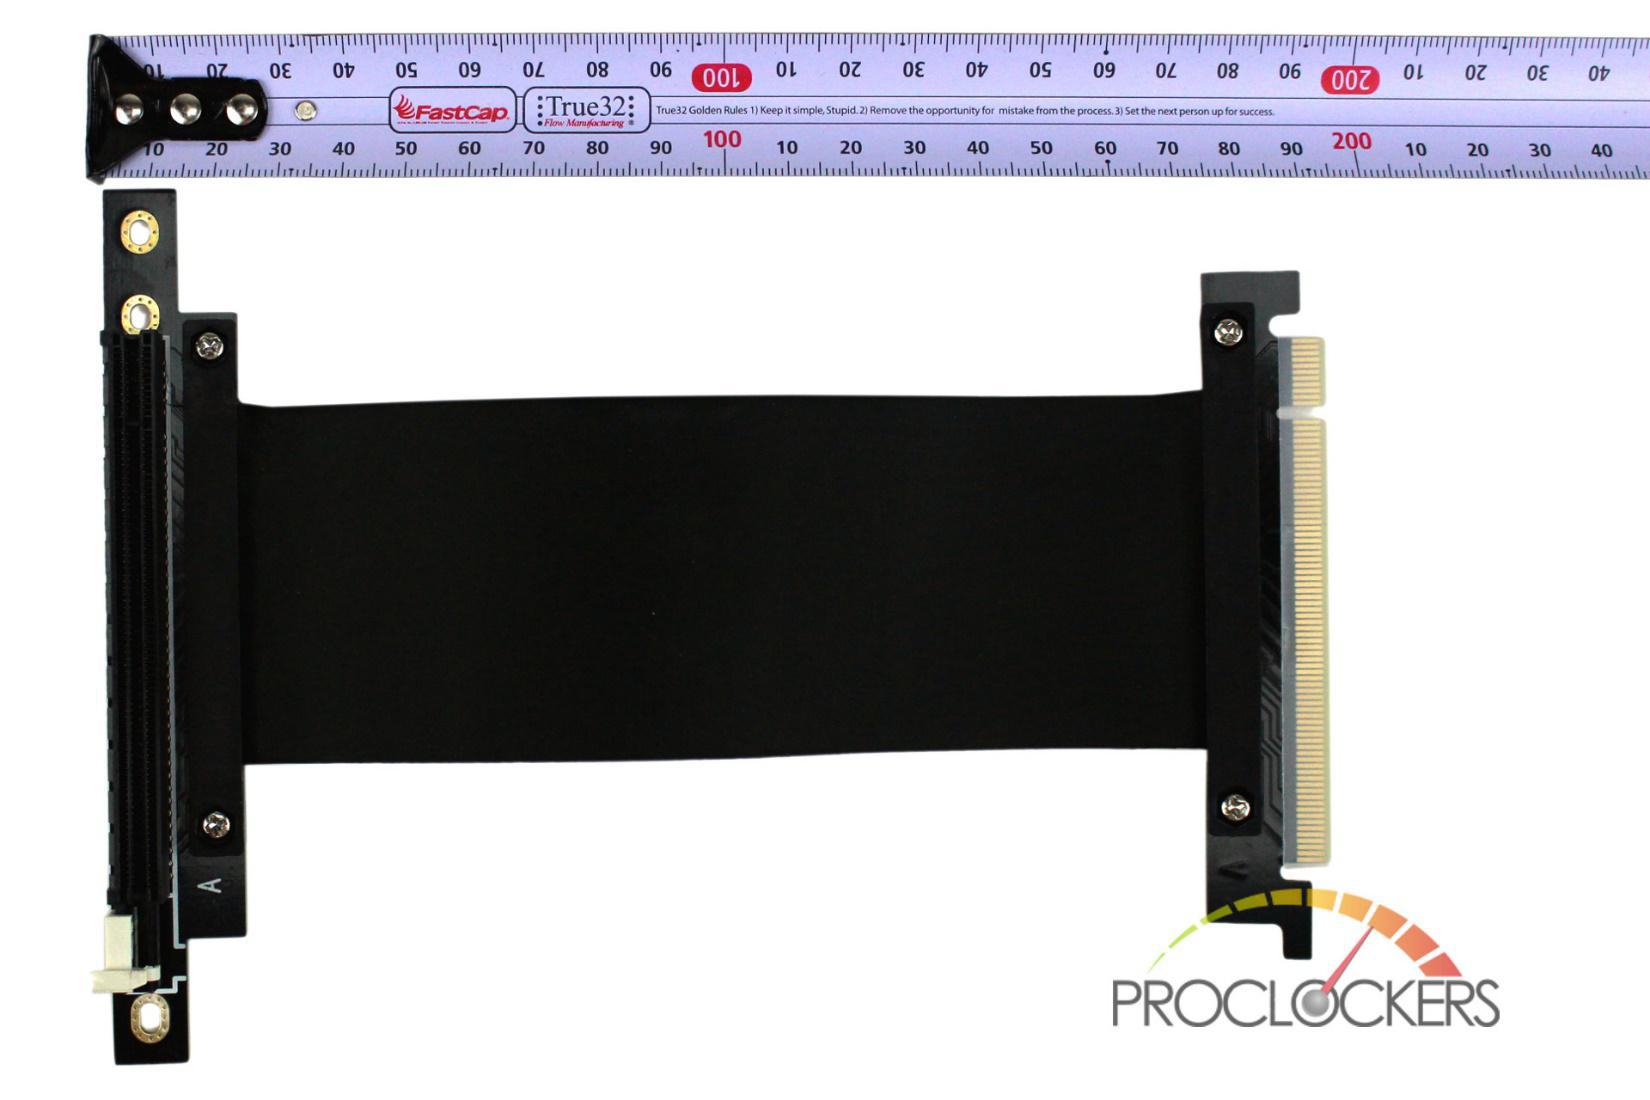
The entire riser measures a little bit under 200mm long with the flexible cable itself being around 150mm in length.
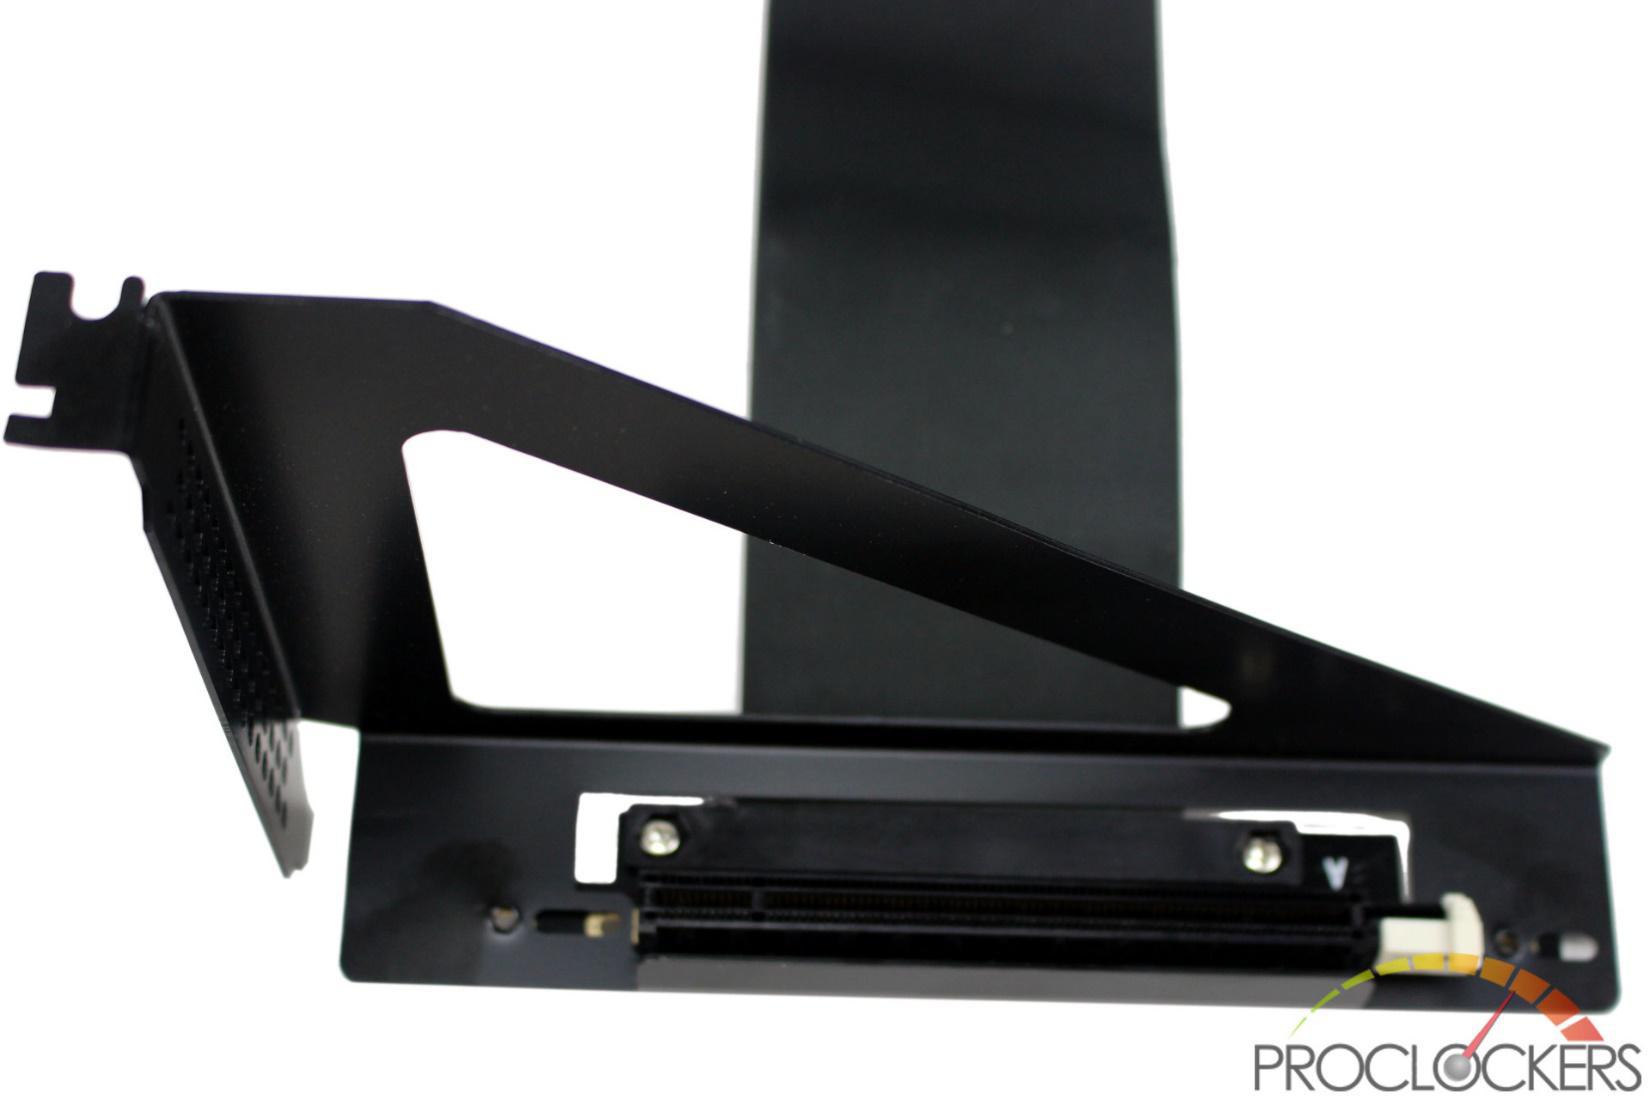
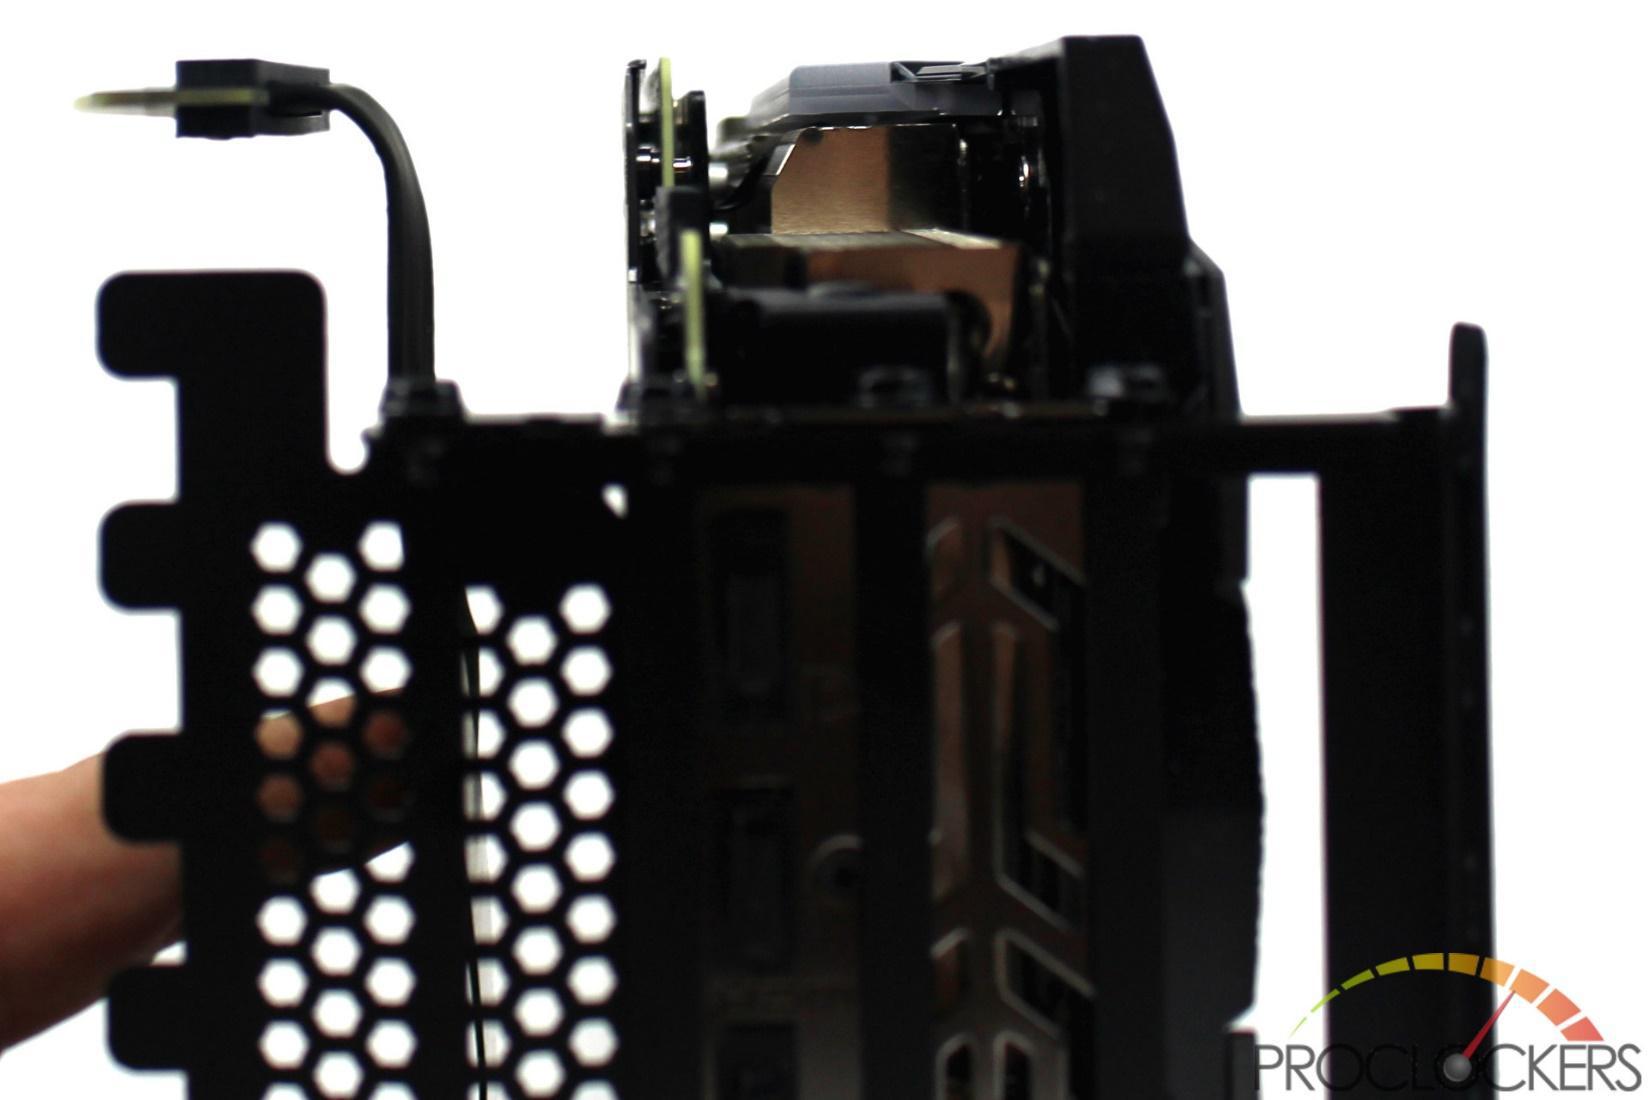
The riser just pokes through the mounting bracket from the bottom.
Two included thumbscrews hold the PCIe riser in place.
If you have a compact case, you may need to abandon the thumbscrews for space reasons and use a few spare M3 SSD screws instead.
Installation
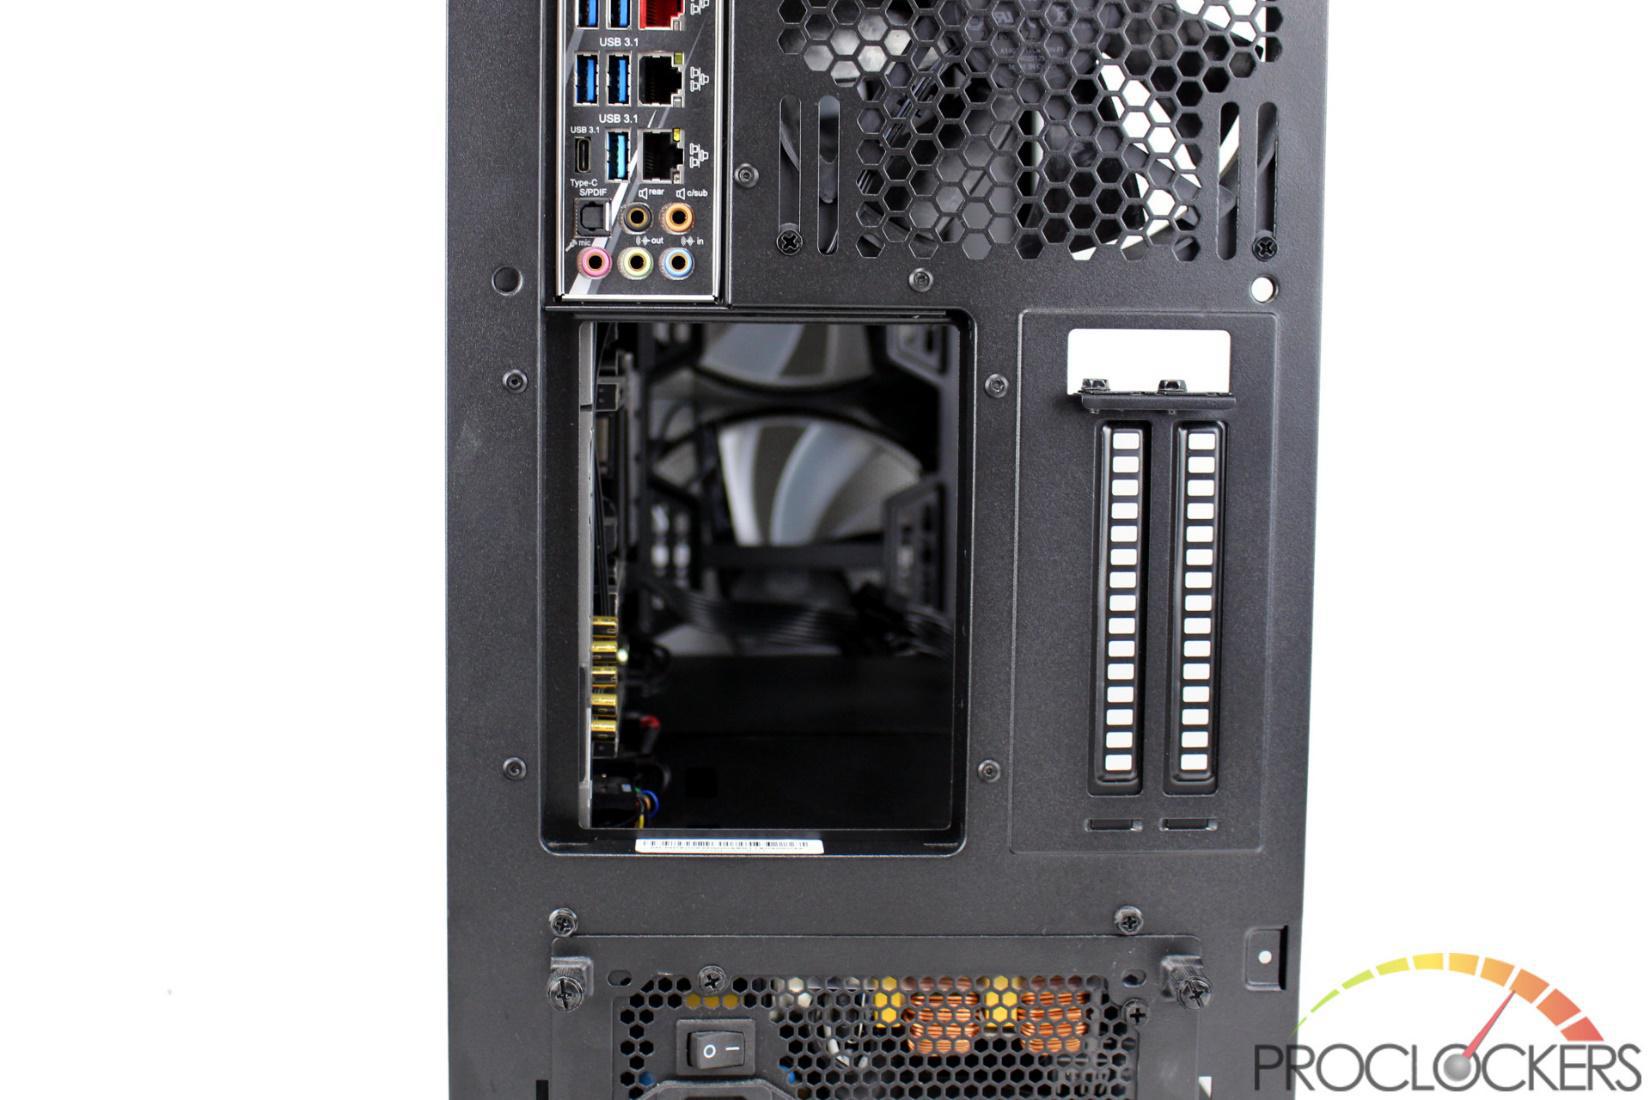
The first step to installation is to remove all of the PCIe slot covers at the rear of your case. Some cases are completely open at this point like ours, but if yours has a narrow band of metal between each slot, you’ll need to remove it. Twisting them back and forth until the pop out on each end with heavy pliers works usually, or metal shears/snips.
With everything opened up, we have room to move on.
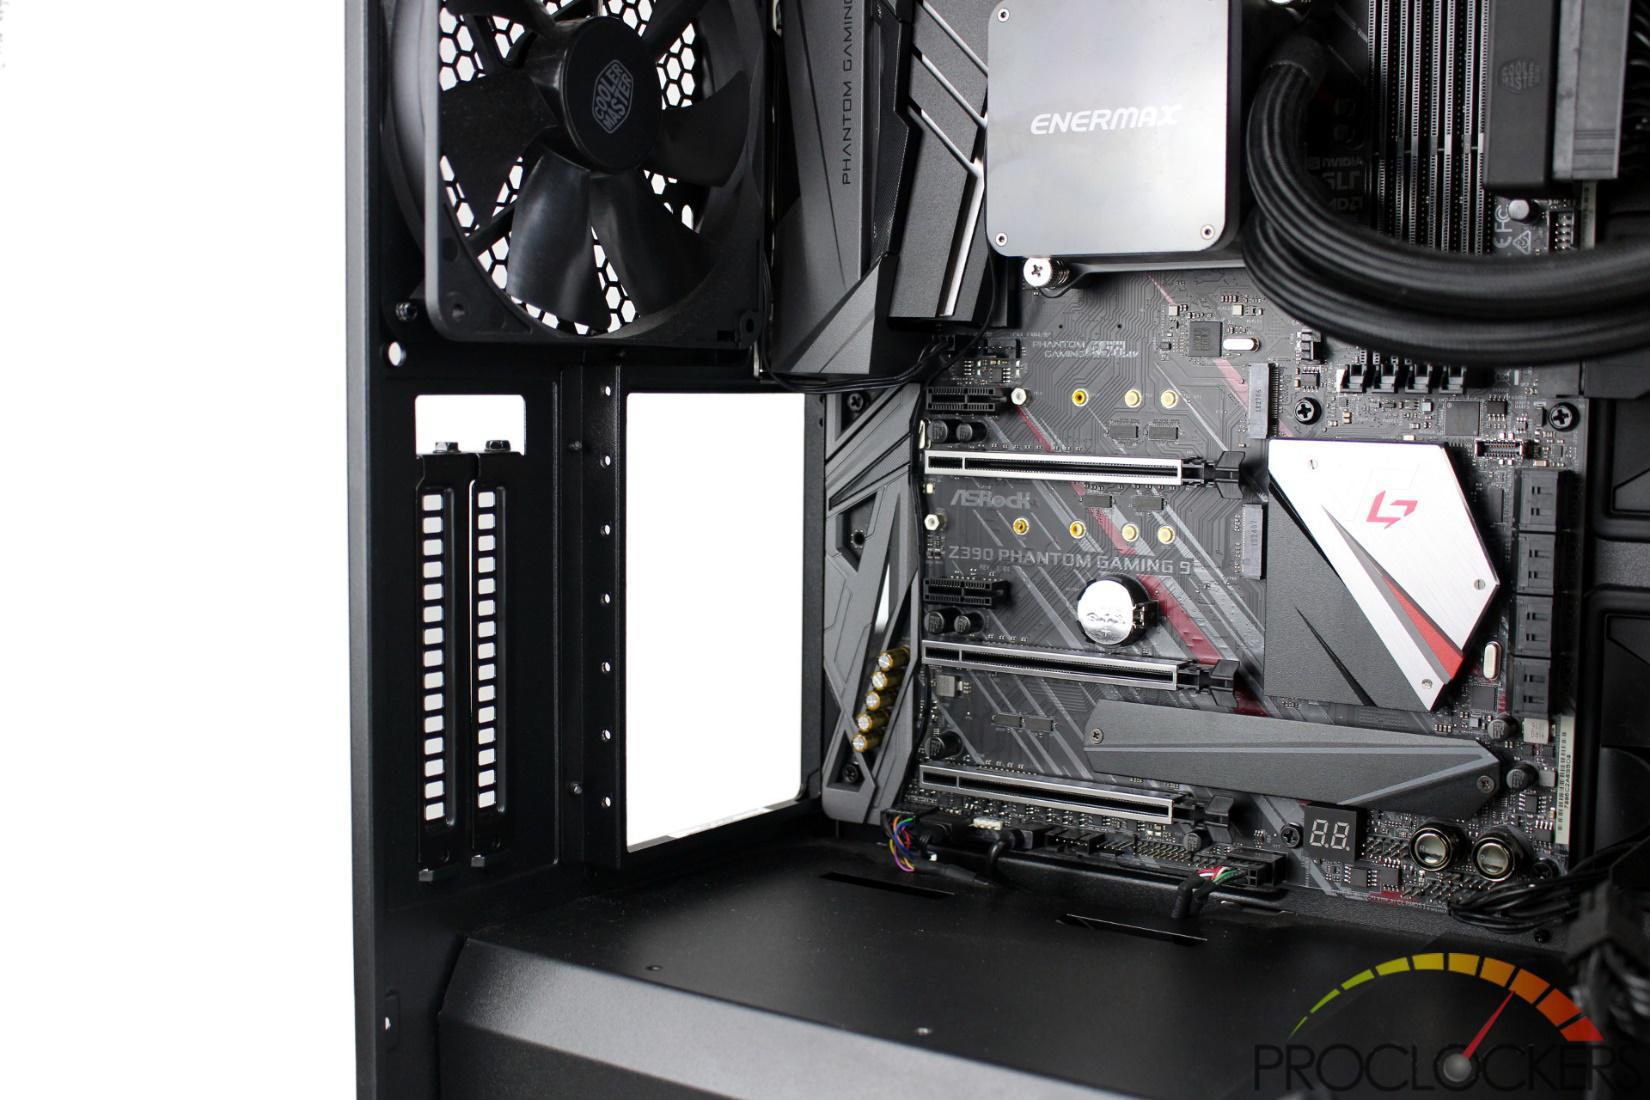
You’ll want to install the kit first without the GPU to make sure everything clears.
Since out motherboard has its primary PCIe x16 slot in the second position, the riser plug would not clear the mounting bracket. Since our card has a 2-slot rear mounting bracket, we slot the mounting bracket out one space which gives us plenty of room.
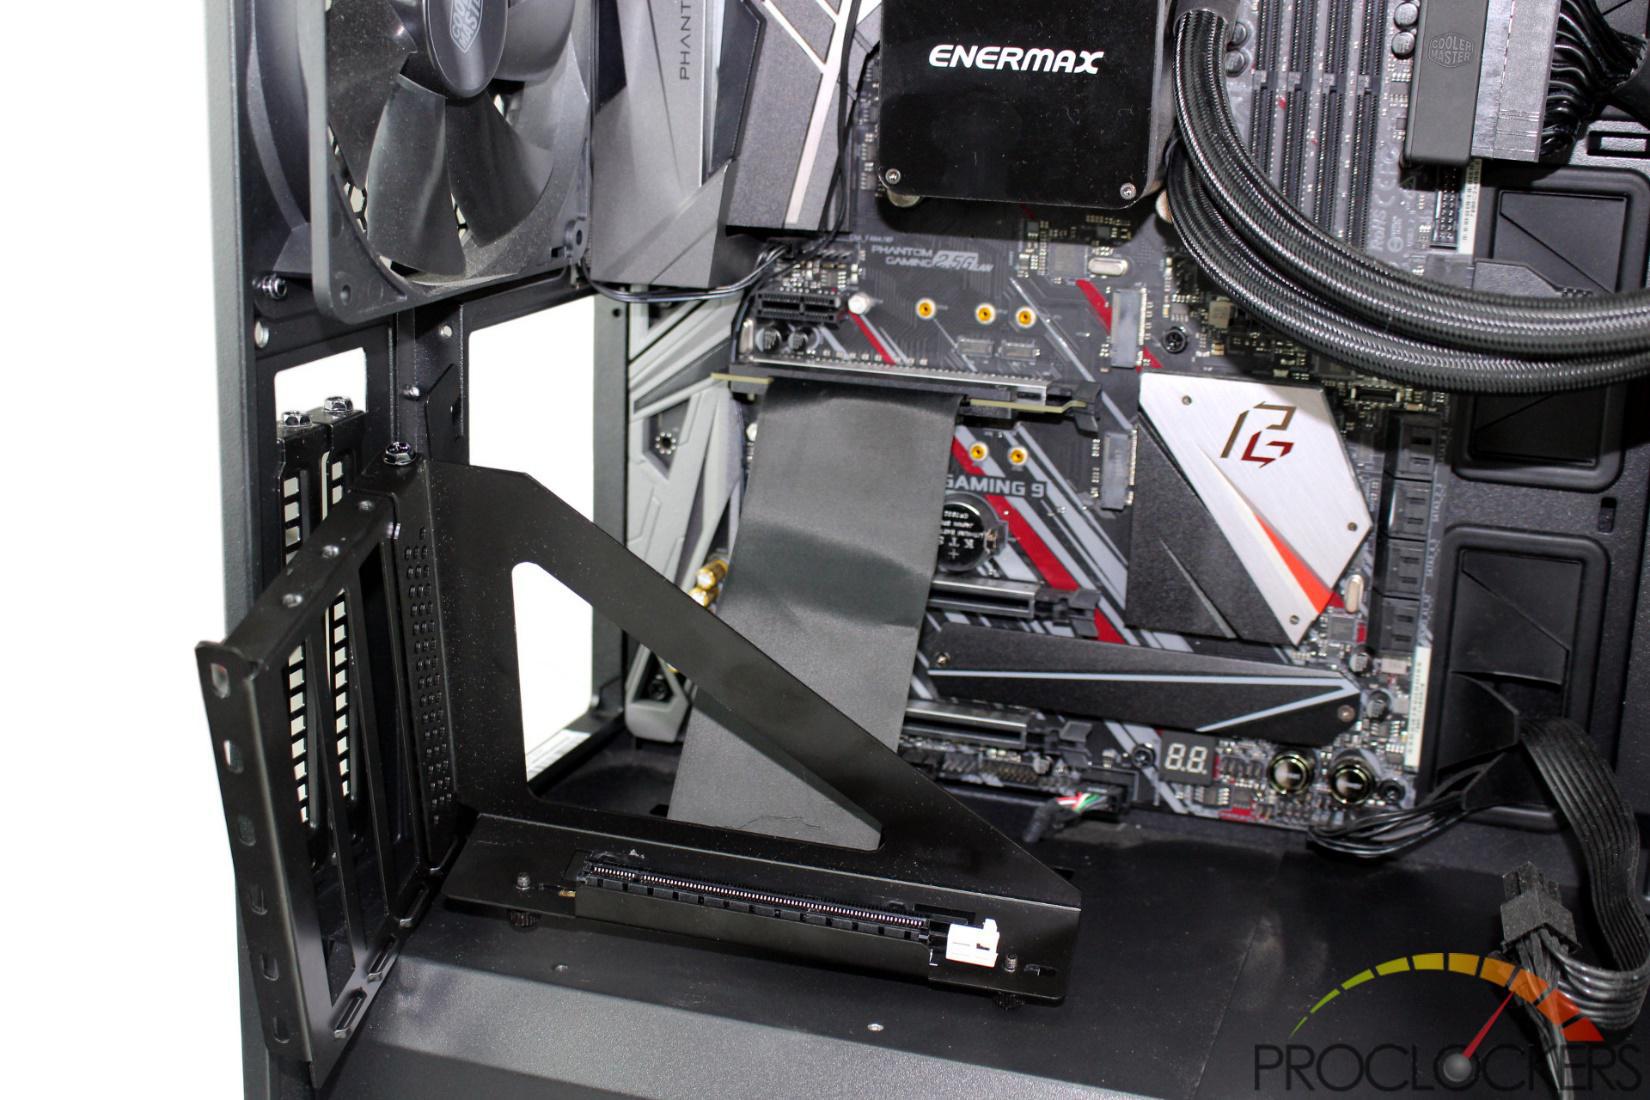
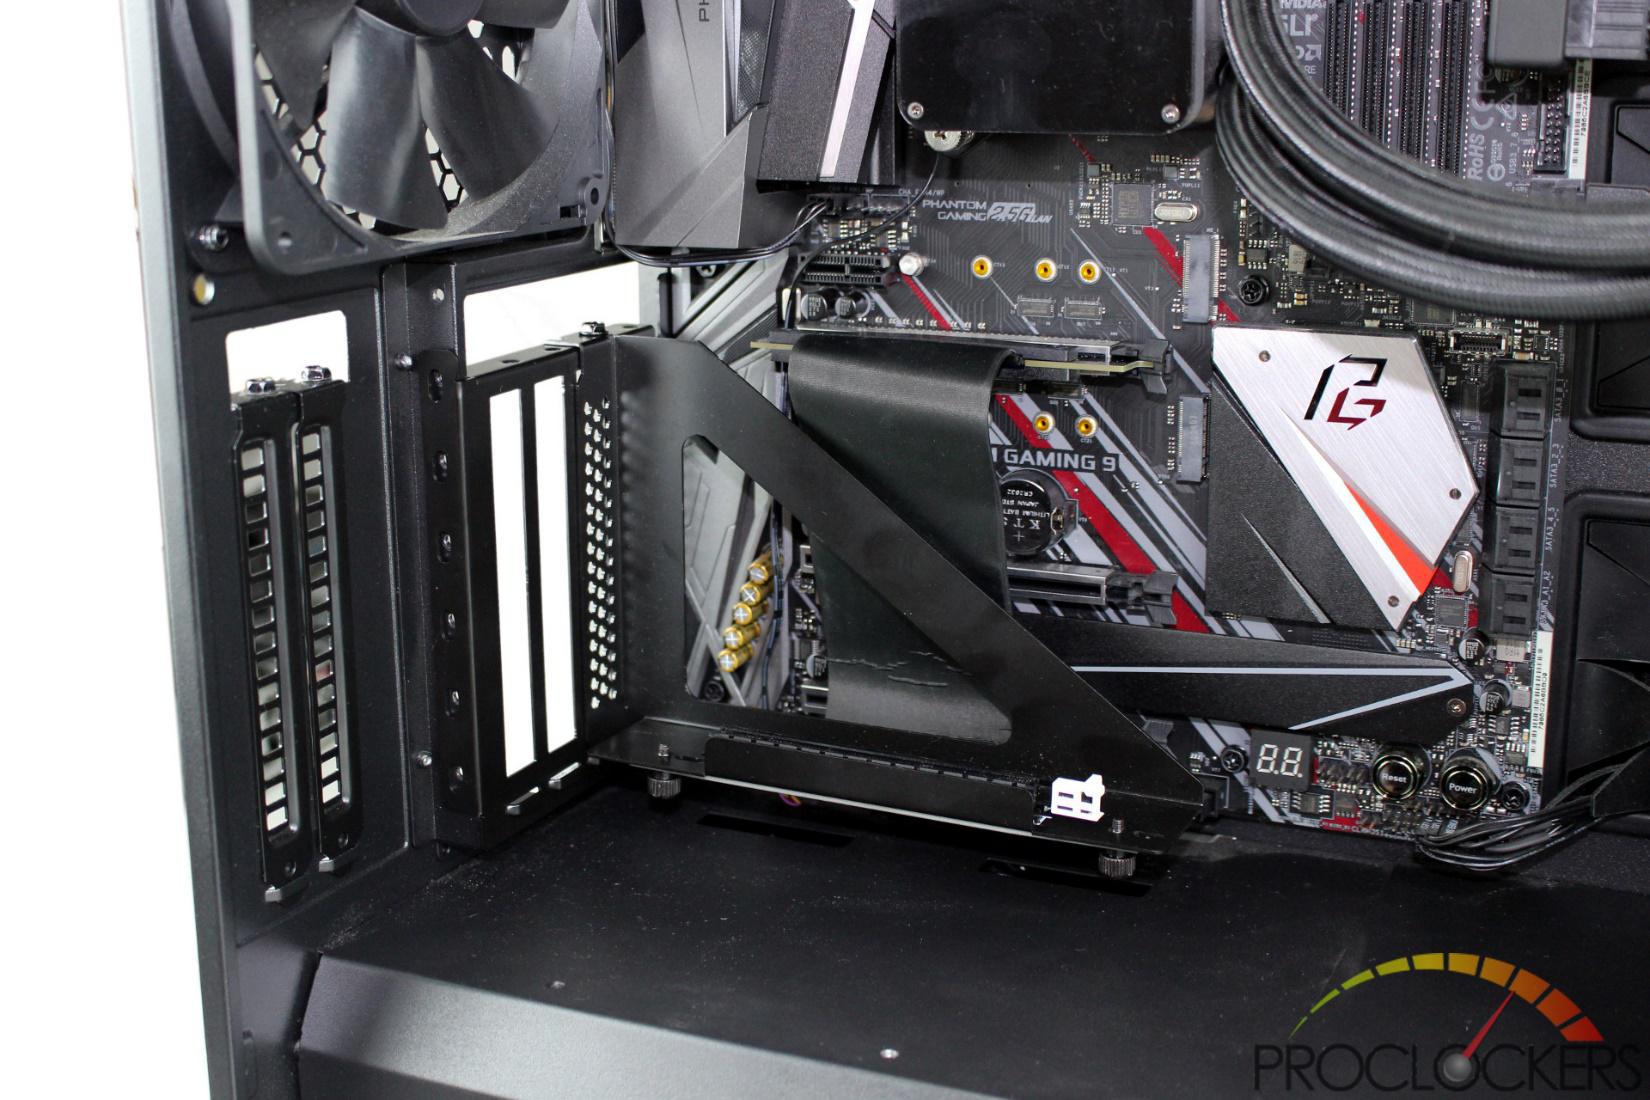
At this point, we’ll pull the kit back out and install our GPU like you would in the case.
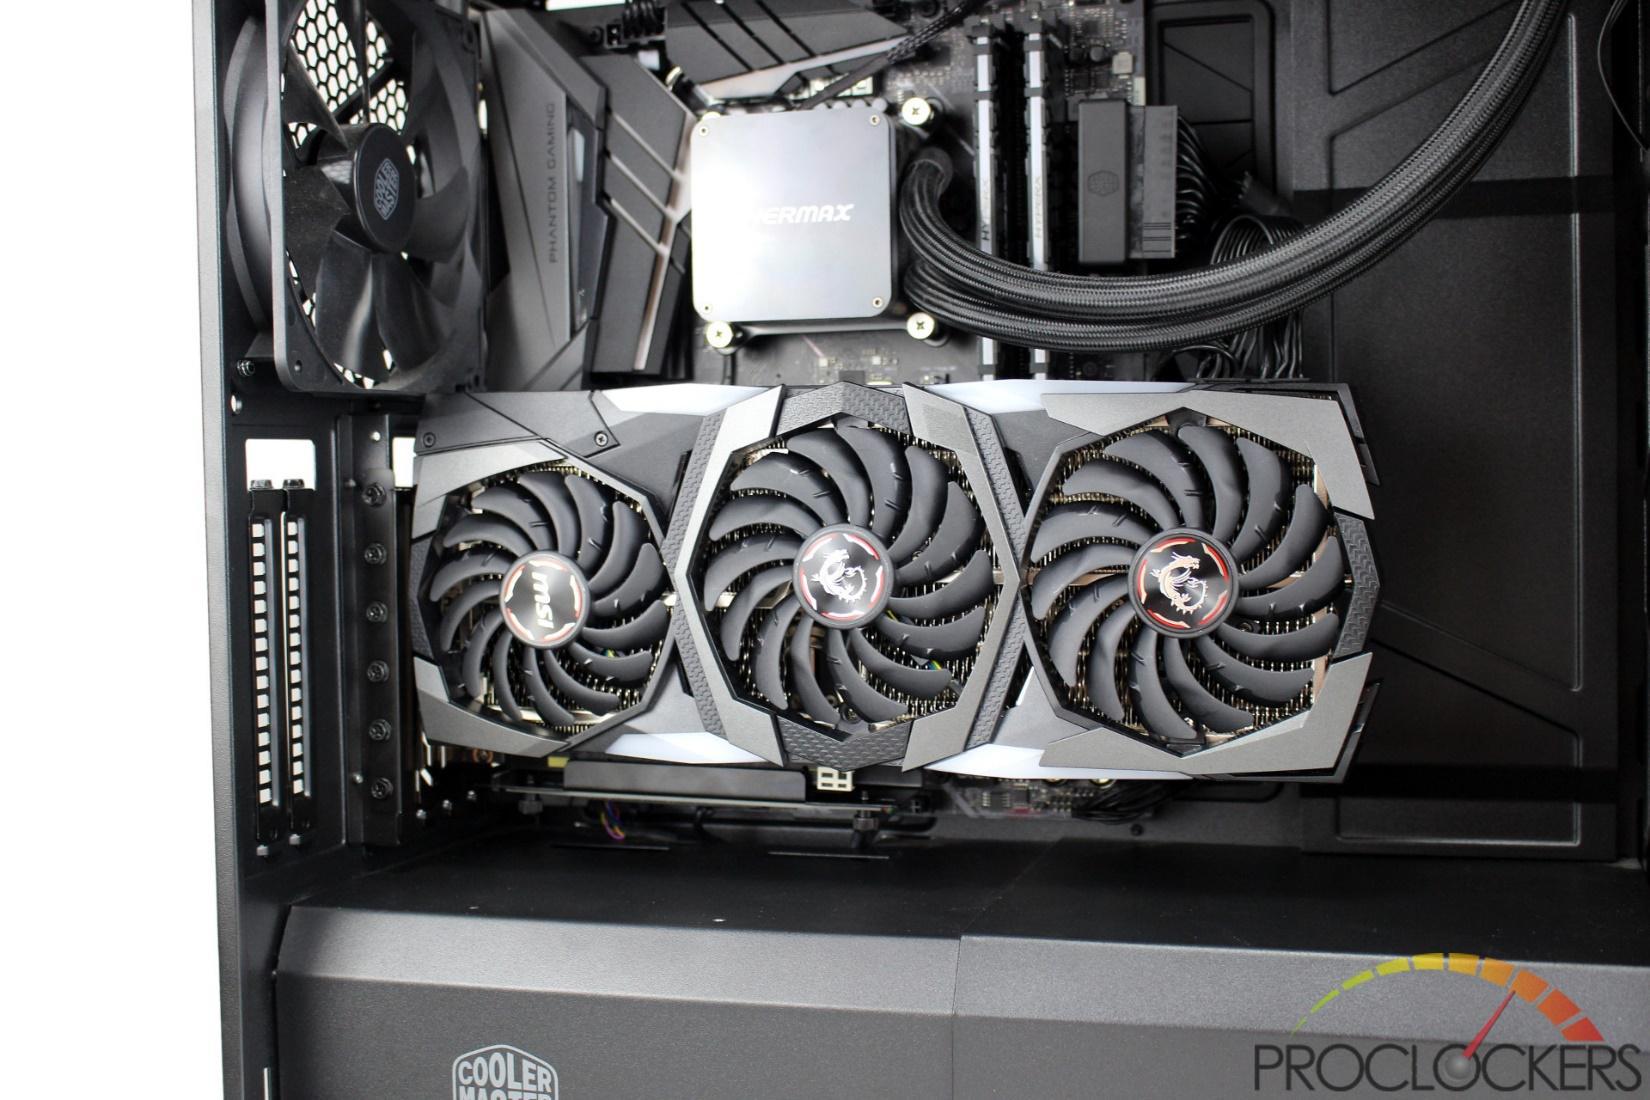
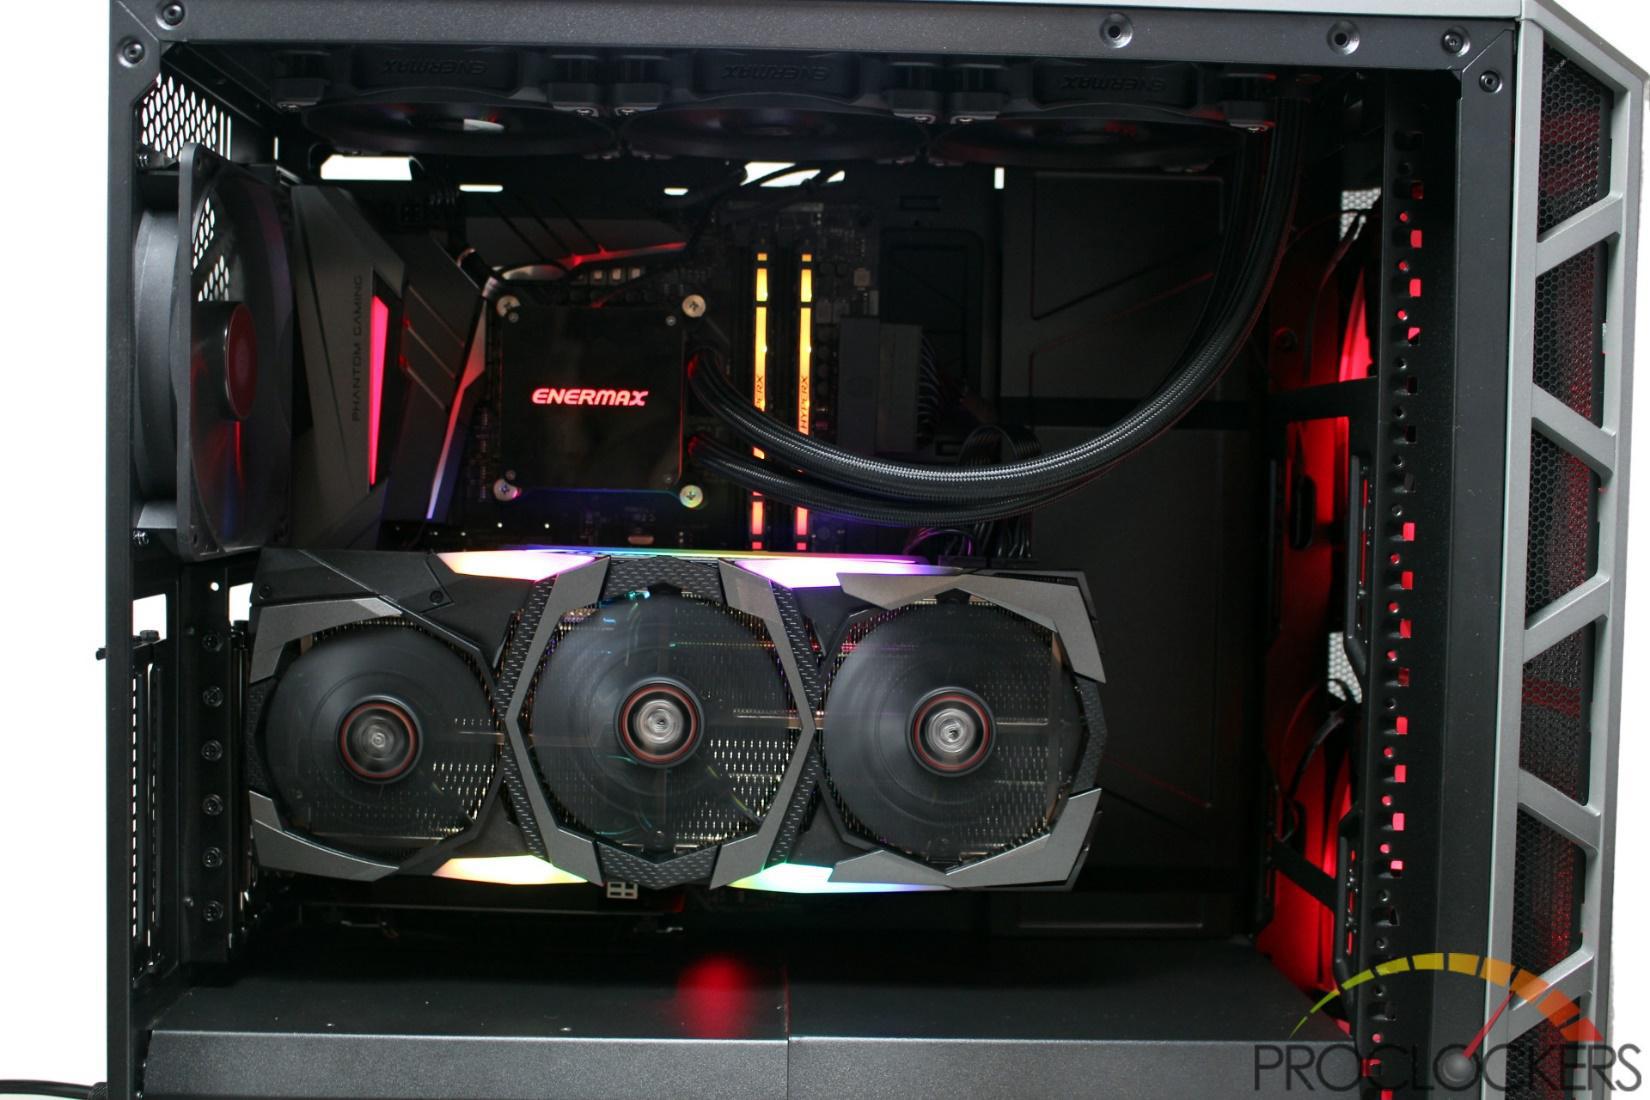
You can see here that there is plenty of room between the back of the card and the mounting kit. Even if you have an abnormally thick backplate, there will be no problems. You can also see that our card is nearly 3 slots thick.
This card makes the mounting kit looks small, but that angled piece going down makes it incredibly strong and more than capable of supporting this card.
Lastly, we’ll plug in the PCIe riser and then mount the kit in place.

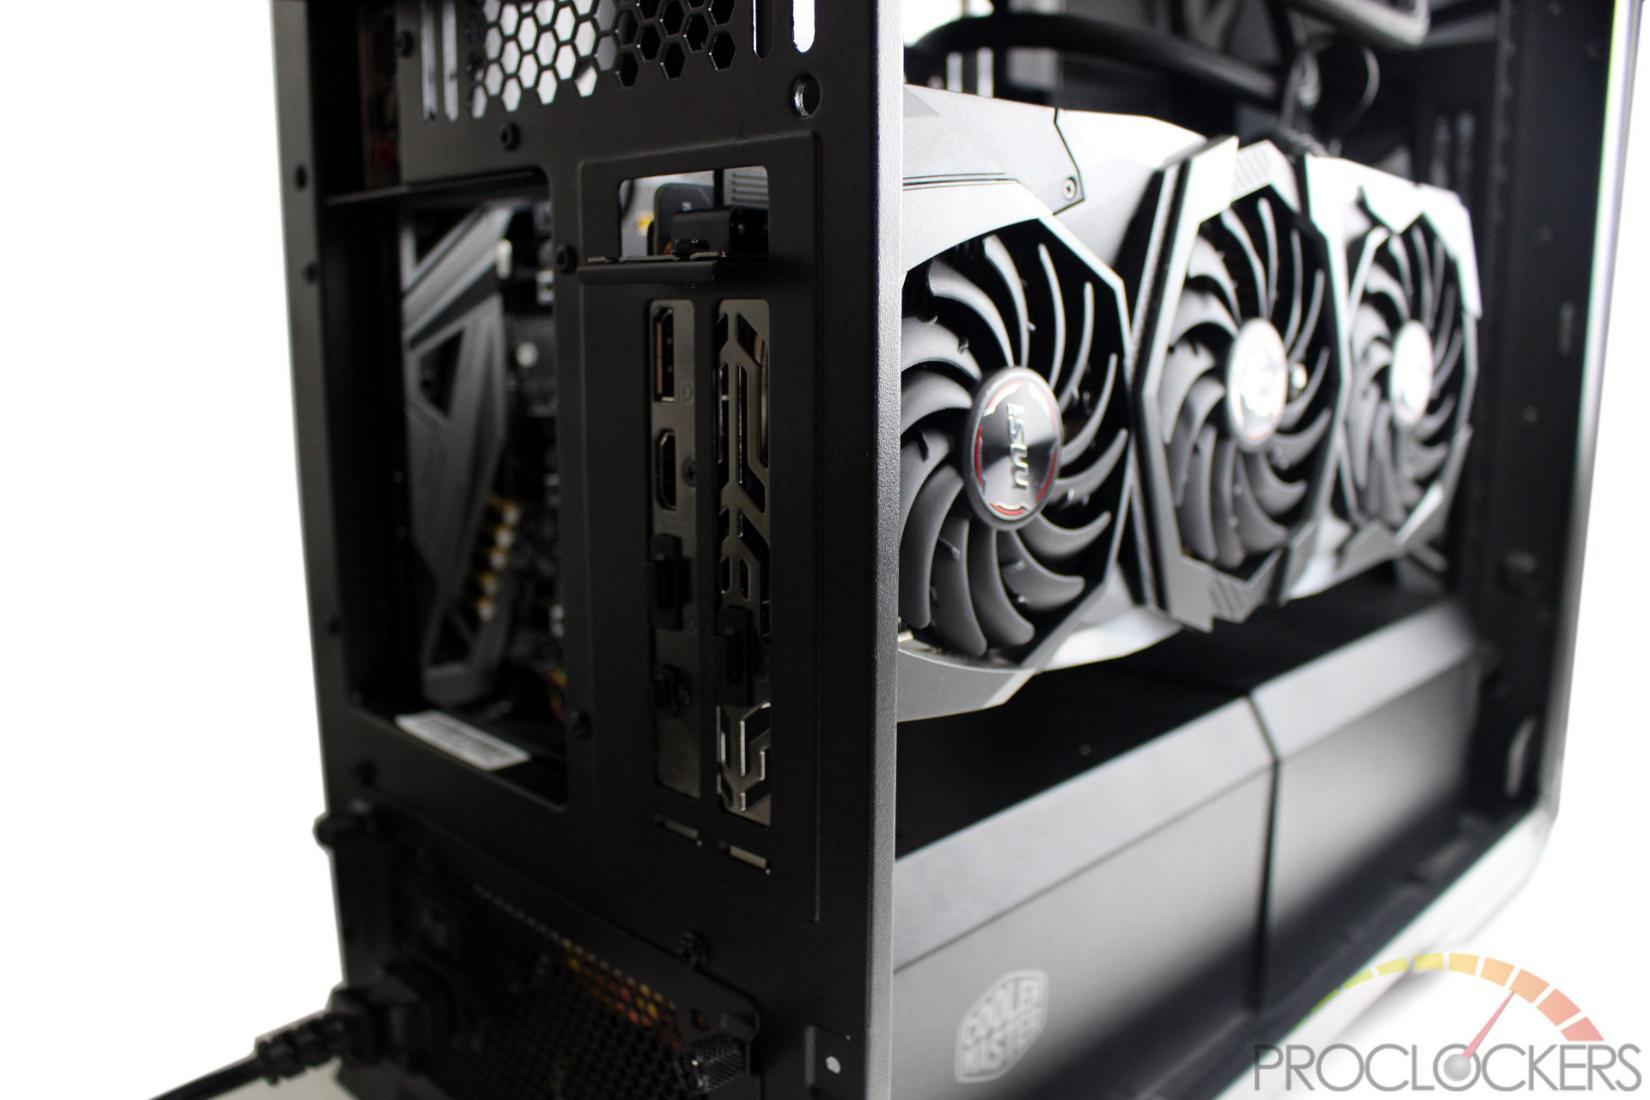
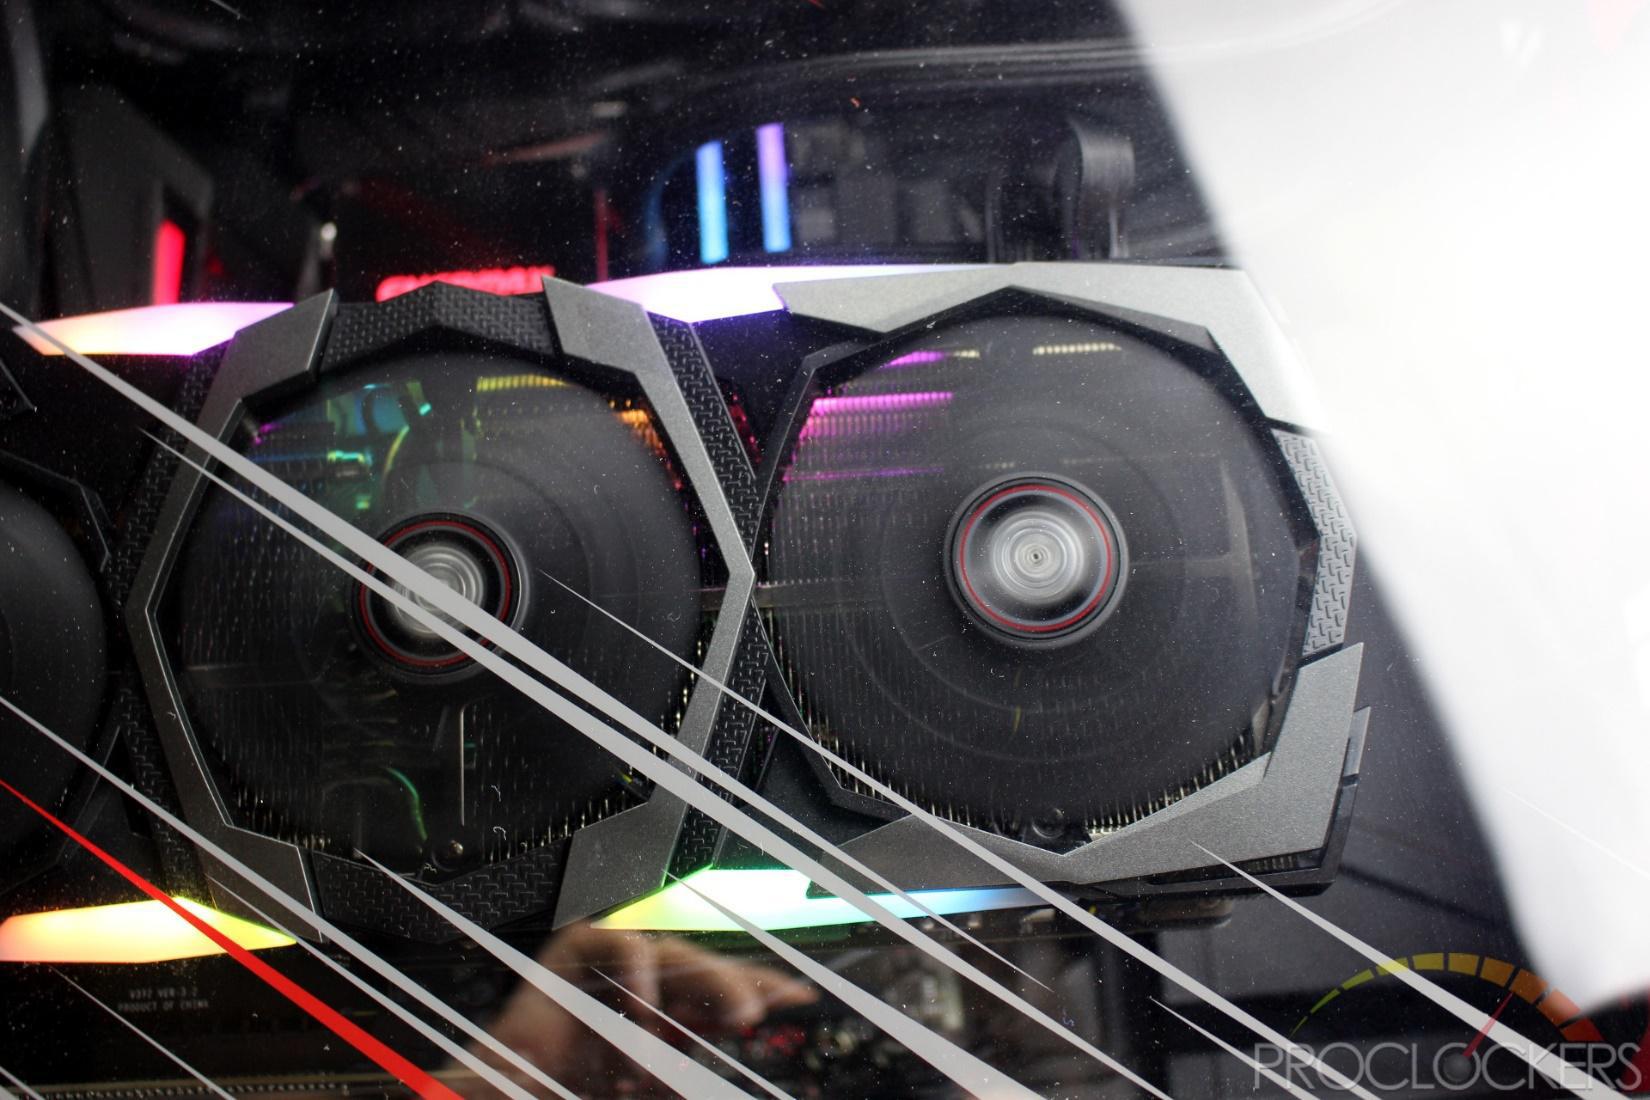
If you’ve been wondering up to this point why we’ve been mounting the Li-Heat kit in a case that already supports vertical mounting, here is exactly why. Using the LI-heat kit here gives us almost 90mm of space between the new face of the card, and the glass window that will cover it. The factory mounting position puts this massive card so close to the glass that it can barely draw any air in to cool itself.
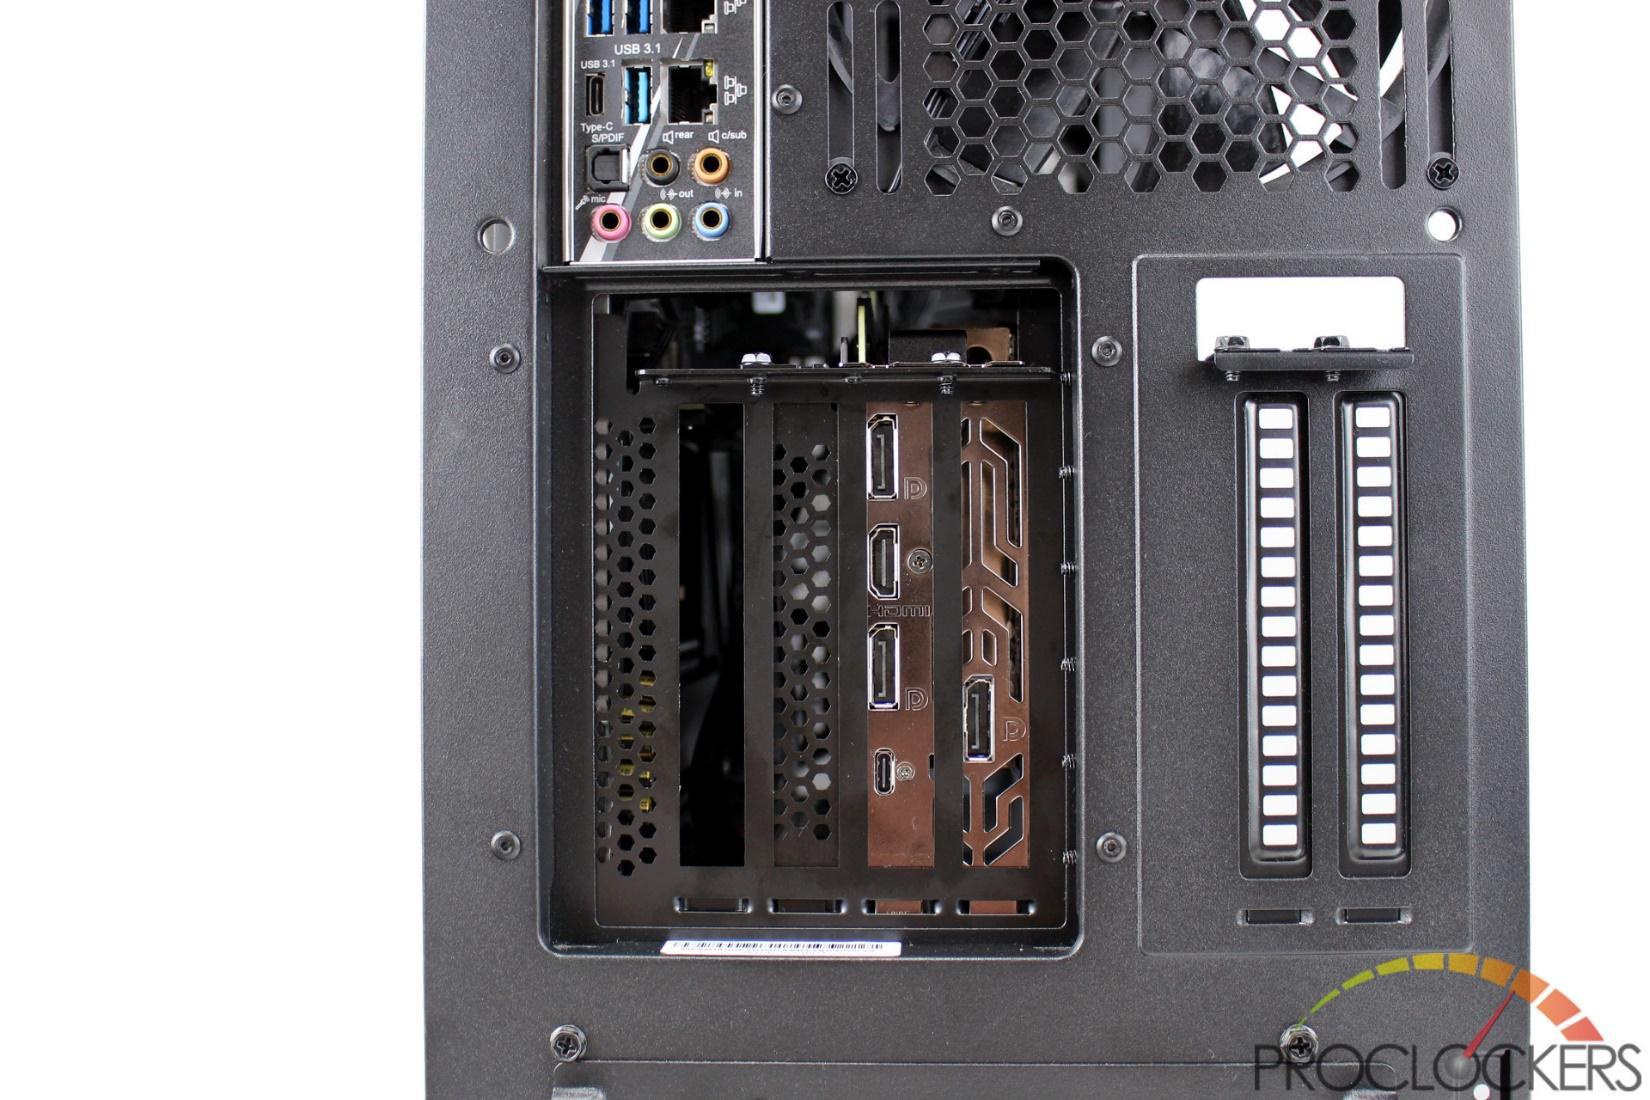
The top ‘slot’ of the case remains open to the point that you could use most thumbscrews to mount your card to the bracket. We wish the Li-Heat mounting kit came with a matching slot cover here though for aesthetics. We can use the cases covers, but the slotted openings just don’t look nice between the two honeycombs next to it.
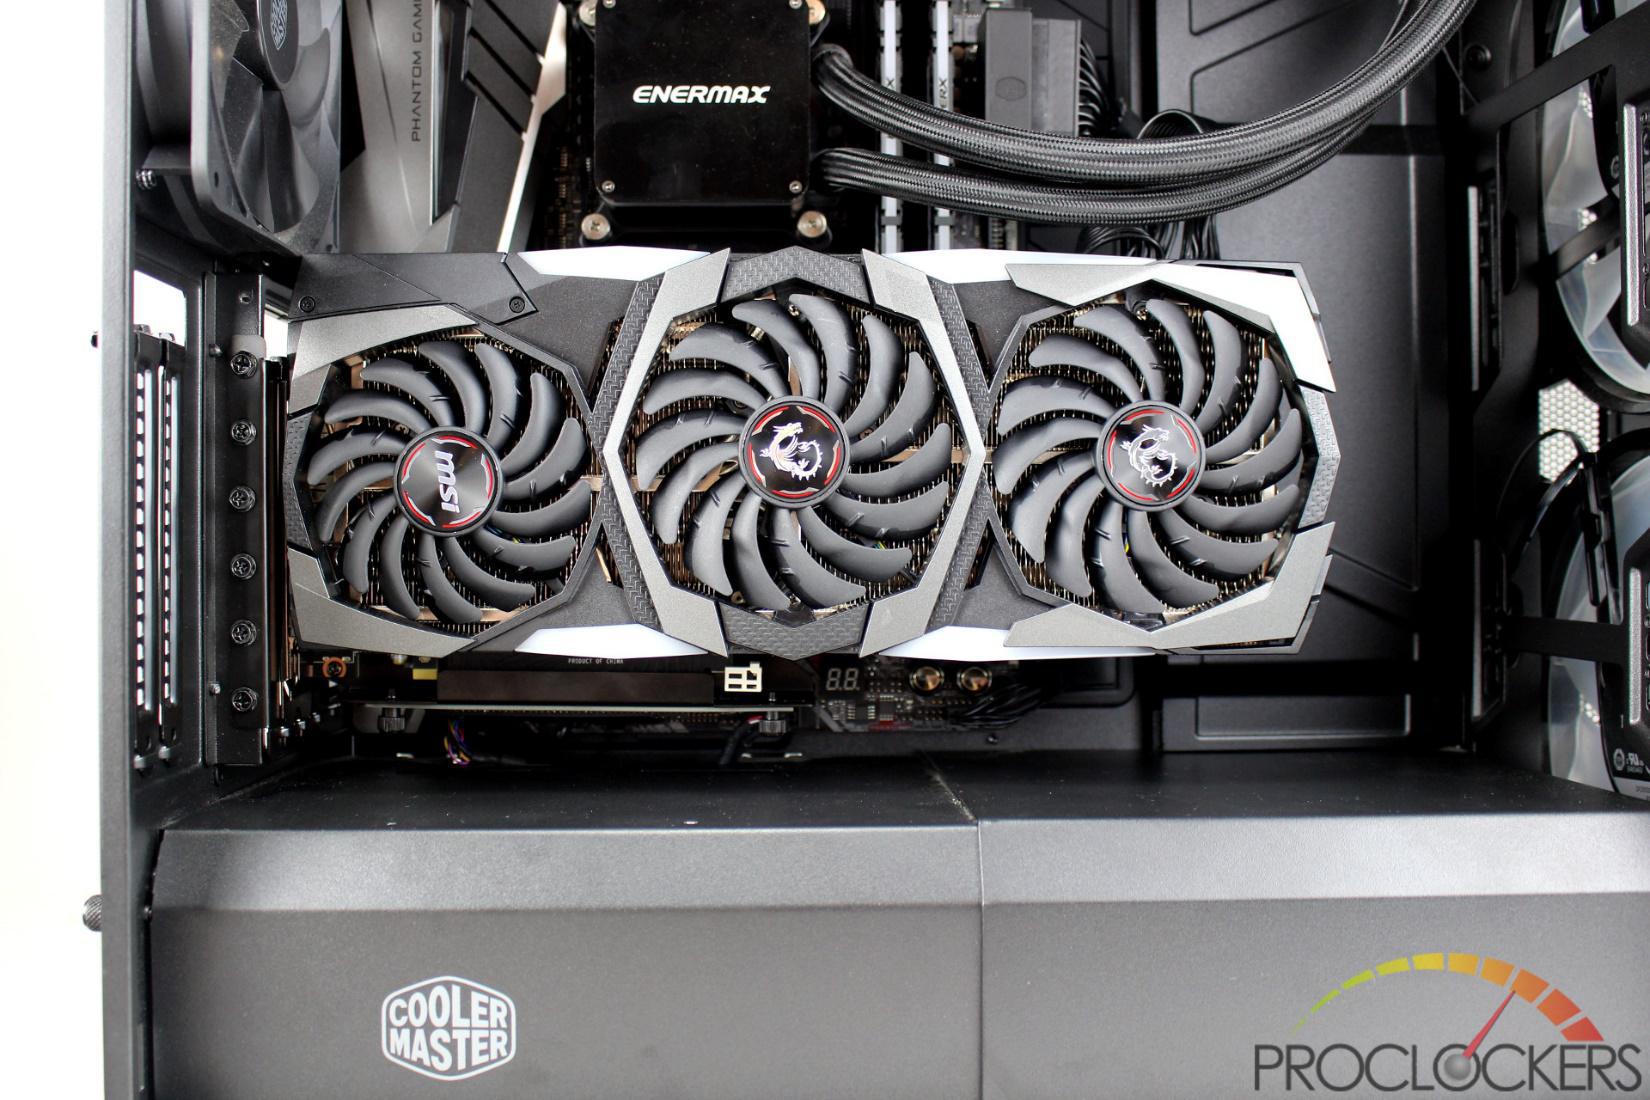
It’s always hard to tell in pictures because you can’t be sure of perspective, but our card is hanging all on its own here and staying nice and level. We did have to lift the rear of the card up slightly as we tightened the screws that connect the bracket to the case, but that was due to the case itself bowing under the weight rather than the GPU mounting kit.
Testing & Performance
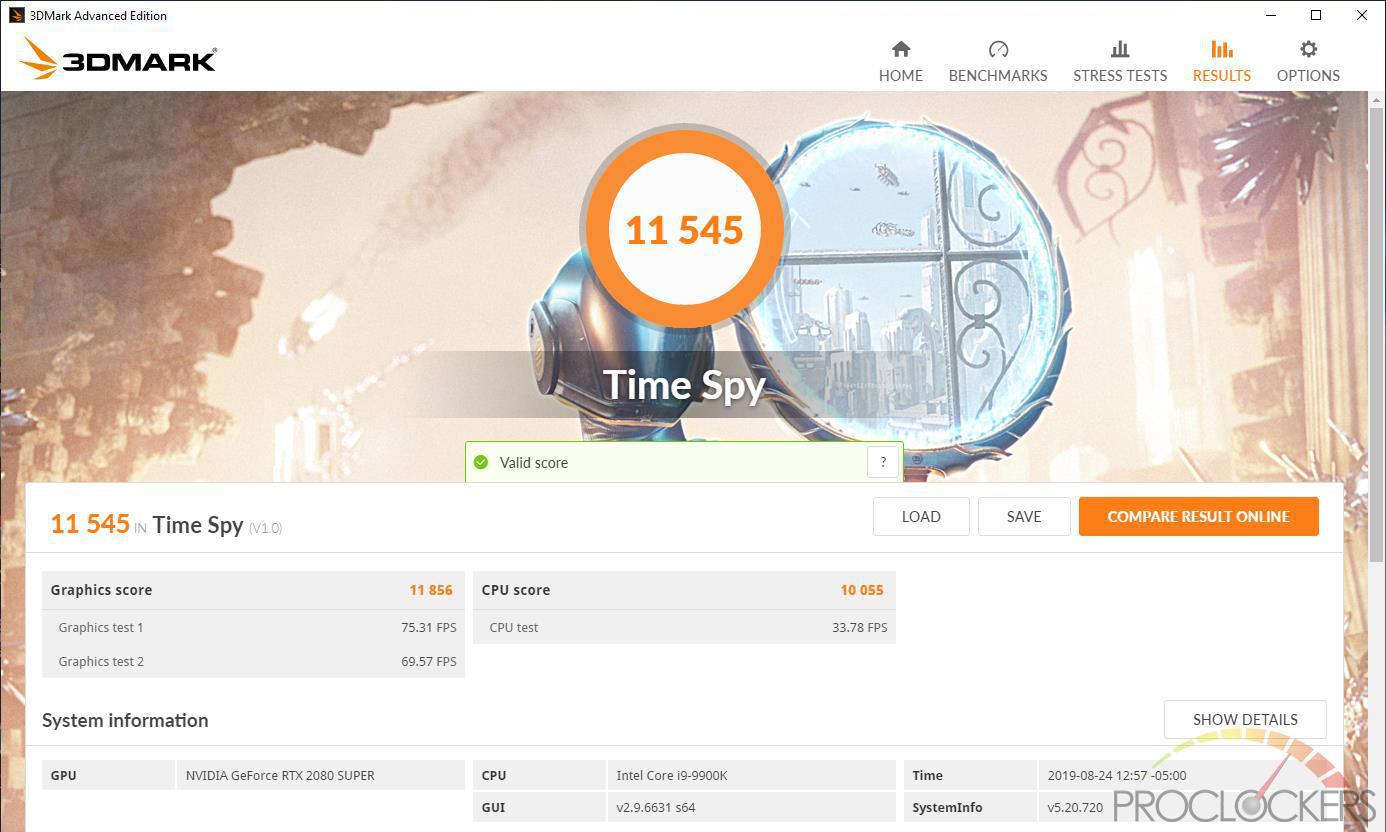
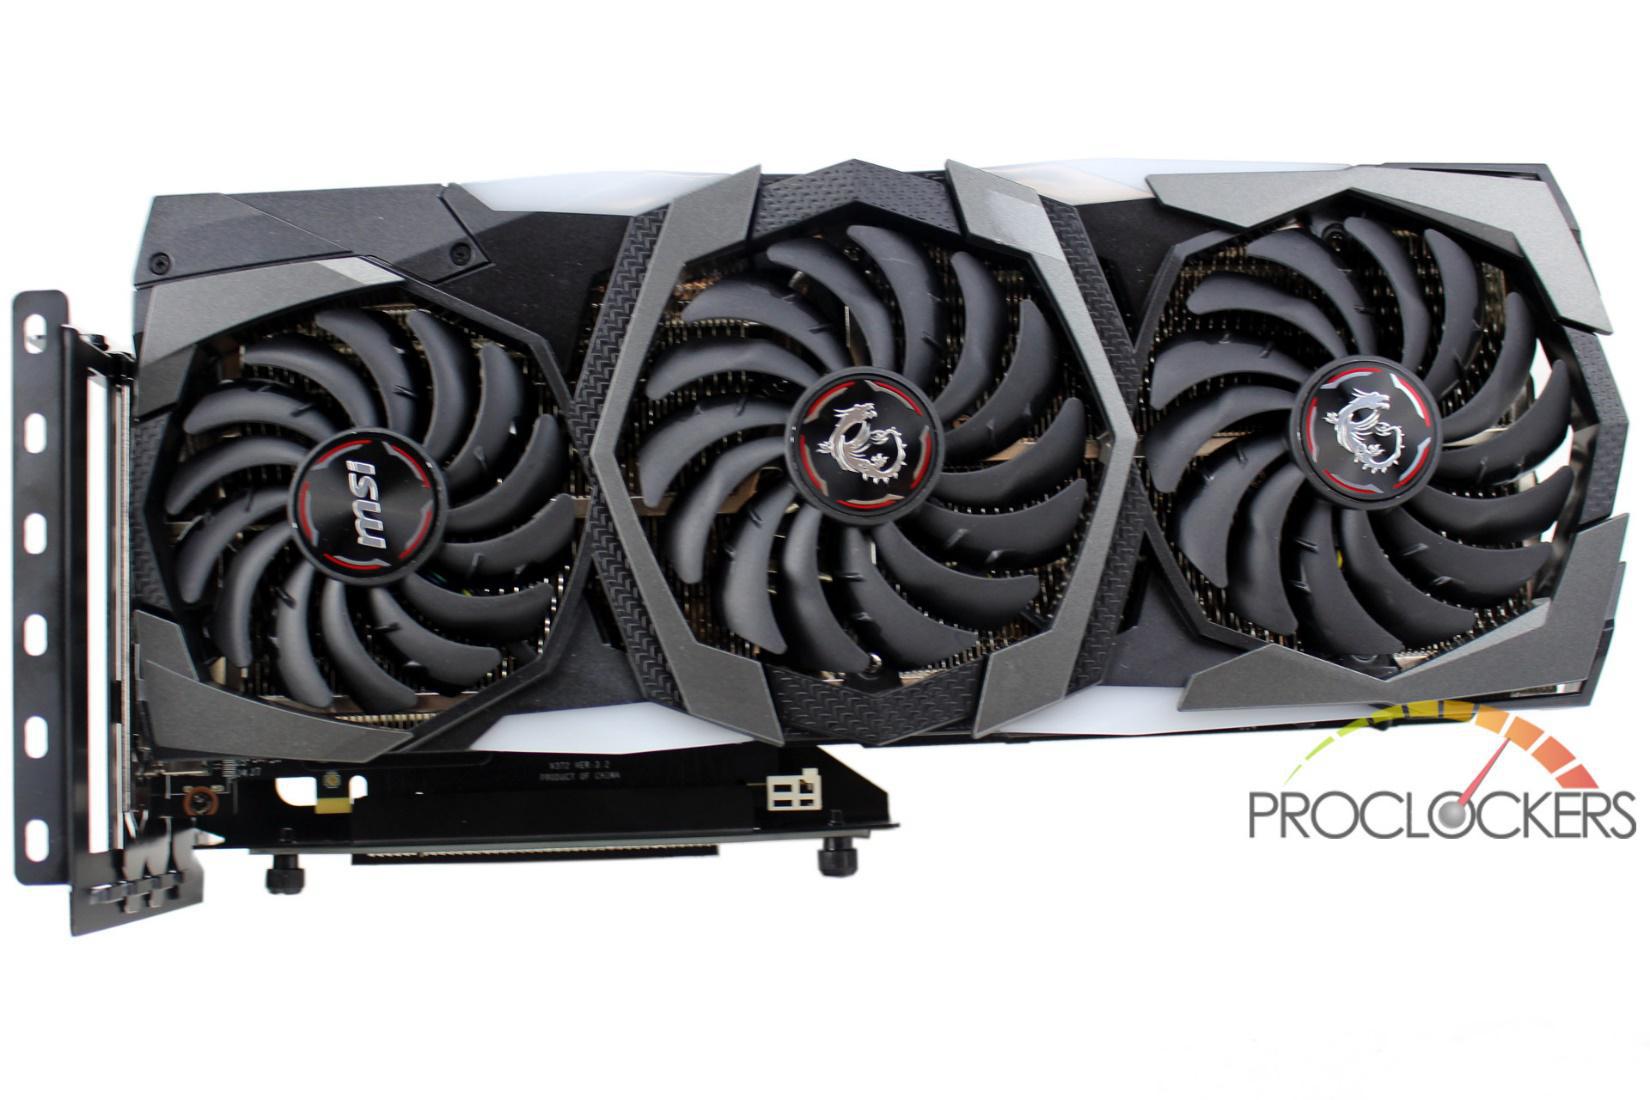
We’ll start out testing the MSI RTX 2080 Super Gaming X Trio plugged directly into the motherboard in typical fashion.
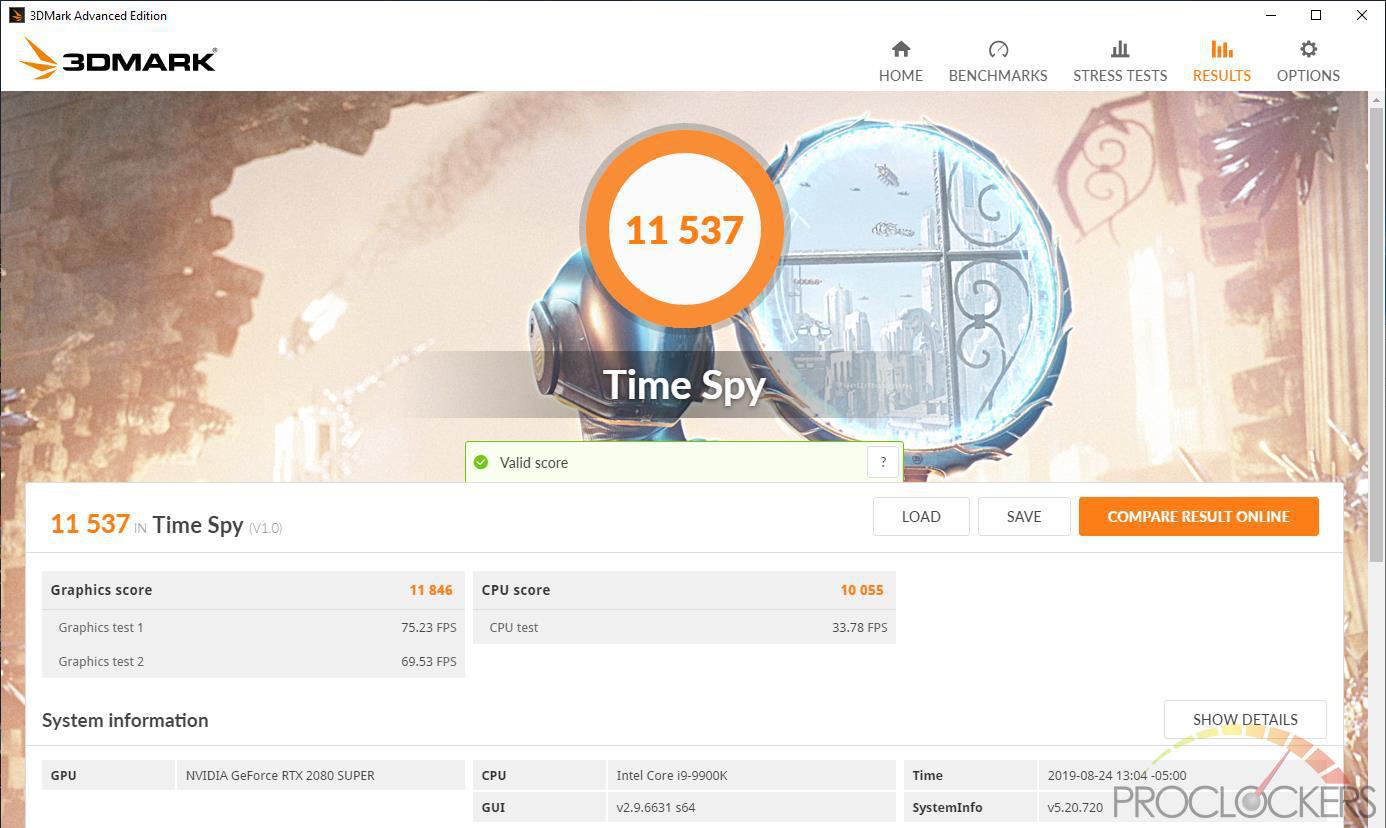
We see almost the same score with the MSI card mounted in LI-Heat’s kit. While the score *does* decrease 8 points, that makes up a statistically insignificant 0.07% change in score.
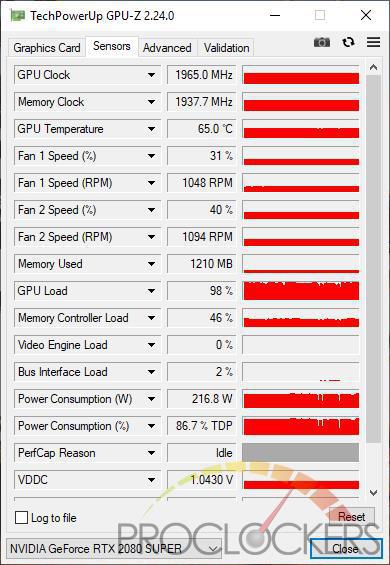
The next thing we want to do is show the thermal differences. This is running a stress test with the GPU mounted in the Li-Heat kit as pictured in the previous section. We got almost exactly the same results mounted regularly with no kit. Notice the peak temperature of 65C, with fans, ramped up to 31% and 40% respectively.
With the card mounted in the Cooler Master H500P Mesh Phantom Gaming Edition’s built-in Vertical Mounting position this puts the face of the GPU very close to the glass, and we see that reflected negatively.
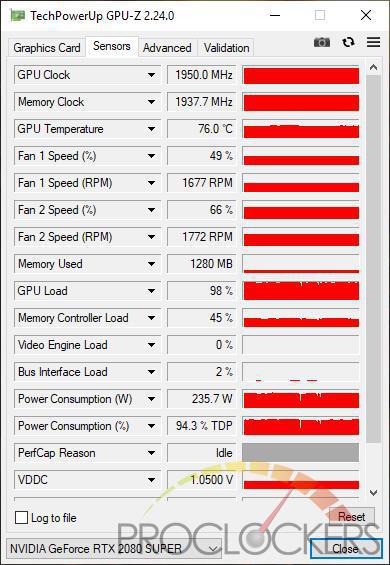
Boost clocks fall a bit, and we see an 11C increase in card temps which is a huge leap.
We also see the fan speeds ramp up from 31/40% to 49/66% which brings fan RPM’s up 500-600 RPM and makes the card audible. This might look really nice, but starving the GPU of airflow is never a good thing.
Final Thoughts & Conclusion
Li-Heat provides a robust and easily adjustable solution for mounting the crown jewel of your gaming rig in a way that will make you the envy of all your digital enemies. Even if you have a computer case that natively supports vertical mounting of a GPU, Li-Heat can still offer several benefits for a very modest price. Having tried several of the most popular solutions on the market, we can confidently say this model leaves most of them in the dust. The flexibility and support for even the largest cards on the market lead the way offer enough of an advantage on their own. The ability to hold the largest and heaviest cards with no sagging or flexing protects what is likely the most expensive part of your build from strain and damage and is really what seals the deal for us. While the card we used in this review is one of the largest on the market, the Li-Heat mounting kit didn’t give at all. The case we used did flex slightly under the load but we were able to adjust the bracket mounting enough to bring the card right back up to level.
Performance-wise, we couldn’t see any difference between normal mounting plugged directly into the board and using the riser. Our card was also kept far enough from the window to allow ample airflow which means boost clocks stayed high and temperatures and noise stayed low. While some AMD fans may complain that the riser doesn’t officially support PCI 4.0, Li-Heat has a solution coming to market soon for those users. In reality, the only PCIe 4.0 cards on the market at the time of this publishing don’t see a benefit from running at 4.0 speeds over 3.0 currently anyway. If we HAD to nitpick something, we would liked to have had a matching PCIe slot cover to fill the gap when using a 2-slot card, and MAYBE a couple of extra screws thrown in. The mounting kit uses standard case and drive screws readily enough, so you’ll probably have a few extra floating around anyway.
Great job Li-Heat!

For our readers in Europe, you can buy from PC-Cooling:


The 25 Best Anime Cats, Ranked
What are the best anime cats? Cats are something you either love with every fiber of your being or vehemently...


The 25 Best Anime Teachers, Ranked
Who are the best anime teachers? With high school being such a prevalent setting in anime, it makes sense that...


The 25 Best Orange Hair Anime Girls, Ranked
Who are the best orange hair anime girls? Orange hair is interesting in anime because it can either be a...