Hardware
Xigmatek Eris Mini-ITX Chassis Review
Introduction
Small form factor builds have certain advantages that make them ideal for particular purposes such as home theater PC builds, LAN party purposes and other situations wherein a smaller computer is ideal.
While limitations in building SFF using a mini-ITX chassis are more compared to larger cases, some brands are making an effort to reduce these limitations and try to fit larger hardware into an SSF build. One of those brands is Xigmatek and they recently released an addition to their mini-ITX line of cases along with the Nebula, the Eris mini-ITX chassis which we will be reviewing today. If you are planning to build an SFF PC soon, check out the Xigmatek Eris and you might just find the case you need.
Xigmatek’s Take on the Eris Chassis
At Xigmatek, we believe in innovation; to bring to you ever-changing designs and concepts to advance you further into the future.
By creating innovative chassis with different sizes, shapes, and functions we allow you to find the perfect choice for you and your home décor whether you want to have a stylish elegant look for your home theatre system, a futuristic design for your gaming station or a compact space-saving construct to fit comfortably into your study area.
With space becoming more and more a growing factor when planning out a room’s décor, the popularity of Mini-ITX systems has been on the rise. The new Eris Mini-ITX has a smart functional look with a compact design smaller than your average mini-tower giving you more options of room configuration.
The Eris is designed with innovative free-flow ventilation and interior layout making it perfect for those who want a powerful computer system without having to sacrifice considerable amounts of space.
For the newest compact Mini-ITX chassis innovation, the new Xigmatek Eris is without a doubt the ideal choice.
Features
- Includes pre-installed silent 80mm high-efficiency liquid FCB (Fluid Circulative Bearing) fan.
- I/ O panel includes 2 x Super-Speed USB 3.0, HD Audio In/Out jacks.
- Capable of mounting Mini-ITX motherboard.
- Innovative 1 x 5.25’’ or 3.5’’ or 2.5’’ + 1 x 3.5’’ drive bays.
- Supports standard ATX size power supply.
- Innovative silent free flow air design and highly ventilated for optimal thermal reduction.
- Supports up to 300mm game graphics.
- Prestige, brushed aluminum style front panel
- 120mm water cooler support with innovative 240mm water cooler option with removal of optical disc drive.
- Removable, tool-free, thumb-screw, top and side panels for convenient mounting of components.
- Top and bottom dust filter
For more details, check you the Xigmatek website at www.xigmatek.com. Let’s check out the packaging and unbox the chassis on the next page.
Packaging and Unboxing
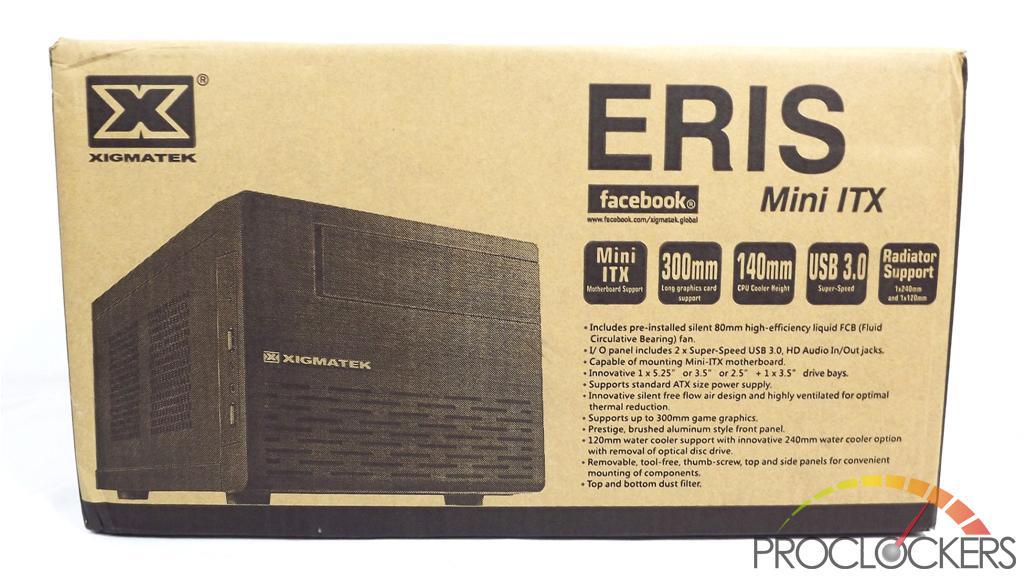
The Xigmatek Eris comes in a carton packaging with the features written in the front.
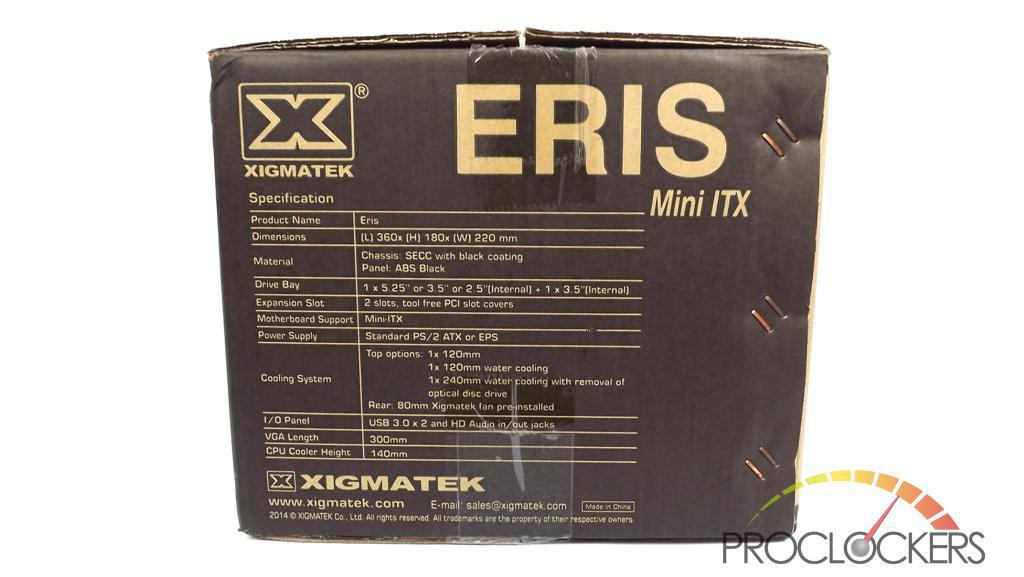
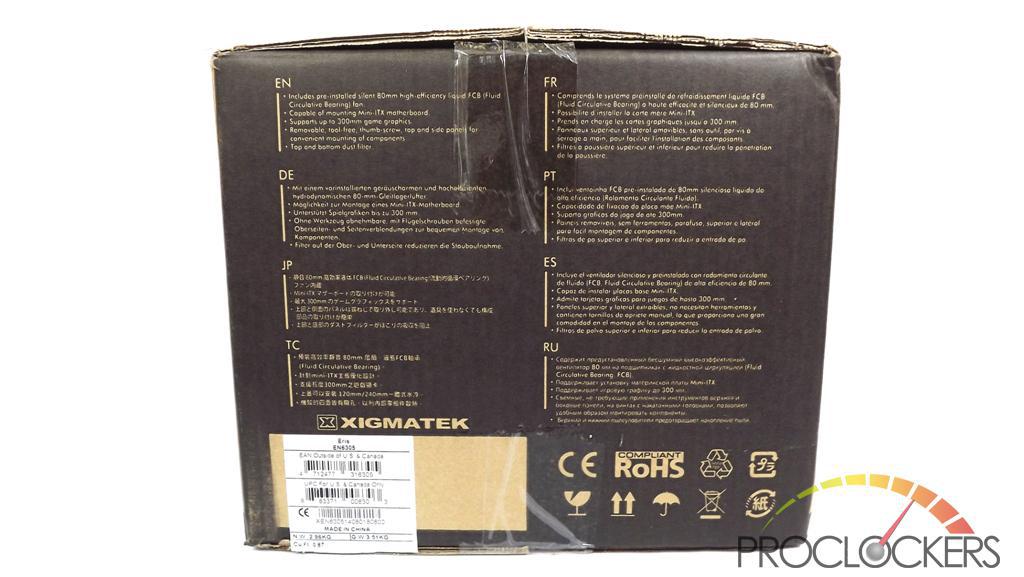
The sides contain details on specifications and other details features in different languages.

The Eris is protected with foam and a clear plastic bag. Pretty much the standard packaging protection.
Accessories
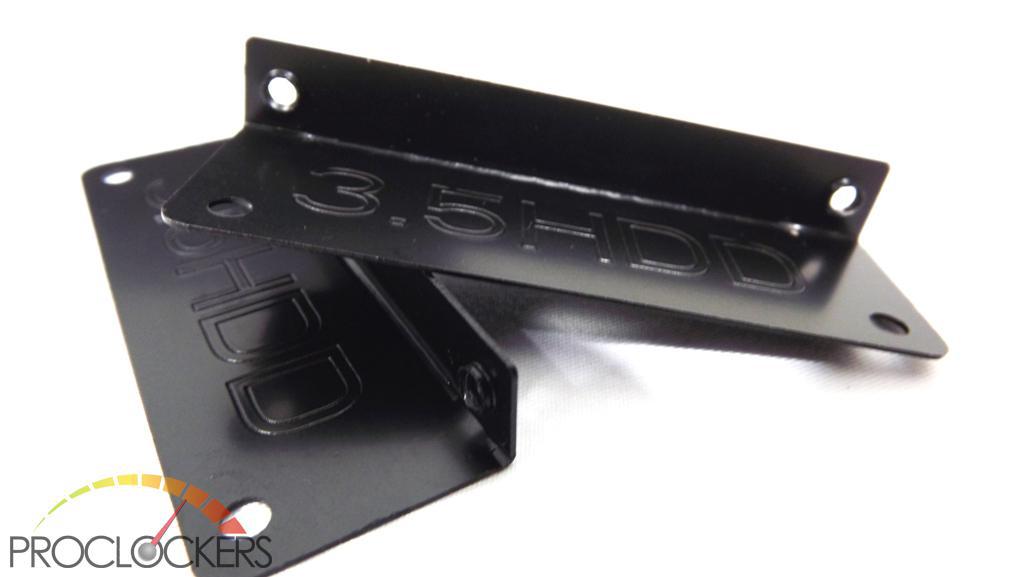
These are 3.5-inch HDD brackets you can use on the hidden hard drive mounting holes to be shown on the later pages.

These are the case feet you would mount manually.

The motherboard speaker.
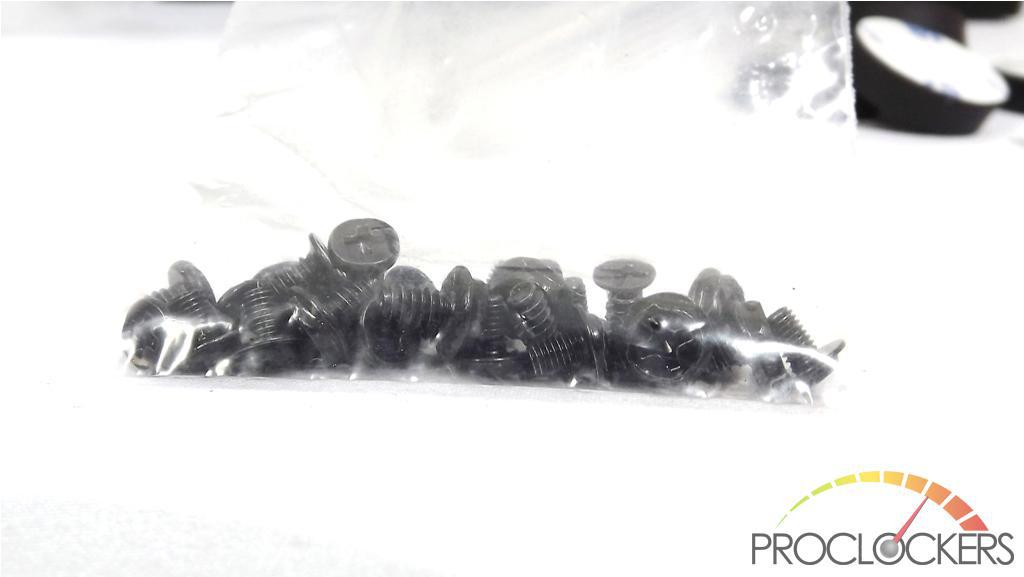
A pack of screws for mounting hardware on the Eris.
Closer Look – External
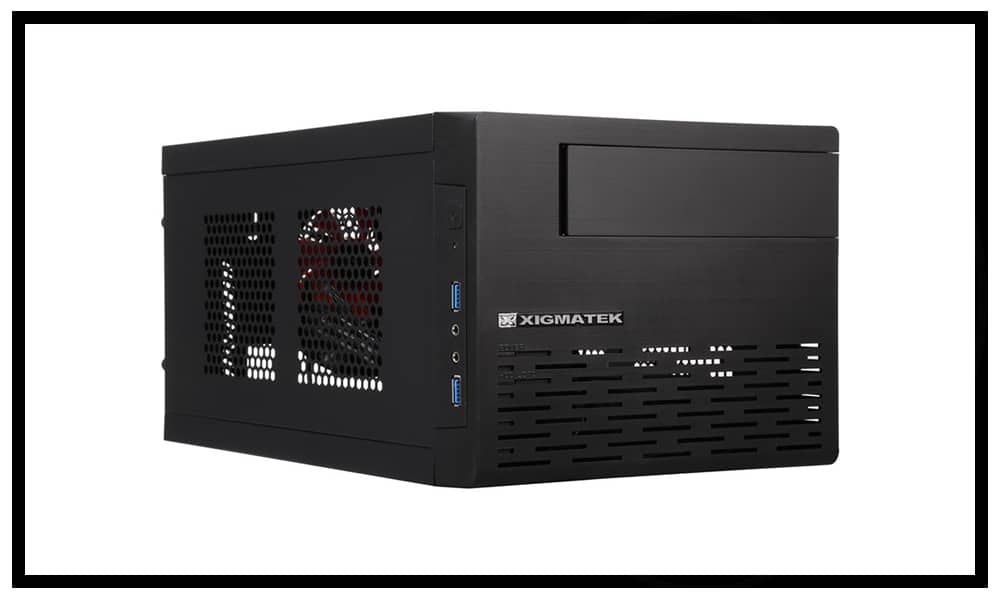
Now let’s take a closer look at the Eris.
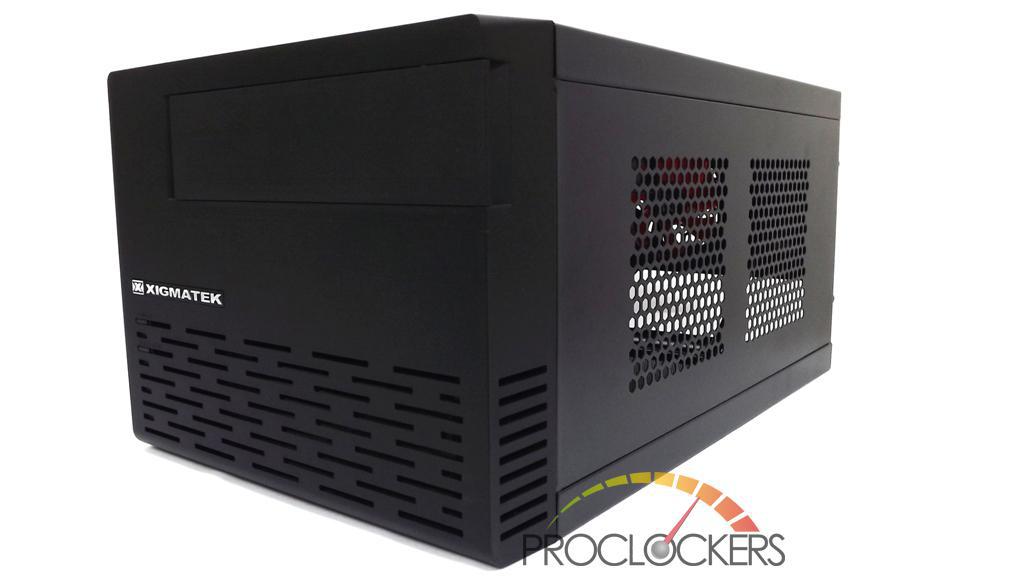
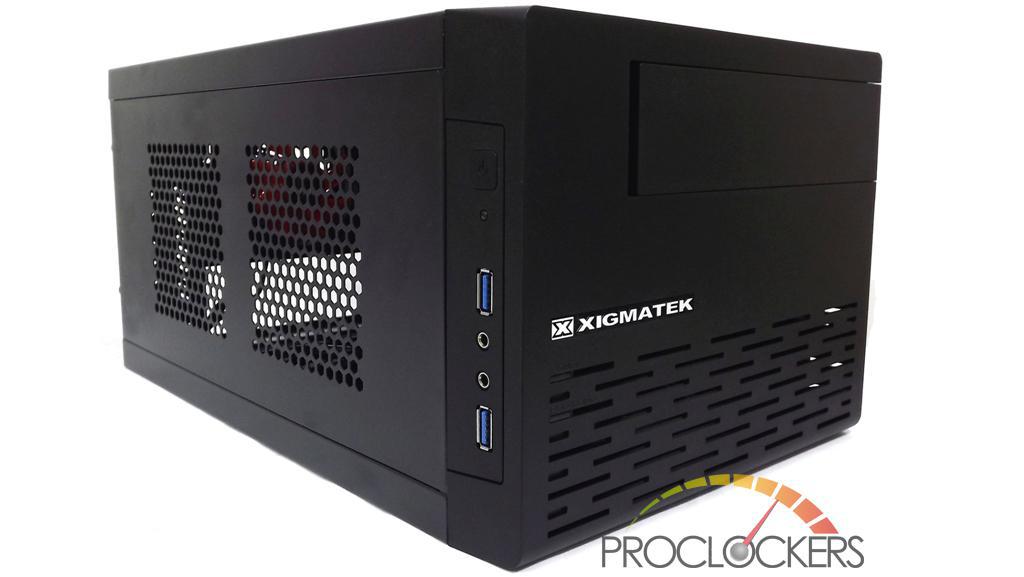
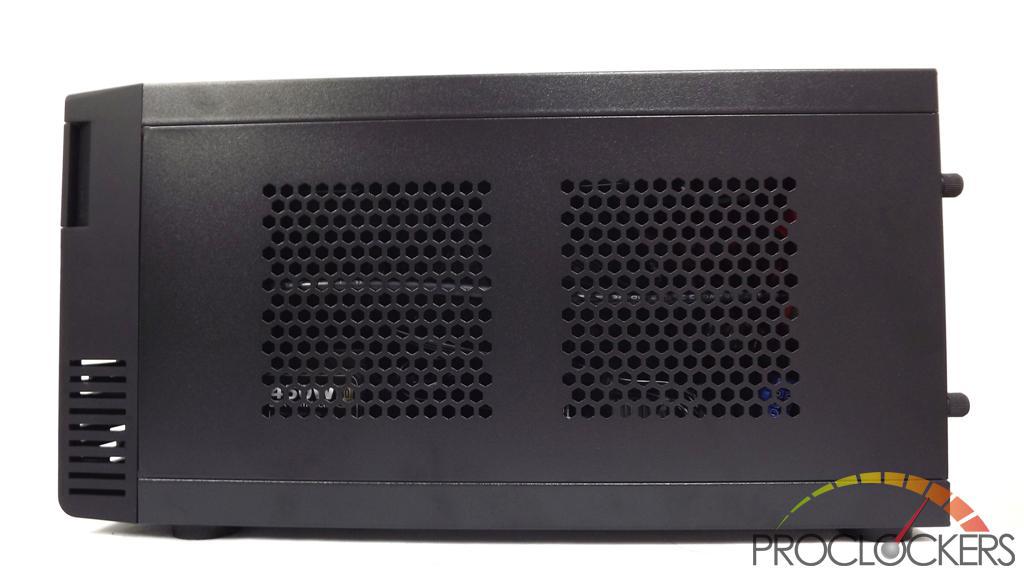
The Eris have a very basic shape and full of ventilation holes in all sides, literally.
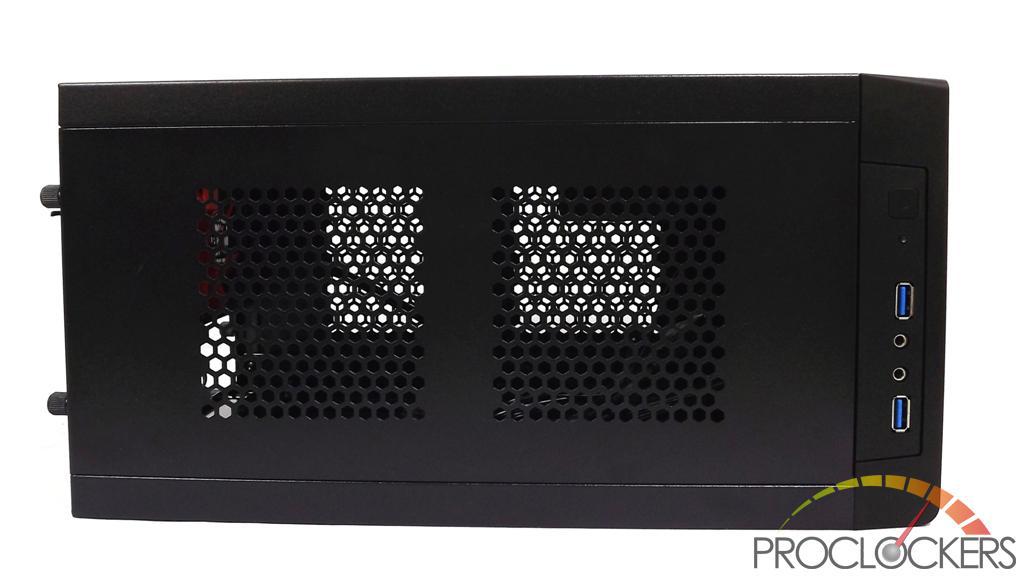
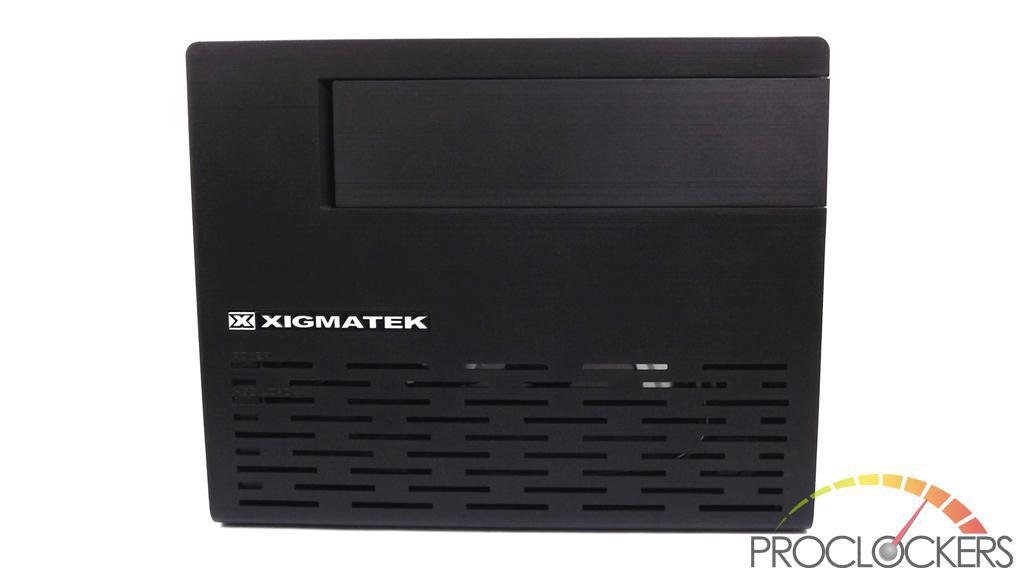
These are the side panels of the Eris. The topmost image show the left-face side panel where you can find the front O/I panel. So if you place this chassis to the right of your desk, the I/O panel will be favorable to the user.
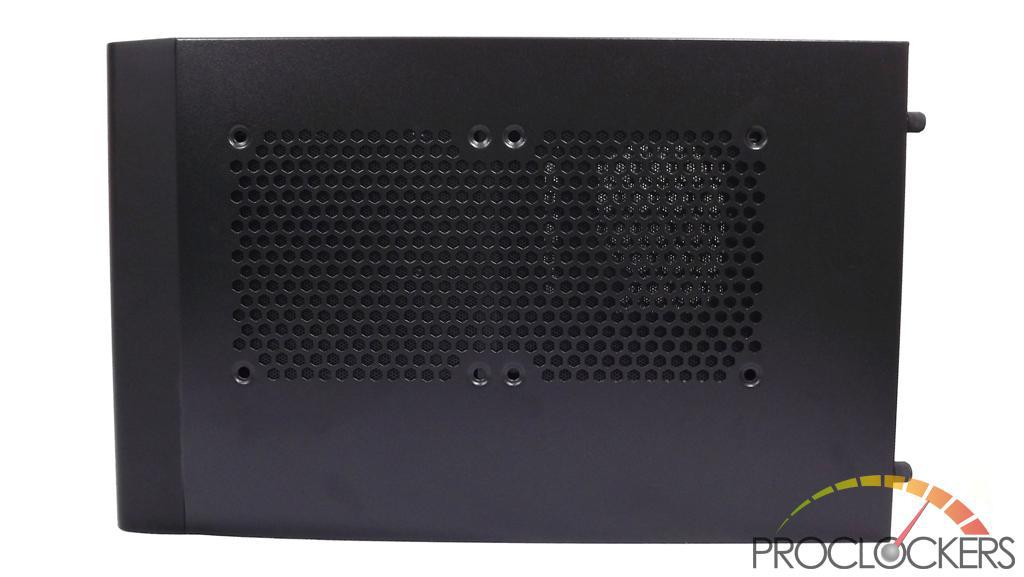
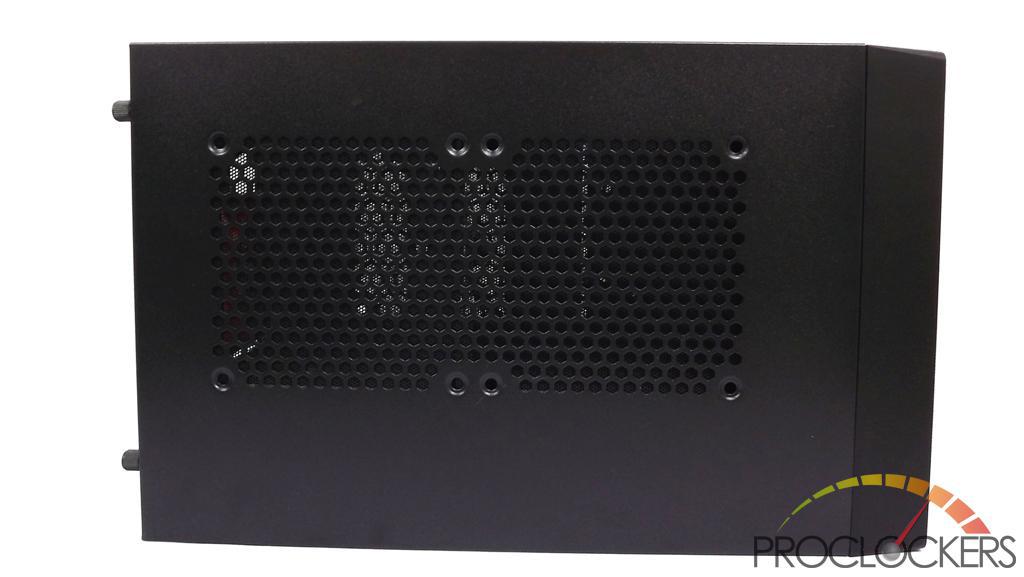
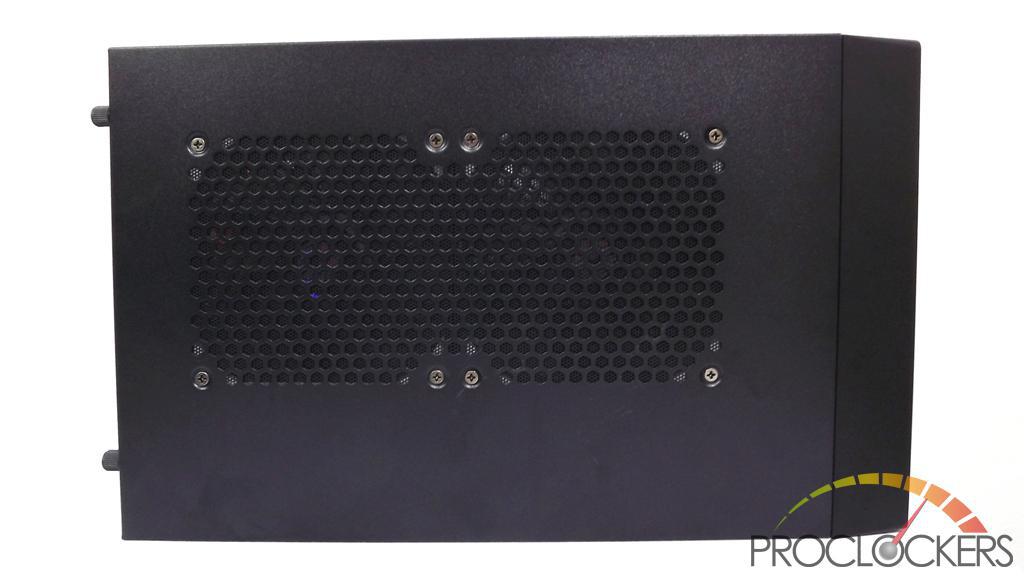
These two images above are the top and bottom panels which looks very identical. Notice there are no case feet attached anywhere? Case feet are attached manually which we will show later in this review. Also, note that this chassis can have a vertical or horizontal orientation.
Move on to the next page for a closer look on the internal side of the chassis.
Closer Look – Internal
Here’s the front of the chassis without the front panel. There’s a single 5.25-inch bay for a single ODD or fan controller if desired. The bottom hole is where you would mount the power supply.
The Eris can use a standard ATX power supply and a SFX power supply wherein there’s a adapter plate already included which you need to remove if mounting a standard ATX power supply.
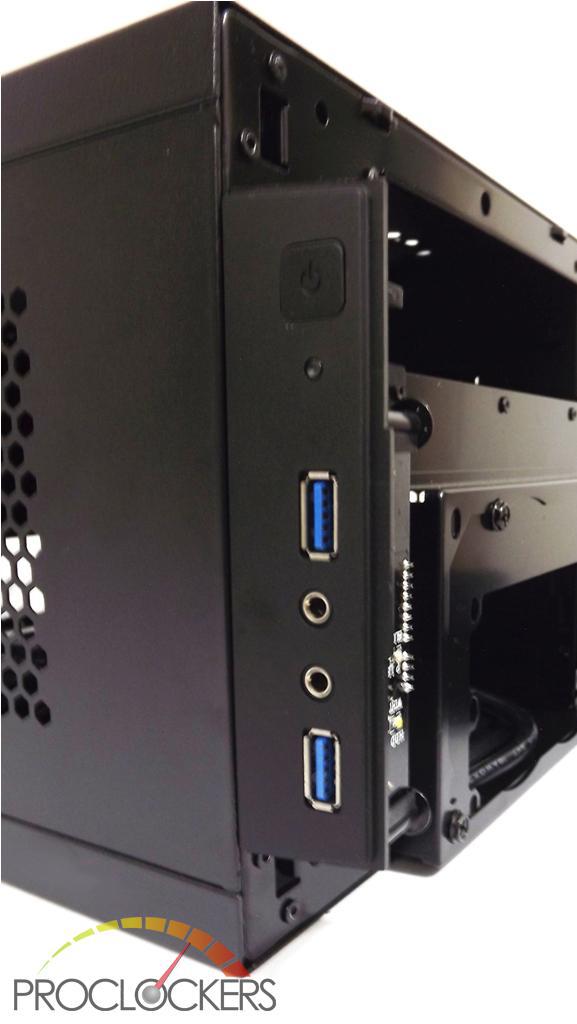
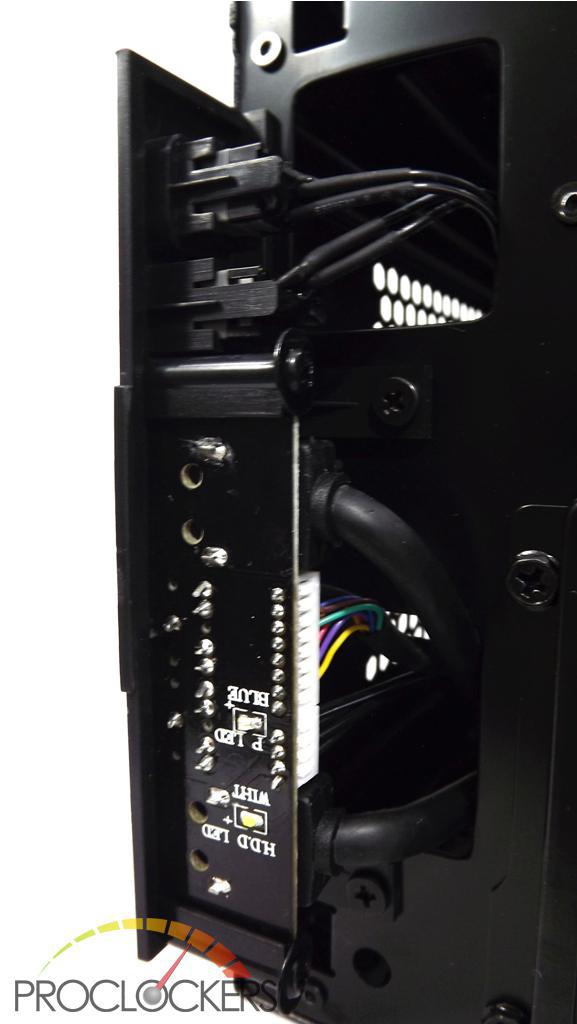
Here’s a closer look at the front I/O panel. It has the power switch on the top, 2 x USB 3.0 ports and the 3.5mm audio jack ports in between the USB 3.0 ports.
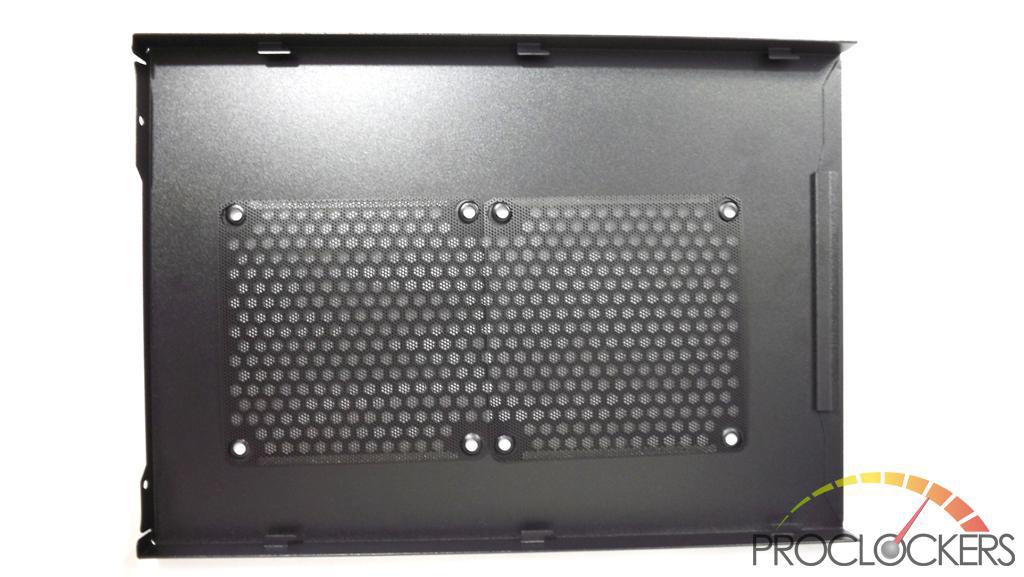
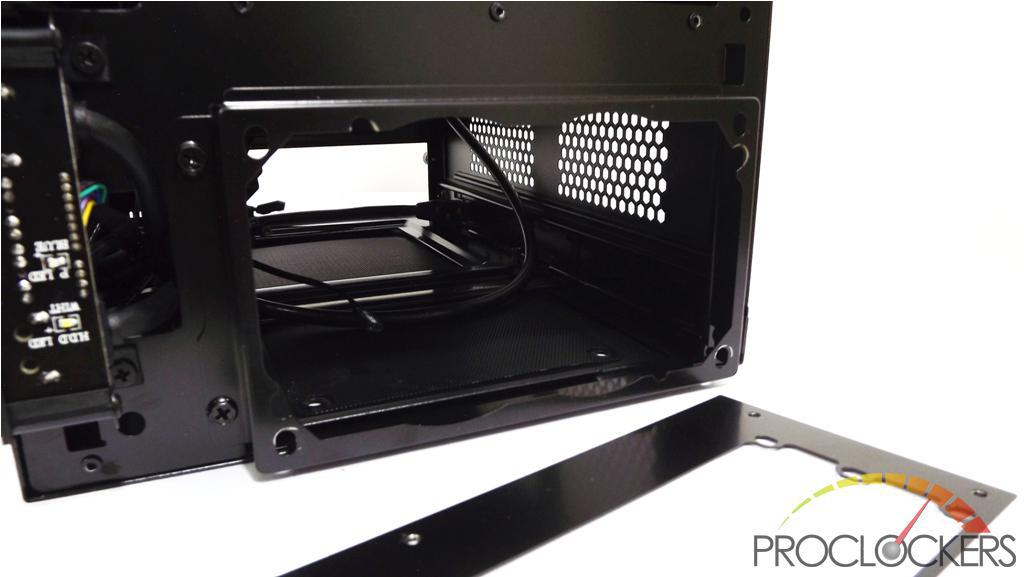
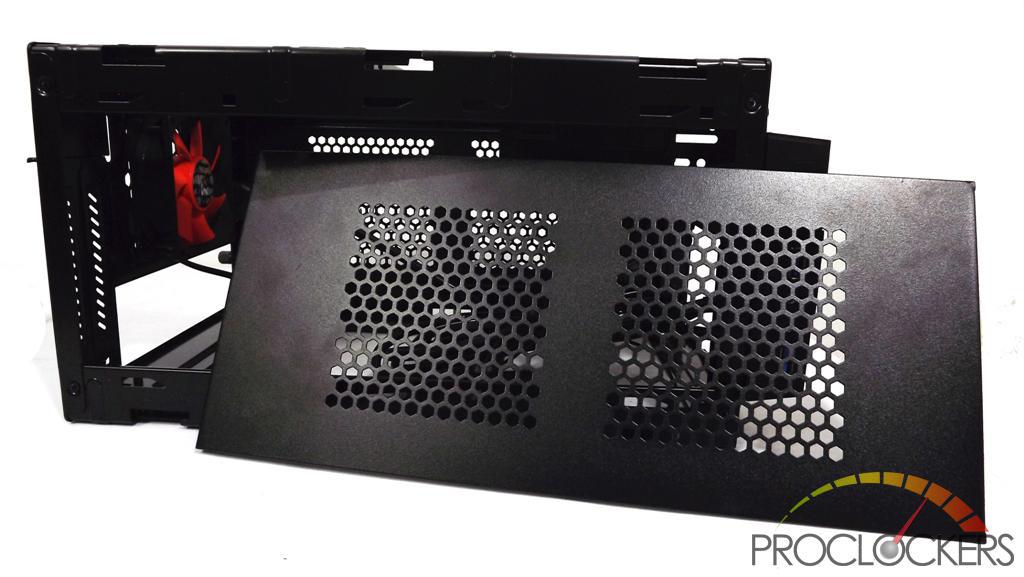
The top panel has a mesh filter and does support 2 x 120mm fans.
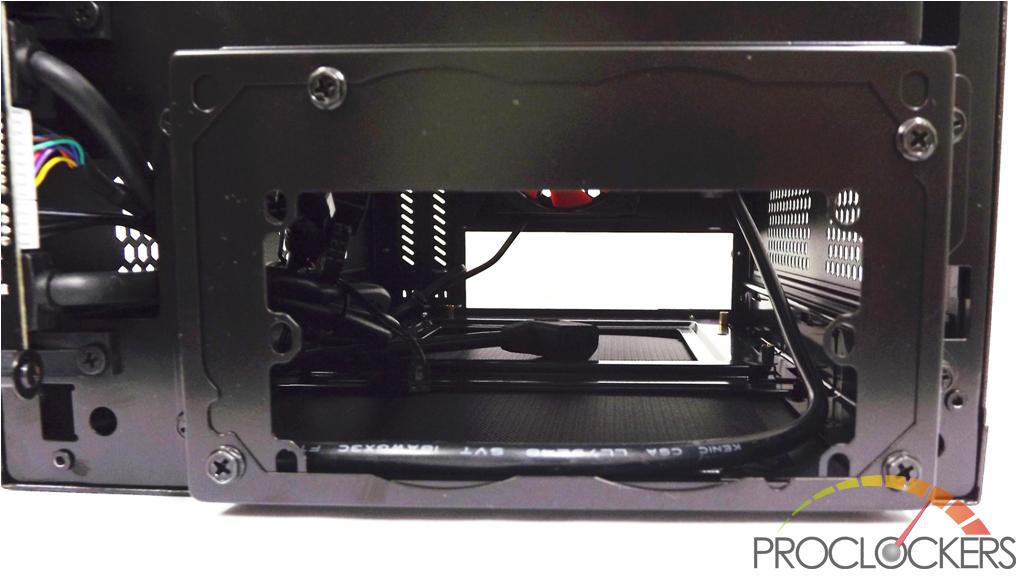
From the top, you can see the hidden drive bay mounting holes near the front, the back also has a drive mounting hole or 120mm fan mounting hole.
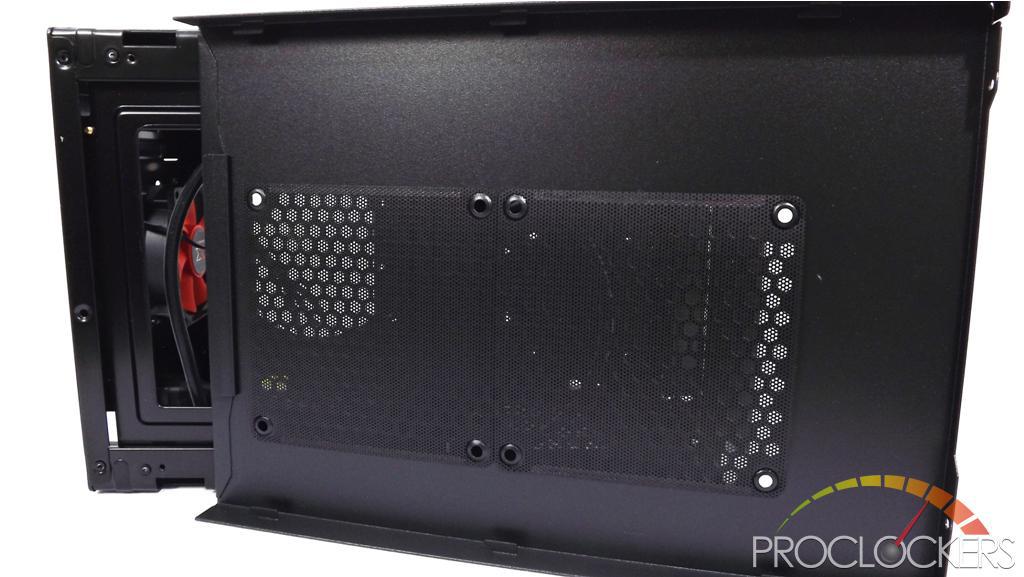
The bottom also has a similar panel. They are actually interchangeable with the top panel. On the bottom view, you can see the huge motherboard cutout hole and the hole for the power supply as well adjacent to where the power supply’s ventilation fan would be.
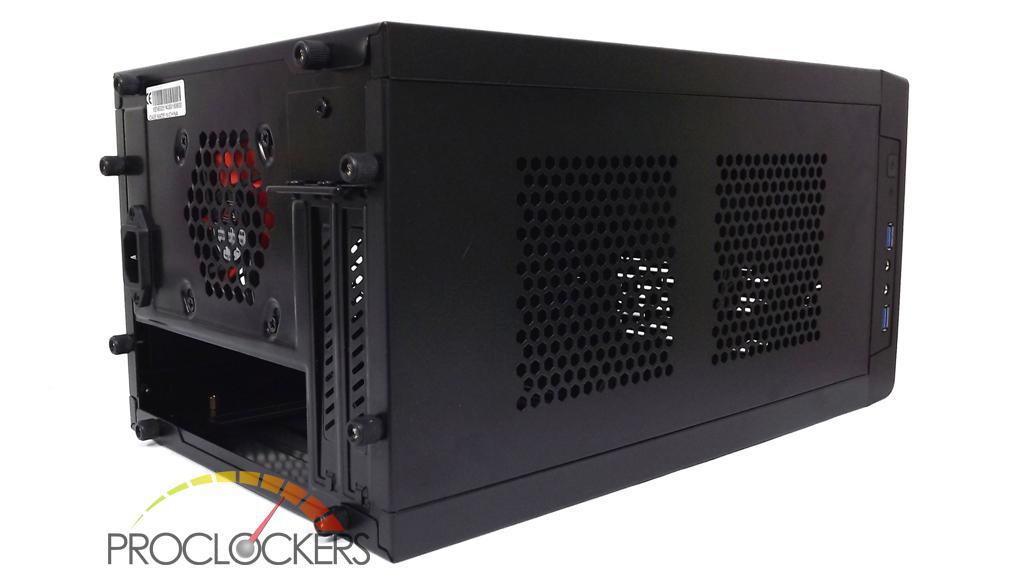
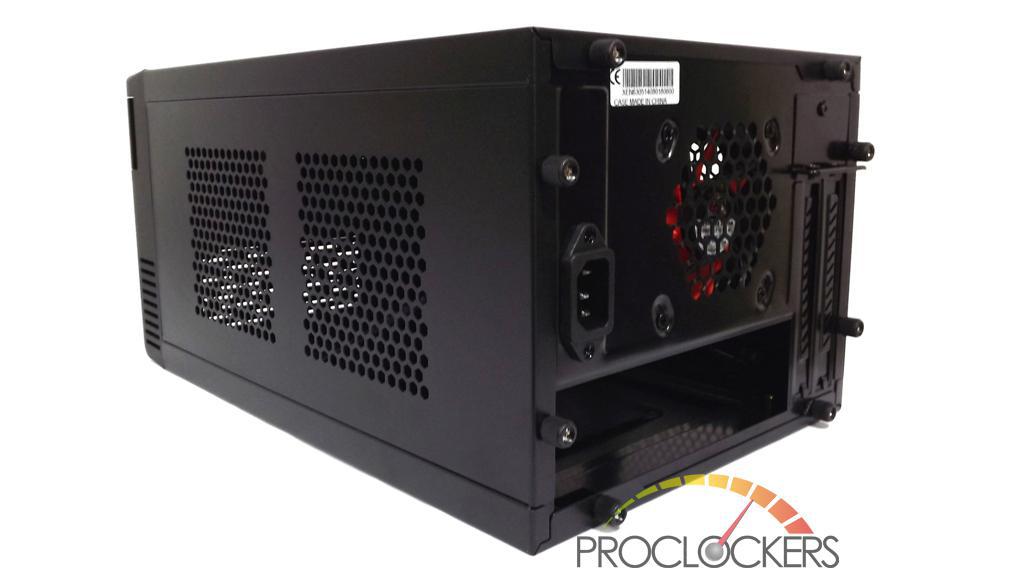
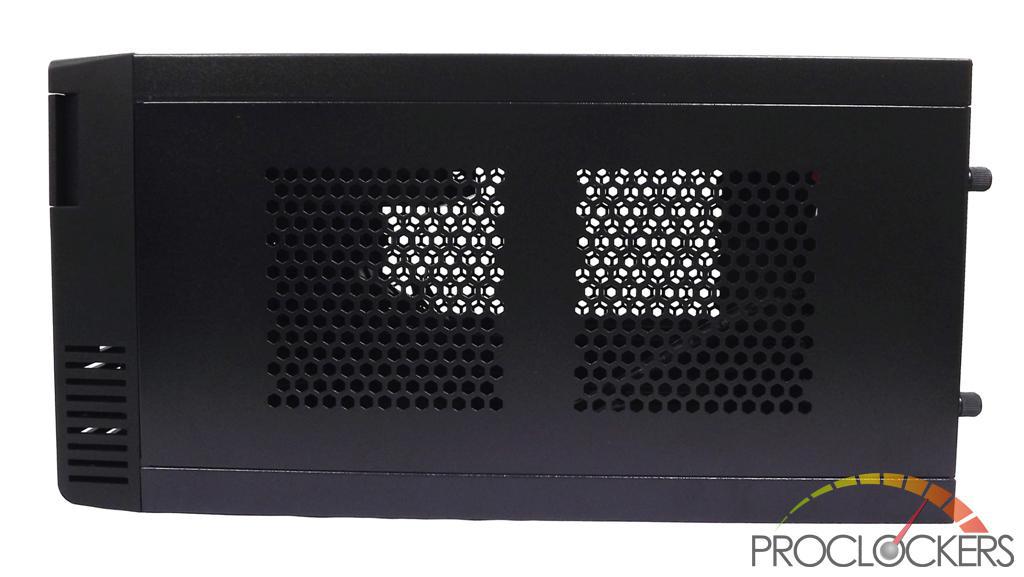
The side panels are identical on both sides.
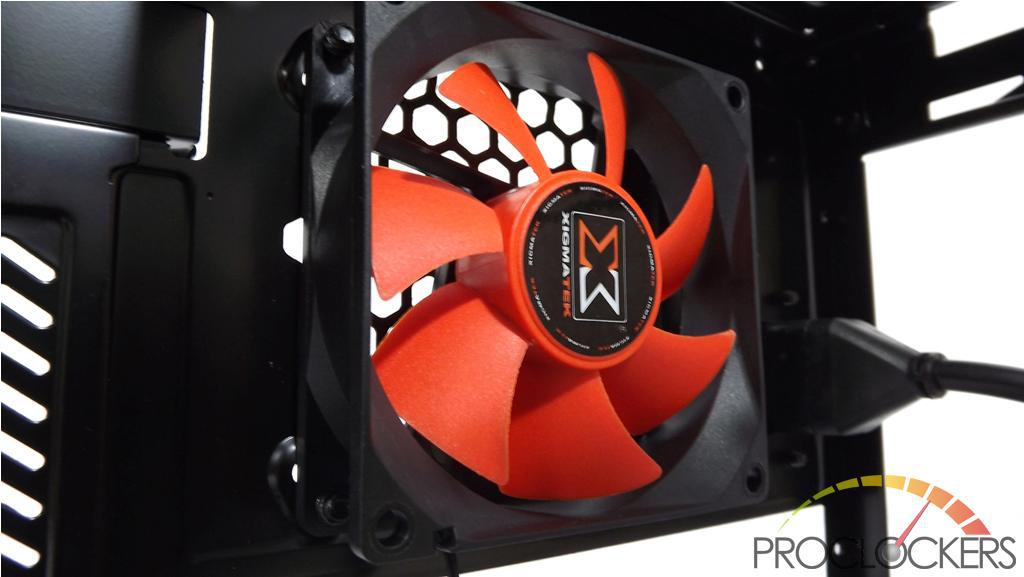
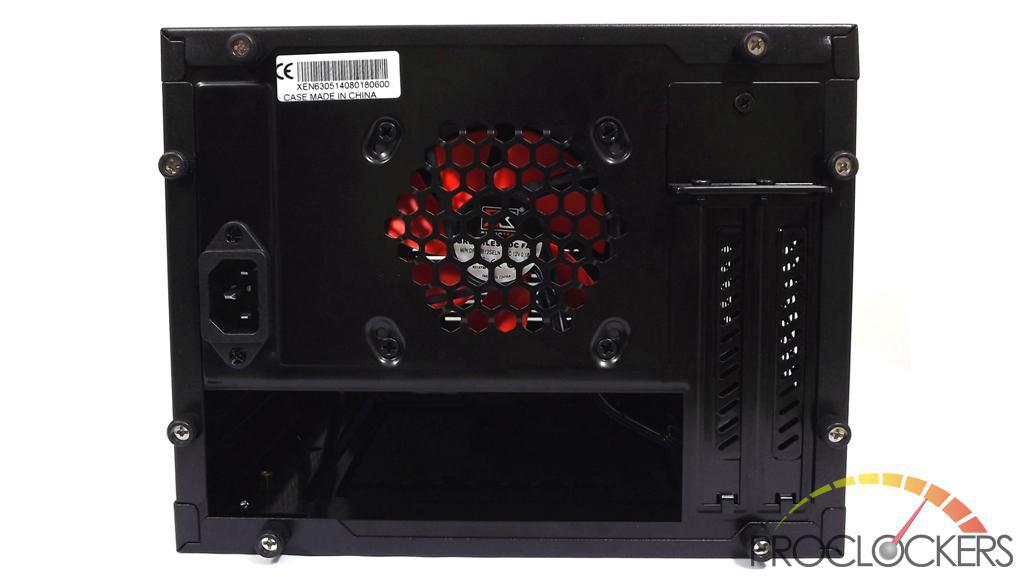
On the rear is a 80mm ventilation fan included with the Eris and it comes in an orange-black color.
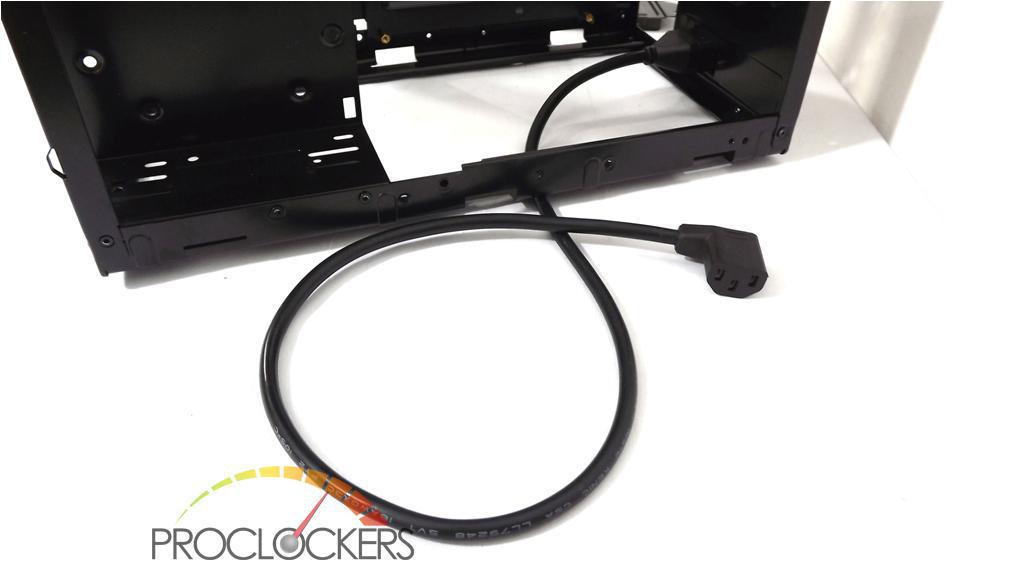
There’s a power supply cable extension that runs from the front to the back. You might be wondering why it looks longer that what is required. Later on the installation part you’d see that the cable is actually a perfect fit.
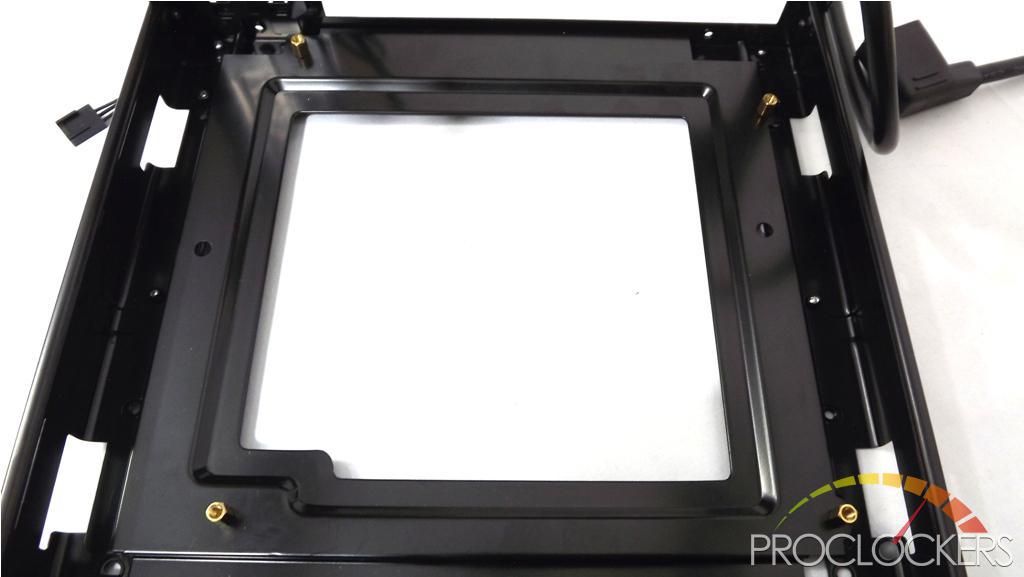
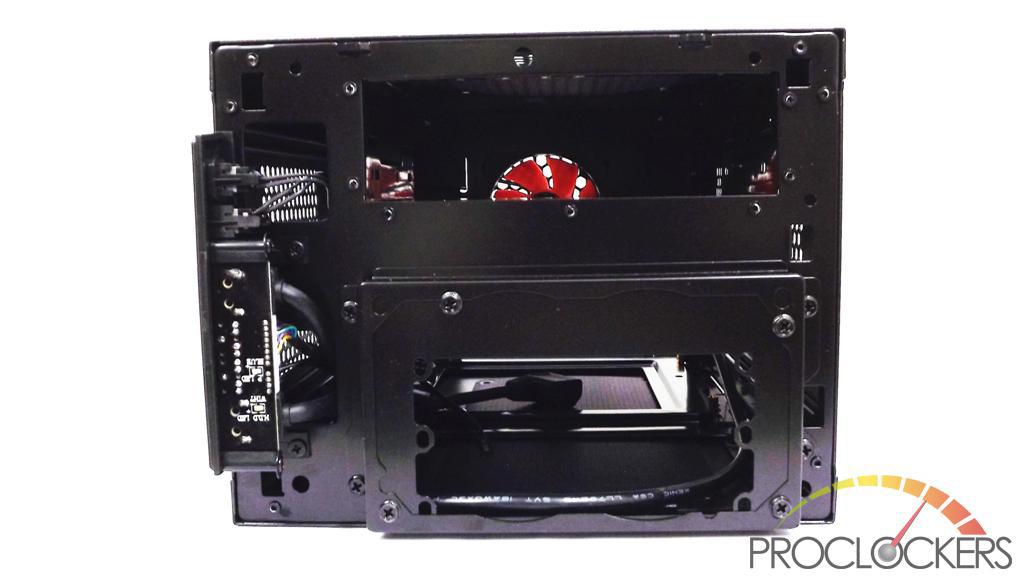
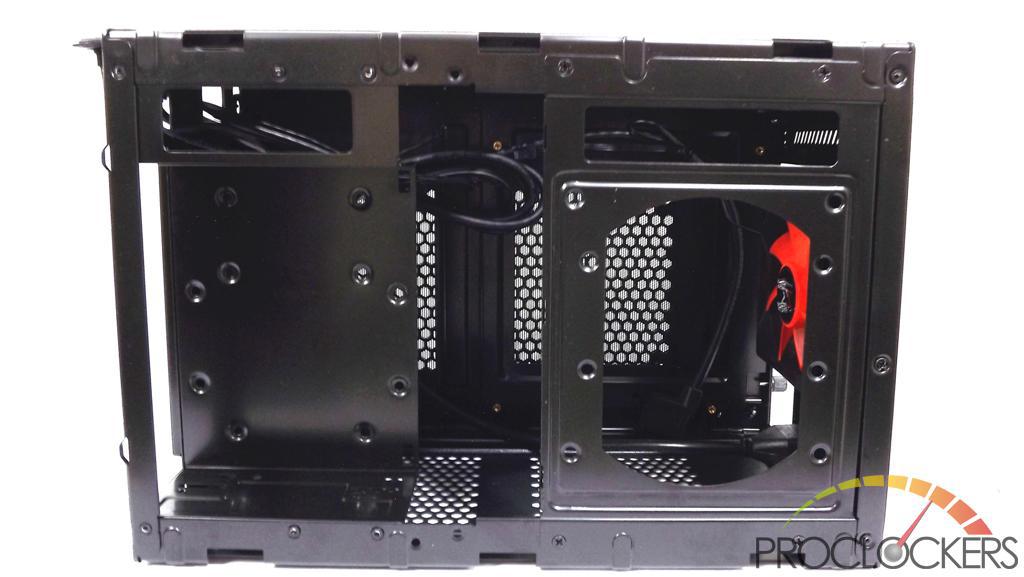
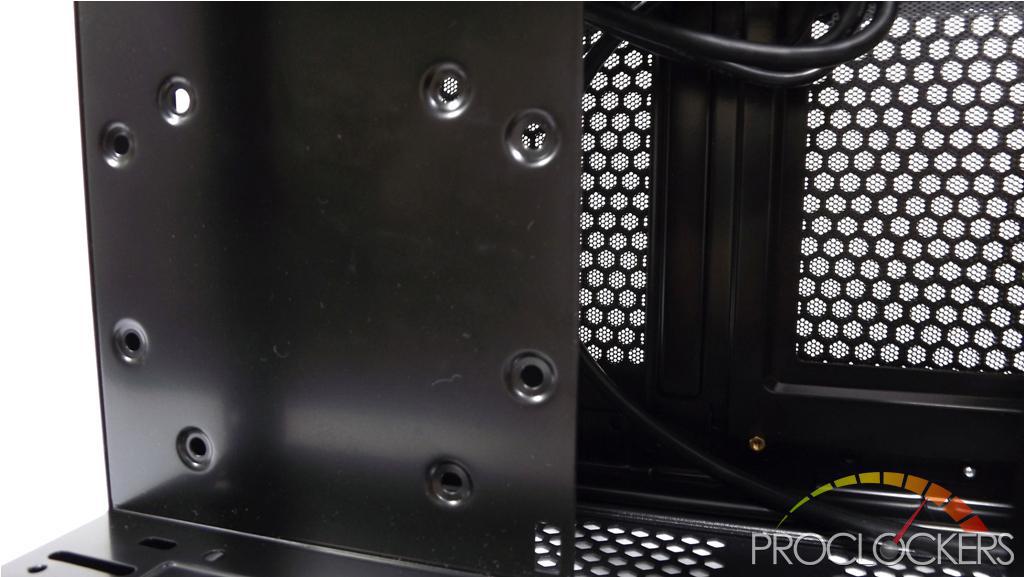
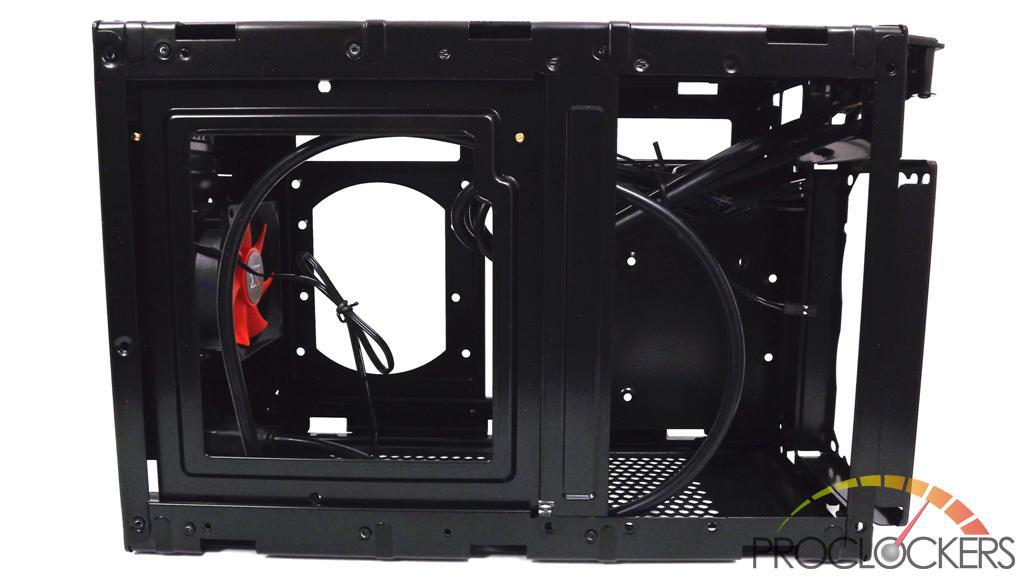
Here’s a closer look at the motherboard tray area.
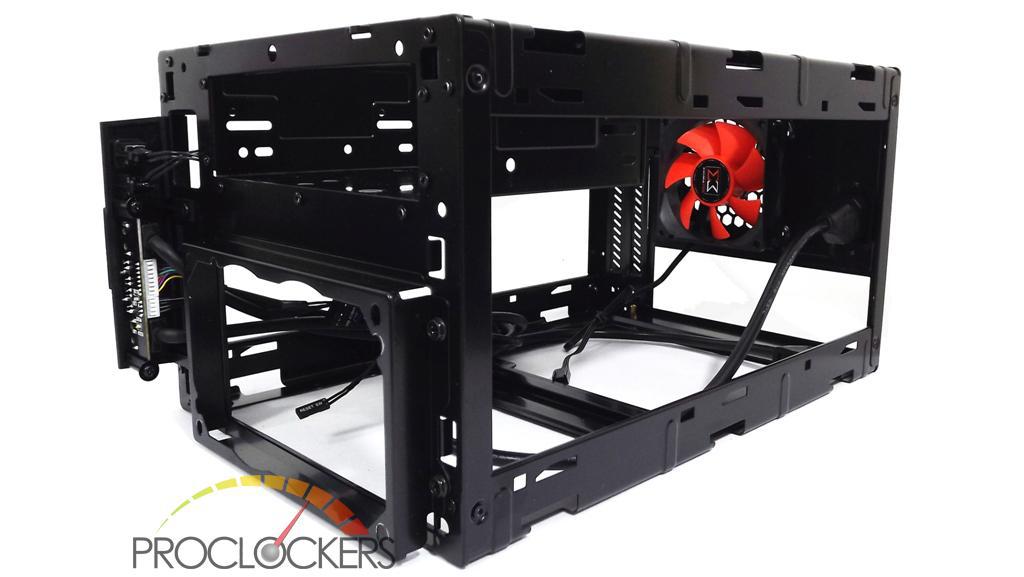
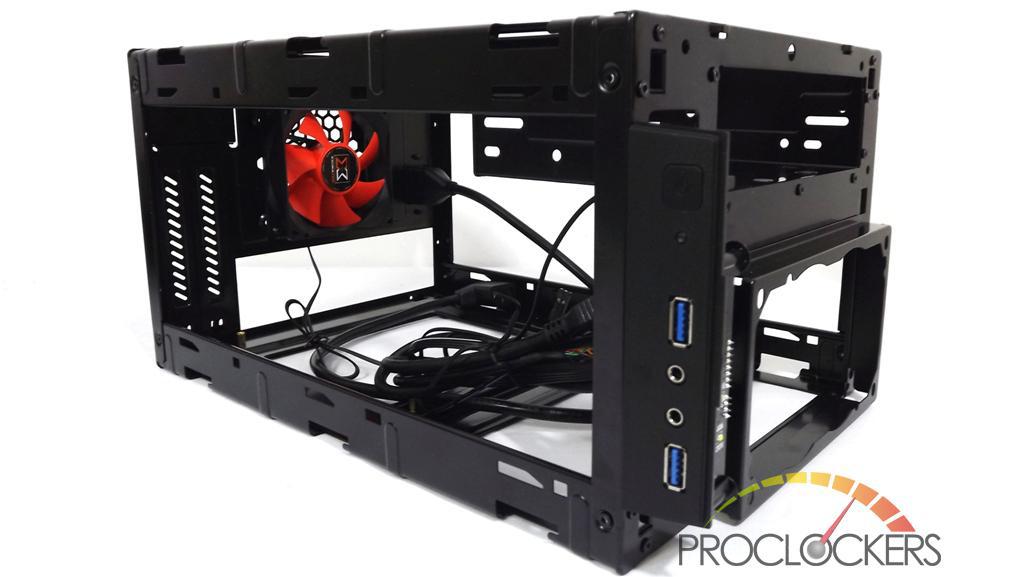
Here’s a look at the Eris without all the panels. Yes you can remove all the panels excluding the back. This makes installation very easy. Your hands can go and access any portion with ease with all the panels removed.
Now let’s move on to the next page for the installation.
Build and Installation
Our build using the Xigmatek Eris mini-ITX chassis will use the following hardware below.
- Motherboard: ECS H67H2-I mini-ITX motherboard
- Processor: Intel i3-2100
- Graphics Card: Gigabyte GTX 770 OC 2GB
- Memory: Kingston HyperX 10-Year Anniversary Edition
- Drives: OCZ Vector 2.5-inch SSD / Western Digital Caviar Blue 1TB 3.5-inch HDD
- Power Supply: Cougar SL 500 ATX PSU / Silverstone ST45SF-G SFX PSU
- Cooling: Intel Stock Heatsink Fan / 2 x 120mm ID Cooling NO 12025-W fans
- Other Hardware: Silverstone SST-PP05-E Flat Black PSU cables
Power Supply Installation
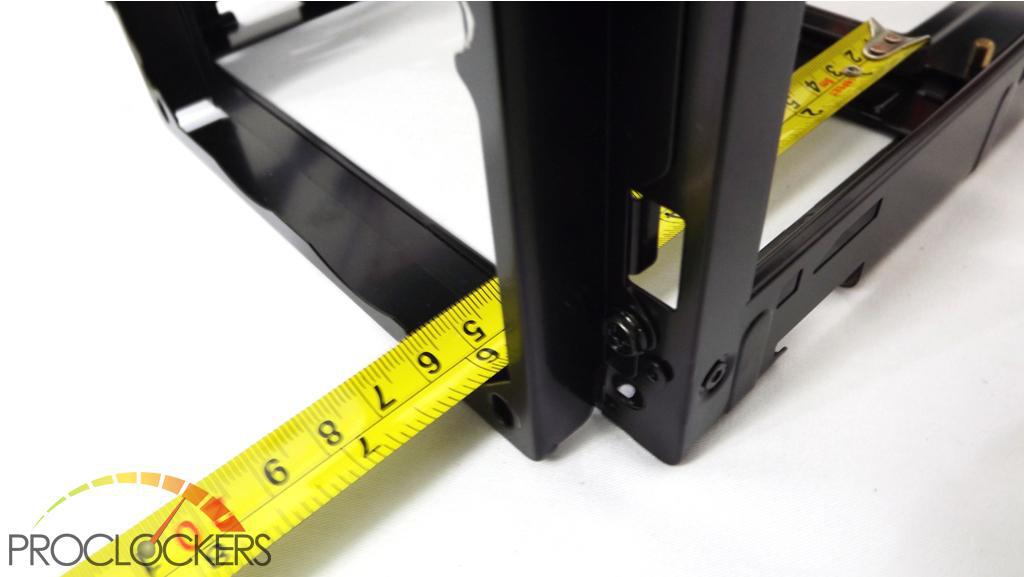
The power supply bay can accommodate any standard sized ATX power supply with lengths less than 15 centimeters to be sure.
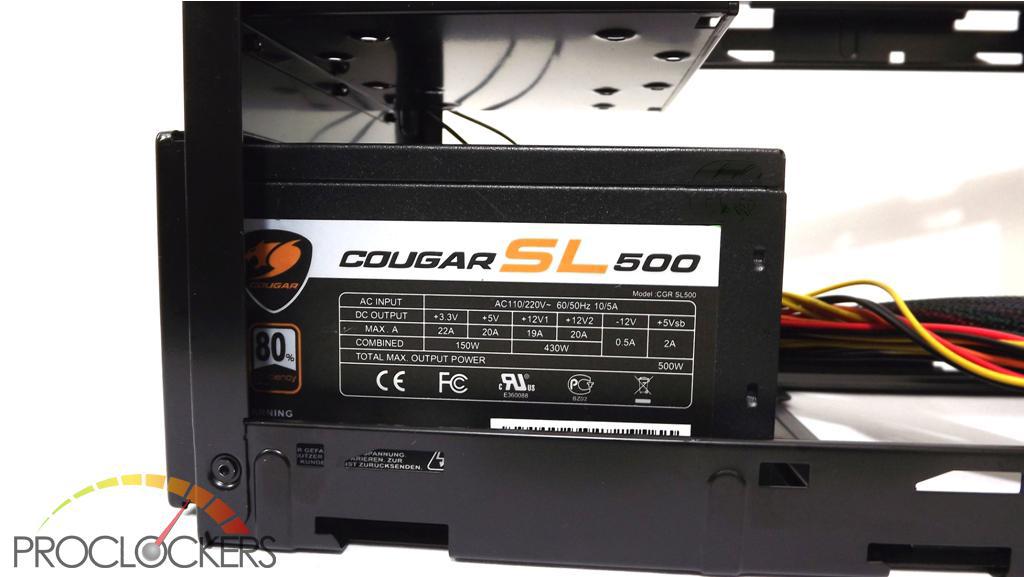
Using a standard ATX PSU like the Cougar SL500 is a perfect fit on the chassis. Just enough space behind to mount the motherboard.
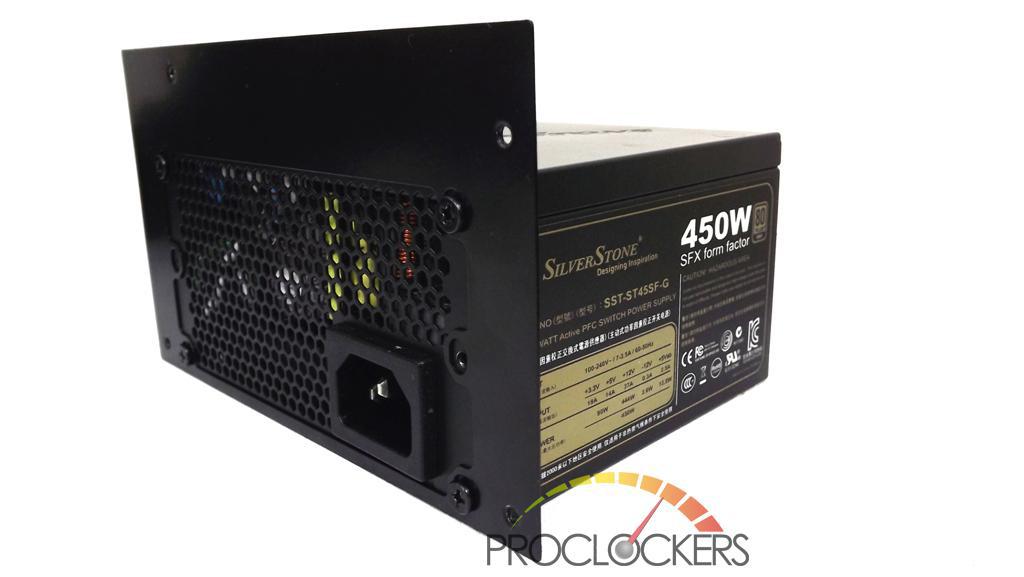
Using a SFX PSU like the Silverstone ST45SF-G, you need to mount it first on the adapter plate then mount it in the PSU bay.


Make sure you don’t use the two bottom screw holes on your SFX PSU because it will hit the PSU bay. You can use the 2 topmost screw holes and the middle screw holes to secure the SFX PSU on the adapter plate.
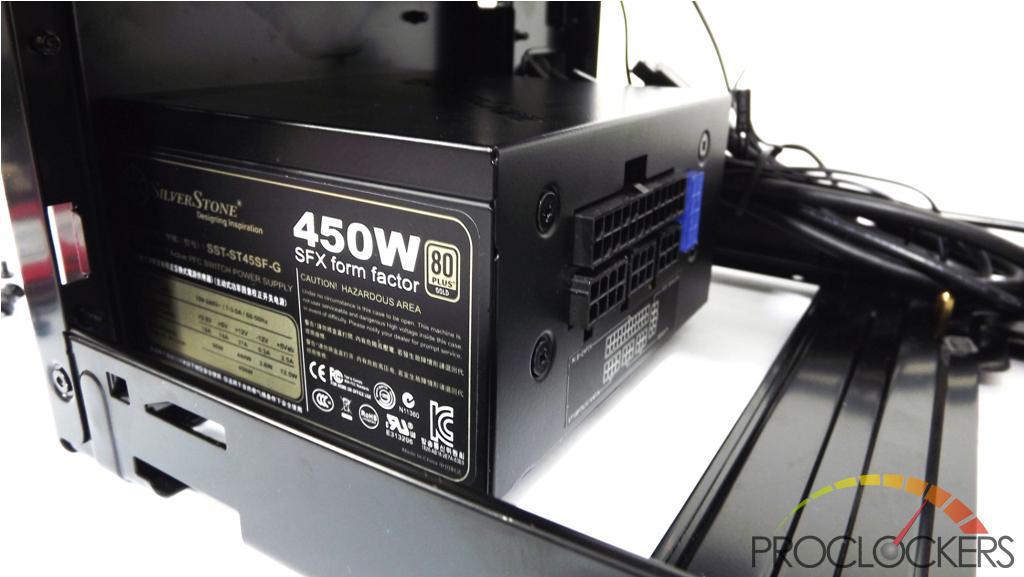
Clearly, using a SFX PSU will give you more space behind for managing cables and have a neater build.
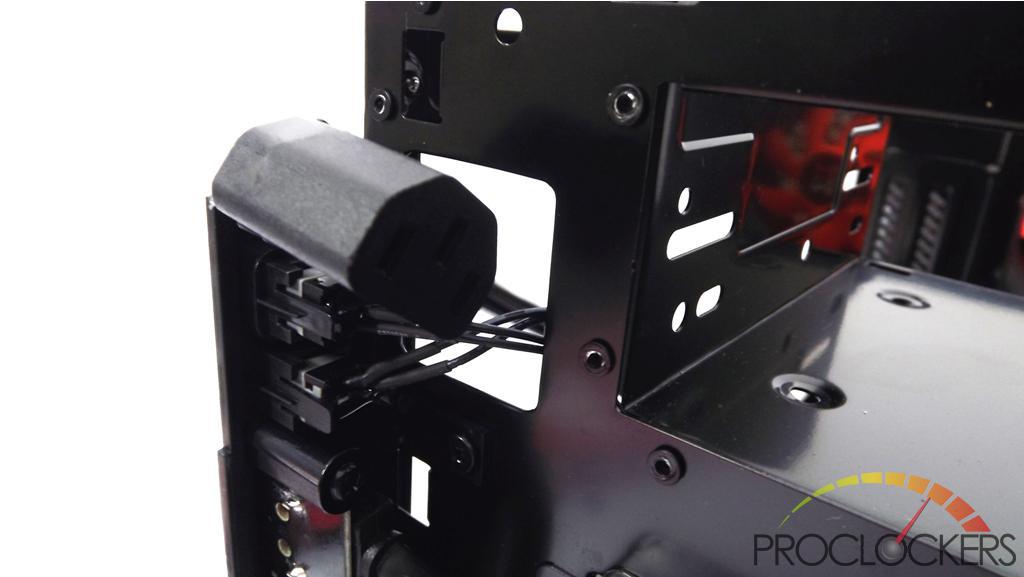
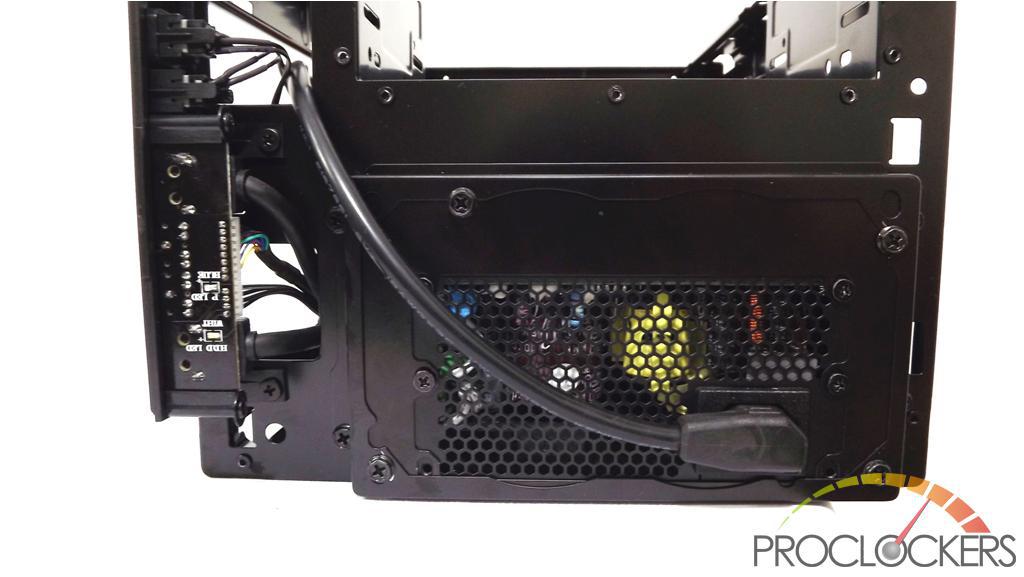
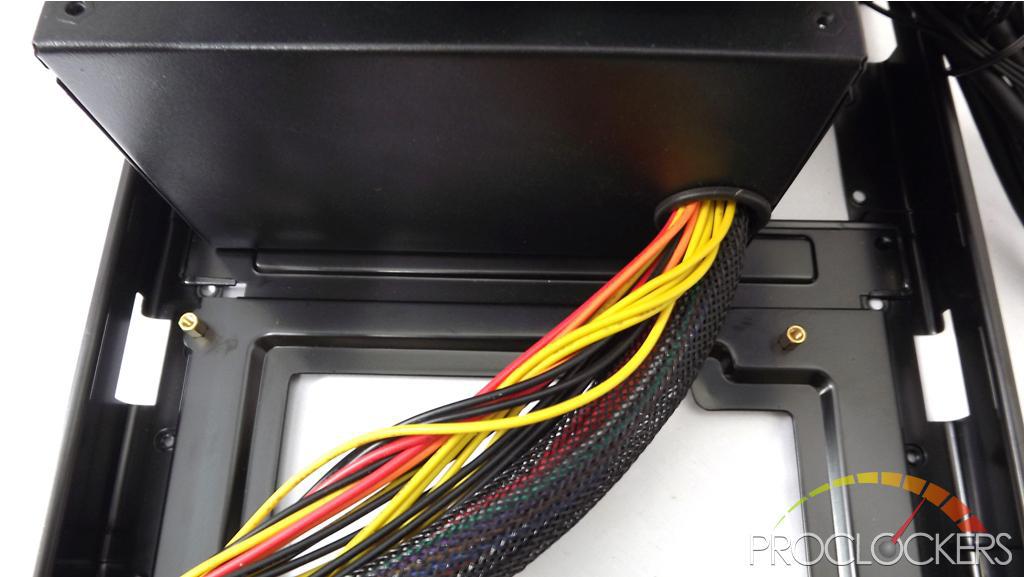
For the power supply extension cable, you need to have it run through a routing hole above the front I/O panel then reach your power supply’s socket. This is why the length of the cable looks long but its actually just enough for it to reach your power supply.
Move on to the next page for the continuation of our installation using the Xigmatek Eris chassis.
Build and Installation Continued
Motherboard Installation

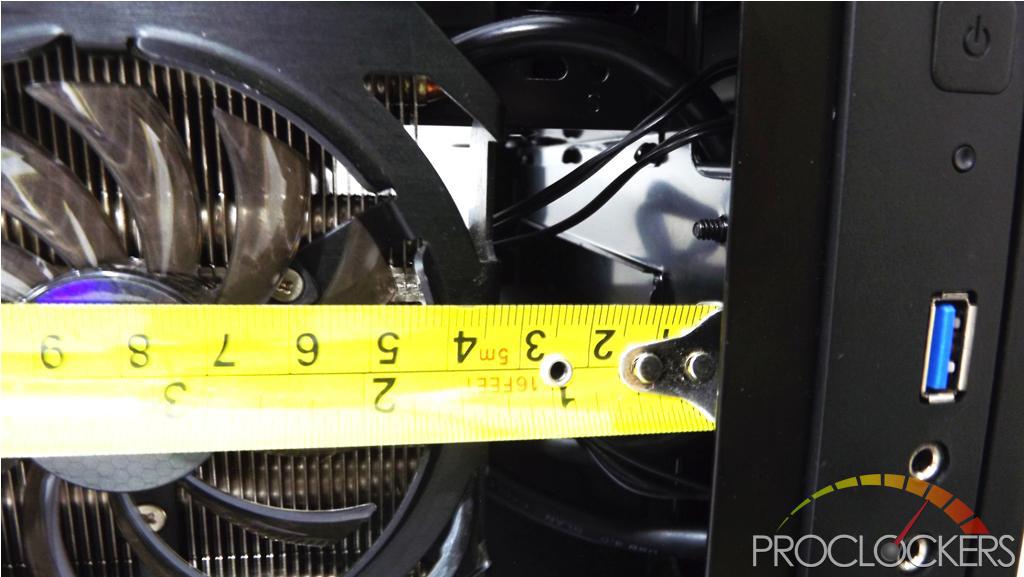
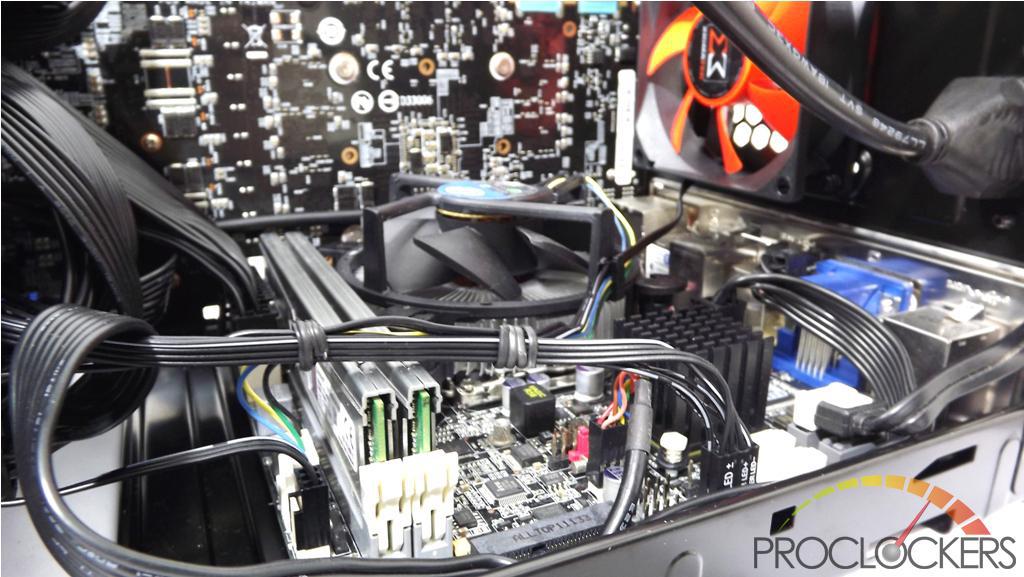
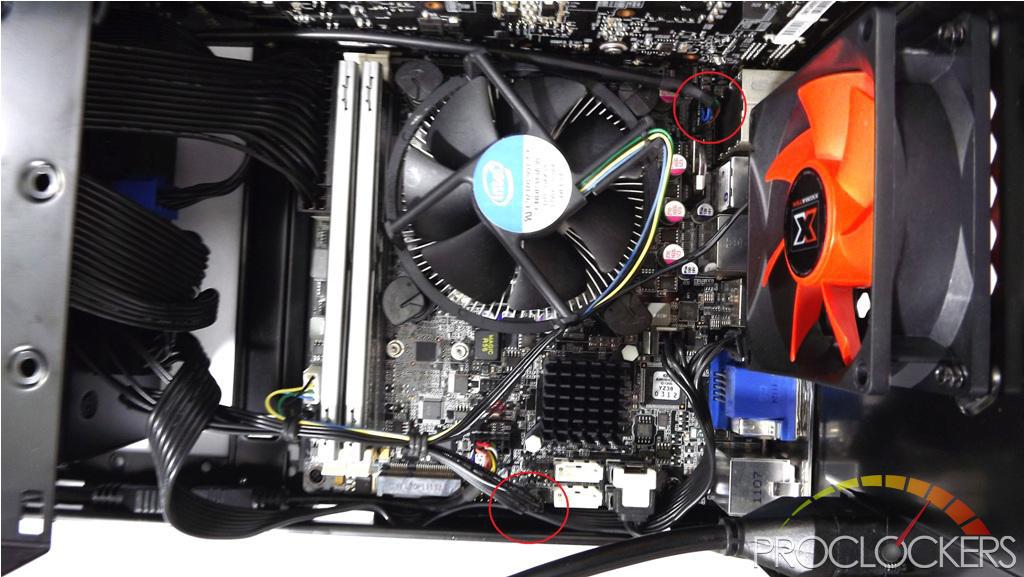
Motherboard installation is pretty straightforward. Unfortunately I cannot find any aftermarket aircooler that fits this chassis and also the motherboard with the processor socket being too close to the PCIe slot. A Noctua NH-L12 would have fit perfectly with the motherboard and chassis but it disables the PCIe slot. Anyway, there’s around 12 centimeters of clearance from the processor to the ceiling if you have fans installed on the top panel. Add 2 centimeters if you don’t have fans or a hard drive installed on top.
Graphics Card Installation

The Xigmatek Eris can support graphics cards with lengths up to 300mm. If you remember our review on the ID Cooling T60-SFX where the Gigabyte GTX 770 OC didn’t fit. The Eris certainly have no problems fitting this long card.
The chassis even has a centimeters to spare after mounting this 292mm long card.
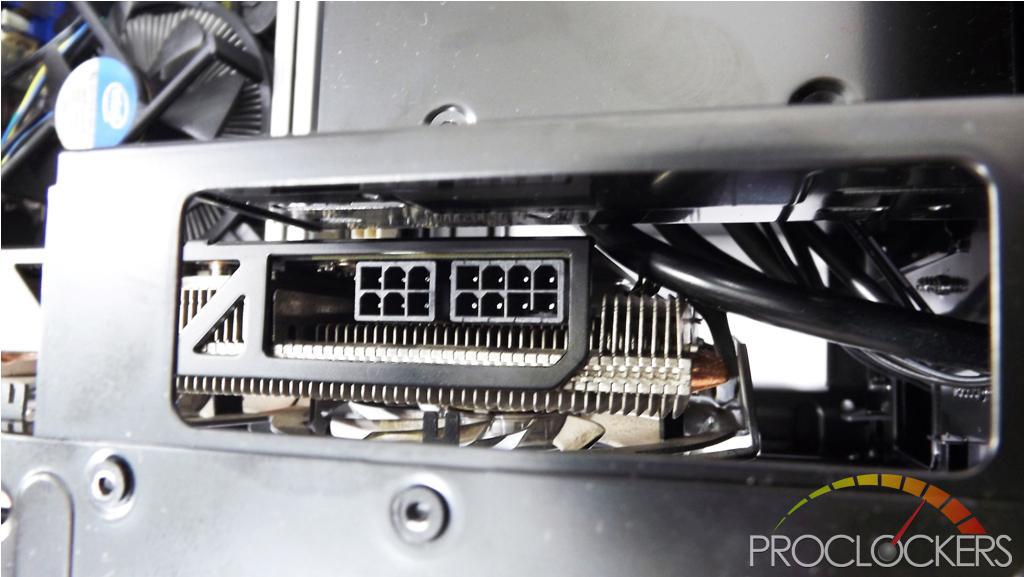

Accessing the power sockets of your graphics is easy with the Eris with is having a hole just for you to access it as shown in the images above.
Hard Drive Installation
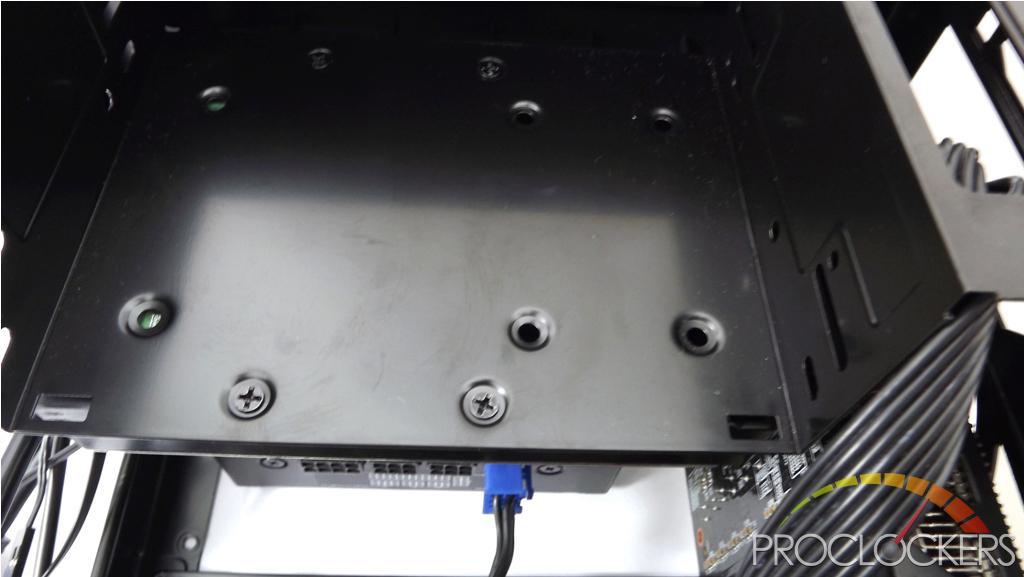
The front hidden drive bay holes can mount either a 2.5-inch or a 3.5-inch drive. The 3.5-inch drive can be mounted in two different orientations which we will show below.
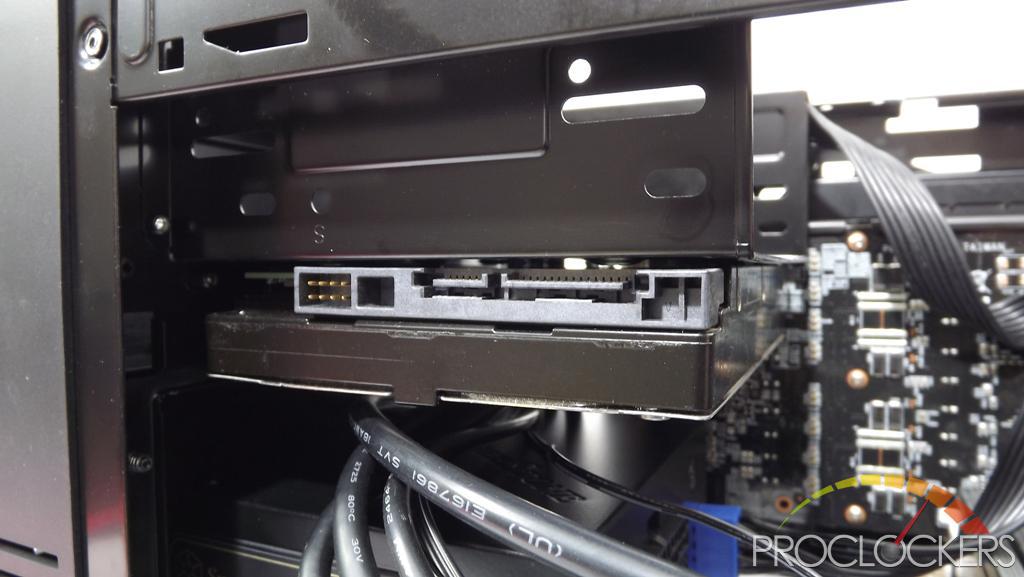
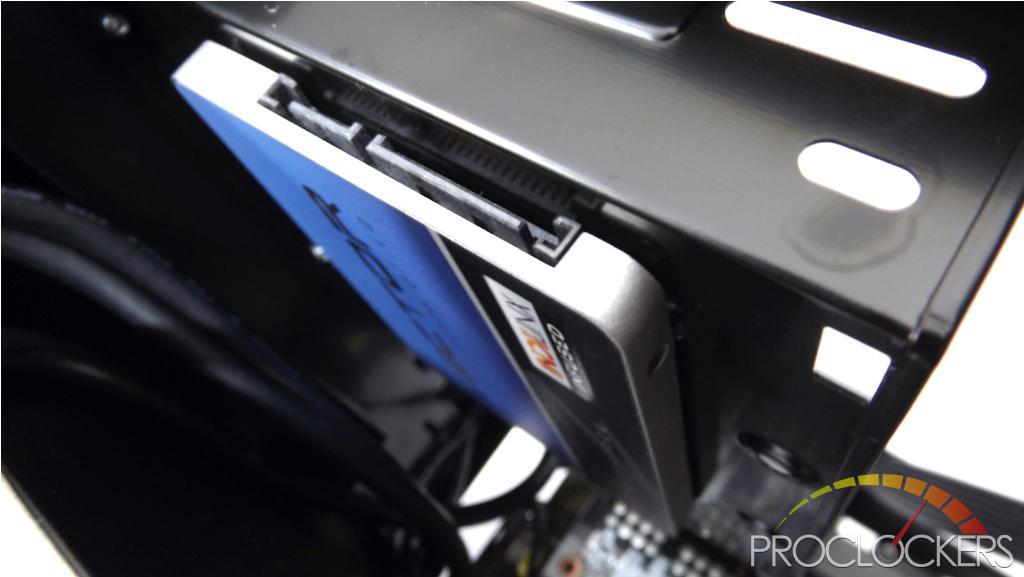
Here’s the first orientation for the 3.5-inch hard drive where the sockets are facing the side panel.
On this orientation, the back portion of the 3.5-inch HDD is just a few millimeters away from the PCB of the graphics card we installed. I’m impressed at how precise the layout is.
On the same orientation, you can also install a single 2.5-inch drive played by an OCZ Vector drive.
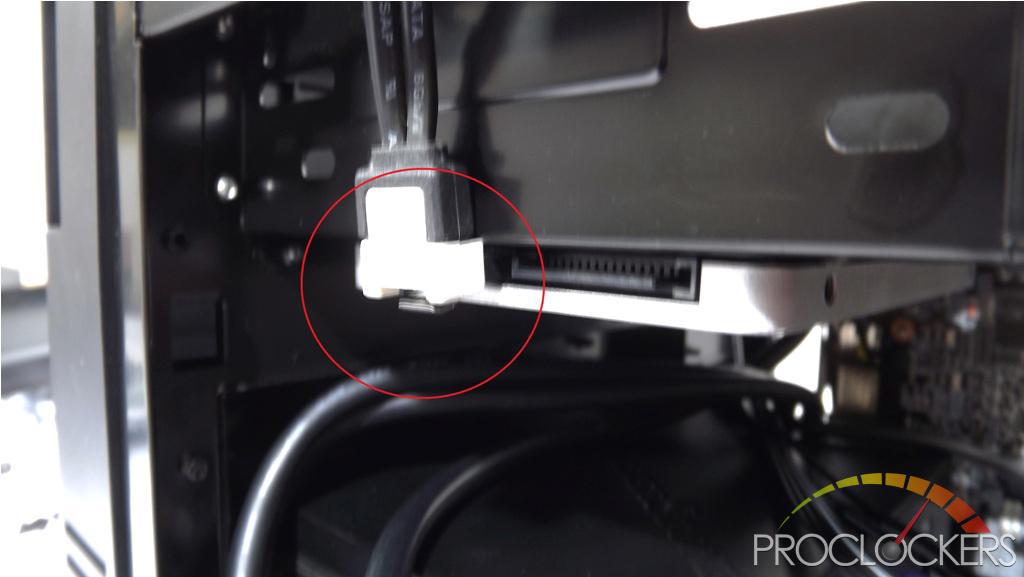

On this orientation for the 2.5-inch drives, you would have problems using an L-type SATA cable where the edge of the ODD drive bay cage becomes an obstacle so the cable will not latch on the socket. You need to use a straight SATA cable for this matter. Not a major problem but it would have been perfect if this fits perfectly.

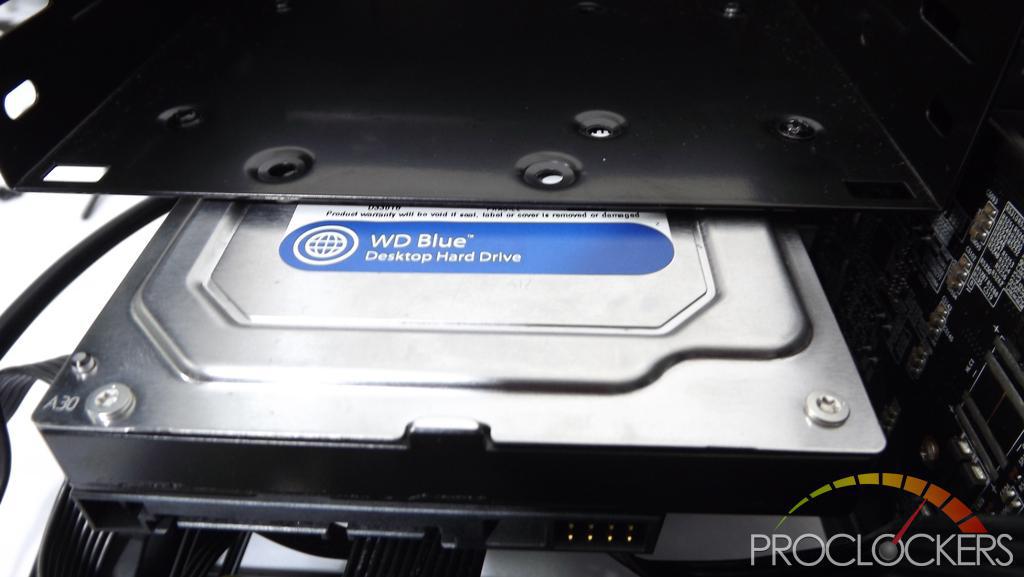
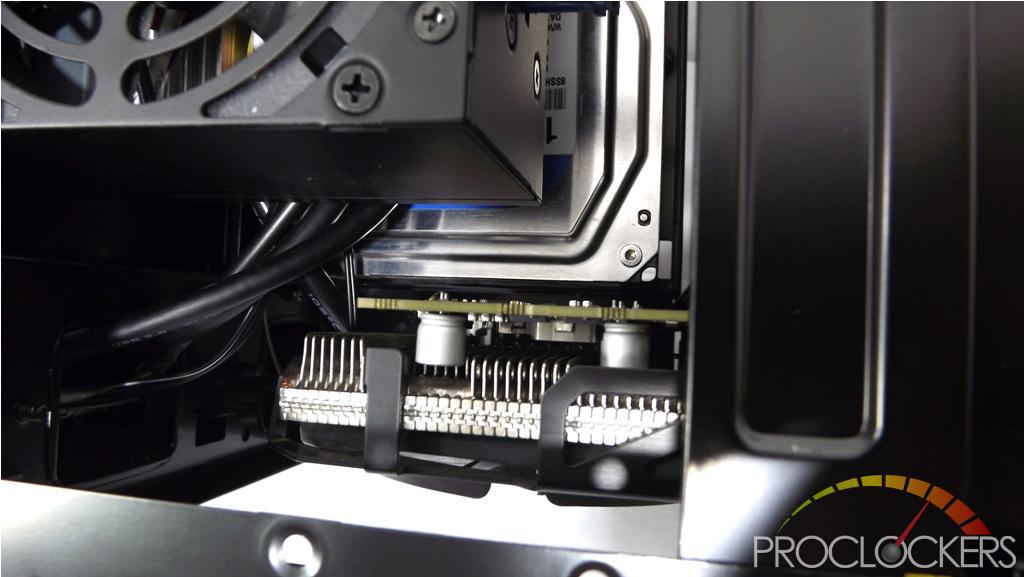
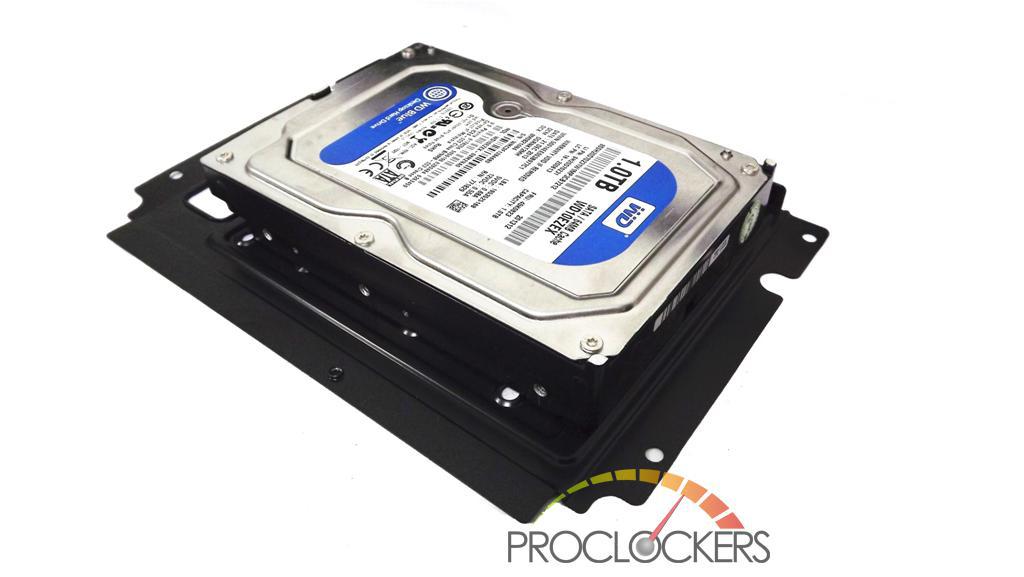
Then the other orientation for the 3.5-inch hard drive, you need to use the hard drive mounting brackets included with the Eris and mount it parallel to the graphics card.
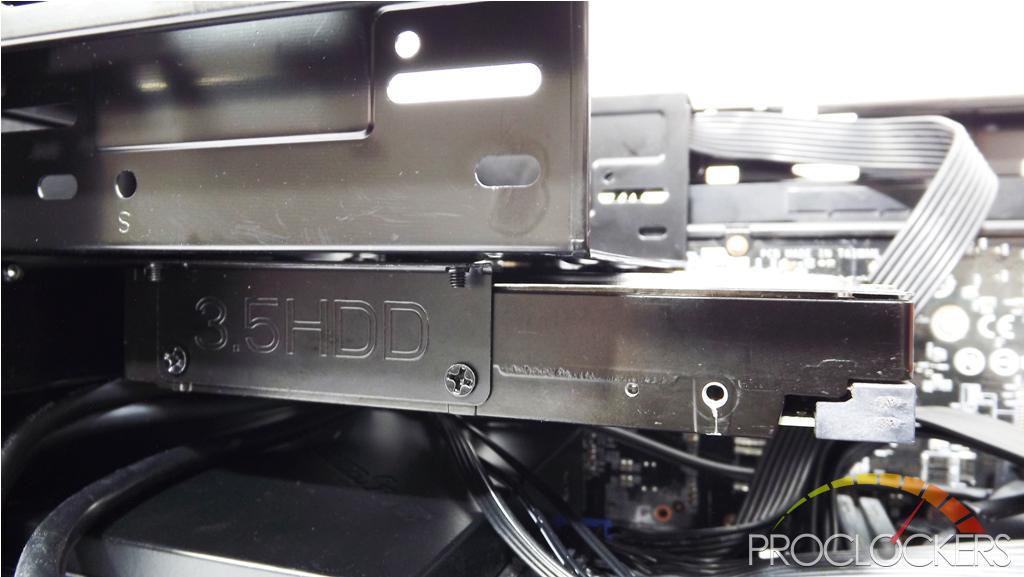
Here’s a view of this hard drive mounting option on the side.
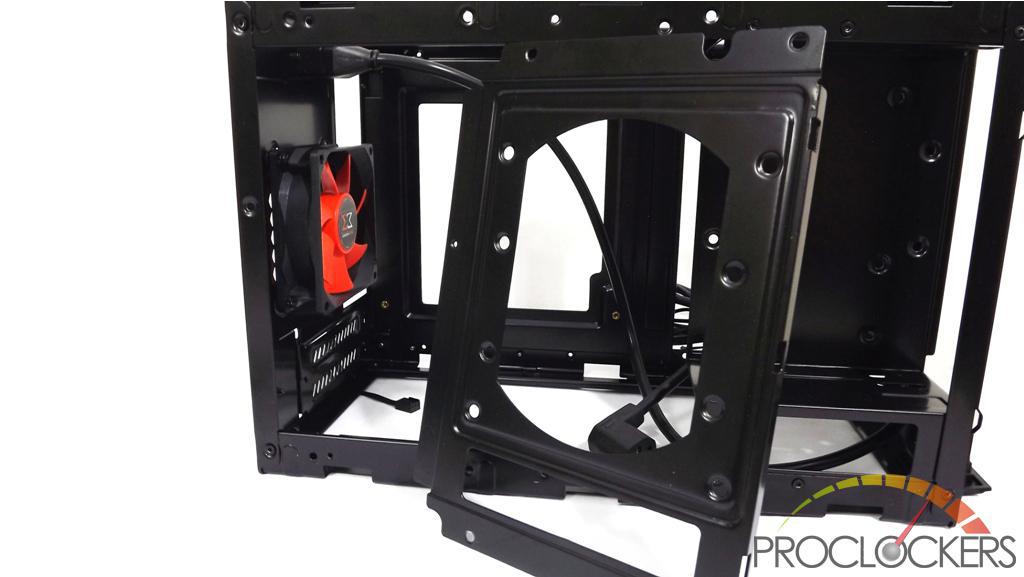
Then there’s also the back hard drive/fan mounting panel.
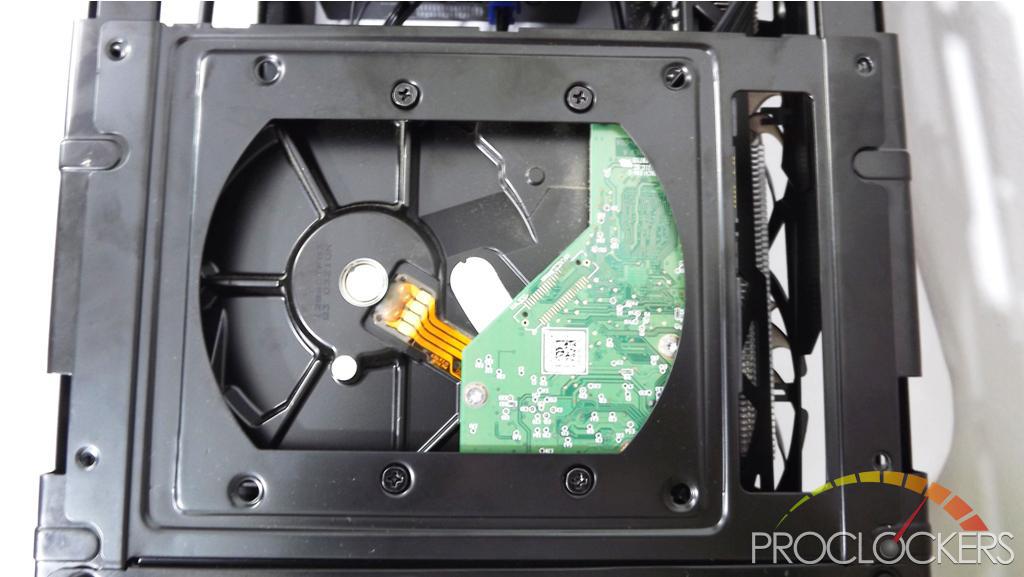
Simply mount the 3.5-inch hard drive on the panel. There’s a hole near the right-face side panel for you to access the cables easily.
On to the next page for the other installation guides and final build.
Build and Installation Continued
Chassis Feet Installation
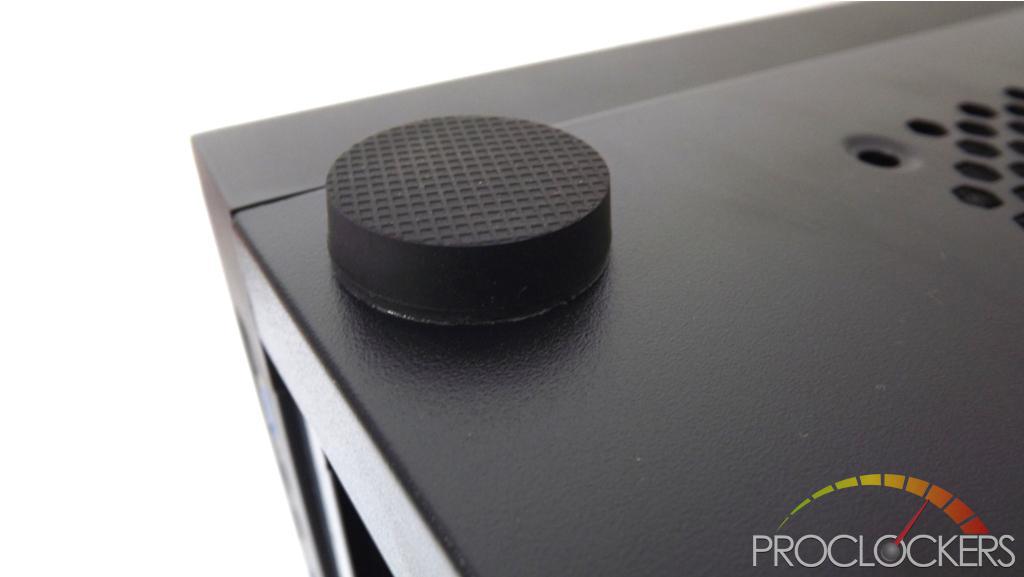
The Xigmatek Eris have rubber case feet you need to stick manually. No need for clue since the feet does come with an adhesive backing.
Chassis Fan Installation

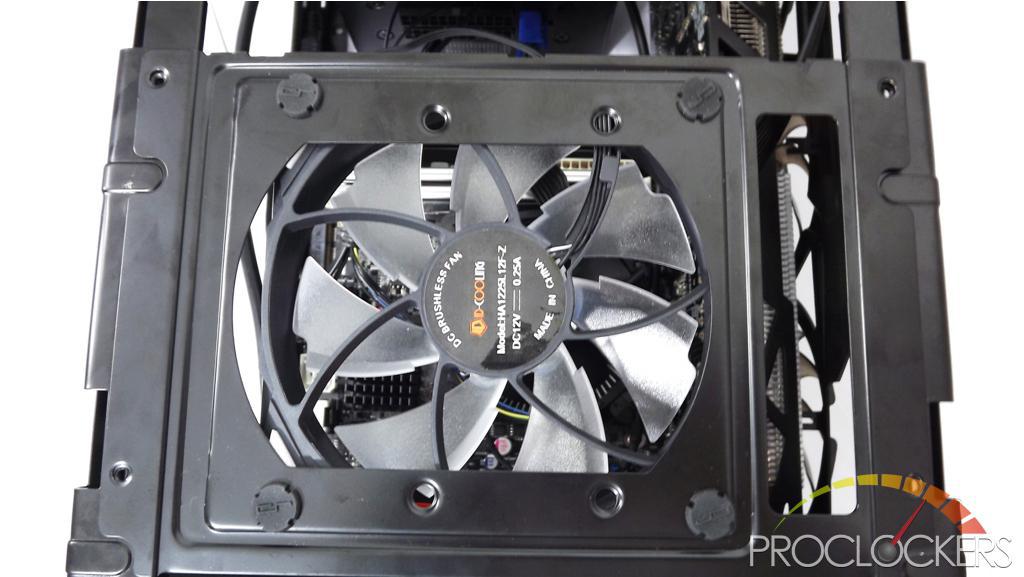
Moving back to the HDD/fan mounting panel on the top of the chassis. Above you can see we installed a single 120mm fan on it.
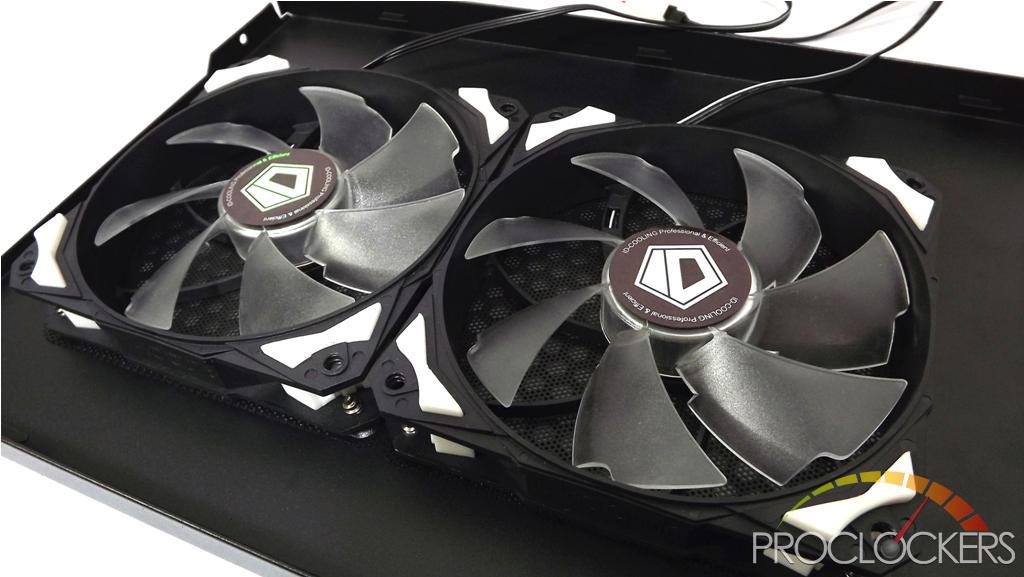
You can also ditch the entire HDD/fan mounting panel and install 2 x 120mm fans to the top panel as shown above. Note that you will not be able to mount the HDD/fan mounting panel with these on.
Final Build Looks
Internal
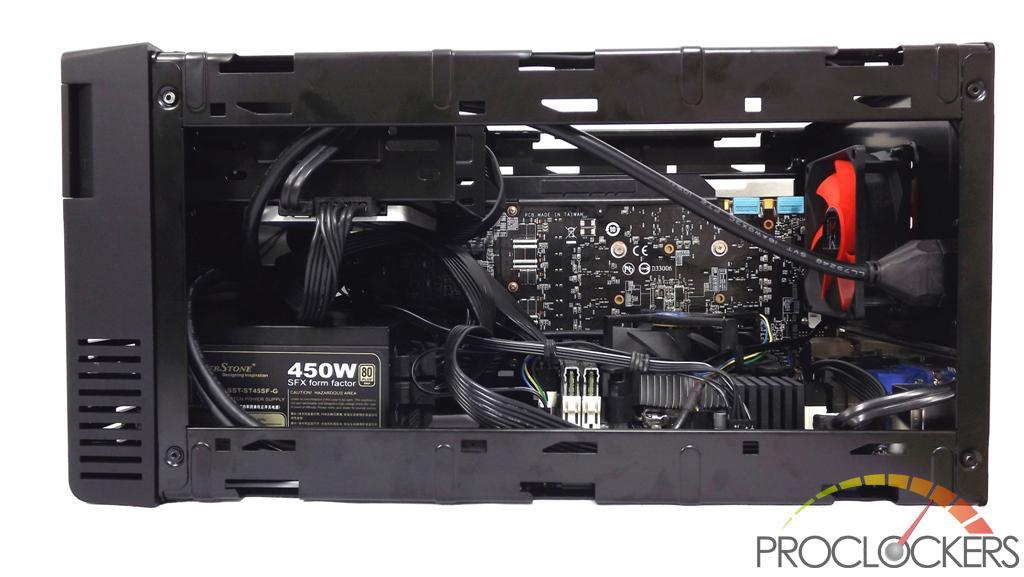
Finally, here’s a look at our final build on the Xigmatek Eris chassis.
There’s a bit of challenge in plugging the front panel I/O cables and audio output cable to the motherboard. They are long enough to have them plugged but with that, there’s no cable management option where you can hide them somewhere. I asked Xigmatek about this and fortunately this scenario is only for the first batch of Xigmatek Eris manufactured. Xigmatek have already addressed this concern and made the I/O front panel and front panel audio cables longer for the new batch of Eris cases that will come out of their factories.
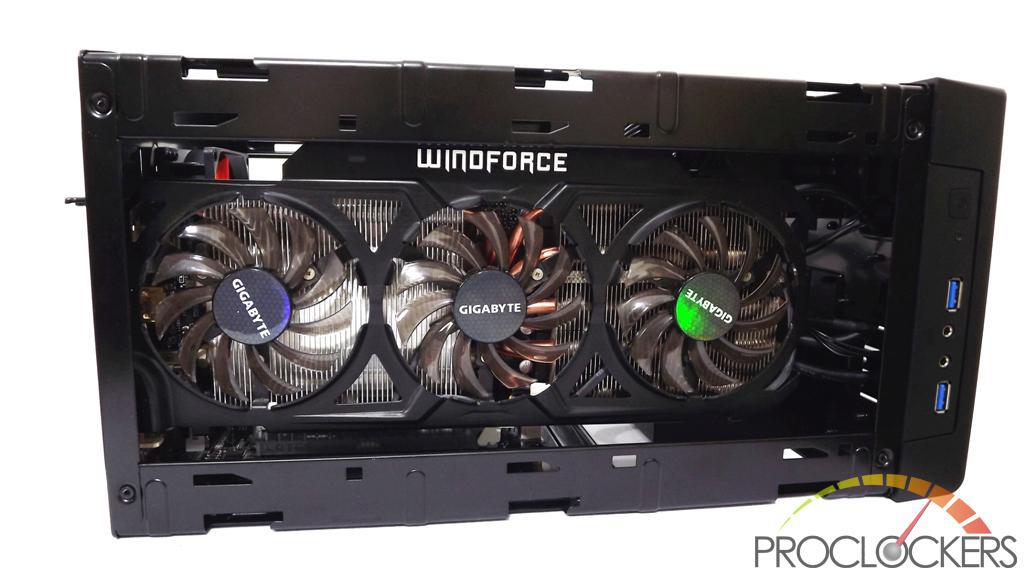
Here’s a look at the side where the graphics card is located. The perfect fit is really impressive.
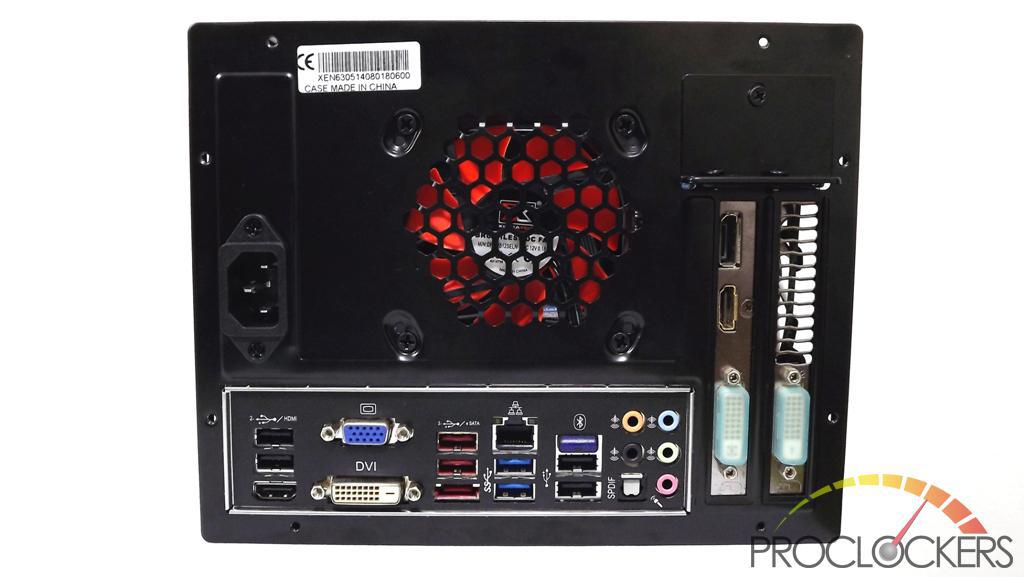
Here’s a look at the rear of the Eris chassis.
External
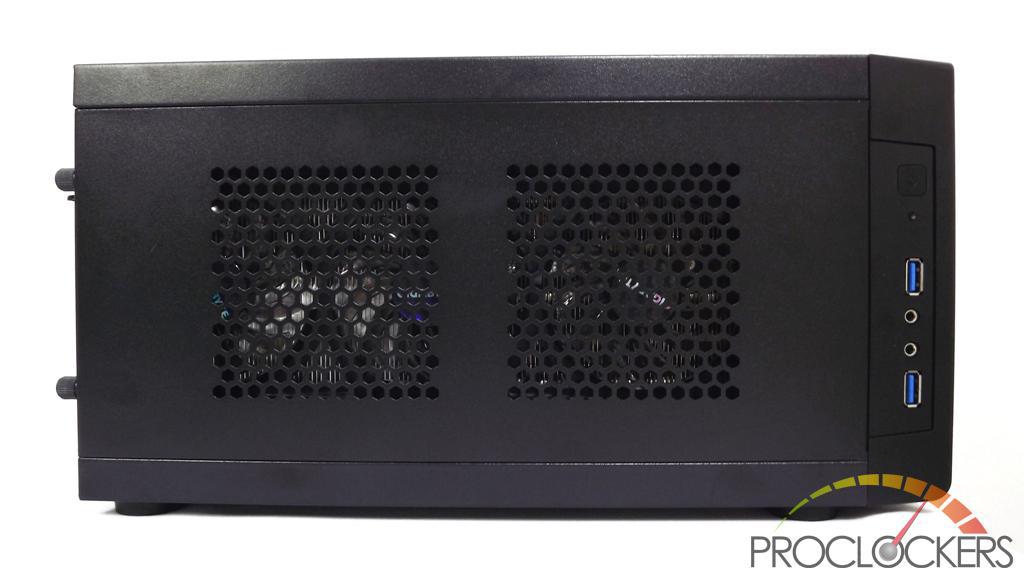
With the side panel on, it clearly shows how the graphics card can easily feed on cool air from the outside of the chassis thanks to the generous addition of ventilation holes on the side panel.
Here’s a look on the right-face side panel. Thanks to the Silverstone SST-PP05-E flat black cables, the cables are visually hidden inside the chassis.
Here’s a look at the top of the Xigmatek Eris with the 2 x 120mm ID-Cooling NO-12025 fans installed.

Here’s a look at the bottom with the case feet installed manually.
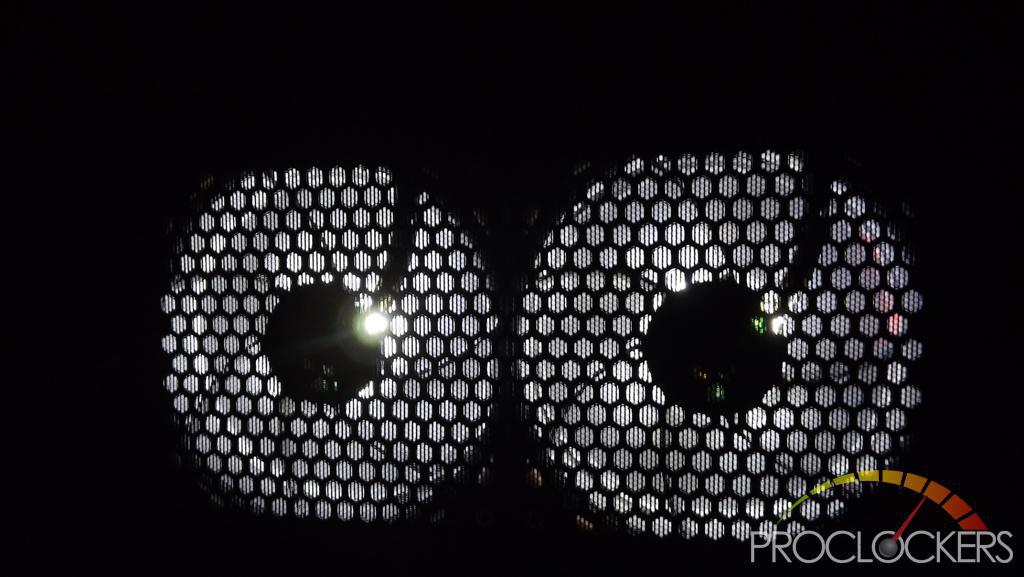
Depending on the type of fans you are using on the top panel, the ID Cooling fans I used on this build looks like this in the dark. If you like LEDs, it surely glows nice through the ventilation holes and mesh filter on the top panel.
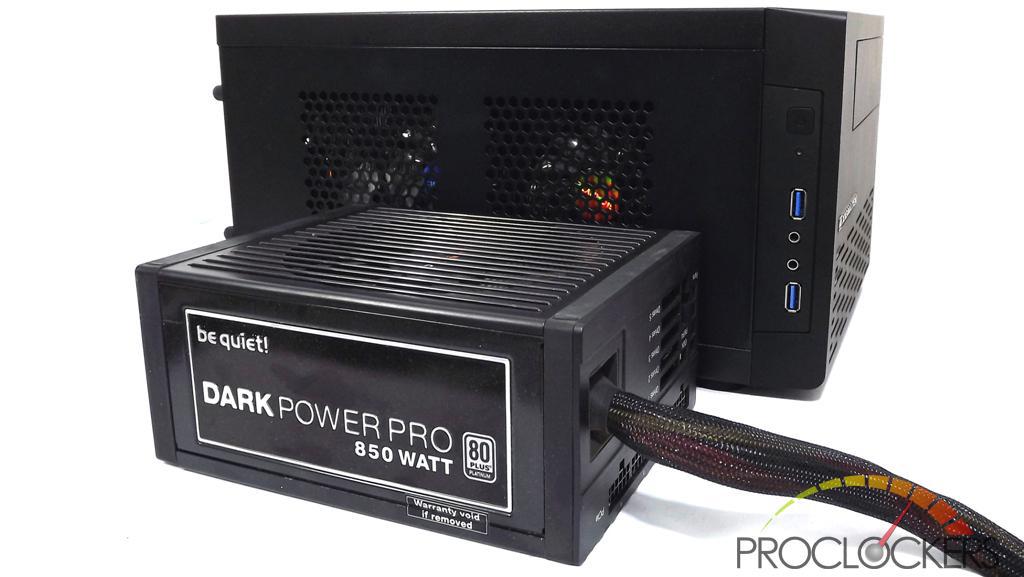
Lastly, here’s a size comparison between the Xigmatek Eris mini-ITX chassis and the be quiet! Dark Power Pro 850 watt PSU. The Eris is indeed that small and compact yet the very smart layout allows it to have long graphics cards, up to 2 x 3.5-inch hard drives and a SFX cooler. You can also use watercooling on the Eris of up to 240mm radiator AIOs. Unfortunately the Antec Kuhler 1250 240mm AIO is too thick to clear the ODD bay but other AIOs should be able to clear that but can only use a single fan configuration.
Now let’s wrap up this review on the last page.
Final Thoughts and Conclusion
There are a lot of things that I find in the Xigmatek Eris very amusing and impressive. I have to say the layout is near perfect with only some minor issues that can be solved using easy solutions. From a scale of 1 to 10, 10 being the highest, I’d rate the layout of the Eris a 9. The layout was well-thought-of be it the graphics card support and the hard drive mounting options. Even the power supply mounting is perfect.
The Eris is certainly appealing in terms of size. Very compact yet very flexible in terms of length clearances. The limitations is certainly less compared to the T60-SFX I reviewed recently. Although I wasn’t able to show the vertical orientation of the chassis, it is also a nice option if desired to minimize the space the chassis will use.
Ventilation of the chassis is superb being that there’s literally ventilation holes on every panel of the chassis; top, bottom, sides, front and back. Installation is also very easy with all the panels removable. You can move the chassis around, flip it and so on during installation without much difficulty.
As for the looks of the Xigmatek Eris, well it is certainly not one of the good looking ones out there like the ID Cooling T60-SFX, Xigmatek Nebula or Silverstone’s Raven RVZ01 case. But if you’re simply looking for a workable mini-ITX chassis with good hardware compatibility, the Eris is a very good candidate. The Xigmatek Eris will be available at a suggested retail price of $34.99. With all these features and a very reasonable price, the Eris gets our highly recommended award and best value award! Would certainly be great if Xigmatek makes a similar chassis with a windowed top panel.
Likes
- Small and compact yet flexible in hardware compatibility
- Excellent passive cooling ability, good ventilation
- Long graphics card support
- Hard drive mounting options
- Ease of build and installation
- Orientation options (horizontal or vertical)
Dislikes
- 2.5-inch drive L-type SATA cable obstacle


The 25 Best Anime Cats, Ranked
What are the best anime cats? Cats are something you either love with every fiber of your being or vehemently...


The 25 Best Anime Teachers, Ranked
Who are the best anime teachers? With high school being such a prevalent setting in anime, it makes sense that...


The 25 Best Orange Hair Anime Girls, Ranked
Who are the best orange hair anime girls? Orange hair is interesting in anime because it can either be a...